It is recommend to always depend on a specific release of a library project instead of on the master branch. This way it is up to you as a developer to decide when to incorporate changes from a library project as opposed to always getting the latest (and potentially breaking) changes from the master branch of a library project.
It is recommended to always review third-party libraries before use. Learn more [securing your use of third-party software](#manuals:application-security).
### Basic access authentication
It is possible to add a username and password/token to the library URL to perform basic access authentication when using libraries that are not publicly available:
```
https://username:password@github.com/defold/private/archive/main.zip
```
The `username` and `password` fields will be extracted and added as an `Authorization` request header. This works for any server which supports basic access authorization.
Make sure to not share or accidentally leak your generated personal access token or password as it can have dire consequences if they fall into the wrong hands!
To avoid accidentally leaking any credentials by having them in clear text in the library URL it is also possible to use a string replacement pattern and store the credentials as environment variables:
```
https://__PRIVATE_USERNAME__:__PRIVATE_TOKEN__@github.com/defold/private/archive/main.zip
```
In the above example the username and token will be read from the system environment variables `PRIVATE_USERNAME` and `PRIVATE_TOKEN`.
#### GitHub authentication
To fetch from a private repository on GitHub you need to [generate a personal access token](https://docs.github.com/en/free-pro-team@latest/github/authenticating-to-github/creating-a-personal-access-token) and use that as your password.
```
https://github-username:personal-access-token@github.com/defold/private/archive/main.zip
```
#### GitLab authentication
To fetch from a private repository on GitLab you need to [generate a personal access token](https://docs.gitlab.com/ee/security/token_overview.html) and send as a URL parameter.
```
https://gitlab.com/defold/private/-/archive/main/test-main.zip?private_token=personal-access-token
```
### Advanced access authentication
When using the basic access authentication a user's access token and username will be shared on any repository used for the project. With a greater than 1 man team this can be an issue. To solve this issue a "read only" user needs to be used for library access to the repository, on GitHub this requires an organization, a team and a user who doesn't need to edit the repo (hence read only).
GitHub Steps:
* [Create an organisation](https://docs.github.com/en/github/setting-up-and-managing-organizations-and-teams/creating-a-new-organization-from-scratch)
* [Create a team within the organisation](https://docs.github.com/en/github/setting-up-and-managing-organizations-and-teams/creating-a-team)
* [Transfer the desired private repository to your organisation](https://docs.github.com/en/github/administering-a-repository/transferring-a-repository)
* [Give the team "read only" access to the repository](https://docs.github.com/en/github/setting-up-and-managing-organizations-and-teams/managing-team-access-to-an-organization-repository)
* [Create or select a user to be part of this team](https://docs.github.com/en/github/setting-up-and-managing-organizations-and-teams/organizing-members-into-teams)
* Use the "basic access authentication" above to create a personal access token for this user
At this point the new user's authentication details can be committed and pushed to the repository. This will allow anyone working with your private repository to fetch it as a library without having edit permissions to the library itself.
The read only user's token is fully accessible to anyone who can access the game repositories that are using the library.
This solution was proposed on the Defold forum and [discussed in this thread](https://forum.defold.com/t/private-github-for-library-solved/67240).
## Setting up library dependencies
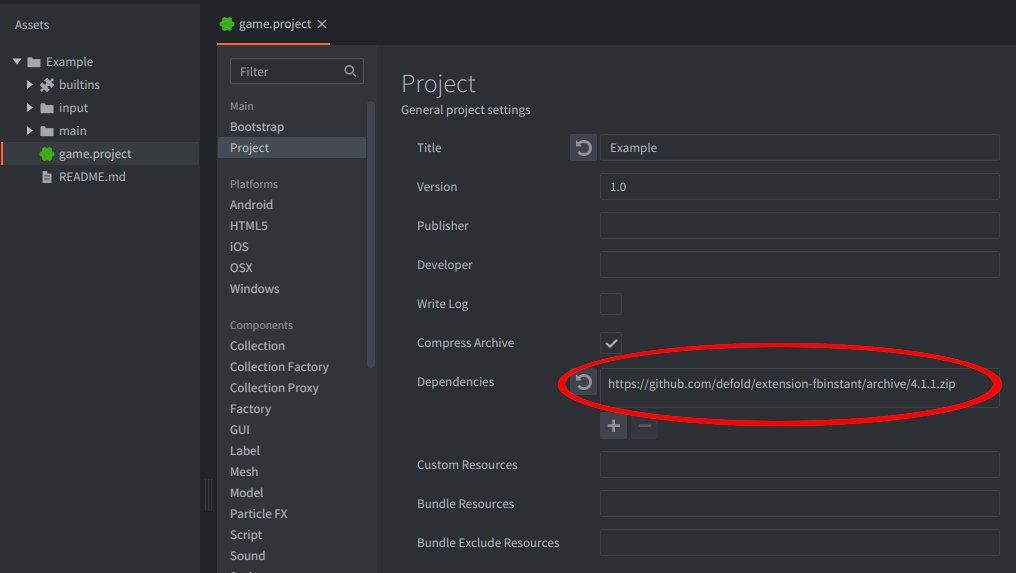
Open the project that you would like to access the library from. In the project settings, add the Library URL to the *dependencies* property. You can specify multiple dependent projects if you want. Just add them one by one using the `+` button and remove using the `-` button:
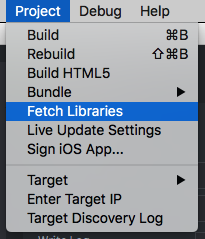
Now, select Project ▸ Fetch Libraries to update library dependencies. This happens automatically whenever you open a project so you will only need to do this if the dependencies change without re-opening the project. This happens if you add or remove dependency libraries or if one of the dependency library projects is changed and synchronized by someone.
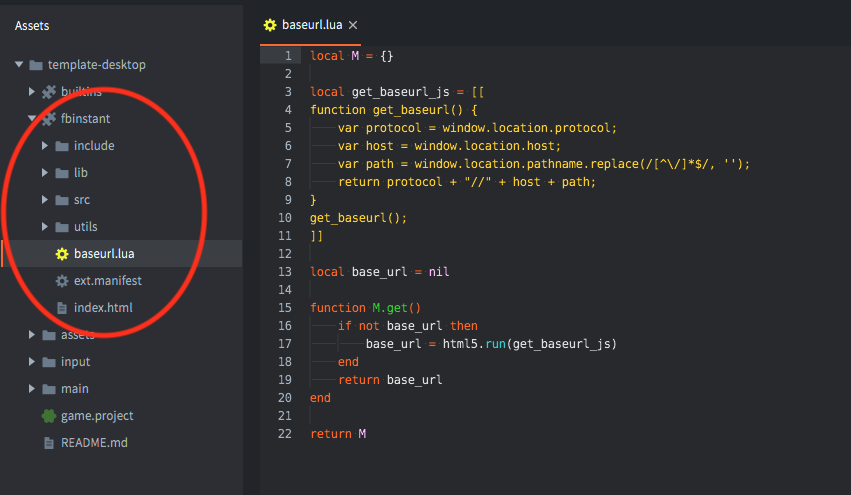
Now the folders that you shared appear in the *Assets pane* and you can use everything you shared. Any synchronized changes done to the library project will be available in your project.
## Editing Files in Library Dependencies
Files in libraries cannot be saved. You can make changes, and the editor will be able to build with those changes, which is useful for testing. However, the file itself remains unchanged, and all modifications will be discarded when the file is closed.
If you want to make changes to library files, make sure to create your own fork of the library and make changes there. Another option is to copy/paste the entire library folder into your project directory and use the local copy. In this case, your local folder will shadow the original dependency, and the dependency link should be removed from `game.project` (don’t forget to choose Project ▸ Fetch Libraries afterward).
`builtins` is also a library provided by the engine. If you want to edit files there, make sure to copy them into your project and use those instead of the original `builtins` files. For example, to modify `default.render_script`, copy both `/builtins/render/default.render` and `/builtins/render/default.render_script` into your project folder as `my_custom.render` and `my_custom.render_script`. Then, update your local `my_custom.render` to reference the `my_custom.render_script` instead of the built-in one, and set your custom `my_custom.render` in `game.project` under the Render setting.
If you copy-paste a material and want to use it across all components of a certain type, it might be useful to use [per-project templates](#manuals:editor).
## Broken references
Library sharing only includes files that are located under the shared folder(s). If you create something that references assets that are located outside of the shared hierarchy, the reference paths will be broken.
## Name collisions
Since you can list several project URLs in the *dependencies* project setting you might encounter a name collision. This happens if two or more of the dependent projects share a folder with the same name in the *`include_dirs`* project setting.
Defold resolves name collisions by simply ignoring all but the last reference to folders of the same name in the order the project URLs are specified in the *dependencies* list. For instance. If you list 3 library project URLs in the dependencies and all of them share a folder named *items*, only one *items* folder will show up---the one belonging to the project that is last in the URL list.
# Ignoring files {#manuals:project-defignore}
It is possible to configure the Defold editor and tools to ignore files and folders in a project. This can be useful if the project contains files with file extensions which conflict with file extensions used by Defold. One such example is Go language files with the .go file extension which is the same as the editor uses for game object files.
## The `.defignore` file
The files and folders to exclude are defined in a file named `.defignore` in the project root. The file should list files and folders to exclude, one per line. Example:
```
/path/to/file.png
/otherpath
```
This will exclude the file `/path/to/file.png` and anything in the path `/otherpath`.
## The `.defunload` file
For certain large projects that contain multiple independent modules, you may want to exclude parts of it from loading to reduce memory usage and load times in the editor. To achieve this, you can list paths to exclude from loading in a `.defunload` file below the project directory.
Simply put, the `.defunload` file allows you to hide parts of the project from the editor without making it a build error to reference the hidden resources.
The patterns in `.defunload` use the same rules as the `.defignore` file. Unloaded Collections and Game Objects will behave as if they were empty when referenced by loaded resources. Other resources that match `.defunload` patterns will be in an unloaded state, and cannot be viewed in the editor. However, if a resource that is loaded depends on them, the unloaded resources and their dependencies are loaded automatically.
For example, if a Sprite depends on images in an Atlas, we have to load the Atlas, or the missing image will be reported as an error. If this happens, a notification will warn the user about the situation and provide information about which unloaded resource was referenced from where.
The editor will prevent the user from adding references to `.defunloaded` resources from loaded resources, so this situation only occurs when resources are read from disk.
Contrary to the `.defignore` file, you need to restart the editor after you edit the `.defunload` file to see the changes take effect.
# Editor overview {#manuals:editor}
The editor allows you to browse and manipulate all files and folders in your game project in an efficient manner. Editing files brings up a suitable editor and shows all relevant information about the file in separate views.
## Starting the Editor
When you run the Defold Editor, you are presented with a project selection and creation screen. Click to select what you want to do:
MY PROJECTS
: Here are your recently opened projects so you can quickly access them. This is the default view of the starting screen.
If you didn't open any projects earlier (or removed all), it will show two buttons - you can click `Open From Disk…` to find and open one using system file browser or click `Create New Project` button and it will switch to a tab `TEMPLATES`.
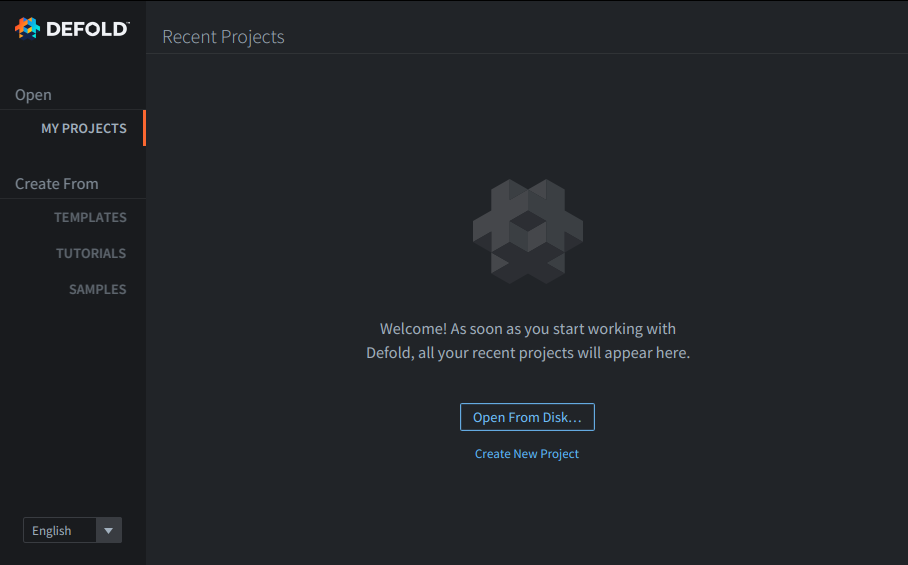
If you have earlier opened projects, it will show a list of your projects, like on the picture below:

TEMPLATES
: Contains empty or almost empty basic projects made for quick start of a new Defold project for certain platforms or using certain extensions.
TUTORIALS
: Contains projects with guided tutorials to learn, play and modify, if you would like to follow a tutorial.
SAMPLES
: Contains projects prepared to showcase certain use cases.
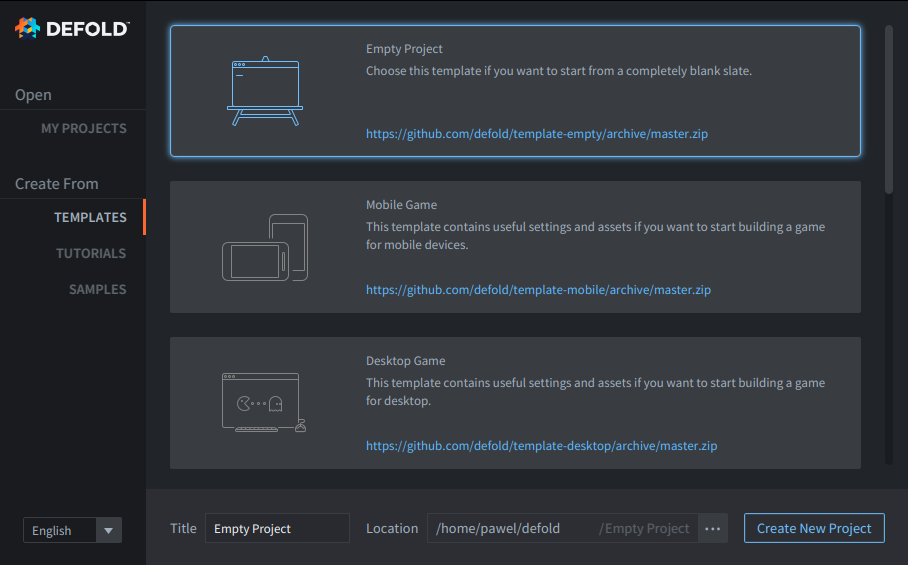
When you create a new project it is stored on your local drive and any edits you do are saved locally.
You can learn more about the different options in the [Project Setup manual](#manuals:project-setup).
## Editor Language
In the bottom left corner of the starting screen you can see a Language selection - select from the available currently localizations (since Defold 1.11.2). This is also available in the Editor in `File ▸ Preferences ▸ General ▸ Editor Language`.

## The Editor panes
The Defold Editor is separated into a set of panes, or views, that display specific information.

### 1. Assets pane
Lists all the files and folders that are part of your project in a tree structure, corresponding to the same structure on your disk. Click and scroll to navigate the list. All file oriented operations can be made in this view:
- Left Mouse Click to select any file or folder, and while holding ⇧ Shift you can expand selection or while holding Ctrl/⌘ Cmd you can (un)select clicked.
- Double Mouse Click a file to open it in a specific editor for that file type.
- Drag and Drop to add files from elsewhere on your disk to the project or move files and folders to new locations in the project.
- Right Mouse Click to open a _Context Menu_ from where you can create new files or folders, rename, delete, track file dependencies and more.
### 2. Editor pane
The center view shows the currently open file in a specific editor for that file type, for example script files are opened in the built-in Code Editor, while visual components - in 3D Visual Editor. All Visual Editors allows you to change the camera view:
- Pan: Alt/⌥ Option + Left Mouse Button or Right Mouse Button
- Zoom: Scroll Mouse Wheel or Alt/⌥ Option + Right Mouse Button.
- Rotate in 3D around selection: Ctrl/^ Control + Left Mouse Button.
#### Toolbar
There is a toolbar in the top right corner of the scene view where you can find object manipulation tools (from left):
*Move* (W), *Rotate* (E), *Scale* (R), *Grid Settings* `▦`, *Align Camera 2D/3D* `2D`, *Camera Perspective/Orthographic Toggle* and *Visibility Filters* `👁`.

### 3. Outline pane
This view shows the content of the file currently being edited, but in a hierarchical tree structure. The Outline reflects the editor view and allows you to perform operations on your items:
- Left Mouse Click to select an item, and while holding ⇧ Shift you can expand selection or while holding Ctrl/⌘ Cmd you can (un)select clicked.
- Drag and drop to move items. Drop a game object on another game object in a collection to create a parent-child relationship.
- Right Mouse Click to open a _Context Menu_ from where you can add items, delete selected items etc.
It is possible to toggle the visibility of game objects and visual components by clicking on the little `👁` Eye Icon to the right of an element in the list (Defold 1.9.8 and newer).

### 4. Properties pane
This view shows properties associated with the currently selected item, like Id, URL, Position, Rotation, Scale, and/or other component specific properties and also custom properties for scripts.
You can also Drag the `↕` Up-Down Arrow and move mouse to change value of the given numerical property (1.10.2+).

### 5. Tools pane
This view has several tabs.
*Console* tab : shows any error, warning and info engine output or purposeful printing that you do while your game is running,
*Build Errors* : shows errors from the building process,
*Search Results* : shows results of searching (Ctrl/⌘ Cmd + Shift + F) the whole project, if you click `Keep Results`
*Curve Editor* : used when editing curves in the [Particle Editor](#manuals:particlefx).
The Tools pane is also used for interacting with the integrated debugger. Read more about it in the [Debugging Manual](#manuals:debugging).
### 6. Changed Files pane
If your project uses the distributed version-control system Git this view lists any files that has been changed, added or deleted in your project. By synchronizing the project regularly you can bring your local copy in sync with what is stored in the project Git repository, that way you can collaborate within a team, and you won’t lose your work if disaster strikes. You can learn more about Git in our [Version Control manual](#manuals:version-control). Some file oriented operations can be performed in this view:
- Left Mouse Click - to select a given file, and while holding ⇧ Shift you can expand selection or while holding Ctrl/⌘ Cmd you can (un)select clicked. If a single changed file is selected you can click `Diff` to show the differences. You can click `Revert` to undo changes in all selected files.
- Double Left Mouse Click a file to open a view of the file. The editor opens the file in a suitable editor, just like in the assets view.
- Right Mouse Click a file to open a pop up menu from where you can open a diff view, revert all changes done to the file, find the file on the filesystem and more.
### Menu Bar
On the top of the Editor view or in System Bar on Mac you can find Menu Bar with 6 menus: `File`, `Edit`, `View`, `Project`, `Debug`, `Help`. Their functions will be explained in the manuals.
### Status Bar
On the bottom bar of the Editor you can find a narrow space in which the Status is displayed, e.g.:
- when a new update is available a clickable button `Update Available` will be visible - check section Updating the Editor in this manual below.
- when building or bundling a progress of it will be presented there.
## Panes Size and Visibility
Panes size can be adjusted inside the Editor by Dragging the section borders between all described above 6 Panes.
Panes visibility can be toggled in the Editor by using options in `View` menu or using given shortcuts:
- `Toggle Assets Pane` (F6) to toggle Assets and Changed Files Panes visibility
- `Toggle Changed Files` to toggle visibility of the Changed Files Pane alone
- `Toggle Tools Pane` (F7) to toggle Tools Pane visibility
- `Toggle Properties Pane` (F8) to toggle Outline and Properties Panes visibility
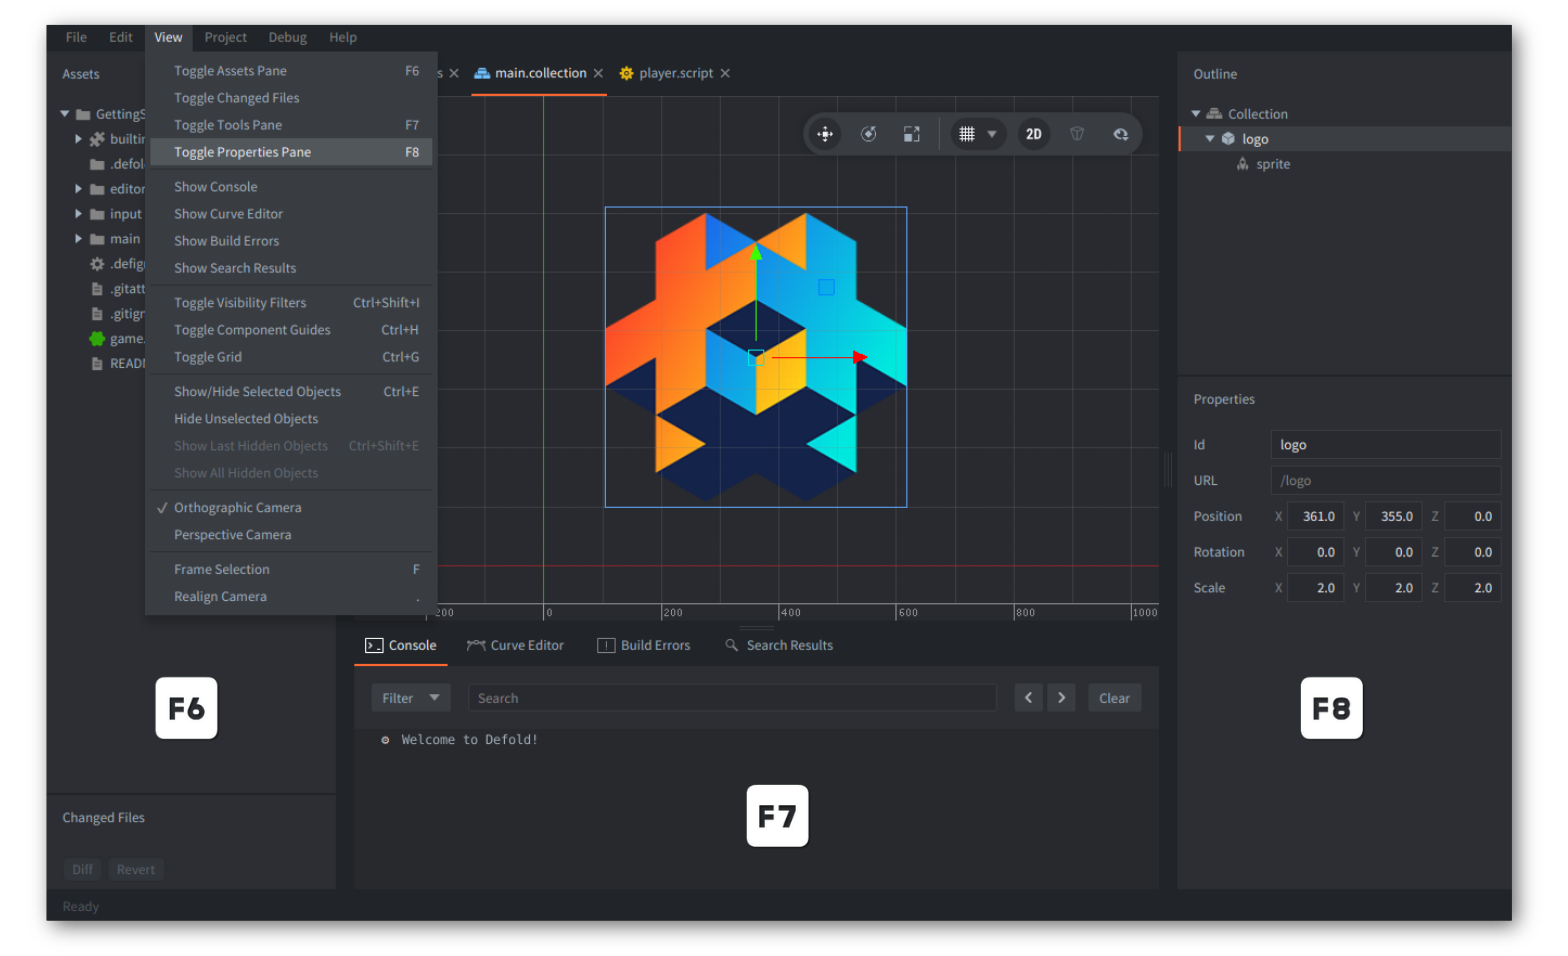
In the `View` menu you can also toggle or change other visibility related settings, like Grid, Guides, Camera or fit the view to selection (`Frame Selection` or F key) and toggle between default 2D and 3D view (`Realign Camera` or . key), many of them accessible from the Toolbar or via shortcuts too.
## Tabs
If you have multiple files open, a separate tab for each file is shown at the top of the Editor view. Tabs in a single pane can be moved around - Drag and Drop them to swap their positions inside the tabs bar. You can also:
- Right Mouse Click on a tab to open a _Context Menu_,
- Click `Close` (Ctrl/⌘ Cmd + W) a single tab,
- Click `Close Others` to close all tabs except the selected one,
- Click `Close All` (Ctrl/⌘ Cmd + Shift+W) to close all tabs in the active pane,
- Select `➝| Open As` - to use other than default editor or associated external tool set in `File ▸ Preferences ▸ Code ▸ Custom Editor`. Check more in [Preferences manual](#manuals:editor-preferences).

## Side-by-side editing
It is possible to open 2 editor views side by side.
- Right Mouse Click the tab for the editor you want to move and select `Move to Other Tab Pane`.
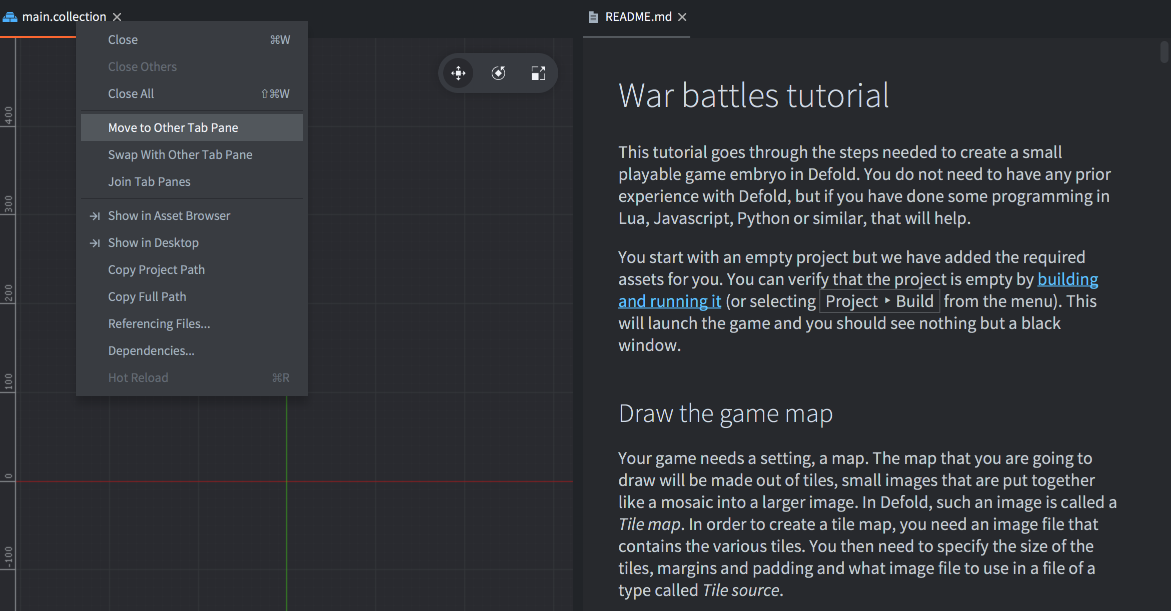
You can also use the tab menu to `Swap with Other Tab Pane` to move given tab between panes or `Join Tab Panes` to a single pane.
## The Scene Editor
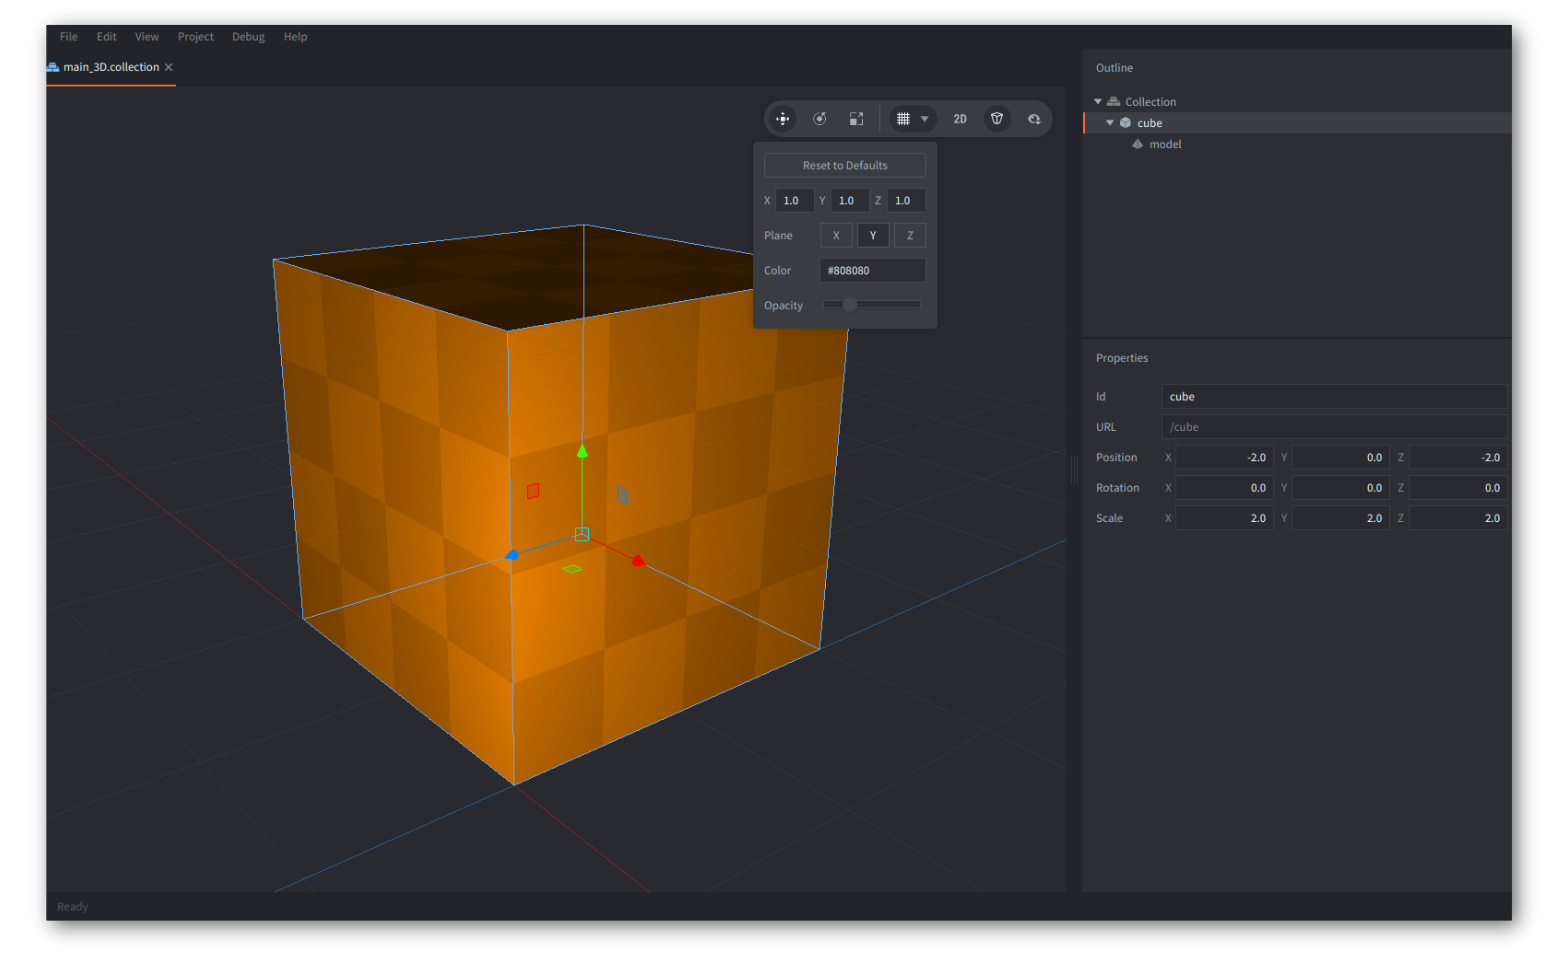
Double clicking a collection or game object or visual component file brings up the *Scene Editor*. By default, all visual scenes open with a 2D orthographic perspective:
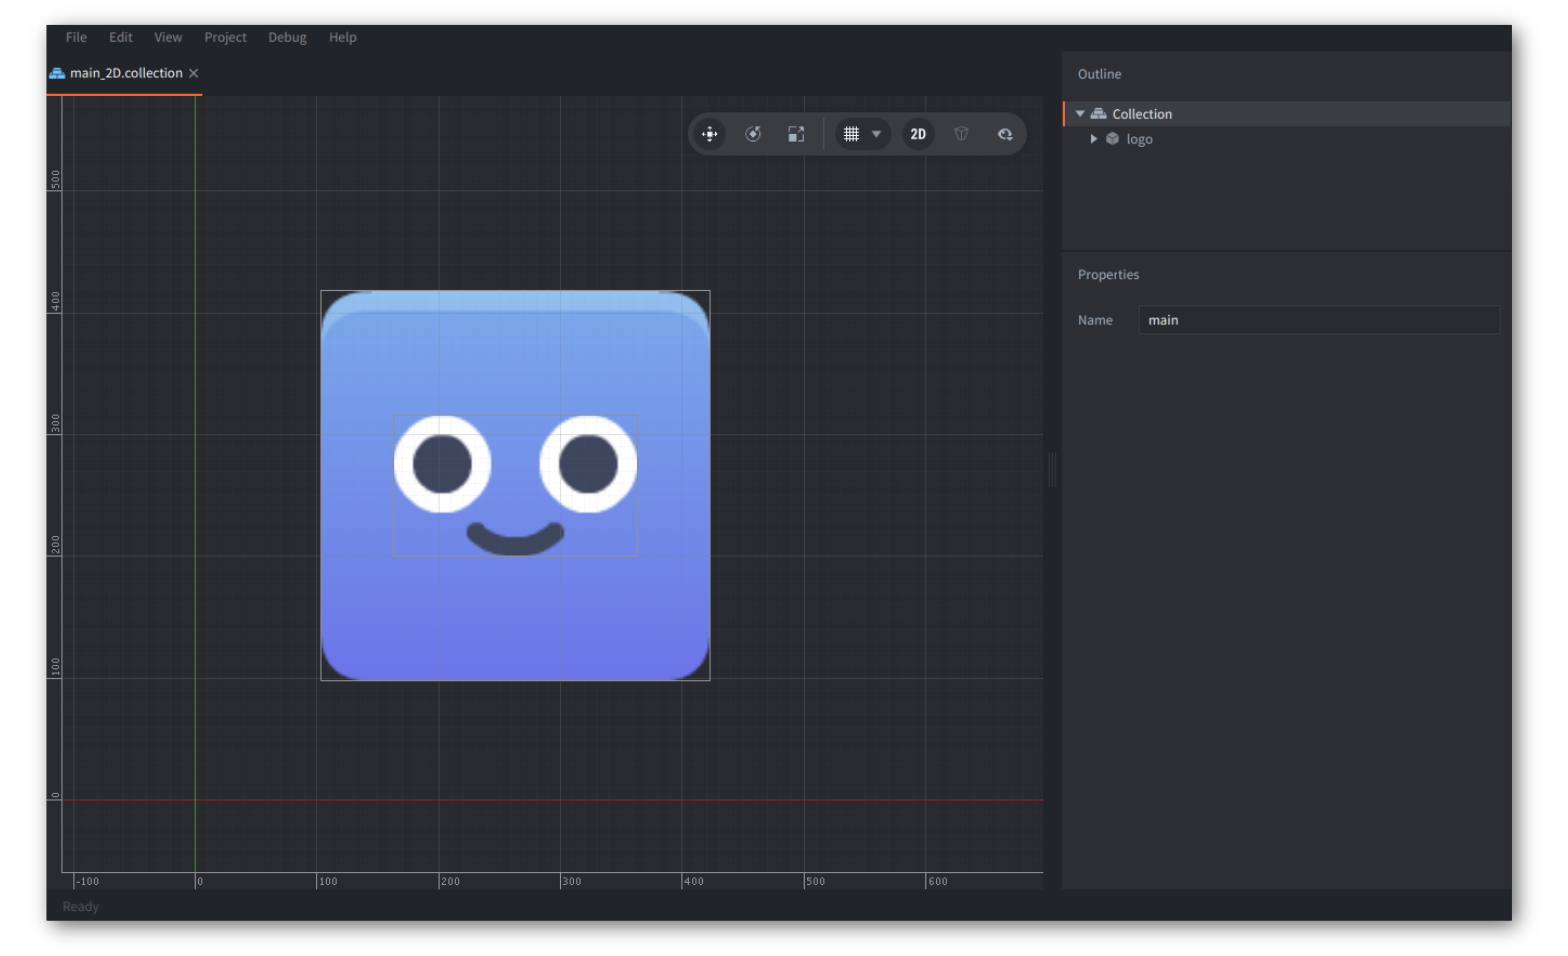
If you are working with a 3D project it is worth to check the Toolbar and adjust the *Grid Settings* `▦` e.g. realign camera to toggle 2D/3D `2D` (or . key), set grid to be displayed on Plane `Y` or any other that looks more intuitively to you and change the camera to perspective - using a toggle on the Toolbar or `View` → `Perspective Camera`:
### Manipulating objects
Left Mouse Click on objects in the main window to select them. The rectangle (or cuboid) surrounding the object in the editor view will highlight with cyan to indicate what item is selected. The selected object is also highlighted in the `Outline` view as in the picture above.
You can also select objects by:
- Left Mouse Click and Drag to select all objects inside the selection region.
- Left Mouse Click objects in the `Outline`, and while holding ⇧ Shift you can expand selection or while holding Ctrl/⌘ Cmd you can (un)select clicked.
#### Move tool

To move objects, use the *Move Tool*. You can find it in the Toolbar in the top right corner of the scene editor, or by pressing the W key.
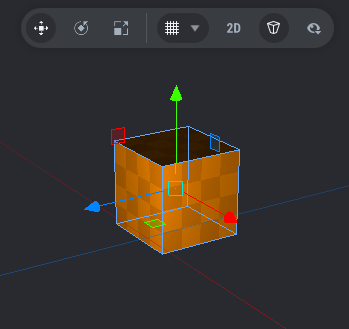
The gizmo changes and shows a set of manipulators - squares and arrows (selected manipulator will turn to orange color) that you can Drag to move:
- one cyan center square handle to move the object only in the screen space,
- 3 red, green and blue arrows along each axis to move the object only along the given X, Y or Z axis.
- 3 red, green and blue square handles to move the object only on the given plane, e.g. X-Y (blue) and (visible if rotating the camera in 3D) X-Z (green) and Y-Z (red) planes.
#### Rotate tool

To rotate objects, use the *Rotate Tool* by selecting it in the Toolbar, or by pressing the E key.
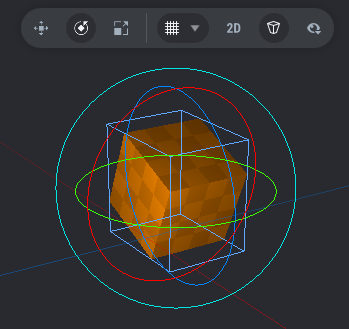
This tool consists of four circular manipulators (selected manipulator will turn to orange color) that you can Drag to rotate:
- one cyan (outer, biggest circle) manipulator that rotates the object in the screen space
- 3 smaller red, green and blue circle manipulators allowing rotation around each of the X, Y and Z axes separately. For 2D orthographic view, the 2 of them are perpendicular to the X- and Y-axis, so the circles only appear as two lines crossing the object.
#### Scale tool

To scale objects, use the *Scale Tool* by selecting it in the toolbar, or by pressing the R key.
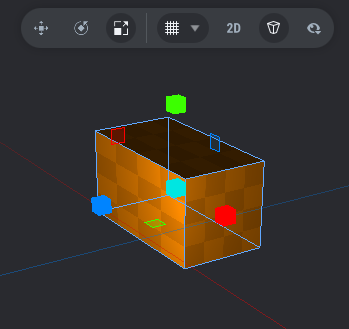
This tool consists of a set of square/cube manipulators (selected manipulator will turn to orange color) that you can Drag to scale:
- one cyan cube in the center scales the object uniformly in all axes (including Z).
- 3 red, blue and green cube manipulators scale the object along each of the X, Y and Z axes separately.
- 3 red, blue and green cube manipulators scale the object in the X-Y plane, the X-Z plane or the Y-Z plane separately.
### Visibility filters
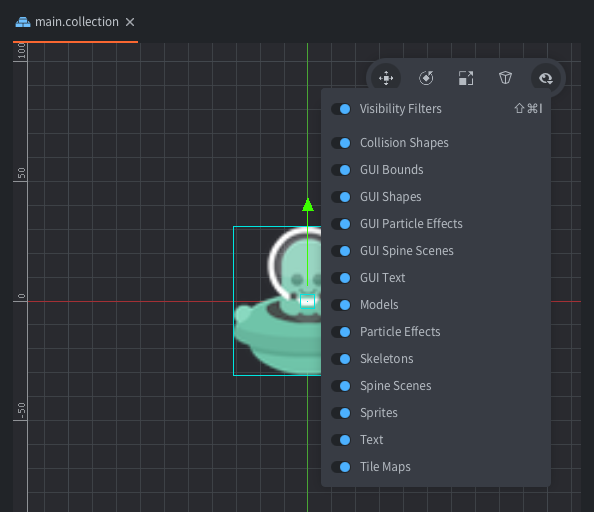
Click on the Visibility Eye Icon (`👁`) in the Toolbar to toggle visibility of various component types as well as bounding boxes and guide lines (`Component Guides` or shortcut Ctrl + H (Win/Linux) or ^ Ctrl + ⌘ Cmd + H(Mac)).
## Creating new project files
To create new resource files, either select `File ▸ New…` and then choose the file type from the menu, or use the context menu:
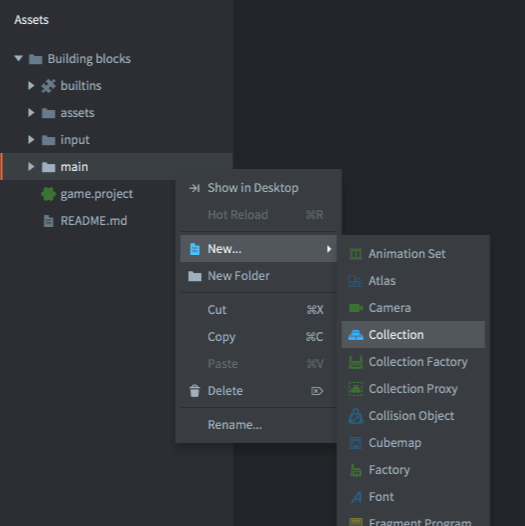
Right Mouse Click the target location in the `Assets` browser, then select `New… ▸ [file type]`:
Type a suitable *Name* for the new file and eventually change *Location*. The full file name including the file type suffix is shown under *Preview* in the dialog:

## Templates
It is possible to specify custom templates for each project. To do so, create a new folder named `templates` in the project’s root directory, and add new files named `default.*` with the desired extensions, such as `/templates/default.gui` or `/templates/default.script`. Additionally, if the `{% raw %}{{NAME}}{% endraw %}` token is used in these files, it will be replaced with the filename specified in the file creation window.
If a template is available for a given file type, whenever a new file of this type is created, it will be initialized with the content of the file from `templates`.

## Importing files to your project
To add asset files (images, sounds, models etc) to your project, simply drag and drop them to the correct position in the *Assets* browser. This will make _copies_ of the files at the selected location in the project file structure. Read more about [how to import assets in our manual](#manuals:importing-assets).

## Updating the Editor
The Editor will automatically check for updates when connected to internet. When an update is detected a blue clickable link `Update Available` will be shown in the lower left corner of the project selection screen or in the lower right corner of the Editor window.
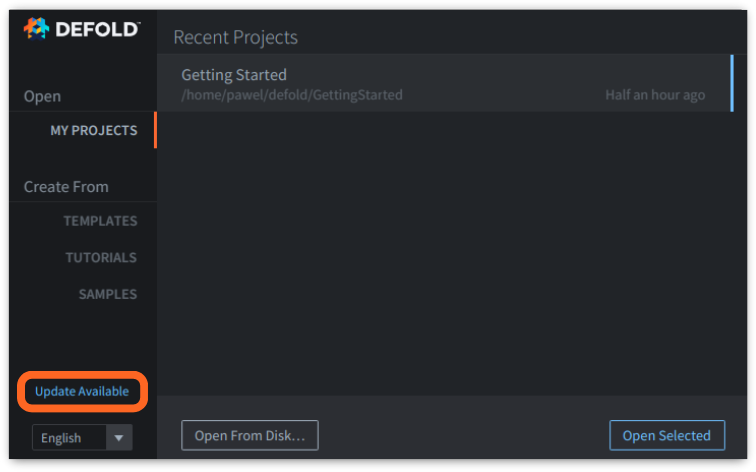
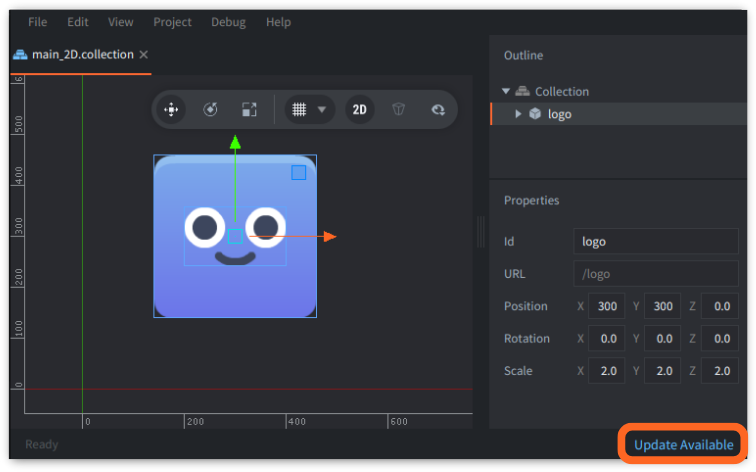
Press the `Update Available` clickable link to download and update. A confirmation window with information will pop up - click `Download Update` to proceed.

You will see the download progress in the bottom status bar:

After update is downloaded the blue link will change to `Restart to Update`. Click it to restart and open the updated Editor.

## Preferences
You can modify the settings of the Editor in the `Preferences` window. To open it click `File ▸ Preferences…` or shortcut Ctrl/⌘ Cmd + ,
Read more details in the [Preferences manual](#manuals:editor-preferences)

## Editor Logs
If you run into a problem with the Editor and need to report issue (`Help ▸ Report Issue`) it is a good idea to provide log files from the editor itself. To open location of the logs in your system browser click on `Help ▸ Show Logs`.
Read more in [Getting Help manual](#manuals:getting-help).

The editor logs files can be found here:
* Windows: `C:\Users\ **Your Username** \AppData\Local\Defold`
* macOS: `/Users/ **Your Username** /Library/Application Support/` or `~/Library/Application Support/Defold`
* Linux: `$XDG_STATE_HOME/Defold` or `~/.local/state/Defold`
You can also get access to editor logs while the Editor is running if it is started from a terminal/command prompt. To launch the Editor use command:
```shell
# Linux:
$ ./path/to/Defold/Defold
# macOS:
$ > ./path/to/Defold.app/Contents/MacOS/Defold
```
## Editor Server
When the Editor opens a project, it will start a web server on a random port. The server may be used to interact with the editor from other applications. Since 1.11.0, the port is written to the `.internal/editor.port` file.
Additionally, since 1.11.0 the editor executable has a command line option `--port` (or `-p`), which allows specifying the port during launch, e.g.::
```shell
# Windows
.\path\to\Defold\Defold.exe --port 8181
# Linux:
./path/to/Defold/Defold --port 8181
# macOS:
./path/to/Defold/Defold.app/Contents/MacOS/Defold --port 8181
```
## Editor Styling
Editor appearance can be changed with custom styling. Read more in the [Editor Styling manual](#manuals:editor-styling.md).
## FAQ
#### Q: What are the system requirements for the editor?
A: The editor will use up to 75% of the available memory of the system. On a computer with 4 GB of RAM this should be enough for smaller Defold projects. For mid-sized or large projects it is recommended to use 6 GB or more of RAM.
#### Q: Are Defold beta versions auto-updating?
A: Yes. The Defold beta editor checks for an update at startup, just like the Defold stable version does.
#### Q: Why am I getting an error saying `java.awt.AWTError: Assistive Technology not found` when launching the editor?
A: This error is related to problems with Java assistive technology such as the [NVDA screen reader](https://www.nvaccess.org/download/). You probably have an `.accessibility.properties` file in your home folder. Remove the file and try launching the editor again. (Note: If you do use any assistive technology and require that file to be present then please reach out to us at info@defold.se to discuss alternative solutions).
Discussed [here on the Defold forum](https://forum.defold.com/t/editor-endless-loading-windows-10-1-2-169-solved/65481/3).
#### Q: Why am I getting an error saying `sun.security.validator.ValidatorException: PKIX path building failed` when launching the editor?
A: This exception occurs when the editor tries to make an https connection but the certificate chain provided by the server cannot be verified.
See [this link](https://github.com/defold/defold/blob/master/editor/README_TROUBLESHOOTING_PKIX.md) for details on this error.
#### Q: Why am I am getting a `java.lang.OutOfMemoryError: Java heap space` when performing certain operations?
A: The Defold editor is built using Java and in some cases the default memory configuration of Java might not be sufficient. If this happens you can manually configure the editor to allocate more memory by editing the editor configuration file. The configuration file, named `config`, is located in the `Defold.app/Contents/Resources/` folder on macOS. On Windows it is located next to `Defold.exe` executable and on Linux next to the `Defold` executable. Open the `config` file and add `-Xmx6gb` to the line starting with `vmargs`. Adding `-Xmx6gb` will set the max heap size to 6 gigabytes (the default is usually 4Gb). It should look something like this:
```
vmargs = -Xmx6gb,-Dfile.encoding=UTF-8,-Djna.nosys=true,-Ddefold.launcherpath=${bootstrap.launcherpath},-Ddefold.resourcespath=${bootstrap.resourcespath},-Ddefold.version=${build.version},-Ddefold.editor.sha1=${build.editor_sha1},-Ddefold.engine.sha1=${build.engine_sha1},-Ddefold.buildtime=${build.time},-Ddefold.channel=${build.channel},-Ddefold.archive.domain=${build.archive_domain},-Djava.net.preferIPv4Stack=true,-Dsun.net.client.defaultConnectTimeout=30000,-Dsun.net.client.defaultReadTimeout=30000,-Djogl.texture.notexrect=true,-Dglass.accessible.force=false,--illegal-access=warn,--add-opens=java.base/java.lang=ALL-UNNAMED,--add-opens=java.desktop/sun.awt=ALL-UNNAMED,--add-opens=java.desktop/sun.java2d.opengl=ALL-UNNAMED,--add-opens=java.xml/com.sun.org.apache.xerces.internal.jaxp=ALL-UNNAMED
```
# Writing code {#manuals:writing-code}
While Defold allows you to create a lot of your game content using visual tools such as the tilemap and particle effect editors you still create your game logic using a code editor. Game logic is written using the [Lua programming language](https://www.lua.org/) while extensions to the engine itself are written using the native language(s) for the target platform.
## Writing Lua code
Defold uses Lua 5.1 and LuaJIT (depending on target platform) and you need to follow the language specification for those specific versions of Lua when writing your game logic. For more details on how to work with Lua in Defold see our [Lua in Defold manual](#manuals:lua).
## Using other languages that transpile to Lua
Defold supports the use of transpilers that emit Lua code. With transpiler extension installed, you can use alternative languages — such as [Teal](https://github.com/defold/extension-teal) — to write statically-checked Lua. It is a preview feature that has limitations: current transpiler support does not expose the information about modules and functions defined in the Defold Lua runtime. It means that using Defold APIs like `go.animate` will require you to write external definitions yourself.
## Writing native code
Defold allows you to extend the game engine with native code to access platform specific functionality not provided by the engine itself. You can also use native code when the performance of Lua isn't enough (resource intensive calculations, image processing etc). Refer to our [manuals on Native Extensions](#manuals:extensions) to learn more.
## Using the built-in code editor
Defold has a built-in code editor that allows you to open and edit Lua files (.lua), Defold script files (.script, .gui_script and .render_script) as well as any other file with a file extension not natively handled by the editor. Additionally the editor provides syntax highlighting for Lua and script files.

### Code completion
The built-in code editor will show code completion of functions while writing code:

Pressing CTRL + Space will show additional information about functions, arguments and return values:

### Linting configuration
The built-in code editor performs code linting using [Luacheck](https://luacheck.readthedocs.io/en/stable/index.html) and [Lua language server](https://luals.github.io/wiki/diagnostics/). To configure the Luacheck, create a `.luacheckrc` file in the project root. You can read the [Luacheck configuration page](https://luacheck.readthedocs.io/en/stable/config.html) for the list of the available options. Defold uses the following defaults for the Luacheck configuration:
```lua
unused_args = false -- don't warn on unused arguments (common for .script files)
max_line_length = false -- don't warn on long lines
ignore = {
"611", -- line contains only whitespace
"612", -- line contains trailing whitespace
"614" -- trailing whitespace in a comment
},
```
## Using an external code editor
The code editor in Defold provides the basic functionality you need to write code, but for more advanced use cases or for power users with a favorite code editor it is possible to let Defold open files using an external editor. In the [Preferences window under the Code tab](#manuals:editor-preferences) it is possible to define an external editor that should be used when editing code.
### Visual Studio Code - Defold Kit
Defold Kit is a Visual Studio Code plugin with the following features:
* Installing recommended extensions
* Lua highlighting, autocompletion and linting
* Applying relevant settings to the workspace
* Lua annotations for Defold API
* Lua annotations for dependencies
* Building and launching
* Debugging with breakpoints
* Bundling for all the platforms
* Deploying to connected mobile devices
Learn more and install Defold Kit from the [Visual Studio Marketplace](https://marketplace.visualstudio.com/items?itemName=astronachos.defold).
## Documentation software
Community created API reference packages are available for [Dash and Zeal](https://forum.defold.com/t/defold-docset-for-dash/2417).
# Editor templates {#manuals:editor-templates}
You can add your own custom project templates to the New Project window:
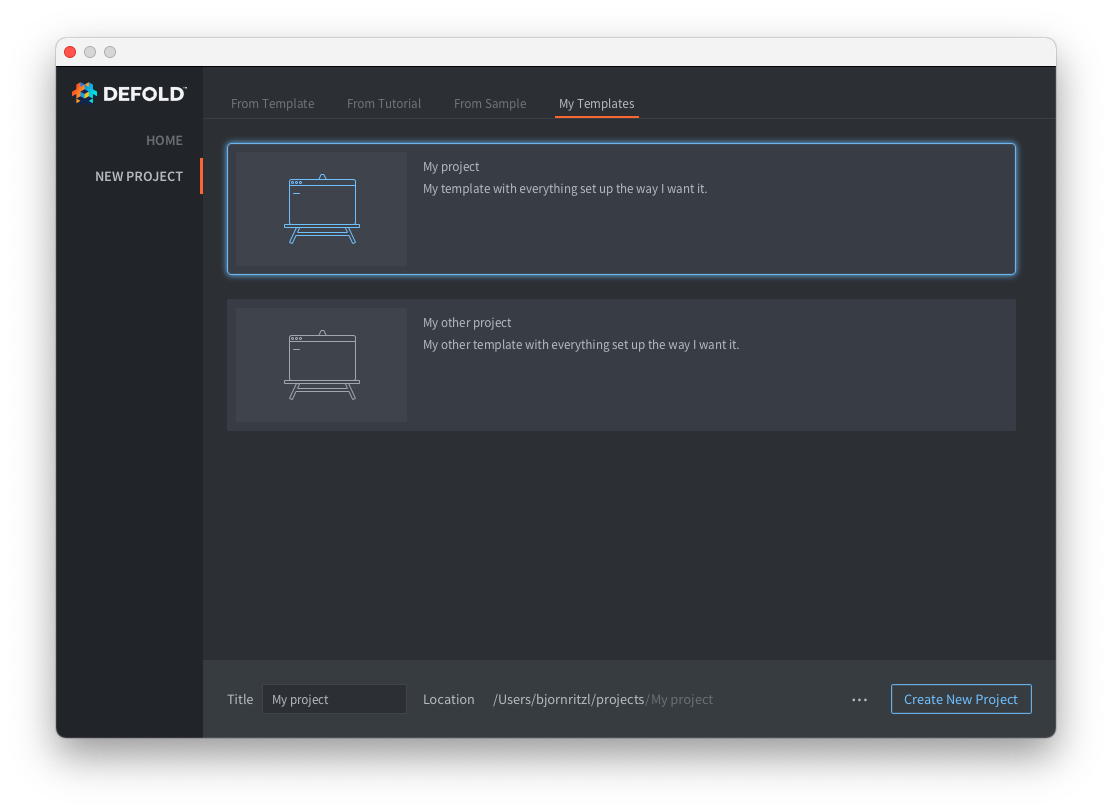
In order to add one or more new tabs with custom project templates you need to add a `welcome.edn` file in the `.defold` folder in your user home directory:
* Create a folder named `.defold` in your user home directory.
* On Windows `C:\Users\**Your Username**\.defold`
* On macOS `/Users/**Your Username**/.defold`
* On Linux `~/.defold`
* Create a `welcome.edn` file in the `.defold` folder
The `welcome.edn` file uses the Extensible Data Notation format. Example:
```
{:new-project
{:categories [
{:label "My Templates"
:templates [
{:name "My project"
:description "My template with everything set up the way I want it."
:image "empty.svg"
:zip-url "https://github.com/britzl/template-project/archive/master.zip"
:skip-root? true},
{:name "My other project"
:description "My other template with everything set up the way I want it."
:image "empty.svg"
:zip-url "https://github.com/britzl/template-other-project/archive/master.zip"
:skip-root? true}]
}]
}
}
```
This will create the list of templates seen in the screenshot above.
You can only use the template images [bundled with the editor](https://github.com/defold/defold/tree/dev/editor/resources/welcome/images).
# Editor scripts {#manuals:editor-scripts}
You can create custom menu items and editor lifecycle hooks using Lua files with special extension: `.editor_script`. Using this system, you can tweak editor to enhance your development workflow.
## Editor script runtime
Editor scripts run inside an editor, in a Lua VM emulated by Java VM. All scripts share the same single environment, which means they can interact with each other. You can require Lua modules, just as with `.script` files, but Lua version that is running inside the editor is different, so make sure your shared code is compatible. Editor uses Lua version 5.2.x, more specifically [luaj](https://github.com/luaj/luaj) runtime, which is currently the only viable solution to run Lua on JVM. Besides that, there are some restrictions:
- there is no `debug` package;
- there is no `os.execute`, though we provide a similar `editor.execute()`;
- there is no `os.tmpname` and `io.tmpfile` — currently editor scripts can access files only inside the project directory;
- there is currently no `os.rename`, although we want to add it;
- there is no `os.exit` and `os.setlocale`.
- it's not allowed to use some long-running functions in contexts where the editor needs an immediate response from the script, see [Execution Modes](#execution-modes) for more details.
All editor extensions defined in editor scripts are loaded when you open a project. When you fetch libraries, extensions are reloaded, since there might be new editor scripts in a libraries you depend on. During this reload, no changes in your own editor scripts are picked up, since you might be in the middle of changing them. To reload them as well, you should run **Project → Reload Editor Scripts** command.
## Anatomy of `.editor_script`
Every editor script should return a module, like that:
```lua
local M = {}
function M.get_commands()
-- TODO - define editor commands
end
function M.get_language_servers()
-- TODO - define language servers
end
function M.get_prefs_schema()
-- TODO - define preferences
end
return M
```
Editor then collects all editor scripts defined in project and libraries, loads them into single Lua VM and calls into them when needed (more on that in [commands](#commands) and [lifecycle hooks](#lifecycle-hooks) sections).
## Editor API
You can interact with the editor using `editor` package that defines this API:
- `editor.platform` — a string, either `"x86_64-win32"` for Windows, `"x86_64-macos"` for macOS or `"x86_64-linux"` for Linux.
- `editor.version` — a string, version name of Defold, e.g. `"1.4.8"`
- `editor.engine_sha1` — a string, SHA1 of Defold engine
- `editor.editor_sha1` — a string, SHA1 of Defold editor
- `editor.get(node_id, property)` — get a value of some node inside the editor. Nodes in the editor are various entities, such as script or collection files, game objects inside collections, json files loaded as resources, etc. `node_id` is a userdata that is passed to the editor script by the editor. Alternatively, you can pass resource path instead of node id, for example `"/main/game.script"`. `property` is a string. Currently these properties are supported:
- `"path"` — file path from the project folder for *resources* — entities that exist as files or directories. Example of returned value: `"/main/game.script"`
- `"children"` — list of children resource paths for directory resources
- `"text"` — text content of a resource editable as text (such as script files or json). Example of returned value: `"function init(self)\nend"`. Please note that this is not the same as reading file with `io.open()`, because you can edit a file without saving it, and these edits are available only when accessing `"text"` property.
- for atlases: `images` (list of editor nodes for images in the atlas) and `animations` (list of animation nodes)
- for atlas animations: `images` (same as `images` in atlas)
- for tilemaps: `layers` (list of editor nodes for layers in the tilemap)
- for tilemap layers: `tiles` (an unbounded 2d grid of tiles), see `tilemap.tiles.*` for more info
- for particlefx: `emitters` (list of emitter editor nodes) and `modifiers` (list of modifier editor nodes)
- for particlefx emitters: `modifiers` (list of modifier editor nodes)
- for collision objects: `shapes` (list of collision shape editor nodes)
- for GUI files: `layers` (list of layer editor nodes)
- some properties that are shown in the Properties view when you have selected something in the Outline view. These types of outline properties supported:
- `strings`
- `booleans`
- `numbers`
- `vec2`/`vec3`/`vec4`
- `resources`
- `curves`
Please note that some of these properties might be read-only, and some might be unavailable in different contexts, so you should use `editor.can_get` before reading them and `editor.can_set` before making editor set them. Hover over property name in Properties view to see a tooltip with information about how this property is named in editor scripts. You can set resource properties to `nil` by supplying `""` value.
- `editor.can_get(node_id, property)` — check if you can get this property so `editor.get()` won't throw an error.
- `editor.can_set(node_id, property)` — check if `editor.tx.set()` transaction step with this property won't throw an error.
- `editor.create_directory(resource_path)` — create a directory if it does not exist, and all non-existent parent directories.
- `editor.create_resources(resources)` — create 1 or more resources, either from templates or with custom content
- `editor.delete_directory(resource_path)` — delete a directory if it exists, and all existent child directories and files.
- `editor.execute(cmd, [...args], [options])` — run a shell command, optionally capturing its output.
- `editor.save()` — persist all unsaved changed to disk.
- `editor.transact(txs)` — modify the editor in-memory state using 1 or more transaction steps created with `editor.tx.*` functions.
- `editor.ui.*` — various UI-related functions, see [UI manual](#manuals:editor-scripts-ui).
- `editor.prefs.*` — functions for interacting with editor preferences, see [preferences](#preferences).
You can find the full editor API reference [here](https://defold.com/ref/alpha/editor/).
## Commands
If editor script module defines function `get_commands`, it will be called on extension reload, and returned commands will be available for use inside the editor in menu bar or in context menus in Assets and Outline panes. Example:
```lua
local M = {}
function M.get_commands()
return {
{
label = "Remove Comments",
locations = {"Edit", "Assets"},
query = {
selection = {type = "resource", cardinality = "one"}
},
active = function(opts)
local path = editor.get(opts.selection, "path")
return ends_with(path, ".lua") or ends_with(path, ".script")
end,
run = function(opts)
local text = editor.get(opts.selection, "text")
editor.transact({
editor.tx.set(opts.selection, "text", strip_comments(text))
})
end
},
{
label = "Minify JSON",
locations = {"Assets"},
query = {
selection = {type = "resource", cardinality = "one"}
},
active = function(opts)
return ends_with(editor.get(opts.selection, "path"), ".json")
end,
run = function(opts)
local path = editor.get(opts.selection, "path")
editor.execute("./scripts/minify-json.sh", path:sub(2))
end
}
}
end
return M
```
Editor expects `get_commands()` to return an array of tables, each describing a separate command. Command description consists of:
- `label` (required) — text on a menu item that will be displayed to the user
- `locations` (required) — an array of either `"Edit"`, `"View"`, `"Project"`, `"Debug"`, `"Assets"`, `"Bundle"`, `"Scene"` or `"Outline"`, describes a place where this command should be available. `"Edit"`, `"View"`, `"Project"` and `"Debug"` mean menu bar at the top, `"Assets"` means context menu in Assets pane, `"Outline"` means context menu in Outline pane, and `"Bundle"` means **Project → Bundle** submenu.
- `query` — a way for command to ask editor for relevant information and define what data it operates on. For every key in `query` table there will be corresponding key in `opts` table that `active` and `run` callbacks receive as argument. Supported keys:
- `selection` means this command is valid when there is something selected, and it operates on this selection.
- `type` is a type of selected nodes command is interested in, currently these types are allowed:
- `"resource"` — in Assets and Outline, resource is selected item that has a corresponding file. In menu bar (Edit or View), resource is a currently open file;
- `"outline"` — something that can be shown in the Outline. In Outline it's a selected item, in menu bar it's a currently open file;
- `"scene"` — something that can be rendered to the Scene.
- `cardinality` defines how many selected items there should be. If `"one"`, selection passed to command callback will be a single node id. If `"many"`, selection passed to command callback will be an array of one or more node ids.
- `argument` — command argument. Currently, only commands in `"Bundle"` location receive an argument, which is `true` when the bundle command is selected explicitly and `false` on rebundle.
- `id` - command identifier string, used e.g. for persisting the last used bundle command in `prefs`
- `active` - a callback that is executed to check that command is active, expected to return boolean. If `locations` include `"Assets"`, `"Scene"` or `"Outline"`, `active` will be called when showing context menu. If locations include `"Edit"` or `"View"`, active will be called on every user interaction, such as typing on keyboard or clicking with mouse, so be sure that `active` is relatively fast.
- `run` - a callback that is executed when user selects the menu item.
### Use commands to change the in-memory editor state
Inside the `run` handler, you can query and change the in-memory editor state. Querying is done using `editor.get()` function, where you can ask the editor about the current state of files and selection (if using `query = {selection = ...}`). You can get the `"text"` property of script files, and also some properties shown in the Properties view — hover over property name to see a tooltip with information about how this property is named in editor scripts. Changing the editor state is done using `editor.transact()`, where you bundle 1 or more modifications in a single undoable step. For example, if you want to be able to reset transform of a game object, you could write a command like that:
```lua
{
label = "Reset transform",
locations = {"Outline"},
query = {selection = {type = "outline", cardinality = "one"}},
active = function(opts)
local node = opts.selection
return editor.can_set(node, "position")
and editor.can_set(node, "rotation")
and editor.can_set(node, "scale")
end,
run = function(opts)
local node = opts.selection
editor.transact({
editor.tx.set(node, "position", {0, 0, 0}),
editor.tx.set(node, "rotation", {0, 0, 0}),
editor.tx.set(node, "scale", {1, 1, 1})
})
end
}
```
#### Editing atlases
In addition to reading and writing properties of an atlas, you can read and modify atlas images and animations. Atlas defines `images` and `animations` node list properties, and animations define `images` node list property: you can use `editor.tx.add`, `editor.tx.remove` and `editor.tx.clear` transaction steps with these properties.
For example, to add an image to an atlas, execute the following code in the command's `run` handler:
```lua
editor.transact({
editor.tx.add("/main.atlas", "images", {image="/assets/hero.png"})
})
```
To find a set of all images in an atlas, execute the following code:
```lua
local all_images = {} ---@type table
If you want to distribute your editor script as a library, you might want to bundle the binary program for editor platforms within the dependency. See [Editor scripts in libraries](#editor-scripts-in-libraries) for more details on how to do it.
## Lifecycle hooks
There is a specially treated editor script file: `hooks.editor_script`, located in a root of your project, in the same directory as *game.project*. This and only this editor script will receive lifecycle events from the editor. Example of such file:
```lua
local M = {}
function M.on_build_started(opts)
local file = io.open("assets/build.json", "w")
file:write('{"build_time": "' .. os.date() .. '"}')
file:close()
end
return M
```
We decided to limit lifecycle hooks to single editor script file because order in which build hooks happen is more important than how easy it is to add another build step. Commands are independent from each other, so it does not really matter in what order they are shown in the menu, in the end user executes a particular command they selected. If it was possible to specify build hooks in different editor scripts, it would create a problem: in which order do hooks execute? You probably want to create a checksums of content after you compress it... And having a single file that establishes order of build steps by calling each step function explicitly is a way to solve this problem.
Existing lifecycle hooks that `/hooks.editor_script` may specify:
- `on_build_started(opts)` — executed when game is Built to run locally or on some remote target using either the Project Build or Debug Start options. Your changes will appear in the built game. Raising an error from this hook will abort a build. `opts` is a table that contains following keys:
- `platform` — a string in `%arch%-%os%` format describing what platform it's built for, currently always the same value as in `editor.platform`.
- `on_build_finished(opts)` — executed when build is finished, be it successful or failed. `opts` is a table with following keys:
- `platform` — same as in `on_build_started`
- `success` — whether build is successful, either `true` or `false`
- `on_bundle_started(opts)` — executed when you create a bundle or Build HTML5 version of a game. As with `on_build_started`, changes triggered by this hook will appear in a bundle, and errors will abort a bundle. `opts` will have these keys:
- `output_directory` — a file path pointing to a directory with bundle output, for example `"/path/to/project/build/default/__htmlLaunchDir"`
- `platform` — platform the game is bundled for. See a list of possible platform values in [Bob manual](#manuals:bob).
- `variant` — bundle variant, either `"debug"`, `"release"` or `"headless"`
- `on_bundle_finished(opts)` — executed when bundle is finished, be it successful or not. `opts` is a table with the same data as `opts` in `on_bundle_started`, plus `success` key indicating whether build is successful.
- `on_target_launched(opts)` — executed when user launched a game and it successfully started. `opts` contains an `url` key pointing to a launched engine service, for example, `"http://127.0.0.1:35405"`
- `on_target_terminated(opts)` — executed when launched game is closed, has same opts as `on_target_launched`
Please note that lifecycle hooks currently are an editor-only feature, and they are not executed by Bob when bundling from command line.
## Language servers
The editor supports a subset [Language Server Protocol](https://microsoft.github.io/language-server-protocol/). While we aim to expand the editor's support for LSP features in the future, currently it can only show diagnostics (i.e. lints) in the edited files and provide completions.
To define the language server, you need to edit your editor script's `get_language_servers` function like so:
```lua
function M.get_language_servers()
local command = 'build/plugins/my-ext/plugins/bin/' .. editor.platform .. '/lua-lsp'
if editor.platform == 'x86_64-win32' then
command = command .. '.exe'
end
return {
{
languages = {'lua'},
watched_files = {
{ pattern = '**/.luacheckrc' }
},
command = {command, '--stdio'}
}
}
end
```
The editor will start the language server using the specified `command`, using the server process's standard input and output for communication.
Language server definition table may specify:
- `languages` (required) — a list of languages the server is interested in, as defined [here](https://code.visualstudio.com/docs/languages/identifiers#known-language-identifiers) (file extensions also work);
- `command` (required) - an array of command and its arguments
- `watched_files` - an array of tables with `pattern` keys (a glob) that will trigger the server's [watched files changed](https://microsoft.github.io/language-server-protocol/specifications/lsp/3.17/specification/#workspace_didChangeWatchedFiles) notification.
## HTTP server
Every running instance of the editor has an HTTP server running. The server can be extended using editor scripts. To extend the editor HTTP server, you need to add `get_http_server_routes` editor script function — it should return the additional routes:
```lua
print("My route: " .. http.server.url .. "/my-extension")
function M.get_http_server_routes()
return {
http.server.route("/my-extension", "GET", function(request)
return http.server.response(200, "Hello world!")
end)
}
end
```
After reloading the editor scripts, you'll see the following output in the console: `My route: http://0.0.0.0:12345/my-extension`. If you open this link in the browser, you'll see your `"Hello world!"` message.
The input `request` argument is a simple Lua table with information about the request. It contains keys such as `path` (URL path segment that starts with `/`), request `method` (e.g. `"GET"`), `headers` (a table with lower-case header names), and optionally `query` (the query string) and `body` (if the route defines how to interpret the body). For example, if you want to make a route that accepts JSON body, you define it with a `"json"` converter parameter:
```lua
http.server.route("/my-extension/echo-request", "POST", "json", function(request)
return http.server.json_response(request)
end)
```
You can test this endpoint in the command line using `curl` and `jq`:
```sh
curl 'http://0.0.0.0:12345/my-extension/echo-request?q=1' -X POST --data '{"input": "json"}' | jq
{
"path": "/my-extension/echo-request",
"method": "POST",
"query": "q=1",
"headers": {
"host": "0.0.0.0:12345",
"content-type": "application/x-www-form-urlencoded",
"accept": "*/*",
"user-agent": "curl/8.7.1",
"content-length": "17"
},
"body": {
"input": "json"
}
}
```
The route path supports patterns that can be extracted from the request path and provided to the handler function as a part of the request, e.g.:
```lua
http.server.route("/my-extension/setting/{category}.{key}", function(request)
return http.server.response(200, tostring(editor.get("/game.project", request.category .. "." .. request.key)))
end)
```
Now, if you open e.g. `http://0.0.0.0:12345/my-extension/setting/project.title`, you'll see the title of your game taken from the `/game.project` file.
In addition to a single segment paths pattern, you can also match the rest of the URL path using `{*name}` syntax. For example, here is a simple file server endpoint that serves files from the project root:
```lua
http.server.route("/my-extension/files/{*file}", function(request)
local attrs = editor.external_file_attributes(request.file)
if attrs.is_file then
return http.server.external_file_response(request.file)
else
return 404
end
end)
```
Now, opening e.g. `http://0.0.0.0:12345/my-extension/files/main/main.collection` in the browser will display the contents of the `main/main.collection` file.
## Editor scripts in libraries
You can publish libraries for other people to use that contain commands, and they will be automatically picked up by the editor. Hooks, on the other hand, can't be picked up automatically, since they have to be defined in a file that is in a root folder of a project, but libraries expose only subfolders. This is intended to give more control over build process: you still can create lifecycle hooks as simple functions in `.lua` files, so users of your library can require and use them in their `/hooks.editor_script`.
Also note that although dependencies are shown in Assets view, they do not exist as files (they are entries in a zip archive). It's possible to make the editor extract some files from the dependencies into `build/plugins/` folder. To do it, you need to create `ext.manifest` file in your library folder, and then create `plugins/bin/${platform}` folder in the same folder where the `ext.manifest` file is located. Files in that folder will be automatically extracted to `/build/plugins/${extension-path}/plugins/bin/${platform}` folder, so your editor scripts can reference them.
## Preferences
Editor scripts can define and use preferences — persistent, uncommitted pieces of data stored on the user's computer. These preferences have three key characteristics:
- typed: every preference has a schema definition that includes the data type and other metadata like default value
- scoped: preferences are scoped either per project or per user
- nested: every preference key is a dot-separated string, where the first path segment identifies an editor script, and the rest
All preferences must be registered by defining their schema:
```lua
function M.get_prefs_schema()
return {
["my_json_formatter.jq_path"] = editor.prefs.schema.string(),
["my_json_formatter.indent.size"] = editor.prefs.schema.integer({default = 2, scope = editor.prefs.SCOPE.PROJECT}),
["my_json_formatter.indent.type"] = editor.prefs.schema.enum({values = {"spaces", "tabs"}, scope = editor.prefs.SCOPE.PROJECT}),
}
end
```
After such editor script is reloaded, the editor registers this schema. Then the editor script can get and set the preferences, e.g.:
```lua
-- Get a specific preference
editor.prefs.get("my_json_formatter.indent.type")
-- Returns: "spaces"
-- Get an entire preference group
editor.prefs.get("my_json_formatter")
-- Returns:
-- {
-- jq_path = "",
-- indent = {
-- size = 2,
-- type = "spaces"
-- }
-- }
-- Set multiple nested preferences at once
editor.prefs.set("my_json_formatter.indent", {
type = "tabs",
size = 1
})
```
## Execution modes
The editor script runtime uses 2 execution modes that are mostly transparent to editor scripts: **immediate** and **long-running**.
**Immediate** mode is used when the editor needs to receive a response from the script as fast as possible. For instance, menu commands' `active` callbacks are executed in immediate mode, because these checks are performed on the editors UI thread in response to user interacting with the editor, and should update the UI within the same frame.
**Long-running** mode is used when the editor doesn't need an instantaneous response from the script. For example, menu commands' `run` callbacks are executed in a **long-running** mode, allowing the script to take more time to complete its work.
Some of the functions that the editor scripts can use may take a lot of time to run. For example, `editor.execute("git", "status", {reload_resources=false, out="capture"})` can take up to a second on sufficiently large projects. To maintain editor responsiveness and performance, functions that may be time-consuming are not allowed in contexts where the editor needs an immediate response. Attempting to use such a function in an immediate context will result in an error: `Cannot use long-running editor function in immediate context`. To resolve this error, avoid using such functions in immediate contexts.
The following functions are considered long-running and cannot be used in immediate mode:
- `editor.create_directory()`, `editor.create_resources()`, `editor.delete_directory()`, `editor.save()`, `os.remove()` and `file:write()`: these functions modify the files on disc, causing the editor to synchronize its in-memory resource tree with the disc state, which can take seconds in large projects.
- `editor.execute()`: execution of shell commands can take an unpredictable amount of time.
- `editor.transact()`: large transactions on widely-referenced nodes may take hundreds of milliseconds, which is too slow for UI responsiveness.
The following code execution contexts use immediate mode:
- Menu command's `active` callbacks: the editor needs a response from the script within the same UI frame.
- Top-level of editor scripts: we don't expect the act of reloading editor scripts to have any side effects.
## Actions
Previously, the editor interacted with the Lua VM in a blocking way, so there was a hard requirement for editor scripts to not block, since some interactions have to be done from the editor UI thread. For that reason, there was e.g. no `editor.execute()` and `editor.transact()`. Executing scripts and changing the editor state was instead triggered by returning an array of "actions" from hooks and command `run` handlers.
Now the editor interacts with the Lua VM in a non-blocking way, so there is no need for these actions any more: using functions like `editor.execute()` is more convenient, concise, and powerful. The actions are now **DEPRECATED**, though we have no plans to remove them.
Editor scripts may return an array of actions from a command's `run` function or from `/hooks.editor_script`'s hook functions. These actions will then be performed by the editor.
Action is a table describing what editor should do. Every action has an `action` key. Actions come in 2 flavors: undoable and non-undoable.
### Undoable actions
Prefer using `editor.transact()`.
Undoable action can be undone after it is executed. If a command returns multiple undoable actions, they are performed together, and get undone together. You should use undoable actions if you can. Their downside is that they are more limited.
Existing undoable actions:
- `"set"` — set a property of a node in the editor to some value. Example:
```lua
{
action = "set",
node_id = opts.selection,
property = "text",
value = "current time is " .. os.date()
}
```
`"set"` action requires these keys:
- `node_id` — node id userdata. Alternatively, you can use resource path here instead of node id you received from the editor, for example `"/main/game.script"`;
- `property` — a property of a node to set, e.g. `"text"`;
- `value` — new value for a property. For `"text"` property it should be a string.
### Non-undoable actions
Prefer using `editor.execute()`.
Non-undoable action clears undo history, so if you want to undo such action, you will have to use other means, such as version control.
Existing non-undoable actions:
- `"shell"` — execute a shell script. Example:
```lua
{
action = "shell",
command = {
"./scripts/minify-json.sh",
editor.get(opts.selection, "path"):sub(2) -- trim leading "/"
}
}
```
`"shell"` action requires `command` key, which is an array of command and it's arguments.
### Mixing actions and side effects
You can mix undoable and non-undoable actions. Actions are executed sequentially, hence depending on an order of actions you will end up losing ability to undo parts of that command.
Instead of returning actions from functions that expect them, you can just read and write to files directly using `io.open()`. This will trigger a resource reload that will clear undo history.
# Editor scripts and UI {#manuals:editor-scripts-ui}
This manual explains how to create interactive UI elements in the editor using editor scripts written in Lua. To get started with editor scripts, see [Editor Scripts manual](#manuals:editor-scripts). You can find the full editor API reference [here](https://defold.com/ref/stable/editor-lua/). Currently, it's only possible to create interactive dialogs, though we want to expand the UI scripting support to the rest of the editor in the future.
## Hello world
All UI-related functionality exists in the `editor.ui` module. Here is the simplest example of an editor script with a custom UI to get started:
```lua
local M = {}
function M.get_commands()
return {
{
label = "Do with confirmation",
locations = {"View"},
run = function()
local result = editor.ui.show_dialog(editor.ui.dialog({
title = "Perform action?",
buttons = {
editor.ui.dialog_button({
text = "Cancel",
cancel = true,
result = false
}),
editor.ui.dialog_button({
text = "Perform",
default = true,
result = true
})
}
}))
print('Perform action:', result)
end
}
}
end
return M
```
This code snippet defines a **View → Do with confirmation** command. When you execute it, you will see the following dialog:
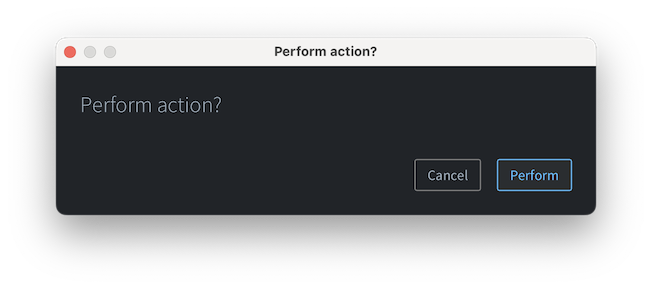
Finally, after pressing Enter (or clicking on the `Perform` button), you'll see the following line in the editor console:
```
Perform action: true
```
## Basic concepts
### Components
The editor provides various UI **components** that can be composed to create the desired UI. By convention, all components are configured using a single table called **props**. The components themselves are not tables, but **immutable userdata** used by the editor for creating the UI.
### Props
**Props** are tables that define inputs into components. Props should be treated as immutable: mutating the props table in-place will not cause the component to re-render, but using a different table will. UI is updated when the component instance receives a props table that is not shallow-equal to the previous one.
### Alignment
When the component gets assigned some bounds in the UI, it will consume the whole space, though it does not mean that the visible part of the component will stretch. Instead, the visible part will take the space it needs, and then it will be aligned within the assigned bounds. Therefore, most built-in components define an `alignment` prop.
For example, consider this label component:
```lua
editor.ui.label({
text = "Hello",
alignment = editor.ui.ALIGNMENT.RIGHT
})
```
The visible part is the `Hello` text, and it's aligned within the assigned component bounds:

## Built-in components
The editor defines various built-in components that can be used together to build the UI. Components may be roughly grouped into 3 categories: layout, data presentation and input.
### Layout components
Layout components are used for placing other components next to each other. Main layout components are **`horizontal`**, **`vertical`** and **`grid`**. These components also define props such as **padding** and **spacing**, where padding is an empty space from the edge of the assigned bounds to the content, and spacing is an empty space between children:
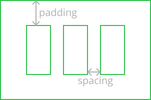
Editor defines `small`, `medium` and `large` padding and spacing constants. When it comes to spacing, `small` is intended for spacing between different sub-elements of an individual UI element, `medium` is for spacing between individual UI elements, and `large` is a spacing between groups of elements. Default spacing is `medium`. A padding value of `large` means padding from the edges of the window to content, `medium` is padding from the edges of a significant UI element, and `small` is a padding from the edges of small UI elements like context menus and tooltips (not implemented yet).
A **`horizontal`** container places its children one after another horizontally, always making the height every child fill the available space. By default, the width of every child is kept to a minimum, though it's possible to make it take as much space as possible by setting `grow` prop to `true` on a child.
A **`vertical`** container is similar to horizontal, but with the axes switched.
Finally, **`grid`** is a container component that lays out its children in a 2D grid, like a table. The `grow` setting in a grid applies to rows or columns, therefore it's set not on a child, but on column configuration table. Also, children in a grid may be configured to span multiple rows or columns with `row_span` and `column_span` props. Grids are useful for creating multi-input forms:
```lua
editor.ui.grid({
padding = editor.ui.PADDING.LARGE, -- add padding around dialog edges
columns = {% raw %}{{}, {grow = true}}{% endraw %}, -- make 2nd column grow
children = {
{
editor.ui.label({
text = "Level Name",
alignment = editor.ui.ALIGNMENT.RIGHT
}),
editor.ui.string_field({})
},
{
editor.ui.label({
text = "Author",
alignment = editor.ui.ALIGNMENT.RIGHT
}),
editor.ui.string_field({})
}
}
})
```
The code above will produce the following dialog form:
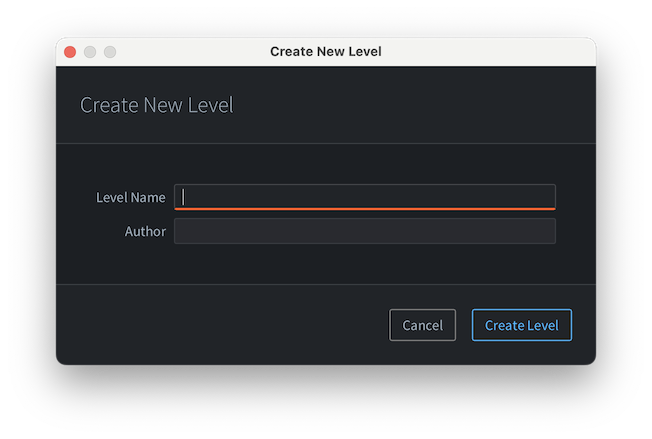
### Data presentation components
The editor defines 4 data presentation components:
- **`label`** — text label, intended to be used with form inputs.
- **`icon`** — an icon; currently, it can only be used for presenting a small set of predefined icons, but we intend to allow more icons in the future.
- **`heading`** — text element intended for presenting a heading line of text in e.g. a form or a dialog. The `editor.ui.HEADING_STYLE` enum defines various heading styles that include HTML's `H1`-`H6` heading, as well as editor-specific `DIALOG` and `FORM`.
- **`paragraph`** — text element intended for presenting a paragraph of text. The main difference with `label` is that paragraph supports word wrapping: if the assigned bounds are too small horizontally, the text will wrap, and possibly will be shortened with `"..."` if it can't fit in the view.
### Input components
Input components are made for the user to interact with the UI. All input components support `enabled` prop to control if the interaction is enabled or not, and define various callback props that notify the editor script on interaction.
If you create a static UI, it's enough to define callbacks that simply modify locals. For dynamic UIs and more advanced interactions, see [reactivity](#reactivity).
For example, it's possible to create a simple static New File dialog like so:
```lua
-- initial file name, will be replaced by the dialog
local file_name = ""
local create_file = editor.ui.show_dialog(editor.ui.dialog({
title = "Create New File",
content = editor.ui.horizontal({
padding = editor.ui.PADDING.LARGE,
spacing = editor.ui.SPACING.MEDIUM,
children = {
editor.ui.label({
text = "New File Name",
alignment = editor.ui.ALIGNMENT.CENTER
}),
editor.ui.string_field({
grow = true,
text = file_name,
-- Typing callback:
on_value_changed = function(new_text)
file_name = new_text
end
})
}
}),
buttons = {
editor.ui.dialog_button({ text = "Cancel", cancel = true, result = false }),
editor.ui.dialog_button({ text = "Create File", default = true, result = true })
}
}))
if create_file then
print("create", file_name)
end
```
Here is a list of built-in input components:
- **`string_field`**, **`integer_field`** and **`number_field`** are variations of a single-line text field that allow editing strings, integers, and numbers.
- **`select_box`** is used for selecting an option from predefined array of options with a dropdown control.
- **`check_box`** is a boolean input field with `on_value_changed` callback
- **`button`** with `on_press` callback that gets invoked on button press.
- **`external_file_field`** is a component intended for selecting a file path on the computer. It consists of a text field and a button that opens a file selection dialog.
- **`resource_field`** is a component intended for selecting a resource in the project.
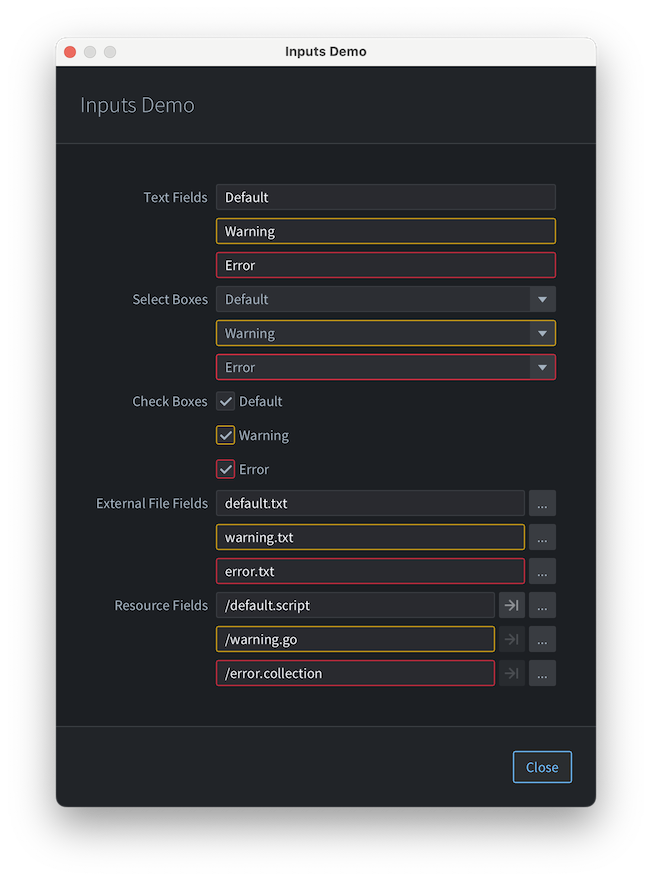
All components except buttons allow setting an `issue` prop that displays the issue related to the component (either `editor.ui.ISSUE_SEVERITY.ERROR` or `editor.ui.ISSUE_SEVERITY.WARNING`), e.g.:
```lua
issue = {severity = editor.ui.ISSUE_SEVERITY.WARNING, message = "This value is deprecated"}
```
When issue is specified, it changes how the input component looks, and adds a tooltip with the issue message.
Here is a demo of all inputs with their issue variants:
### Dialog-related components
To show a dialog, you need to use `editor.ui.show_dialog` function. It expects a **`dialog`** component that defines the main structure of Defold dialogs: `title`, `header`, `content` and `buttons`. Dialog component is a bit special: you can't use it as a child of another component, because it represents a window, not a UI element. `header` and `content` are usual components though.
Dialog buttons are special too: they are created using **`dialog_button`** component. Unlike usual buttons, dialog buttons don't have `on_pressed` callback. Instead, they define a `result` prop with a value that will be returned by the `editor.ui.show_dialog` function when the dialog is closed. Dialog buttons also define `cancel` and `default` boolean props: button with a `cancel` prop is triggered when user presses Escape or closes the dialog with the OS close button, and `default` button is triggered when the user presses Enter. A dialog button may have both `cancel` and `default` props set to `true` at the same time.
### Utility components
Additionally, the editor defines some utility components:
- **`separator`** is a thin line used for delimiting blocks of content
- **`scroll`** is a wrapper component that shows scroll bars when the wrapped component does not fit in the assigned space
## Reactivity
Since components are **immutable userdata**, it's impossible to change them after they are created. How to make the UI change over time then? The answer: **reactive components**.
The editor scripting UI draws inspiration from [React](https://react.dev/) library, so knowing about reactive UI and React hooks will help.
In the most simple terms, a reactive component is a component with a Lua function that receives data (props) and returns view (another component). Reactive component function may use **hooks**: special functions in the `editor.ui` module that add reactive features to your components. By convention, all hooks have a name that starts with `use_`.
To create a reactive component, use `editor.ui.component()` function.
Let's have a look at this example — a New File dialog that only allows creating a file if the entered file name is not empty:
```lua
-- 1. dialog is a reactive component
local dialog = editor.ui.component(function(props)
-- 2. the component defines a local state (file name) that defaults to empty string
local name, set_name = editor.ui.use_state("")
return editor.ui.dialog({
title = props.title,
content = editor.ui.vertical({
padding = editor.ui.PADDING.LARGE,
children = {
editor.ui.string_field({
value = name,
-- 3. typing + Enter updates the local state
on_value_changed = set_name
})
}
}),
buttons = {
editor.ui.dialog_button({
text = "Cancel",
cancel = true
}),
editor.ui.dialog_button({
text = "Create File",
-- 4. creation is enabled when the name exists
enabled = name ~= "",
default = true,
-- 5. result is the name
result = name
})
}
})
end)
-- 6. show_dialog will either return non-empty file name or nil on cancel
local file_name = editor.ui.show_dialog(dialog({ title = "New File Name" }))
if file_name then
print("create " .. file_name)
else
print("cancelled")
end
```
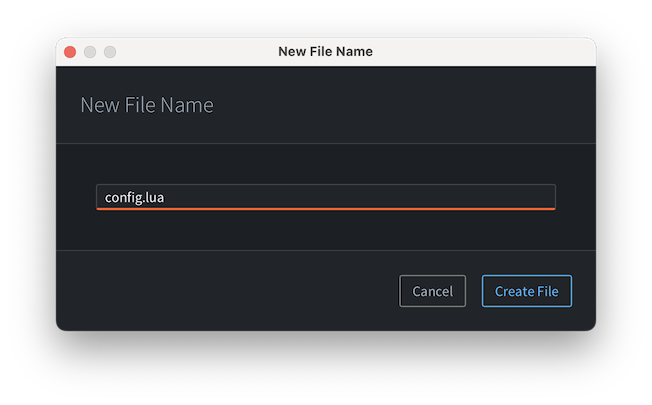
When you execute a menu command that runs this code, the editor will show a dialog with disabled `"Create File"` dialog at the start, but, when you type a name and press Enter, it will become enabled:
So, how does it work? On the very first render, `use_state` hook creates a local state associated with the component and returns it with a setter for the state. When the setter function is invoked, it schedules a component re-render. On subsequent re-renders, the component function is invoked again, and `use_state` returns the updated state. New view component returned by the component function is then diffed against the old one, and the UI is updated where the changes were detected.
This reactive approach greatly simplifies building interactive UIs and keeping them in sync: instead of explicitly updating all affected UI components on user input, the view is defined as a pure function of the input (props and local state), and the editor handles all the updates itself.
### Rules of reactivity
The editor expects reactive function components to behave nicely for them to work:
1. Component functions must be pure. There is no guarantee on when or how often the component function will be invoked. All side-effects should be outside of rendering, e.g. in callbacks
2. Props and local state must be immutable. Don't mutate props. If your local state is a table, don't mutate it in-place, but create a new one and pass it to the setter when the state needs to change.
3. Component functions must call the same hooks in the same order on every invocation. Don't call hooks inside loops, in conditional blocks, after early returns etc. It is a best practice to call hooks in the beginning of the component function, before any other code.
4. Only call hooks from component functions. Hooks work in a context of a reactive component, so it's only allowed to call them in the component function (or another function called directly by the component function).
### Hooks
If you are familiar with [React](https://react.dev/), you will notice that hooks in the editor have slightly different semantics when it comes to hook dependencies.
The editor defines 2 hooks: **`use_memo`** and **`use_state`**.
### **`use_state`**
Local state can be created in 2 ways: with a default value or with an initializer function:
```lua
-- default value
local enabled, set_enabled = editor.ui.use_state(true)
-- initializer function + args
local id, set_id = editor.ui.use_state(string.lower, props.name)
```
Similarly, setter can be invoked with a new value or with an updater function:
```lua
-- updater function
local function increment_by(n, by)
return n + by
end
local counter = editor.ui.component(function(props)
local count, set_count = editor.ui.use_state(0)
return editor.ui.horizontal({
spacing = editor.ui.SPACING.SMALL,
children = {
editor.ui.label({
text = tostring(count),
alignment = editor.ui.ALIGNMENT.LEFT,
grow = true
}),
editor.ui.text_button({
text = "+1",
on_pressed = function() set_count(increment_by, 1) end
}),
editor.ui.text_button({
text = "+5",
on_pressed = function() set_count(increment_by, 5) end
})
}
})
end)
```
Finally, the state may be **reset**. The state is reset when any of the arguments to `editor.ui.use_state()` change, checked with `==`. Because of this, you must not use literal tables or literal initializer functions as arguments to `use_state` hook: this will cause the state to reset on every re-render. To illustrate:
```lua
-- ❌ BAD: literal table initializer causes state reset on every re-render
local user, set_user = editor.ui.use_state({ first_name = props.first_name, last_name = props.last_name})
-- ✅ GOOD: use initializer function outside of component function to create table state
local function create_user(first_name, last_name)
return { first_name = first_name, last_name = last_name}
end
-- ...later, in component function:
local user, set_user = editor.ui.use_state(create_user, props.first_name, props.last_name)
-- ❌ BAD: literal initializer function causes state reset on every re-render
local id, set_id = editor.ui.use_state(function() return string.lower(props.name) end)
-- ✅ GOOD: use referenced initializer function to create the state
local id, set_id = editor.ui.use_state(string.lower, props.name)
```
### **`use_memo`**
You can use `use_memo` hook to improve performance. It is common to perform some computations in the render functions, e.g. to check if the user input is valid. `use_memo` hook can be used in cases where checking if arguments to the computation function have changed is cheaper than invoking the computation function. The hook will call the computation function on first render, and will re-use the computed value on subsequent re-renders if all the arguments to `use_memo` are unchanged:
```lua
-- validation function outside of component function
local function validate_password(password)
if #password < 8 then
return false, "Password must be at least 8 characters long."
elseif not password:match("%l") then
return false, "Password must include at least one lowercase letter."
elseif not password:match("%u") then
return false, "Password must include at least one uppercase letter."
elseif not password:match("%d") then
return false, "Password must include at least one number."
else
return true, "Password is valid."
end
end
-- ...later, in component function
local username, set_username = editor.ui.use_state('')
local password, set_password = editor.ui.use_state('')
local valid, message = editor.ui.use_memo(validate_password, password)
```
In this example, password validation will run on every password change (e.g. on typing in a password field), but not when the username is changed.
Another use-case for `use_memo` is creating callbacks that are then used on input components, or when a locally-created function is used as a prop value for another component — this prevents unnecessary re-renders.
# Debugging game logic {#manuals:debugging-game-logic}
Defold contains an integrated Lua debugger with an inspection facility. Together with the built-in [profiling tools](#manuals:profiling) it is a powerful tool that can help finding the cause of bugs in your game logic or help analyze performance issues.
## Print and visual debugging
The simplest way to debug your game in Defold is to use [print debugging](http://en.wikipedia.org/wiki/Debugging#Techniques). Use `print()` or [`pprint()`](https://defold.com/ref/builtins#pprint) statements to watch variables or indicate the flow of execution. If a game object without a script acts weird, you can just attach a script to it with the sole purpose of debugging. Using any of the printing functions will print to the *Console* view in the editor and to the [game log](#manuals:debugging-game-and-system-logs).
In addition to printing, the engine can also draw debug text and straight lines on the screen. This is done by posting messages to the `@render` socket:
```lua
-- Draw value of "my_val" with debug text on the screen
msg.post("@render:", "draw_text", { text = "My value: " .. my_val, position = vmath.vector3(200, 200, 0) })
-- Draw colored text on the screen
local color_green = vmath.vector4(0, 1, 0, 1)
msg.post("@render:", "draw_debug_text", { text = "Custom color", position = vmath.vector3(200, 180, 0), color = color_green })
-- Draw debug line between player and enemy on the screen
local start_p = go.get_position("player")
local end_p = go.get_position("enemy")
local color_red = vmath.vector4(1, 0, 0, 1)
msg.post("@render:", "draw_line", { start_point = start_p, end_point = end_p, color = color_red })
```
The visual debug messages adds data to the rendering pipeline and is drawn as part of the regular render pipeline.
* `"draw_line"` adds data that is rendered with the `render.draw_debug3d()` function in the render script.
* `"draw_text"` is rendered with the `/builtins/fonts/debug/always_on_top.font` that uses the `/builtins/fonts/debug/always_on_top_font.material` material.
* `"draw_debug_text"` is the same as `"draw_text"`, but it's rendered in a custom color.
Note that you probably want to update this data every frame so posting the messages in the `update()` function is a good idea.
## Running the debugger
To run the debugger, select Debug ▸ Start/Attach which either starts up the game with the debugger attached or attaches the debugger to an already running game.

As soon as the debugger is attached, you have control of the execution of the game through the debugger control buttons in the console, or through the Debug menu:
Break
:  Break execution of the game immediately. The game will break at its current point. You are now able to inspect the state of the game, advance the game step by step, or continue running it until the next breakpoint. The current point of execution is marked in the code editor:

Continue
:
Break execution of the game immediately. The game will break at its current point. You are now able to inspect the state of the game, advance the game step by step, or continue running it until the next breakpoint. The current point of execution is marked in the code editor:

Continue
:  Continue running the game. The game code will continue to run until you either press pause or the execution hits a breakpoint that you have set. If execution breaks at a set breakpoint, the the execution point is marked in the code editor on top of the breakpoint marker:

Stop
:
Continue running the game. The game code will continue to run until you either press pause or the execution hits a breakpoint that you have set. If execution breaks at a set breakpoint, the the execution point is marked in the code editor on top of the breakpoint marker:

Stop
:  Stop the debugger. Pressing this button will immediately stop the debugger, detach it from the game and terminate the running game.
Step Over
:
  Advance execution of the program one step. If the execution involves running another Lua function, the execution _will not step into the function_ but continue running and stop on the next line below the function call. In this example, if the user presses "step over", the debugger will execute code and stop at the `end` statement below the line with the call to the function `nextspawn()`:

Advance execution of the program one step. If the execution involves running another Lua function, the execution _will not step into the function_ but continue running and stop on the next line below the function call. In this example, if the user presses "step over", the debugger will execute code and stop at the `end` statement below the line with the call to the function `nextspawn()`:

A line of Lua code does not correspond to a single expression. Stepping in the debugger moves ahead one expression at a time, meaning that currently you may have to hit the step button more than once to advance to the next line.
Step Into
:  Advance execution of the program one step. If the execution involves running another Lua function, the execution _will step into the function_. Calling the function adds an entry to the call stack. You can click each entry in the call stack list to view the entry point and the content of all variables in that closure. Here, the user has stepped into the function `nextspawn()`:

Step Out
:
Advance execution of the program one step. If the execution involves running another Lua function, the execution _will step into the function_. Calling the function adds an entry to the call stack. You can click each entry in the call stack list to view the entry point and the content of all variables in that closure. Here, the user has stepped into the function `nextspawn()`:

Step Out
:  Continue execution until it returns from the current function. If you have stepped execution into a function, pressing the button "step out" will continue execution until the function returns.
Setting and clearing breakpoints
: You can set an arbitrary number of breakpoints in your Lua code. When the game runs with the debugger attached, it will stop execution at the next breakpoint it encounters and wait for further interaction from you.
To set or clear a breakpoint, click in the column just right of the line numbers in the code editor. You can also select Edit ▸ Toggle Breakpoint from the menu.
Setting conditional breakpoints
: You can configure your breakpoint to contain a condition that needs to evaluate to true for the breakpoint to trigger. The condition can access local variables available at the line during code execution.
To edit the breakpoint condition, right-click in the column just right of the line numbers in the code editor, or select Edit ▸ Edit Breakpoint from the menu.
Evaluating Lua expressions
: With the debugger attached and the game stopped at a breakpoint, a Lua runtime is available with the current context. Type Lua expressions in the bottom of the console and press Enter to evaluate them:

It is currently not possible to modify variables through the evaluator.
Detaching the debugger
: Select Debug ▸ Detach Debugger to detach the debugger from the game. It will continue running immediately.
## Lua debug library
Lua comes with a debug library that is useful in some situations, particularly if you need to inspect the innards of your Lua environment. You can find more information about it in [the chapter about the Debug Library in the Lua manual](http://www.lua.org/pil/contents.html#23).
## Debugging checklist
If you encounter an error or if your game does not behave like expected, here is a debugging checklist:
1. Check the console output and verify that there are no runtime errors.
2. Add `print` statements to your code to verify that the code is actually running.
3. If it's not running, check that you have done the proper setup in the editor required for the code to run. Is the script added to the right game object? Have your script acquired input focus? Are the input-triggers correct? Is the shader code added to the material? Etc.
4. If your code is depending on the values of variables (in an if-statement, for example), either `print` those values where they are used or checked, or inspect them with the debugger.
Sometimes finding a bug can be a hard and time consuming process, requiring you to go through your code bit by bit, checking everything and narrowing down the faulty code and eliminating sources of error. This is best done by a method called "divide and conquer":
1. Figure out which half (or less) of the code that must contain the bug.
2. Again, figure out which half, of that half, must contain the bug.
3. Continue narrowing down the code that must cause the bug until you find it.
Happy hunting!
## Debugging problems with physics
If you have problems with physics and collisions aren't working as expected it is recommended to enable physics debugging. Check the *Debug* checkbox in the *Physics* section of the *game.project* file:
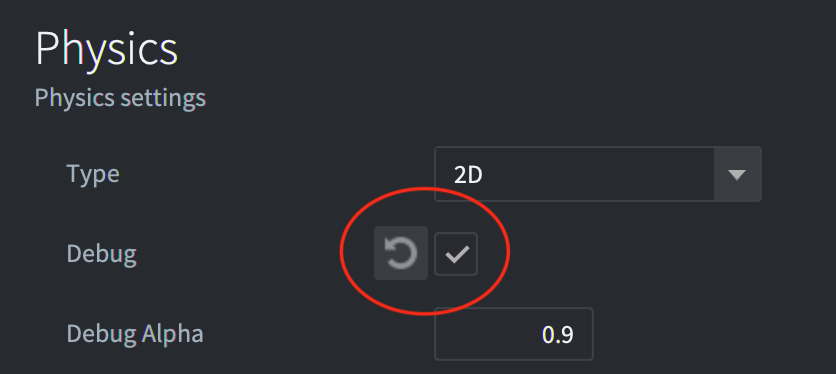
When this checkbox is enabled Defold will draw all collision shapes and contact points of collisions:
# Editor preferences {#manuals:editor-preferences}
You can modify the settings of the editor from the Preferences window. The preferences window is opened from the File -> Preferences menu.
## General
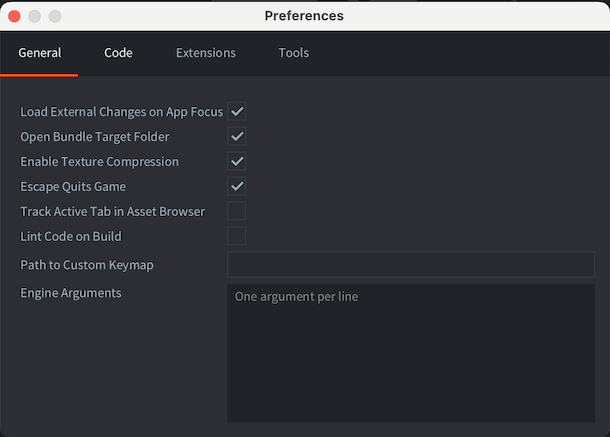
Load External Changes on App Focus
: Enables scanning for external changes when the editor receives focus.
Open Bundle Target Folder
: Enables opening of the target bundle folder after bundling process is done.
Enable Texture Compression
: Enables [texture compression](#manuals:texture-profiles) for all builds made from the editor.
Escape Quits Game
: Shutdown a running build of your game using the Esc key.
Track Active Tab in Asset Browser
: The file edited in selected tab in the *Editor* pane will be selected in the Asset Browser (also known as the *Asset* pane).
Lint Code on Build
: Enables [code linting](#manuals:writing-code) when the project is built. This option is enabled by default, but can be disabled if the linting in a large project takes too much time.
Engine Arguments
: Arguments that will be passed to the dmengine executable when the editor builds and runs.
Use one argument per line. For example:
```
--config=bootstrap.main_collection=/my dir/1.collectionc
--verbose
--graphics-adapter=vulkan
```
## Code
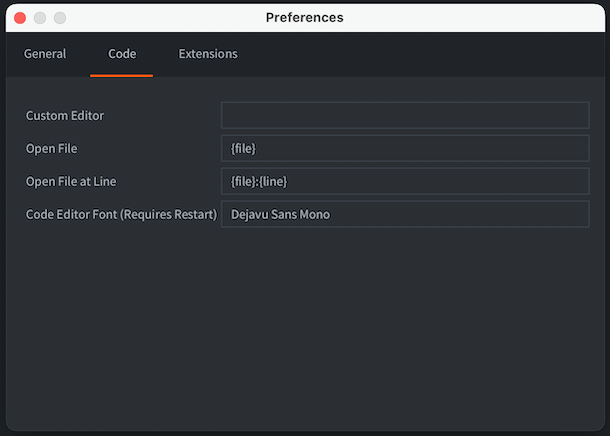
Custom Editor
: Absolute path to an external editor. On macOS it should be the path to the executable inside the .app (e.g. `/Applications/Atom.app/Contents/MacOS/Atom`).
Open File
: The pattern used by the custom editor to specify which file to open. The pattern `{file}` will be replaced by the filename to open.
Open File at Line
: The pattern used by the custom editor to specify which file to open and on which line number. The pattern `{file}` will be replaced by the filename to open and `{line}` by the line number.
Code editor font
: Name of a system installed font to use in the code editor.
Zoom on Scroll
: Whether to change the font size when scrolling in the code editor while holding Cmd/Ctrl button.
### Open script files in Visual Studio Code
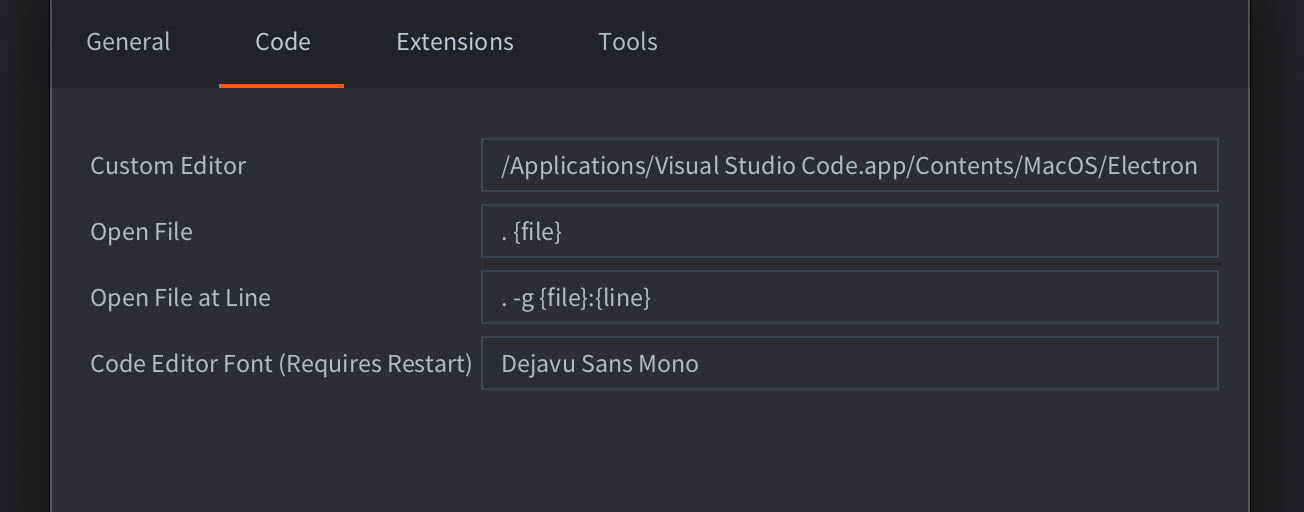
To open script files from the Defold Editor directly in Visual Studio Code, you must set the following settings by specifying the path to the executable file:
- MacOS: `/Applications/Visual Studio Code.app/Contents/MacOS/Electron`
- Linux: `/usr/bin/code`
- Windows: `C:\Program Files\Microsoft VS Code\Code.exe`
Set these parameters to open specific files and lines:
- Open File: `. {file}`
- Open File at Line: `. -g {file}:{line}`
The `.` character here is required to open the entire workspace, not an individual file.
## Extensions
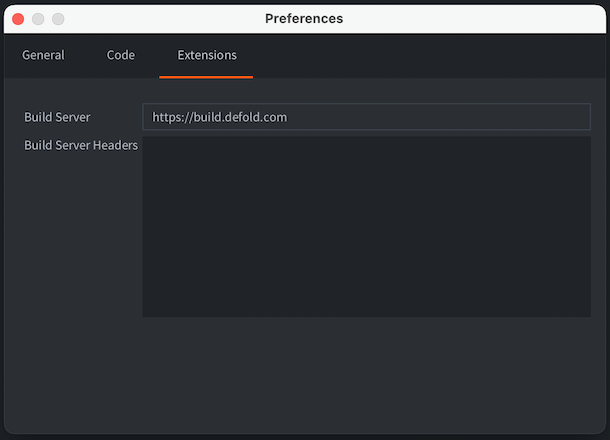
Build Server
: URL to the build server used when building a project containing [native extensions](#manuals:extensions). It is possible to add a username and access token to the URL for authenticated access to the build server. Use the following notation to specify the username and access token: `username:token@build.defold.com`. Authenticated access is required for Nintendo Switch builds and when running your own build server instance with authentication enabled ([refer to the build server documentation](https://github.com/defold/extender/blob/dev/README_SECURITY.md) for more information). The username and password can also be set as the system environment variables `DM_EXTENDER_USERNAME` and `DM_EXTENDER_PASSWORD`.
Build Server Username
: username for authentication.
Build Server Password
: password for authentication, will be stored encrypted in the preferences file.
Build Server Headers
: additional headers to the build server when building native extensions. It's important for using CloudFlare service or similar services with extender.
## Tools
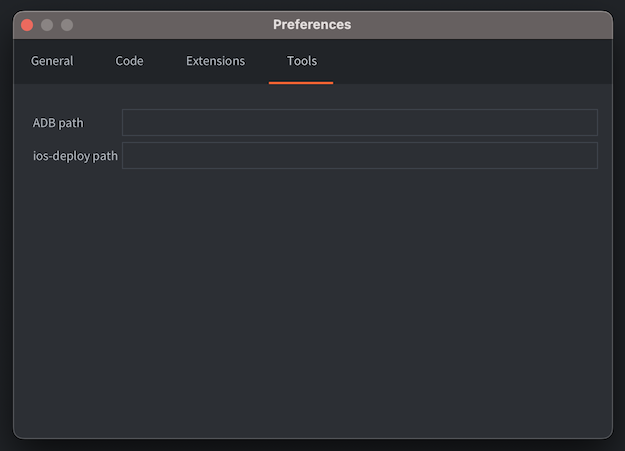
ADB path
: Path to [ADB](https://developer.android.com/tools/adb) command line tool installed on this system. If you have ADB installed on your system, the Defold editor will use it to install and run bundled Android APKs to a connected Android Device. By default, the editor checks if ADB is installed in well-known locations, so you only need to specify the path if you have ADB installed in a custom location.
ios-deploy path
: Path to [ios-deploy](https://github.com/ios-control/ios-deploy) command line tools installed on this system (only relevant for macOS). Similarly to the ADB path, the Defold editor will use this tool to install and run bundled iOS applications on a connected iPhone. By default, the editor checks if ios-deploy is installed in well-known locations, so you only need to specify the path if you use a custom installation of ios-deploy.
## Keymap
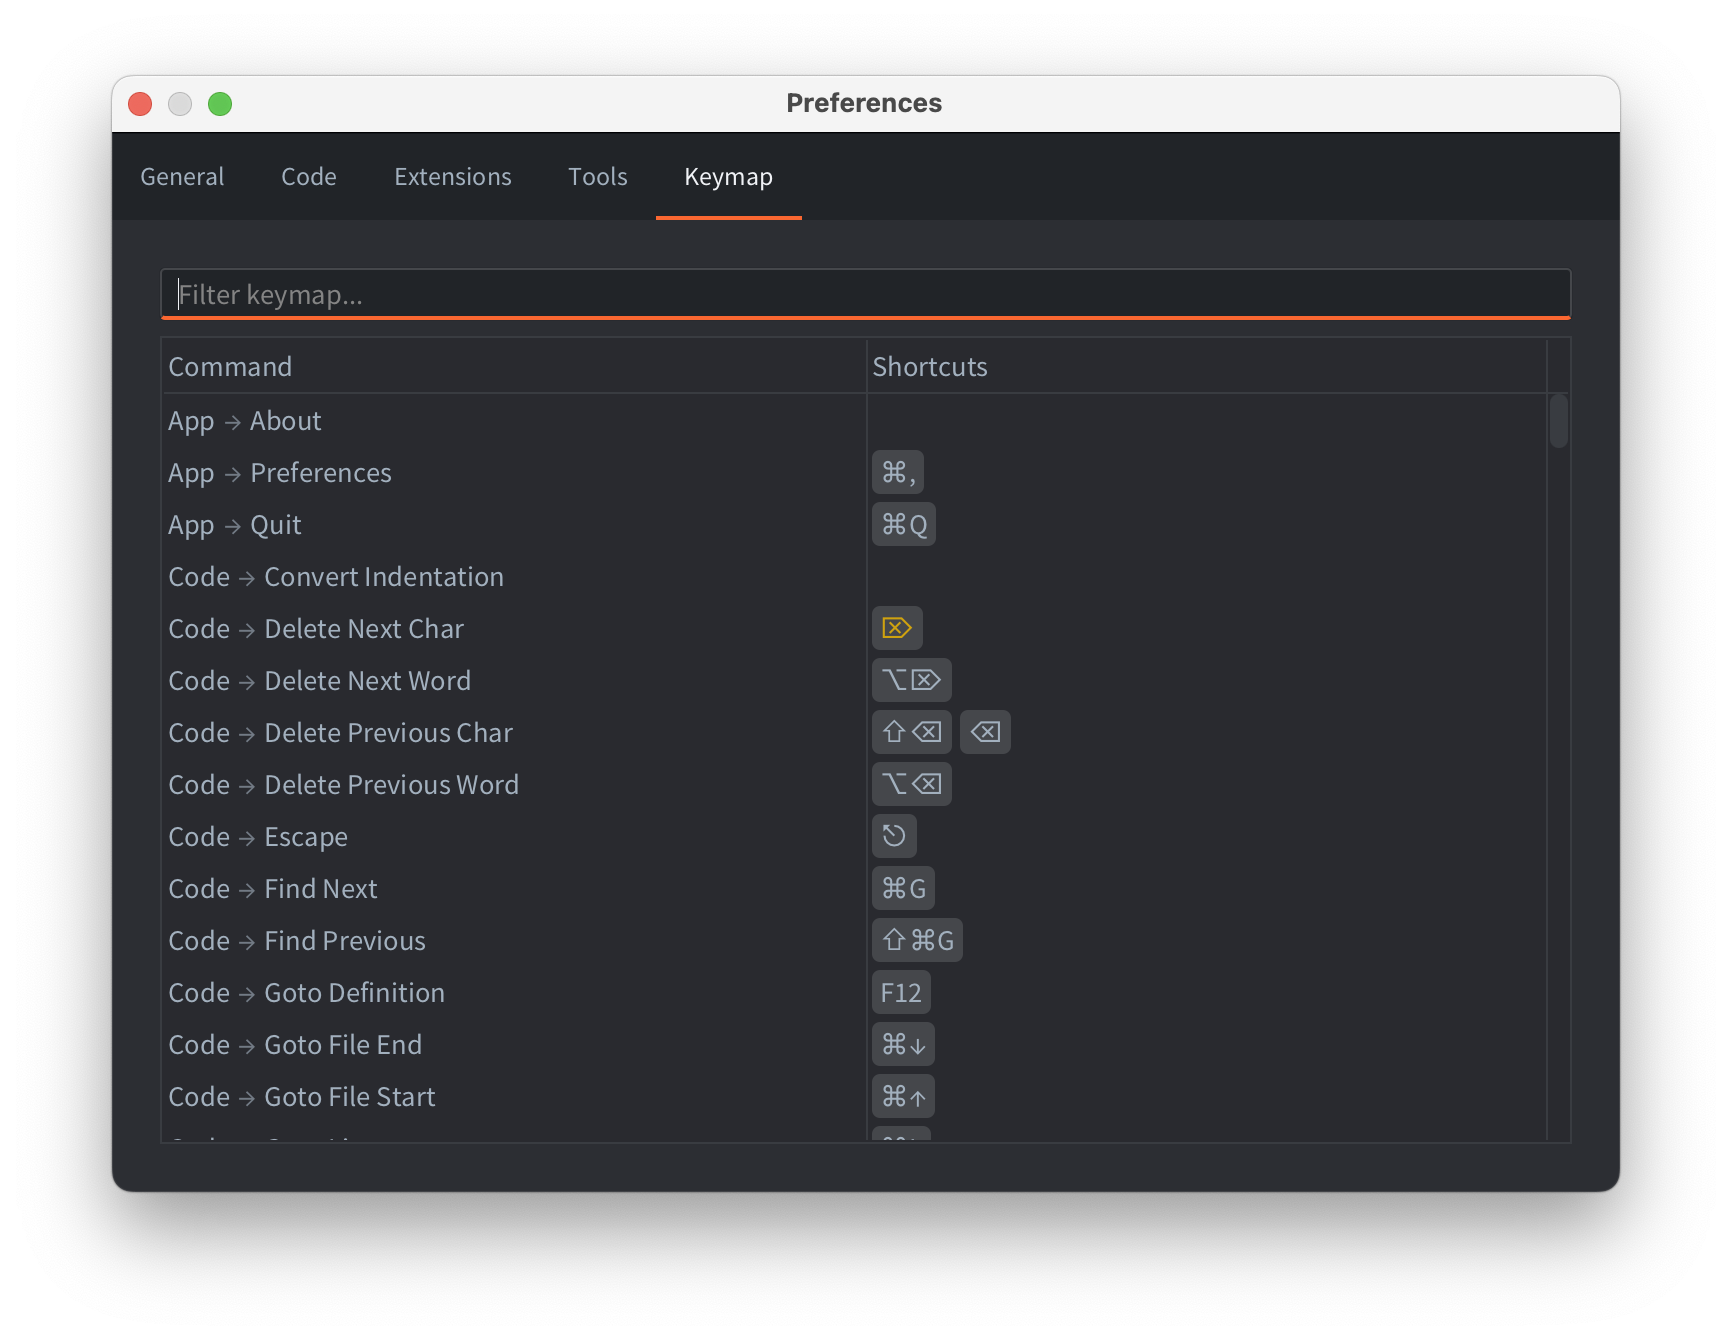
You can configure the editor shortcuts, both adding custom and removing the built-in ones. Use context menu on individual commands in the shortcut table to edit the shortcuts, or double-click/press Enter to open a new shortcut popup.
Some shortcuts might have warnings: they are displayed using orange color. Hover over the shortcut to see the warning. Typical warnings are:
- typeable shortcuts: the selected shortcut is typeable in a text inputs. Make sure the command is off in the code editing / text input contexts.
- conflicts: the same shortcut is assigned to multiple different commands. Make sure at most one command is enabled when the shortcut is invoked, otherwise the editor will execute one of the assigned commands in an undefined manner.
# Refactoring {#manuals:refactoring}
Refactoring refers to the process of restructuring existing code and assets. During the development of a project, the need to change or move things around often surfaces: names need to change to adhere to naming conventions or to improve clarity and code or asset files need to move to a more logical place in the project hierarchy.
Defold helps you refactor efficiently by keeping track of how assets are used. It automatically updates references to assets that are renamed and/or moved. As a developer, you should feel free in your work. Your project is a flexible structure that you can change at will without fearing that everything will break and fall to pieces.
Continue execution until it returns from the current function. If you have stepped execution into a function, pressing the button "step out" will continue execution until the function returns.
Setting and clearing breakpoints
: You can set an arbitrary number of breakpoints in your Lua code. When the game runs with the debugger attached, it will stop execution at the next breakpoint it encounters and wait for further interaction from you.

To set or clear a breakpoint, click in the column just right of the line numbers in the code editor. You can also select Edit ▸ Toggle Breakpoint from the menu.
Setting conditional breakpoints
: You can configure your breakpoint to contain a condition that needs to evaluate to true for the breakpoint to trigger. The condition can access local variables available at the line during code execution.

To edit the breakpoint condition, right-click in the column just right of the line numbers in the code editor, or select Edit ▸ Edit Breakpoint from the menu.
Evaluating Lua expressions
: With the debugger attached and the game stopped at a breakpoint, a Lua runtime is available with the current context. Type Lua expressions in the bottom of the console and press Enter to evaluate them:

It is currently not possible to modify variables through the evaluator.
Detaching the debugger
: Select Debug ▸ Detach Debugger to detach the debugger from the game. It will continue running immediately.
## Lua debug library
Lua comes with a debug library that is useful in some situations, particularly if you need to inspect the innards of your Lua environment. You can find more information about it in [the chapter about the Debug Library in the Lua manual](http://www.lua.org/pil/contents.html#23).
## Debugging checklist
If you encounter an error or if your game does not behave like expected, here is a debugging checklist:
1. Check the console output and verify that there are no runtime errors.
2. Add `print` statements to your code to verify that the code is actually running.
3. If it's not running, check that you have done the proper setup in the editor required for the code to run. Is the script added to the right game object? Have your script acquired input focus? Are the input-triggers correct? Is the shader code added to the material? Etc.
4. If your code is depending on the values of variables (in an if-statement, for example), either `print` those values where they are used or checked, or inspect them with the debugger.
Sometimes finding a bug can be a hard and time consuming process, requiring you to go through your code bit by bit, checking everything and narrowing down the faulty code and eliminating sources of error. This is best done by a method called "divide and conquer":
1. Figure out which half (or less) of the code that must contain the bug.
2. Again, figure out which half, of that half, must contain the bug.
3. Continue narrowing down the code that must cause the bug until you find it.
Happy hunting!
## Debugging problems with physics
If you have problems with physics and collisions aren't working as expected it is recommended to enable physics debugging. Check the *Debug* checkbox in the *Physics* section of the *game.project* file:

When this checkbox is enabled Defold will draw all collision shapes and contact points of collisions:

# Editor preferences {#manuals:editor-preferences}
You can modify the settings of the editor from the Preferences window. The preferences window is opened from the File -> Preferences menu.
## General

Load External Changes on App Focus
: Enables scanning for external changes when the editor receives focus.
Open Bundle Target Folder
: Enables opening of the target bundle folder after bundling process is done.
Enable Texture Compression
: Enables [texture compression](#manuals:texture-profiles) for all builds made from the editor.
Escape Quits Game
: Shutdown a running build of your game using the Esc key.
Track Active Tab in Asset Browser
: The file edited in selected tab in the *Editor* pane will be selected in the Asset Browser (also known as the *Asset* pane).
Lint Code on Build
: Enables [code linting](#manuals:writing-code) when the project is built. This option is enabled by default, but can be disabled if the linting in a large project takes too much time.
Engine Arguments
: Arguments that will be passed to the dmengine executable when the editor builds and runs.
Use one argument per line. For example:
```
--config=bootstrap.main_collection=/my dir/1.collectionc
--verbose
--graphics-adapter=vulkan
```
## Code

Custom Editor
: Absolute path to an external editor. On macOS it should be the path to the executable inside the .app (e.g. `/Applications/Atom.app/Contents/MacOS/Atom`).
Open File
: The pattern used by the custom editor to specify which file to open. The pattern `{file}` will be replaced by the filename to open.
Open File at Line
: The pattern used by the custom editor to specify which file to open and on which line number. The pattern `{file}` will be replaced by the filename to open and `{line}` by the line number.
Code editor font
: Name of a system installed font to use in the code editor.
Zoom on Scroll
: Whether to change the font size when scrolling in the code editor while holding Cmd/Ctrl button.
### Open script files in Visual Studio Code

To open script files from the Defold Editor directly in Visual Studio Code, you must set the following settings by specifying the path to the executable file:
- MacOS: `/Applications/Visual Studio Code.app/Contents/MacOS/Electron`
- Linux: `/usr/bin/code`
- Windows: `C:\Program Files\Microsoft VS Code\Code.exe`
Set these parameters to open specific files and lines:
- Open File: `. {file}`
- Open File at Line: `. -g {file}:{line}`
The `.` character here is required to open the entire workspace, not an individual file.
## Extensions

Build Server
: URL to the build server used when building a project containing [native extensions](#manuals:extensions). It is possible to add a username and access token to the URL for authenticated access to the build server. Use the following notation to specify the username and access token: `username:token@build.defold.com`. Authenticated access is required for Nintendo Switch builds and when running your own build server instance with authentication enabled ([refer to the build server documentation](https://github.com/defold/extender/blob/dev/README_SECURITY.md) for more information). The username and password can also be set as the system environment variables `DM_EXTENDER_USERNAME` and `DM_EXTENDER_PASSWORD`.
Build Server Username
: username for authentication.
Build Server Password
: password for authentication, will be stored encrypted in the preferences file.
Build Server Headers
: additional headers to the build server when building native extensions. It's important for using CloudFlare service or similar services with extender.
## Tools

ADB path
: Path to [ADB](https://developer.android.com/tools/adb) command line tool installed on this system. If you have ADB installed on your system, the Defold editor will use it to install and run bundled Android APKs to a connected Android Device. By default, the editor checks if ADB is installed in well-known locations, so you only need to specify the path if you have ADB installed in a custom location.
ios-deploy path
: Path to [ios-deploy](https://github.com/ios-control/ios-deploy) command line tools installed on this system (only relevant for macOS). Similarly to the ADB path, the Defold editor will use this tool to install and run bundled iOS applications on a connected iPhone. By default, the editor checks if ios-deploy is installed in well-known locations, so you only need to specify the path if you use a custom installation of ios-deploy.
## Keymap

You can configure the editor shortcuts, both adding custom and removing the built-in ones. Use context menu on individual commands in the shortcut table to edit the shortcuts, or double-click/press Enter to open a new shortcut popup.
Some shortcuts might have warnings: they are displayed using orange color. Hover over the shortcut to see the warning. Typical warnings are:
- typeable shortcuts: the selected shortcut is typeable in a text inputs. Make sure the command is off in the code editing / text input contexts.
- conflicts: the same shortcut is assigned to multiple different commands. Make sure at most one command is enabled when the shortcut is invoked, otherwise the editor will execute one of the assigned commands in an undefined manner.
# Refactoring {#manuals:refactoring}
Refactoring refers to the process of restructuring existing code and assets. During the development of a project, the need to change or move things around often surfaces: names need to change to adhere to naming conventions or to improve clarity and code or asset files need to move to a more logical place in the project hierarchy.
Defold helps you refactor efficiently by keeping track of how assets are used. It automatically updates references to assets that are renamed and/or moved. As a developer, you should feel free in your work. Your project is a flexible structure that you can change at will without fearing that everything will break and fall to pieces.
Automatic refactoring will only work if changes are made from within the editor. If you rename or move a file outside the editor any references to this file will not get automatically changed.
However, if you break a reference by, for instance, deleting an asset, the editor can't resolve the problem, but will provide helpful error signals. For example, if you delete an animation from an atlas and that animation is in use somewhere, Defold will signal an error when you try to start the game. The editor will also mark where the errors occur to help you quickly locate the problem:
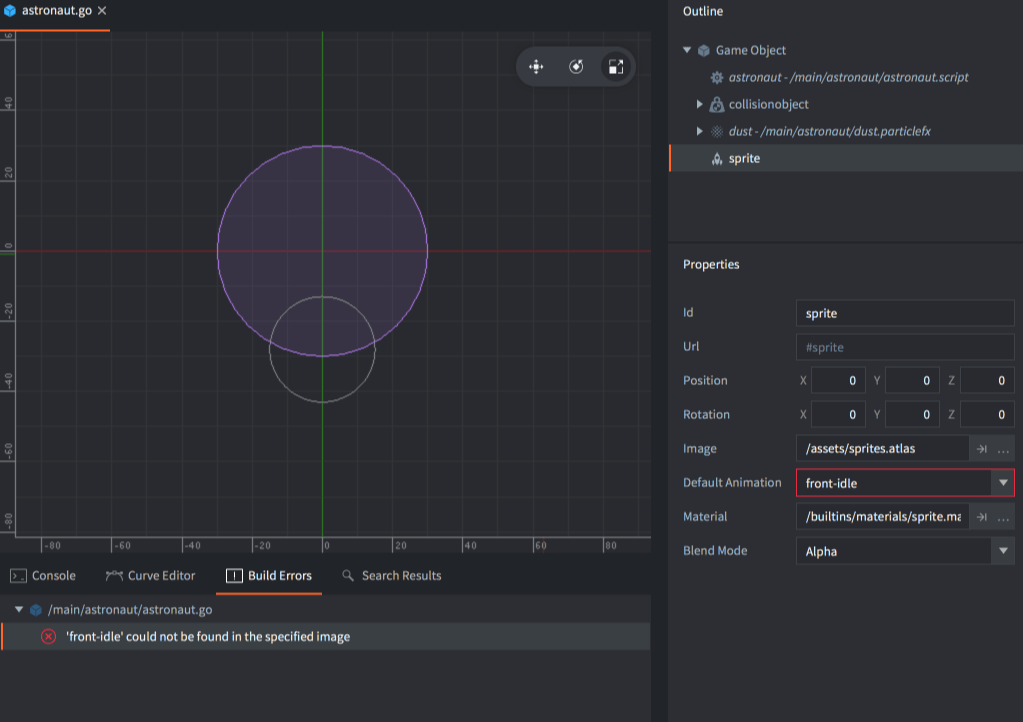
Build errors appear in the *Build Errors* pane at the bottom of the editor. Double clicking an error takes you to the location of the problem.
# Editor styling {#manuals:editor-styling}
You can modify the colors, typography and other visual aspects of the editor using a custom stylesheet:
* Create a folder named `.defold` in your user home directory.
* On Windows `C:\Users\**Your Username**\.defold`
* On macOS `/Users/**Your Username**/.defold`
* On Linux `~/.defold`
* Create a `editor.css` file in the `.defold` folder
The editor will on startup load your custom stylesheet and apply it on top of the default style. The editor uses JavaFX for the user interface and the stylesheets are almost identical to the CSS files used in a browser to apply style attributes to the elements of a webpage. The default stylesheets for the editor are [available for inspection on GitHub](https://github.com/defold/defold/tree/editor-dev/editor/styling/stylesheets/base).
## Changing color
The default colors are defined in [`_palette.scss`](https://github.com/defold/defold/blob/editor-dev/editor/styling/stylesheets/base/_palette.scss) and look like this:
```
* {
// Background
-df-background-darker: derive(#212428, -10%);
-df-background-dark: derive(#212428, -5%);
-df-background: #212428;
-df-background-light: derive(#212428, 10%);
-df-background-lighter: derive(#212428, 20%);
// Component
-df-component-darker: derive(#464c55, -20%);
-df-component-dark: derive(#464c55, -10%);
-df-component: #464c55;
-df-component-light: derive(#464c55, 10%);
-df-component-lighter: derive(#464c55, 20%);
// Text & icons
-df-text-dark: derive(#b4bac1, -10%);
-df-text: #b4bac1;
-df-text-selected: derive(#b4bac1, 20%);
and so on...
```
The basic theme is divided into three groups of colors (with darker and lighter variants):
* Background color - background color in panels, windows, dialogs
* Component color - buttons, scroll bar handles, text field outlines
* Text color - text and icons
As an example, if you add this to your custom `editor.css` stylesheet in `.defold` folder in user home:
```
* {
-df-background-darker: derive(#0a0a42, -10%);
-df-background-dark: derive(#0a0a42, -5%);
-df-background: #0a0a42;
-df-background-light: derive(#0a0a42, 10%);
-df-background-lighter: derive(#0a0a42, 20%);
}
```
You will get the following look in your editor:
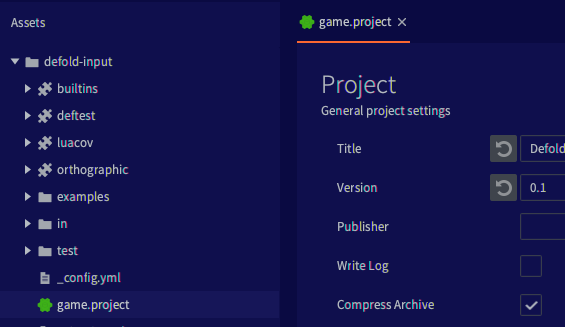
## Changing fonts
The editor uses two fonts: `Dejavu Sans Mono` for code and mono spaced text (errors) and `Source Sans Pro` for the rest of the UI. The font definitions are mainly found in [`_typography.scss`](https://github.com/defold/defold/blob/editor-dev/editor/styling/stylesheets/base/_typography.scss) and look like this:
```
@font-face {
src: url("SourceSansPro-Light.ttf");
}
@font-face {
src: url("DejaVuSansMono.ttf");
}
$default-font-mono: 'Dejavu Sans Mono';
$default-font: 'Source Sans Pro';
$default-font-bold: 'Source Sans Pro Semibold';
$default-font-italic: 'Source Sans Pro Italic';
$default-font-light: 'Source Sans Pro Light';
.root {
-fx-font-size: 13px;
-fx-font-family: $default-font;
}
Text.strong {
-fx-font-family: $default-font-bold;
}
and so on...
```
The main font is defined in a root element which makes it quite easy to replace the font in most places. Add this to your `editor.css`:
```
@import url('https://fonts.googleapis.com/css2?family=Architects+Daughter&display=swap');
.root {
-fx-font-family: "Architects Daughter";
}
```
You will get the following look in your editor:
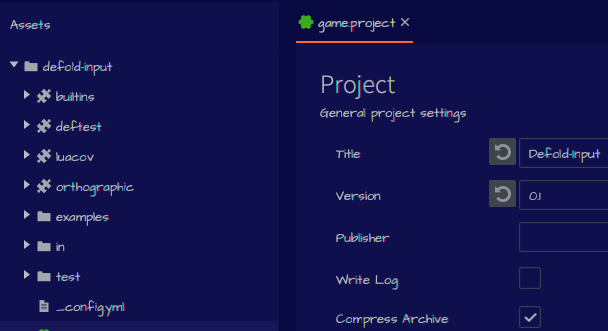
It is also possible to use a local font instead of a web font:
```
@font-face {
font-family: 'Comic Sans MS';
src: local("cs.ttf");
}
.root {
-fx-font-family: 'Comic Sans MS';
}
```
The code editor font is defined separately in the editor Preferences!
# Building blocks {#manuals:building-blocks}
At the core of Defold's design are a few concepts that are very important to get a good grip on. This manual explains what the building blocks of Defold consist of. After having read this manual, move on to the [addressing manual](#manuals:addressing) and the [message passing manual](#manuals:message-passing). There are also a set of [tutorials](/tutorials/getting-started) available from within the editor to get you up and running quickly.
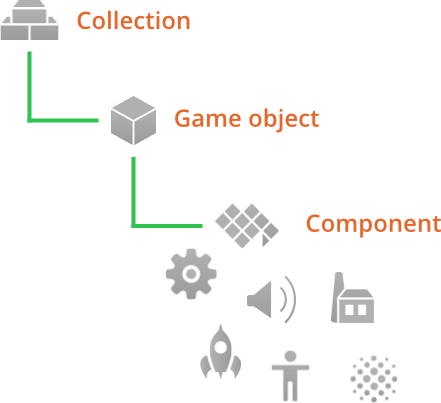
There are three basic types of building blocks that you use to construct a Defold game:
Collection
: A collection is a file used to structure your game. In collections you build hierarchies of game objects and other collections. They are typically used to structure game levels, groups of enemies or characters built out of several game objects.
Game object
: A game object is a container with an id, position, rotation and scale. It is used to contain components. They are typically used to create player characters, bullets, the game’s rule system or a level loader/e.
Component
: Components are entities that are put in game object to give them visual, audible and/or logic representation in the game. They are typically used to create character sprites, script files, add sound effects or add particle effects.
## Collections
Collections are tree structures that hold game objects and other collections. A collection is always stored on file.
When the Defold engine starts, it loads a single _bootstrap collection_ as specified in the *game.project* settings file. The bootstrap collection is often named "main.collection" but you are free to use any name you like.
A collection can contain game objects and other collections (by reference to the sub-collection's file), nested arbitrarily deep. Here is an example file called "main.collection". It contains one game object (with the id "can") and one sub-collection (with the id "bean"). The sub-collection, in turn, contains two game objects: "bean" and "shield".

Notice that the sub-collection with id "bean" is stored in its own file, called "/main/bean.collection" and is only referenced in "main.collection":
You cannot address collections themselves since there are no runtime objects corresponding to the "main" and "bean" collections. However, you sometimes need to use the identity of a collection as part of the _path_ to a game object (See the [addressing manual](#manuals:addressing) for details):
```lua
-- file: can.script
-- get position of the "bean" game object in the "bean" collection
local pos = go.get_position("bean/bean")
```
A collection is always added to another collection as a reference to a collection file:
Right-click the collection in the *Outline* view and select Add Collection File.
## Game objects
Game objects are simple objects that each have a separate lifespan during the execution of your game. Game objects have a position, rotation, and scale that each of which can be manipulated and animated at runtime.
```lua
-- animate X position of "can" game object
go.animate("can", "position.x", go.PLAYBACK_LOOP_PINGPONG, 100, go.EASING_LINEAR, 1.0)
```
Game objects can be used empty (as position markers, for instance) but are usually equipped with various components, like sprites, sounds, scripts, models, factories and more. Game objects are either created in the editor, placed in collection files, or dynamically spawned at run-time through _factory_ components.
Game objects are either added in-place in a collection, or added to a collection as a reference to a game object file:
Right-click the collection in the *Outline* view and select Add Game Object (add in-place) or Add Game Object File (add as file reference).
## Components
Components are used to give specific expression and/or functionality to game objects. Components have to be contained inside game objects and are affected by the position, rotation and scale of the game object that contains the component:

Many components have type specific properties that can be manipulated and there are component type specific functions available for interacting with them in runtime:
```lua
-- disable the can "body" sprite
msg.post("can#body", "disable")
-- play "hoohoo" sound on "bean" in 1 second
sound.play("bean#hoohoo", { delay = 1, gain = 0.5 } )
```
Components are either added in-place in a game object, or added to a game object as a reference to a component file:
Right-click the game object in the *Outline* view and select Add Component (add in-place) or Add Component File (add as file reference).
In most cases it makes most sense to create components in-place, but the following component types must be created in separate resource files before being added by reference to a game object:
* Script
* GUI
* Particle FX
* Tile Map
Refer to the [component overview](#manuals:components) for a list of all available component types.
## Objects added in-place or by reference
When you create a collection, game object or component _file_, you create what we call a prototype (also known as "prefabs" or "blueprints" in other engines). This only adds a file to the project file structure, nothing is added to your running game. To add an instance of a collection, game object or component based on a prototype file, you add an instance of it in one of your collection files.
You can see what file an object instance is based on in the outline view. The file "main.collection" contains three instances that are based on files:
1. The "bean" sub-collection.
2. The "bean" script component in the "bean" game object in the "bean" sub-collection.
3. The "can" script component in the "can" game object.

The benefit of creating prototype files becomes apparent when you have multiple instances of a game object or collection and wish to change all of them:
By changing the prototype file, any instance that uses that file will immediately be updated.
Here the sprite image of the prototype file is changed and immediately all instances using the file are updated:
## Childing game objects
In a collection file, you can build hierarchies of game objects so that one or more game objects are children to a single parent game object. By simply dragging one game object and dropping it onto another, the dragged game object becomes a child of the target:
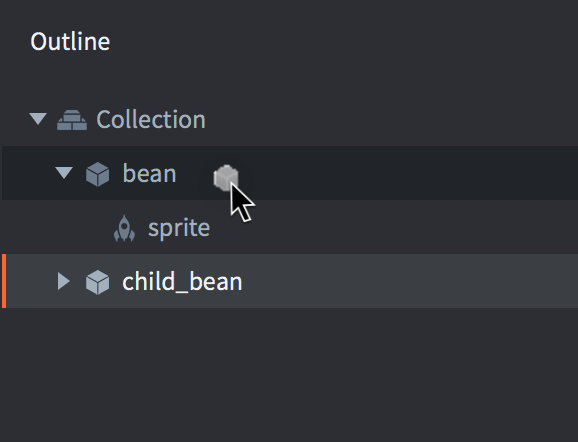
Object parent-child hierarchies is a dynamic relation affecting how objects react to transformations. Any transformation (movement, rotation or scaling) applied to an object will in turn be applied to the object’s children, both in the editor and in runtime:
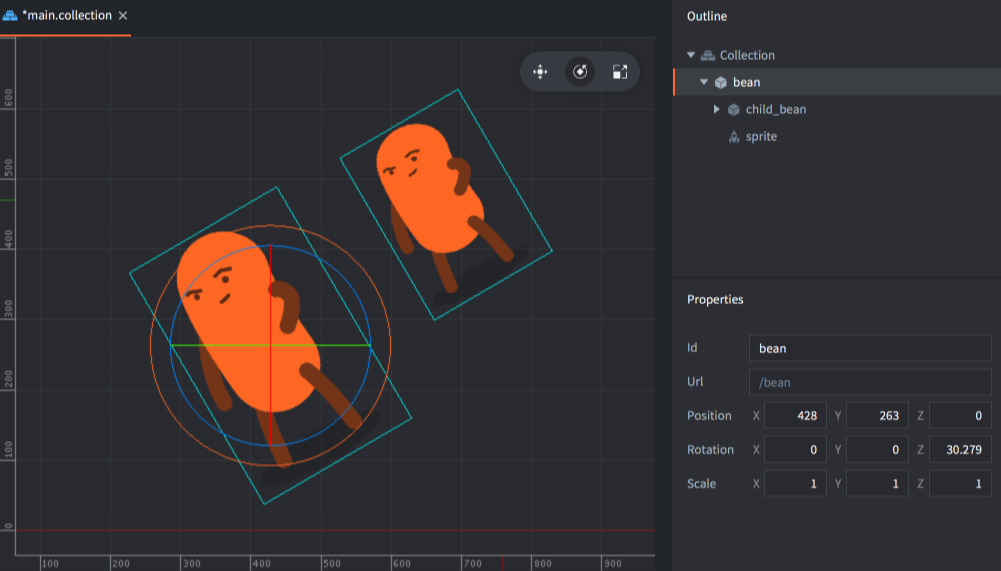
Conversely, a child's translations are done in the local space of the parent. In the editor, you can choose to edit a child game object in the local space or world space by selecting Edit ▸ World Space (the default) or Edit ▸ Local Space.
It is also possible to alter an object’s parent in run-time by sending a `set_parent` message to the object.
```lua
local parent = go.get_id("bean")
msg.post("child_bean", "set_parent", { parent_id = parent })
```
A common misunderstanding is that a game object's place in the collection hierarchy changes when it becomes part of a parent-child hierarchy. However, these are two very different things. Parent-child hierarchies dynamically alter the scene graph, which allows objects to be visually attached to each other. The only thing that dictates a game object's address is its place in the collection hierarchy. The address is static throughout the lifetime of the object.
# Addressing {#manuals:addressing}
Code that controls a running game must be able to reach every object and component in order to move, scale, animate, delete and manipulate what the player sees and hears. Defold's addressing mechanism makes this possible.
## Identifiers
Defold uses addresses (or URLs, but let's ignore that for now) to refer to game objects and components. These addresses consist of identifiers. The following are all examples of how Defold uses addresses. Through this manual we are going to examine in detail how they work:
```lua
local id = factory.create("#enemy_factory")
label.set_text("my_gameobject#my_label", "Hello World!")
local pos = go.get_position("my_gameobject")
go.set_position(pos, "/level/stuff/other_gameobject")
msg.post("#", "hello_there")
local id = go.get_id(".")
```
Let's start with a very simple example. Suppose that you have a game object with a single sprite component. You also have a script component to control the game object. The setup in the editor would look something like this:
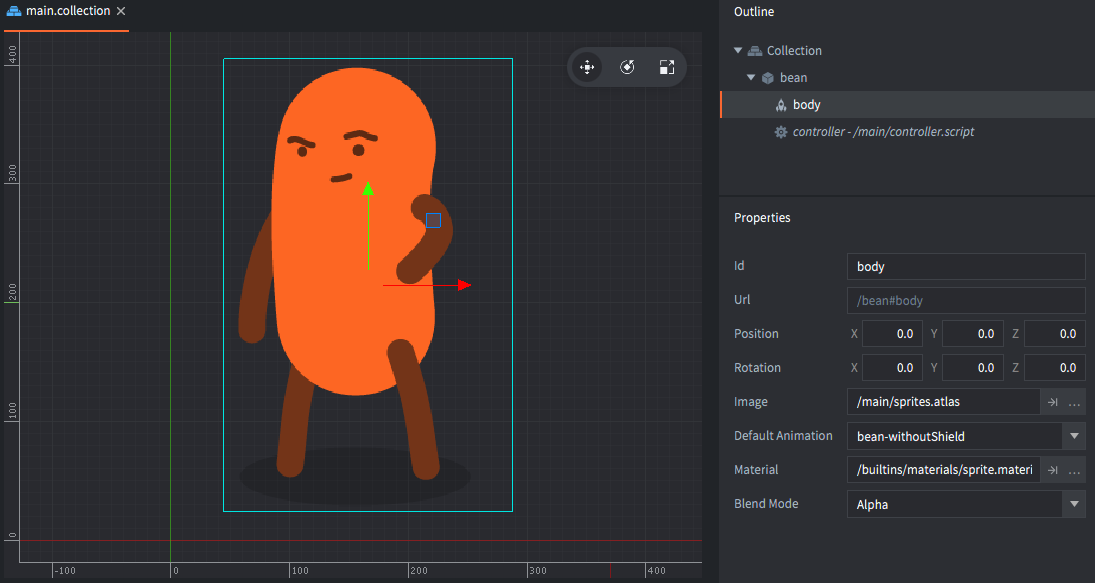
Now you want to disable the sprite when the game starts, so you can make it appear later. That is easily done by putting the following code in "controller.script":
```lua
function init(self)
msg.post("#body", "disable") -- <1>
end
```
1. Don't worry if you're puzzled by the '#' character. We'll get to that soon.
This will work as expected. When the game starts, the script component *addresses* the sprite component by its identifier "body" and uses that address to send it a *message* with the "disable". The effect of this special engine message is that the sprite component hides the sprite graphics. Schematically, the setup looks like this:
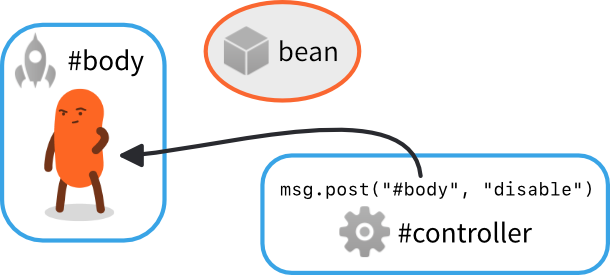
The identifiers in the setup are arbitrary. Here we have chosen to give the game object the identifier "bean", its sprite component has been named "body", and the script component that controls the character has been named "controller".
If you don't choose a name, the editor will. Whenever you create a new game object or component in the editor, a unique *Id* property is automatically set.
- Game objects automatically get an id called "go" with an enumerator ("go2", "go3" etc).
- Components get an id corresponding to the component type ("sprite", "sprite2" etc).
You can stick to these automatically assigned names if you want to, but we encourage you to change the identifiers into good, descriptive names.
Now, let's add another sprite component and give the bean a shield:
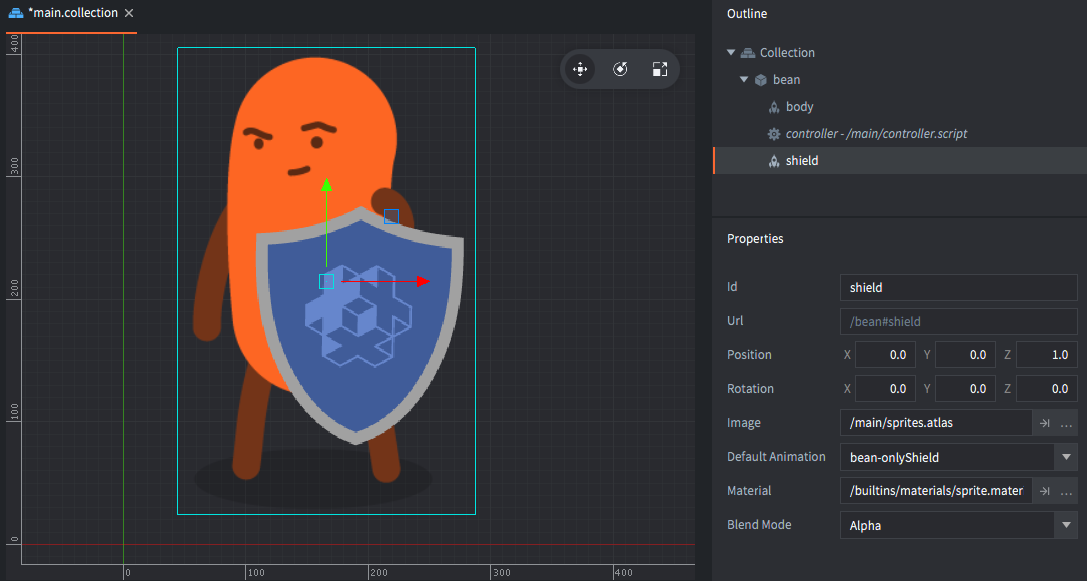
The new component must be uniquely identified within the game object. If you would give it the name "body" the script code would be ambiguous as to which sprite it should send the "disable" message. Therefore we pick the unique (and descriptive) identifier "shield". Now we can enable and disable the "body" and "shield" sprites at will.
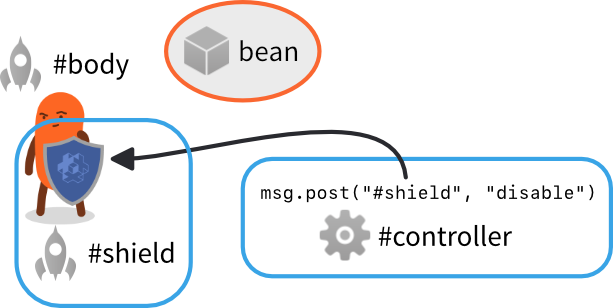
If you do try to use an identifier more than once, the editor will signal an error so this is never a problem in practice:
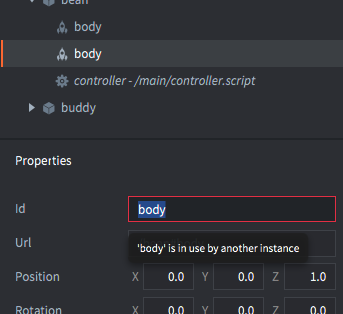
Now, let's look at what happens if you add more game objects. Suppose you want to pair two "beans" into a small team. You decide to call one of the bean game objects "bean" and the other one "buddy". Furthermore, when "bean" has been idle for a while, it should tell "buddy" to start dancing. That is done by sending a custom message called "dance" from the "controller" script component in "bean" to the "controller" script in "buddy":

There are two separate components named "controller", one in each game object but this is perfectly legal since each game object creates a new naming context.
Since the addressee of the message is outside the game object sending the message ("bean"), the code needs to specify which "controller" should receive the message. It needs to specify both the target game object id as well as the component id. The full address to the component becomes `"buddy#controller"` and this address consists of two separate parts.
- First come the identity of the target game object ("buddy"),
- then follows the game object/component separator character ("#"),
- and finally you write the identity of the target component ("controller").
Going back to the previous example with a single game object we see that by leaving out the game object identifier part of the target address, the code can address components in the *current game object*.
For example, `"#body"` denotes the address to the component "body" in the current game object. This is very useful because this code will work in *any* game object, as long as there is a "body" component present.
## Collections
Collections makes it possible to create groups, or hierarchies, of game objects and reuse them in a controlled way. You use collection files as templates (or "prototypes" or "prefabs") in the editor when you populate your game with content.
Suppose that you want to create a great number of bean/buddy teams. A good way to do that is to create a template in a new *collection file* (name it "team.collection"). Build the team game objects in the collection file and save it. Then put an instance of that collection file's contents in your main bootstrap collection and give the instance an identifier (name it "team_1"):
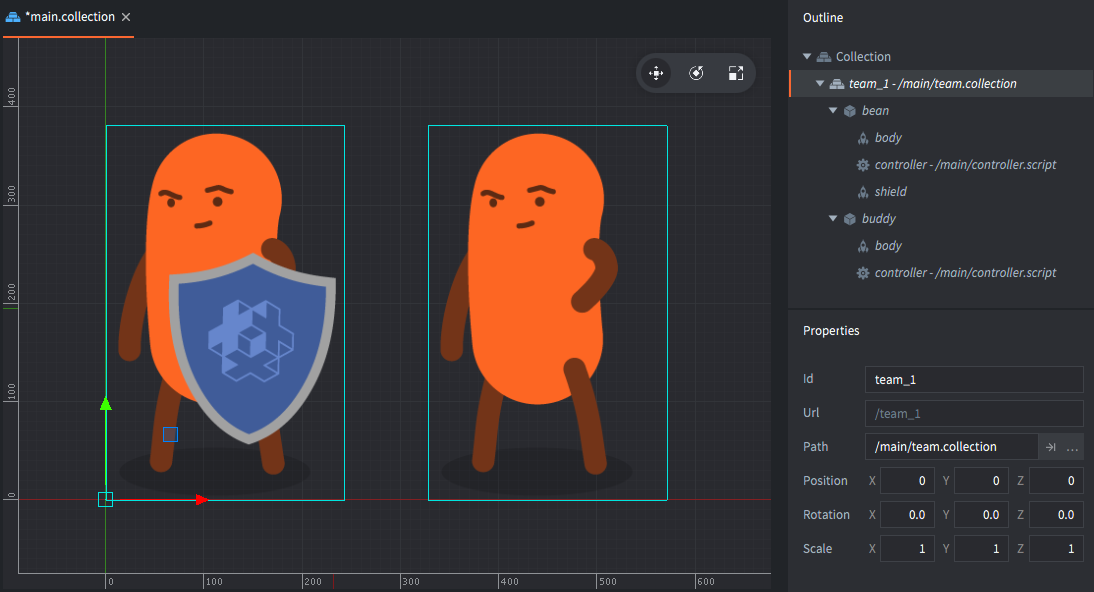
With this structure, the "bean" game object can still refer to the "controller" component in "buddy" by the address `"buddy#controller"`.
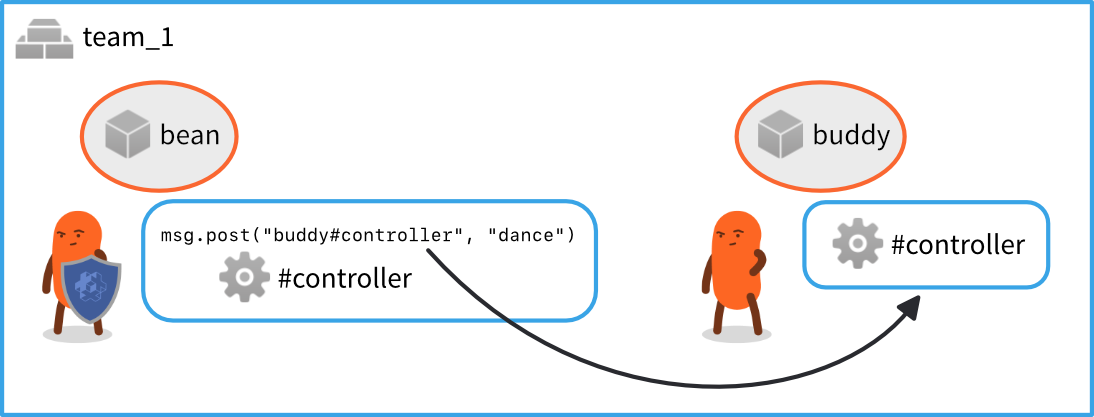
And if you add a second instance of "team.collection" (name it "team_2"), the code running inside the "team_2" script components will work just as well. The "bean" game object instance from collection "team_2" can still address the "controller" component in "buddy" by the address `"buddy#controller"`.
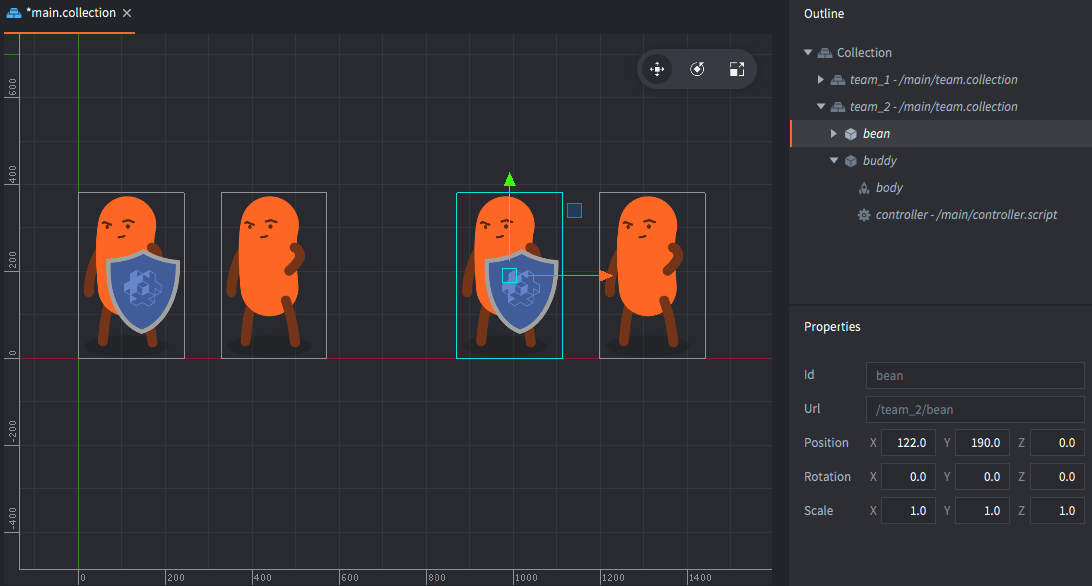
## Relative addressing
The address `"buddy#controller"` works for the game objects in both collections because it is a *relative* address. Each of the collections "team_1" and "team_2" creates a new naming context, or "namespace" if you will. Defold avoids naming collisions by taking the naming context a collection creates into consideration for addressing:
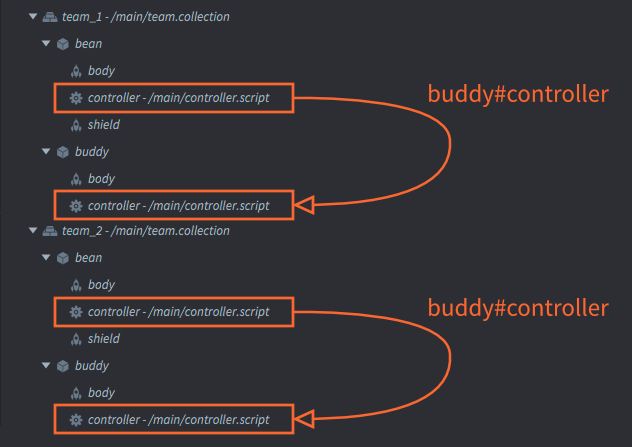
- Within the naming context "team_1", the game objects "bean" and "buddy" are uniquely identified.
- Similarly, within the naming context "team_2", the game objects "bean" and "buddy" are also uniquely identified.
Relative addressing works by automatically prepending the current naming context when resolving a target address. This is again immensely useful and powerful because you can create groups of game objects with code and reuse those efficiently throughout the game.
### Shorthands
Defold provides two handy shorthands that you can use to send messages without specifying a complete URL:
`.`
: Shorthand resolving to the current game object.
`#`
: Shorthand resolving to the current component.
For example:
```lua
-- Let this game object acquire input focus
msg.post(".", "acquire_input_focus")
```
```lua
-- Post "reset" to the current script
msg.post("#", "reset")
```
## Game object paths
To correctly understand the naming mechanism, let's look at what happens when you build and run the project:
1. The editor reads the bootstrap collection ("main.collection") and all its content (game objects and other collections).
2. For each static game object, the compiler creates an identifier. These are built as "paths" starting at the bootstrap root, down the collection hierarchy to the object. A '/' character is added at each level.
For our example above, the game will run with the following 4 game objects:
- /team_1/bean
- /team_1/buddy
- /team_2/bean
- /team_2/buddy
Identities are stored as hashed values. The runtime also stores the hash state for each collection identity which is used to continue hashing relative string to an absolute id.
In runtime, the collection grouping does not exist. There is no way to find out what collection a specific game object belonged to before compilation. Nor is it possible to manipulate all the objects in a collection at once. If you need to do such operations, you can easily do the tracking yourself in code. Each object's identifier is static, it is guaranteed to stay fixed throughout the object's lifetime. This means that you can safely store the identity of an object and use it later.
## Absolute addressing
It is possible to use the full identifiers described above when addressing. In most cases relative addressing is preferred since it allows for content reuse, but there are cases where absolutely addressing becomes necessary.
For example, suppose that you want an AI manager that tracks the state of each bean object. You want beans to report their active status to the manager, and the manager makes tactical decisions and gives orders to the beans based on their status. It would make perfect sense in this case to create a single manager game object with a script component and place that alongside the team collections in the bootstrap collection.
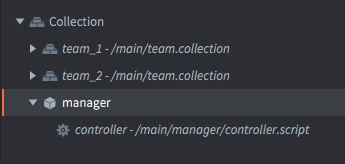
Each bean is then responsible for sending status messages to the manager: "contact" if it spots an enemy or "ouch!" if it is hit and takes damage. For this to work, the bean controller script uses absolute addressing to send messages to the component "controller" in "manager".
Any address that starts with a '/' will be resolved from the root of the game world. This corresponds to the root of the *bootstrap collection* that is loaded on game start.
The absolute address of the manager script is `"/manager#controller"` and this absolute address will resolve to the right component no matter where it is used.
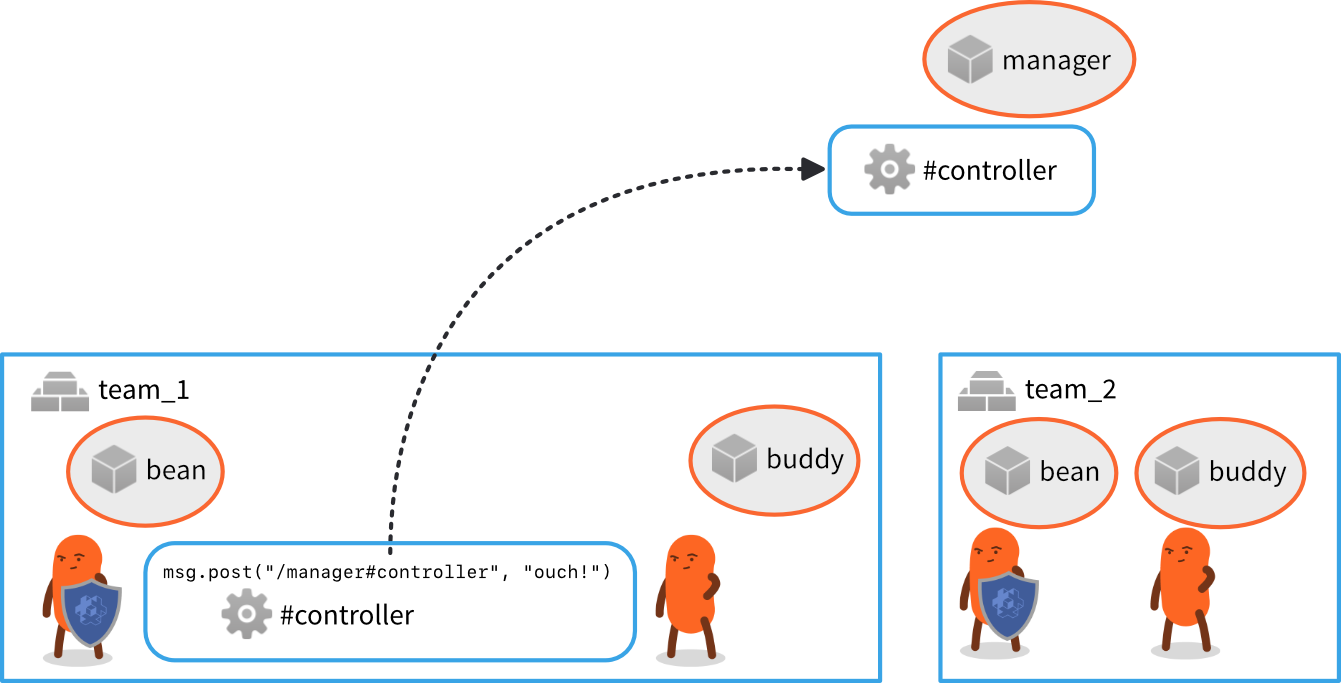
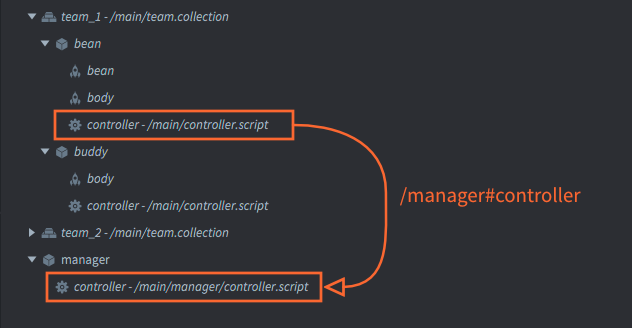
## Hashed identifiers
The engine stores all identifiers as hashed values. All functions that take as argument a component or a game object accepts a string, hash or a URL object. We have seen how to use strings for addressing above.
When you get the identifier of a game object, the engine will always return an absolute path identifier that is hashed:
```lua
local my_id = go.get_id()
print(my_id) --> hash: [/path/to/the/object]
local spawned_id = factory.create("#some_factory")
print(spawned_id) --> hash: [/instance42]
```
You can use such an identifier in place of a string id, or construct one yourself. Note though that a hashed id corresponds to the path of the object, i.e. an absolute address:
The reason relative addresses must be given as strings is because the engine will compute a new hash id based on the hash state of the current naming context (collection) with the given string added to the hash.
```lua
local spawned_id = factory.create("#some_factory")
local pos = vmath.vector3(100, 100, 0)
go.set_position(pos, spawned_id)
local other_id = hash("/path/to/the/object")
go.set_position(pos, other_id)
-- This will not work! Relative addresses must be given as strings.
local relative_id = hash("my_object")
go.set_position(pos, relative_id)
```
## URLs
To complete the picture, let's look at the full format of Defold addresses: the URL.
A URL is an object, usually written as a specially formatted string. A generic URL consists of three parts:
`[socket:][path][#fragment]`
socket
: Identifies the game world of the target. This is important when working with [Collection Proxies](#manuals:collection-proxy) and is then used to identify the _dynamically loaded collection_.
path
: This part of the URL contains the full id of the target game object.
fragment
: The identity of the target component within the specified game object.
As we have seen above, you can leave out some, or most of this information in the majority of cases. You almost never need to specify the socket, and you often, but not always, have to specify the path. In those cases when you do need to address things in another game world then you need to specify the socket part of the URL. For instance, the full URL string for the "controller" script in the "manager" game object above is:
`"main:/manager#controller"`
and the buddy controller in team_2 is:
`"main:/team_2/buddy#controller"`
We can send messages to them:
```lua
-- Send "hello" to the manager script and team buddy bean
msg.post("main:/manager#controller", "hello_manager")
msg.post("main:/team_2/buddy#controller", "hello_buddy")
```
## Constructing URL objects
URL objects can also be constructed programmatically in Lua code:
```lua
-- Construct URL object from a string:
local my_url = msg.url("main:/manager#controller")
print(my_url) --> url: [main:/manager#controller]
print(my_url.socket) --> 786443 (internal numeric value)
print(my_url.path) --> hash: [/manager]
print(my_url.fragment) --> hash: [controller]
-- Construct URL from parameters:
local my_url = msg.url("main", "/manager", "controller")
print(my_url) --> url: [main:/manager#controller]
-- Build from empty URL object:
local my_url = msg.url()
my_url.socket = "main" -- specify by valid name
my_url.path = hash("/manager") -- specify as string or hash
my_url.fragment = "controller" -- specify as string or hash
-- Post to target specified by URL
msg.post(my_url, "hello_manager!")
```
# Message passing {#manuals:message-passing}
Message passing is a mechanism for Defold game objects to communicate with each other. This manual assumes that you have a basic understanding of Defold's [addressing mechanism](#manuals:addressing) and [basic building blocks](#manuals:building-blocks).
Defold does not do object orientation in the sense that you define your application by setting up class hierarchies with inheritance and member functions in your objects (like Java, C++ or C#). Instead, Defold extends Lua with a simple and powerful object oriented design where object state is kept internally in script components, accessible through the `self` reference. Objects can furthermore be fully decoupled with asynchronous message passing as means of communication between objects.
## Usage examples
Let's first look at a few simple usage examples. Suppose that you are building a game consisting of:
1. A main bootstrap collection containing a game object with a GUI component (the GUI consists of a minimap and a score counter). There is also a collection with id "level".
2. The collection named "level" contains two game objects: one hero player character and one enemy.
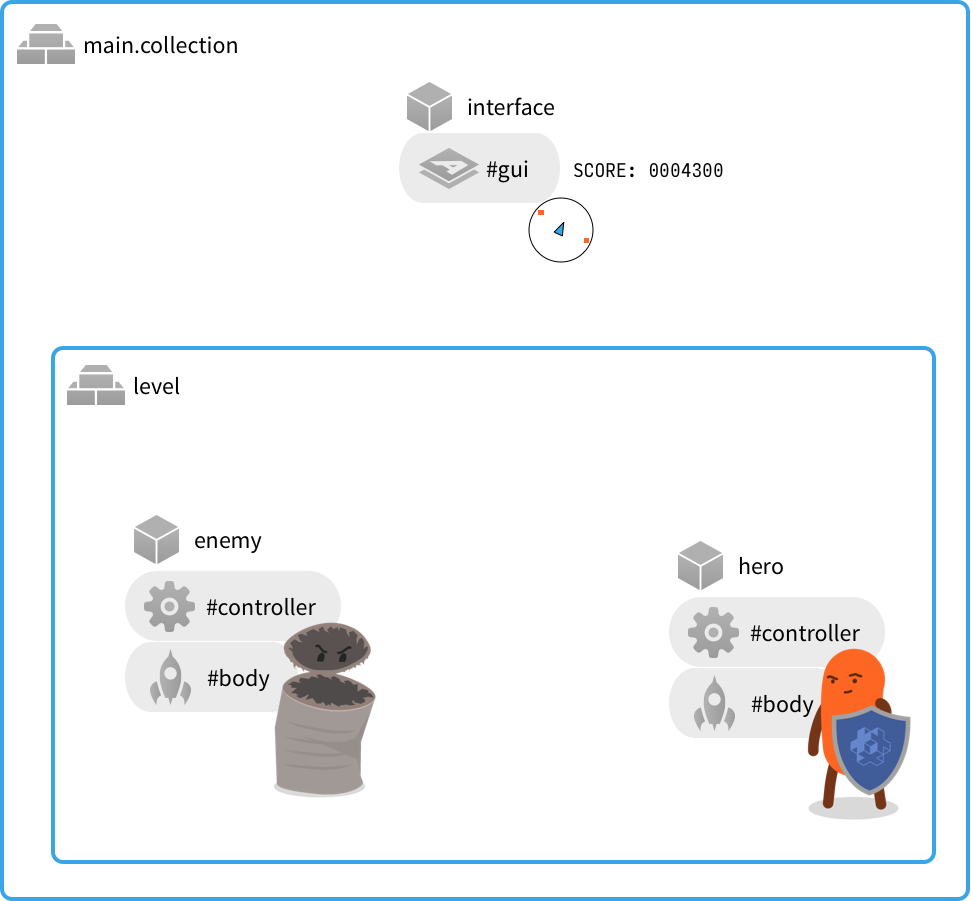
The content of this example lives in two separate files. There is one file for the main bootstrap collection and one for the collection with the id "level". However, file names _do not matter_ in Defold. The identity you assign to instances does.
The game contains a few simple mechanics that require communication between the objects:
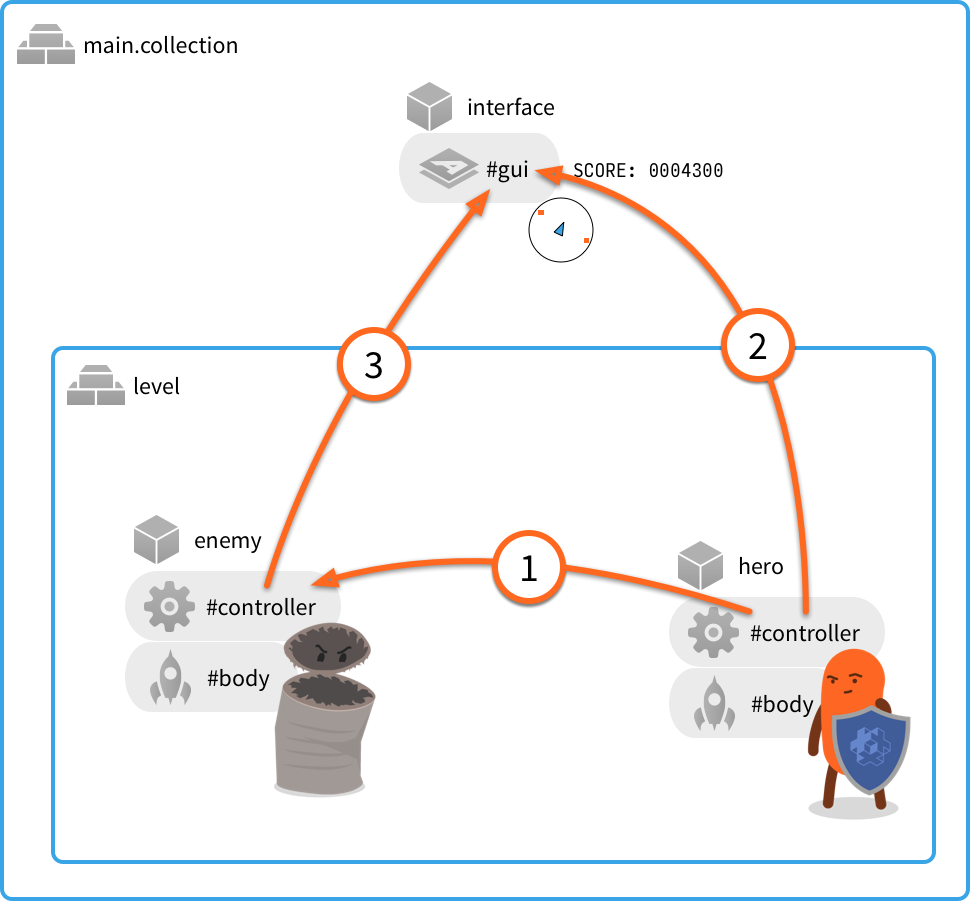
① The hero punches the enemy
: As part of this mechanic, a `"punch"` message is sent from the "hero" script component to the "enemy" script component. Since both objects live in the same place in the collection hierarchy, relative addressing is preferred:
```lua
-- Send "punch" from the "hero" script to "enemy" script
msg.post("enemy#controller", "punch")
```
There is only a single strength punch move in the game so the message does not need to contain any more information than its name, "punch".
In the script component of the enemy, you create a function to receive the message:
```lua
function on_message(self, message_id, message, sender)
if message_id == hash("punch") then
self.health = self.health - 100
end
end
```
In this case, the code only looks at the name of the message (sent as a hashed string in the parameter `message_id`). The code does not care about message data nor the sender---*anyone* sending the message "punch" will inflict damage on the poor enemy.
② Hero gaining score
: Whenever the player defeats an enemy, the player score increases. A `"update_score"` message is also sent from the "hero" game object's script component to the "gui" component of the "interface" game object.
```lua
-- Enemy defeated. Increase score counter by 100.
self.score = self.score + 100
msg.post("/interface#gui", "update_score", { score = self.score })
```
In this case it's not possible to write a relative address since "interface" is at the root of the naming hierarchy and "hero" is not. The message is sent to the GUI component that has a script attached to it, so it can react to the message accordingly. Messages can be sent freely between scripts, GUI scripts and render scripts.
The message `"update_score"` is coupled with score data. The data is passed as a Lua table in the `message` parameter:
```lua
function on_message(self, message_id, message, sender)
if message_id == hash("update_score") then
-- set the score counter to new score
local score_node = gui.get_node("score")
gui.set_text(score_node, "SCORE: " .. message.score)
end
end
```
③ Enemy position on the minimap
: The player has a minimap on screen to help locate and track enemies. Each enemy is responsible for signalling its position by sending an `"update_minimap"` message to the "gui" component in the "interface" game object:
```lua
-- Send the current position to update the interface minimap
local pos = go.get_position()
msg.post("/interface#gui", "update_minimap", { position = pos })
```
The GUI script code needs to track the position of each enemy, and if the same enemy sends a new position, the old should be replaced. The sender of the message (passed in parameter `sender`) can be used to key a Lua table with positions:
```lua
function init(self)
self.minimap_positions = {}
end
local function update_minimap(self)
for url, pos in pairs(self.minimap_positions) do
-- update position on map
...
end
end
function on_message(self, message_id, message, sender)
if message_id == hash("update_score") then
-- set the score counter to new score
local score_node = gui.get_node("score")
gui.set_text(score_node, "SCORE: " .. message.score)
elseif message_id == hash("update_minimap") then
-- update the minimap with new positions
self.minimap_positions[sender] = message.position
update_minimap(self)
end
end
```
## Sending messages
The mechanics of sending a message are, as we have seen above, very simple. You call the function `msg.post()` which posts your message to the message queue. Then, each frame, the engine runs through the queue and delivers each message to its target address. For some system messages (like `"enable"`, `"disable"`, `"set_parent"` etc) the engine code handles the message. The engine also produces some system messages (like `"collision_response"` on physics collisions) that are delivered to your objects. For user messages sent to script components, the engine simply calls a special Defold Lua function named `on_message()`.
You can send arbitrary messages to any existing object or component and it is up to the code on the recipient side to respond to the message. If you send a message to a script component and the script code ignores the message, that is fine. The responsibility of dealing with messages is fully on the receiving end.
The engine will check the message target address. If you try sending a message to an unknown recipient, Defold will signal an error in the console:
```lua
-- Try to post to a non existing object
msg.post("dont_exist#script", "hello")
```
```txt
ERROR:GAMEOBJECT: Instance '/dont_exists' could not be found when dispatching message 'hello' sent from main:/my_object#script
```
The complete signature of the `msg.post()` call is:
`msg.post(receiver, message_id, [message])`
receiver
: The id of the target component or game object. Note that if you target a game object, the message will be broadcast to all components in the game object.
message_id
: A string or hashed string with the name of the message.
[message]
: An optional Lua table with message data key-value pairs. Almost any type of data can be included in the message Lua table. You can pass numbers, strings, booleans, URLs, hashes and nested tables. You can not pass functions.
```lua
-- Send table data containing a nested table
local inventory_table = { sword = true, shield = true, bow = true, arrows = 9 }
local stats = { score = 100, stars = 2, health = 4, inventory = inventory_table }
msg.post("other_object#script", "set_stats", stats)
```
There is a hard limit to the `message` parameter table size. This limit is set to 2 kilobytes. There is currently no trivial way to figure out the exact memory size a table consumes but you can use `collectgarbage("count")` before and after inserting the table to monitor memory use.
### Shorthands
Defold provides two handy shorthands that you can use to send messages without specifying a complete URL:
`.`
: Shorthand resolving to the current game object.
`#`
: Shorthand resolving to the current component.
For example:
```lua
-- Let this game object acquire input focus
msg.post(".", "acquire_input_focus")
```
```lua
-- Post "reset" to the current script
msg.post("#", "reset")
```
## Receiving messages
Receiving messages is a matter of making sure the target script component contains a function named `on_message()`. The function accepts four parameters:
`function on_message(self, message_id, message, sender)`
`self`
: A reference to the script component itself.
`message_id`
: Contains the name of the message. The name is _hashed_.
`message`
: Contains the message data. This is a Lua table. If there is no data, the table is empty.
`sender`
: Contains the full URL of the sender.
```lua
function on_message(self, message_id, message, sender)
print(message_id) --> hash: [my_message_name]
pprint(message) --> {
--> score = 100,
--> value = "some string"
--> }
print(sender) --> url: [main:/my_object#script]
end
```
## Messaging between game worlds
If you use a collection proxy component to load a new game world into the runtime, you will want to pass messages between the game worlds. Suppose that you have loaded a collection via proxy and that the collection has its *Name* property set to "level":
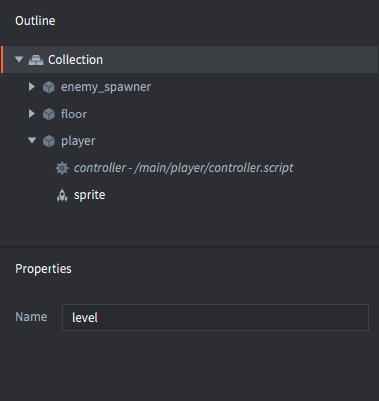
As soon as the collection has been loaded, initiated and enabled, you can post messages to any component or object in the new world by specifying the game world name in the recipient address "socket" field:
```lua
-- Send a message to the player in the new game world
msg.post("level:/player#controller", "wake_up")
```
A more in depth description on how proxies work can be found in the [Collection Proxies](#manuals:collection-proxy) documentation.
## Message chains
When a message that has been posted is eventually dispatched, the recipients’ `on_message()` is called. It is quite common that the reaction code posts new messages, which are added to the message queue.
When the engine starts dispatching it will work through the message queue and call each message recipient's `on_message()` function and go on until the message queue is empty. If the dispatching pass adds new messages to the queue, it will do another pass. There is, however, a hard limit to how many times the engine tries to empty the queue, which effectively puts a limit to how long message chains you can expect to be fully dispatched within a frame. You can easily test how many dispatch passes the engine performs between each `update()` with the following script:
```lua
function init(self)
-- We’re starting a long message chain during object init
-- and keeps it running through a number of update() steps.
print("INIT")
msg.post("#", "msg")
self.updates = 0
self.count = 0
end
function update(self, dt)
if self.updates < 5 then
self.updates = self.updates + 1
print("UPDATE " .. self.updates)
print(self.count .. " dispatch passes before this update.")
self.count = 0
end
end
function on_message(self, message_id, message, sender)
if message_id == hash("msg") then
self.count = self.count + 1
msg.post("#", "msg")
end
end
```
Running this script will print something like the following:
```txt
DEBUG:SCRIPT: INIT
INFO:ENGINE: Defold Engine 1.2.36 (5b5af21)
DEBUG:SCRIPT: UPDATE 1
DEBUG:SCRIPT: 10 dispatch passes before this update.
DEBUG:SCRIPT: UPDATE 2
DEBUG:SCRIPT: 75 dispatch passes before this update.
DEBUG:SCRIPT: UPDATE 3
DEBUG:SCRIPT: 75 dispatch passes before this update.
DEBUG:SCRIPT: UPDATE 4
DEBUG:SCRIPT: 75 dispatch passes before this update.
DEBUG:SCRIPT: UPDATE 5
DEBUG:SCRIPT: 75 dispatch passes before this update.
```
We see that this particular Defold engine version performs 10 dispatch passes on the message queue between `init()` and the first call to `update()`. It then performs 75 passes during each subsequent update loop.
# Application lifecycle {#manuals:application-lifecycle}
The lifecycle of a Defold application or game is on the large scale simple. The engine moves through three stages of execution: initialization, the update loop (where apps and games spend most of their time) and finalization.

In many cases only a rudimentary understanding of Defold's inner workings is necessary. However, you might run into edge cases where the exact order Defold carries out its tasks becomes vital. This document describes how the engine runs an application from start to finish.
The application starts by initializing everything that is needed to run the engine. It loads the main collection and calls [`init()`](https://defold.com/ref/go#init) on all loaded components that have an `init()` Lua function (script components and GUI components with GUI scripts). This allows you to do custom initialization.
The application then enters the update loop where the application will spend the majority of its lifetime. Each frame, game objects and the components they contain are updated. Any script and GUI script [`update()`](https://defold.com/ref/go#update) functions are called. During the update loop messages are dispatched to their recipients, sounds are played and all graphics are rendered.
At some point the application's lifecycle will come to an end. Before the application quits the engine steps out of the update loop and enters a finalization stage. It prepares all loaded game objects for deletion. All object components’ [`final()`](https://defold.com/ref/go#final) functions are called, which allows for custom cleanup. Then the objects are deleted and the main collection is unloaded.
## Initialization
This diagram contains a more detailed breakdown of the initialization steps. The steps involved in the "dispatch messages" pass (right before "spawn dynamic objects") have been put in a separate block to the right for clarity.
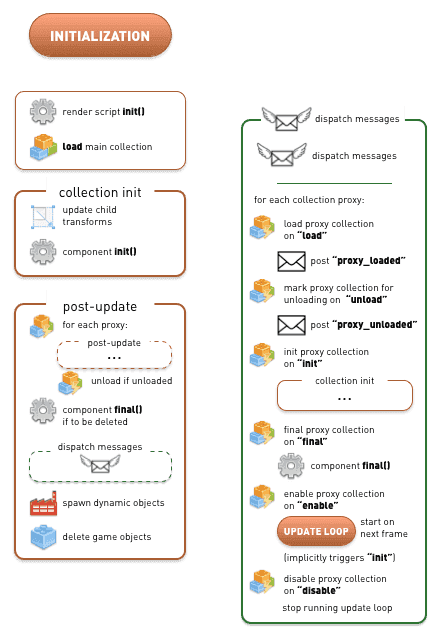
The engine actually takes many more steps during initialization, before the main collection is loaded. The memory profiler, sockets, graphics, HID (input devices), sound, physics and much more are set up. The application configuration (*game.project*) is also loaded and set up.
The first user-controllable entry point, at the end of engine initialization, is the call to the current render script’s `init()` function.
The main collection is then loaded and initialized. All game objects in the collection apply their transforms (translation (change of position), rotation and scaling) to their children. All component `init()` functions that exist are then called.
The order in which game object component `init()` functions are called is unspecified. You should not assume that the engine initializes objects belonging to the same collection in a certain order.
Since your `init()` code can post new messages, tell factories to spawn new objects, mark objects for deletion and do all sorts of things, the engine performs a full "post-update" pass next. This pass carries out message delivery, the actual factory game object spawning and object deletion. Note that the post-update pass includes a "dispatch messages" sequence that not only sends any queued messages but also handles messages sent to collection proxies. Any subsequent updates on the proxies (enable and disable, loading and mark for unloading) are performed during those steps.
Studying the diagram above reveals that it is fully possible to load a [collection proxy](#manuals:collection-proxy) during `init()`, ensure all its contained objects are initialized, and then unload the collection through the proxy---all this before the first component `update()` is called, i.e. before the engine has left the initialization stage and entered the update loop:
```lua
function init(self)
print("init()")
msg.post("#collectionproxy", "load")
end
function update(self, dt)
-- The proxy collection is unloaded before this code is reached.
print("update()")
end
function on_message(self, message_id, message, sender)
if message_id == hash("proxy_loaded") then
print("proxy_loaded. Init, enable and then unload.")
msg.post("#collectionproxy", "init")
msg.post("#collectionproxy", "enable")
msg.post("#collectionproxy", "unload")
-- The proxy collection objects’ init() and final() functions
-- are called before we reach this object’s update()
end
end
```
## The update loop
The update loop runs through a long sequence once every frame. The update sequence in the diagram below is divided into logical sequence blocks for clarity. "Dispatch messages" is also broken out separately for the same reason:
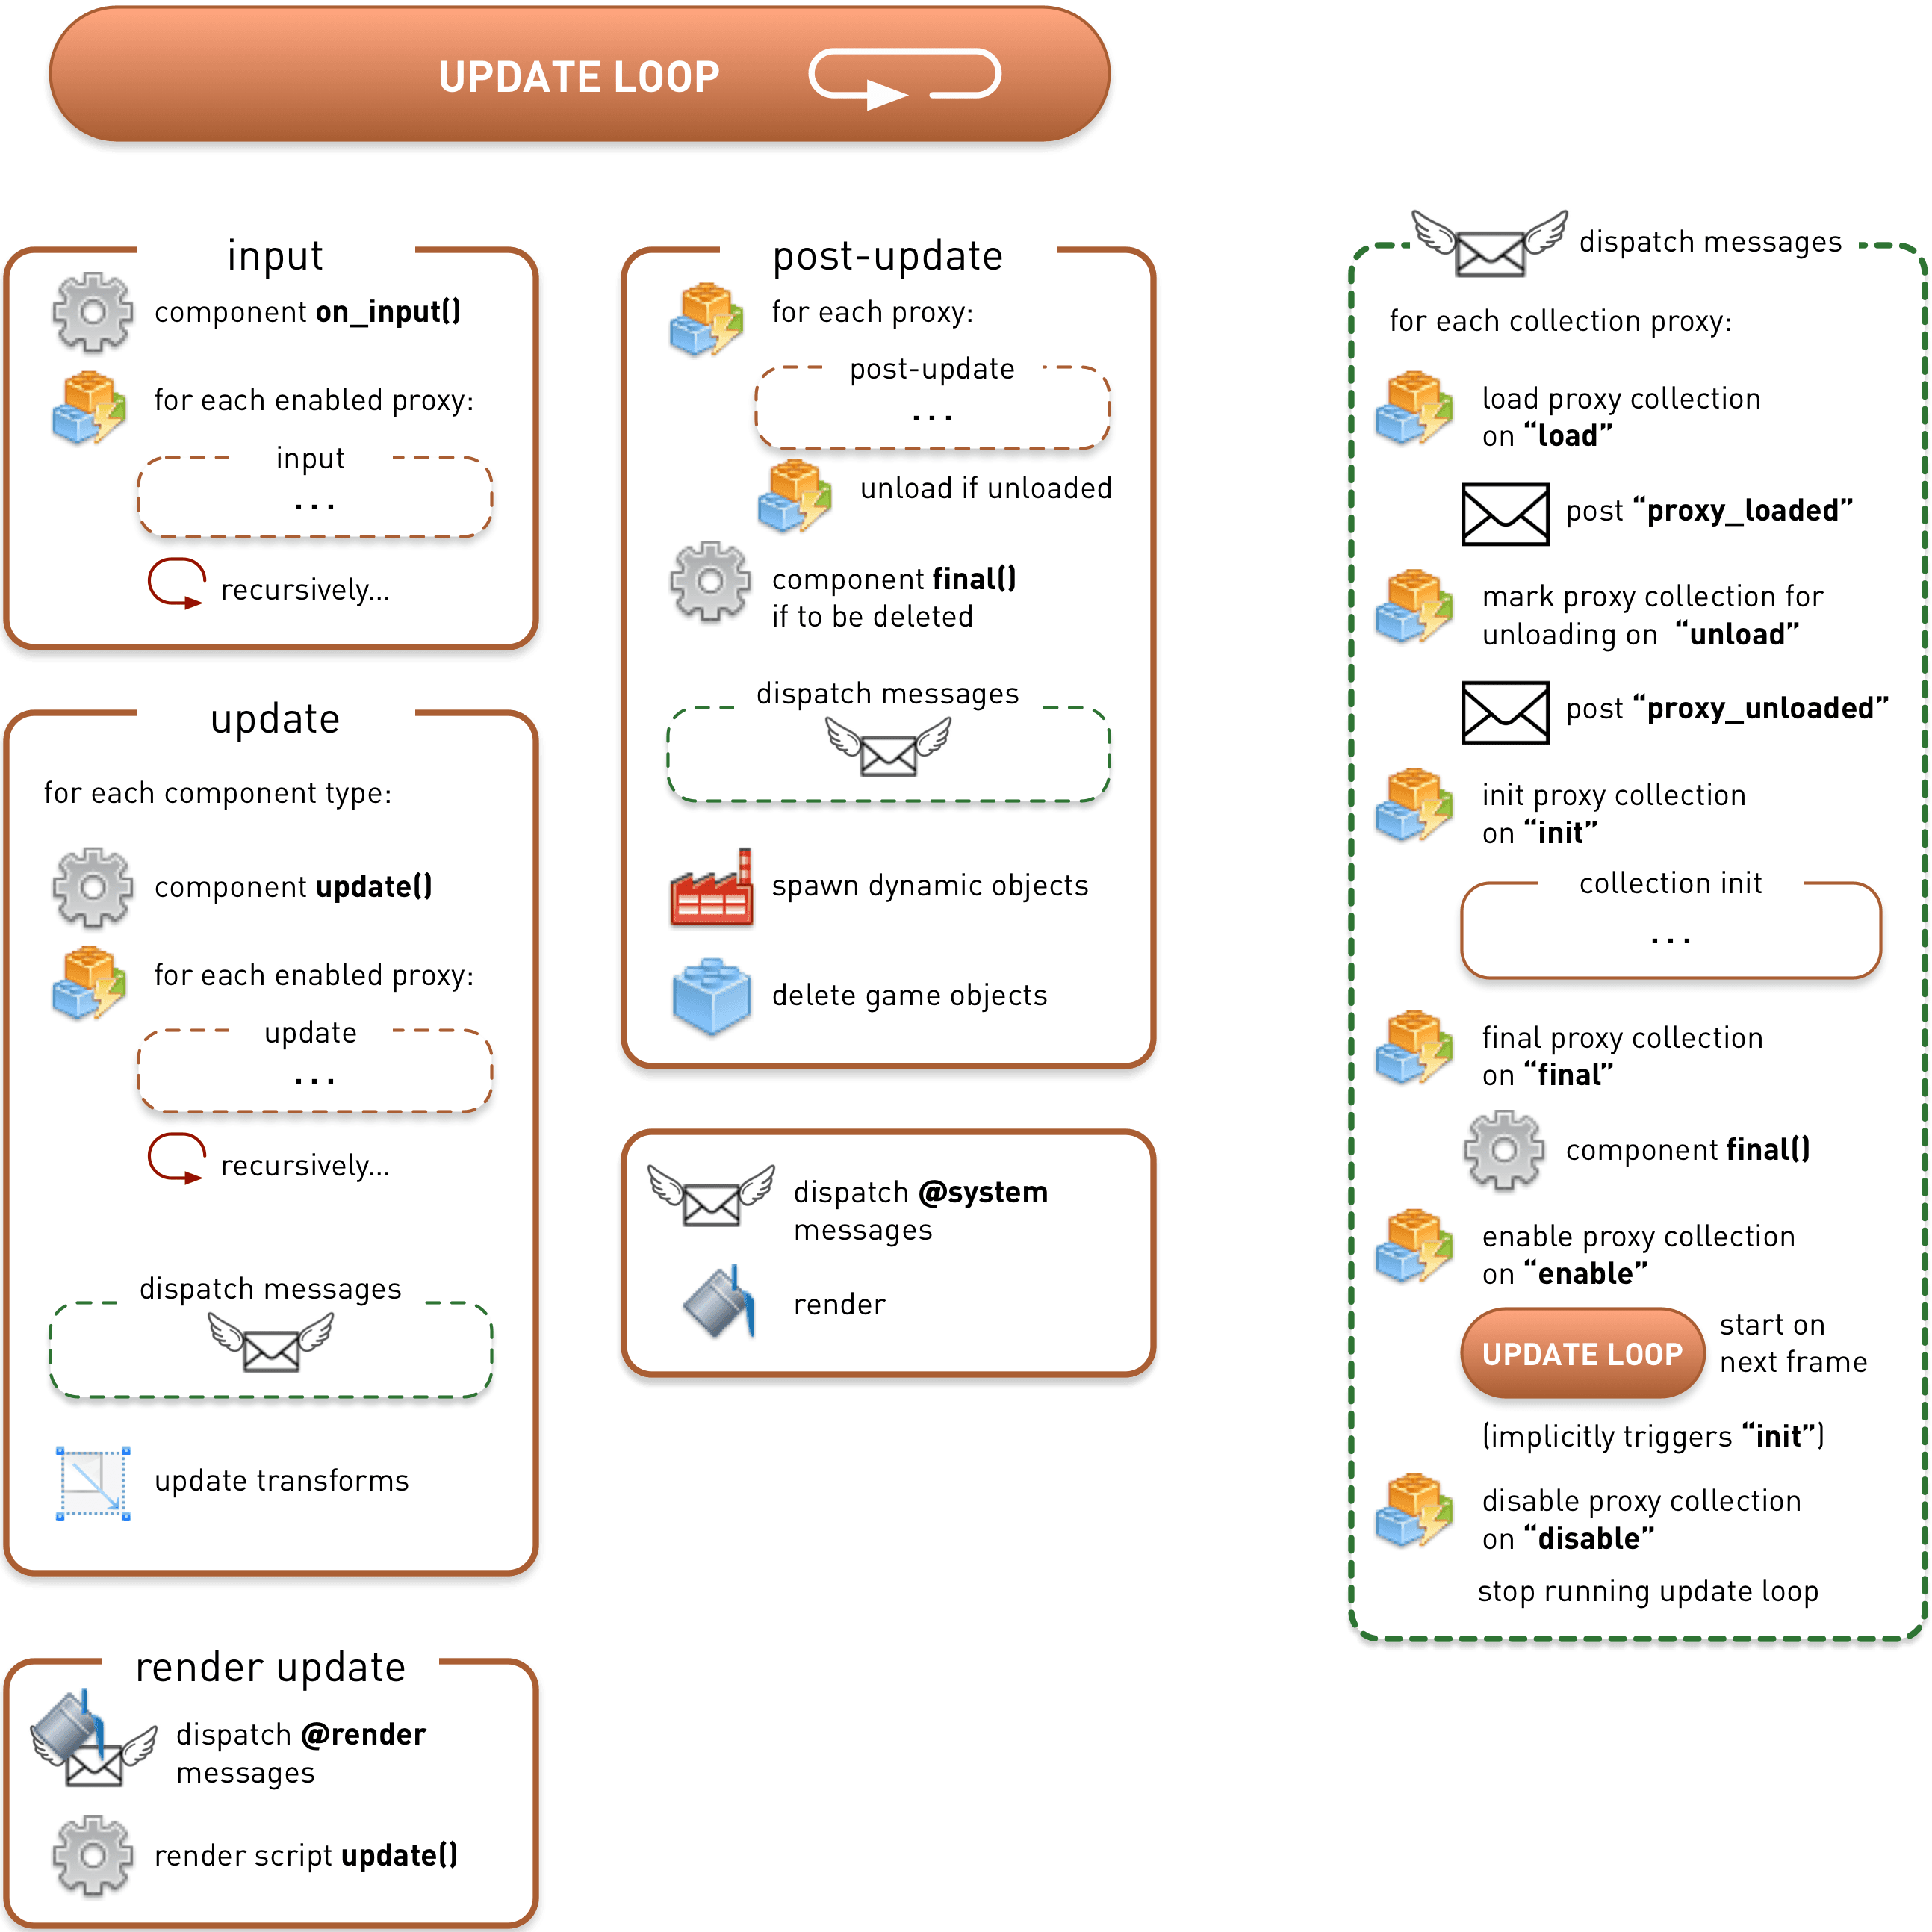
## Input
Input is read from available devices, mapped against [input bindings](#manuals:input) and then dispatched. Any game object that has acquired input focus gets input sent to all its components' `on_input()` functions. A game object with a script component and a GUI component with a GUI script will get input to both components’ `on_input()` functions---given that they are defined and that they have acquired input focus.
Any game object that has acquired input focus and contains collection proxy components dispatches input to components inside the proxy collection. This process continues recursively down enabled collection proxies within enabled collection proxies.
## Update
Each game object component in the main collection is traversed. If any of these components has a script `update()` function, then that will be called. If the component is a collection proxy, each component in the proxy collection is recursively updated with all the steps in the "update" sequence in the diagram above.
If a [fixed timestep is used for physics simulation](#manuals:physics) there may also be a call to the `fixed_update()` function in all script components. This function is useful in physics based games when you wish to manipulate physics objects at regular intervals to achieve a stable physics simulation.
The order in which game object component `update()` functions are called is unspecified. You should not assume that the engine updates objects belonging to the same collection in a certain order.
In the next step all posted messages are dispatched. Since any receiver components’ `on_message()` code can post additional messages the message dispatcher will continue to dispatch posted messaged until the message queue is empty. There is, however, a limit to how many runs through the message queue the message dispatcher performs. See [Message Chains](#manuals:message-passing#message-chains) for details.
For collision object components, physics messages (collisions, triggers, ray_cast responses etc) are dispatched throughout the encompassing game object to all components that contain a script with an `on_message()` function.
Transforms are then done, applying any game object movement, rotation and scaling to each game object component and any child game object components.
## Render update
The render update block dispatches messages to the `@render` socket (camera component `set_view_projection` messages, `set_clear_color` messages etc). The render script `update()` is then called.
## Post update
After the updates, a post update sequence is run. It unloads from memory collection proxies that are marked for unloading (this happens during the "dispatch messages" sequence). Any game object that is marked for deletion will call all of its components’ `final()` functions, if there are any. The code in `final()` functions often posts new messages to the queue so a "dispatch messages" pass is run afterwards.
Any factory component that has been told to spawn a game object will do that next. Finally, game objects that are marked for deletion are actually deleted.
The last step in the update loop involves dispatching `@system` messages (`exit`, `reboot` messages, toggling the profiler, starting and stopping video capture etc). Then graphics are rendered. During the graphics rendering, video capture is done, as is any rendering of the visual profiler (see the [Debugging documentation](#manuals:debugging).)
## Frame rate and collection time step
The number of frame updates per second (which equals the number of update-loop runs per second) can be set in the project settings, or programmatically by sending a `set_update_frequency` message to the `@system` socket. In addition, it is possible to set the _time step_ for collection proxies individually by sending a `set_time_step` message to the proxy. Changing a collection's time step does not affect the frame rate. It does affect the physics update time step as well as the `dt` variable passed to `update().` Also note that altering the time step does not alter the number of times `update()` will be called each frame---it is always exactly once.
(See the [Collection proxy manual](#manuals:collection-proxy) and [`set_time_step`](https://defold.com/ref/collectionproxy#set-time-step) for details)
## Finalization
When the application exits, first it finishes the last update loop sequence, which will unload any collection proxies: finalizing and deleting all game objects in each proxy collection.
When that is done the engine enters a finalization sequence that handles the main collection and its objects:
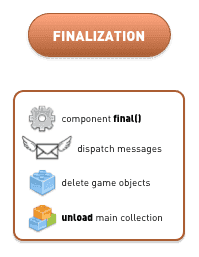
Component `final()` functions are called first. A subsequent dispatching of messages follows. Finally, all game objects are deleted and the main collection is unloaded.
The engine follows up with behind the scenes shutting down of subsystems: project configuration is deleted, the memory profiler is shut down, and so forth.
The application is now completely shut down.
# Importing and editing assets {#manuals:importing-assets}
A game project usually consists of a large number of external assets that are produced in various specialized programs for producing graphics, 3D models, sound files, animations and so forth. Defold is built for a workflow where you work in your external tools and then import the assets into Defold as they are finalized.
## Importing assets
Defold needs all the assets used in your project to be located somewhere in the project hierarchy. You therefore need to import all assets before you can use them. To import assets, simply drag the files from the file system on your computer and drop them in an appropriate place in the Defold editor *Assets pane*.

Defold supports images in the PNG and JPEG image formats. PNG images must be in 32 bit RGBA format. Other image formats need to be converted before they can be used.
## Using assets
When the assets are imported into Defold they can be used by the various component types supported by Defold:
* Images can be used to create many kinds of visual components frequently used in 2D games. Read more about [how to import and use 2D graphics here](#manuals:importing-graphics).
* Sounds can be used by the [Sound component](#manuals:sound) to play sounds.
* Fonts are used by the [Label component](#manuals:label) and by [text nodes](#manuals:gui-text) in a GUI.
* glTF and Collada models can be used by the [Model component](#manuals:model) to show 3D models with animations. Read more about [how to import and use 3D models here](#manuals:importing-models).
## Editing external assets
Defold does not provide editing tools for images, sound files, models or animations. Such assets need to be created outside of Defold in specialized tools and imported into Defold. Defold automatically detects changes to any asset among your project files and updates the editor view accordingly.
## Editing Defold assets
The editor saves all Defold assets in text based files that are merge friendly. They are also easy to create and modify with simple scripts. See [this forum thread](https://forum.defold.com/t/deftree-a-python-module-for-editing-defold-files/15210) for more information. Note though that we do not publish our file format details since they do change once in a while. You can also use [Editor Scripts](#manuals:editor-scripts) to hook into certain life-cycle events in the Editor to run scripts to generate or modify assets.
Extra care should be taken when working with Defold asset files through a text editor or external tool. If you introduce errors those can prevent the file from opening in the Defold editor.
Some external tools such as [Tiled](https://defold.com/assets/tiled/) and [Tilesetter](https://www.tilesetter.org/beta) can be used to generate Defold Assets automatically.
# Caching assets {#manuals:caching-assets}
Games created with Defold usually build in a matter of seconds, but as a project grows so does the amount of assets. Compiling fonts and compressing textures can take a significant amount of time in a large project and the asset cache exists to speed up builds by only rebuilding assets that have changed while using already compiled assets from the cache for assets that hasn't changed.
Defold uses a three-tiered cache:
1. Project cache
2. Local cache
3. Remote cache
## Project cache
Defold will by default cache compiled assets in the `build/default` folder of a Defold project. The project cache will speed up subsequent builds as it is only modified assets that have to be recompiled, while assets with no changes will be used from the project cache. This cache is always enabled and it used by both the editor and the command line tools.
The project cache can be deleted manually by deleting the files in `build/default` or by issuing the `clean` command from the [command line build tool Bob](#manuals:bob).
## Local cache
Added in Defold 1.2.187
The local cache is an optional second cache where compiled assets are stored in an external file location on the same machine or on a network drive. Thanks to its external location the contents of the cache survives a cleanup of the project cache. It can also be shared by multiple developers working on the same project. The cache is currently only available when building using the command line tools. It is enabled through the `resource-cache-local` option:
```sh
java -jar bob.jar --resource-cache-local /Users/john.doe/defold_local_cache
```
Compiled assets are accessed from the local cache based on a computed checksum which takes into account the Defold engine version, the names and the contents of the source assets as well as project build options. This will guarantee that cached assets are unique and that the cache can be shared between multiple versions of Defold.
Files stored in the local cache are stored indefinitely. It is up to the developer to manually remove old/unused files.
## Remote cache
Added in Defold 1.2.187
The remote cache is an optional third cache where compiled assets are stored on a server and accessed through HTTP request. The cache is currently only available when building using the command line tools. It is enabled through the `resource-cache-remote` option:
```sh
java -jar bob.jar --resource-cache-remote http://192.168.0.100/
```
As with the local cache all assets are accessed from the remote cache based on a computed checksum. Cached assets are accessed through the HTTP request methods GET, PUT and HEAD. Defold does not provide the remote cache server. It is up to each developer to set this up. An example of [a basic Python server can be seen here](https://github.com/britzl/httpserver-python).
# Importing 2D graphics {#manuals:importing-graphics}
Defold supports many kinds of visual components frequently used in 2D games. You can use Defold to create static and animated sprites, UI components, particle effects, tile maps and bitmap fonts. Before you can create any of these visual components you need to import image files with the graphics that you wish to use. To import image files you simply drag the files from the file system on your computer and drop them in an appropriate place in the Defold editor *Assets pane*.

Defold supports images in the PNG and JPEG image formats. Other image formats need to be converted before they can be used.
## Creating Defold assets
When the images are imported into Defold they can be used to create Defold specific assets:
 Atlas
: An atlas contains a list of separate images files, which are automatically combined into a larger texture image. Atlases can contain still images and *Animation Groups*, sets of images that together form a flipbook animation.
Learn more about the atlas resource in the [Atlas manual](#manuals:atlas).
 Tile Source
: A tile source references an image file that is already made out to consist of smaller sub-images ordered on a uniform grid. Another term commonly used for this type of compound image is _sprite sheet_. Tile sources can contain flipbook animations, defined by the first and last tile for the animation. It is also possible to use an image to automatically attach collision shapes to tiles.
Learn more about the tile source resource in the [Tile source manual](#manuals:tilesource).
 Bitmap Font
: A bitmap font has its glyphs in a PNG font sheet. These types of fonts provide no performance improvement from fonts generated from TrueType or OpenType font files, but can include arbitrary graphics, coloring and shadows right in the image.
Learn more about bitmap fonts in the [Fonts manual](#manuals:font).
## Using Defold assets
When you have converted the images into Atlas and Tile Source files you can use these to create several different kinds of visual components:

: A sprite is either a static image or flipbook animation that is displayed on screen.
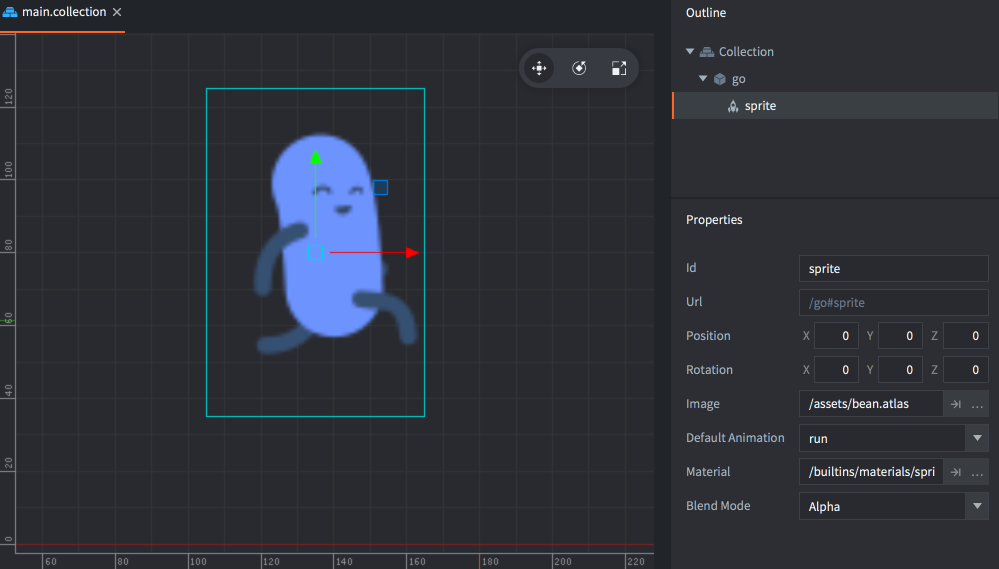
Learn more about sprites in the [Sprite manual](#manuals:sprite).
 Tile map
: A tilemap component pieces together a map from tiles (image and collision shapes) that come from a tile source. Tile maps cannot use atlas sources.
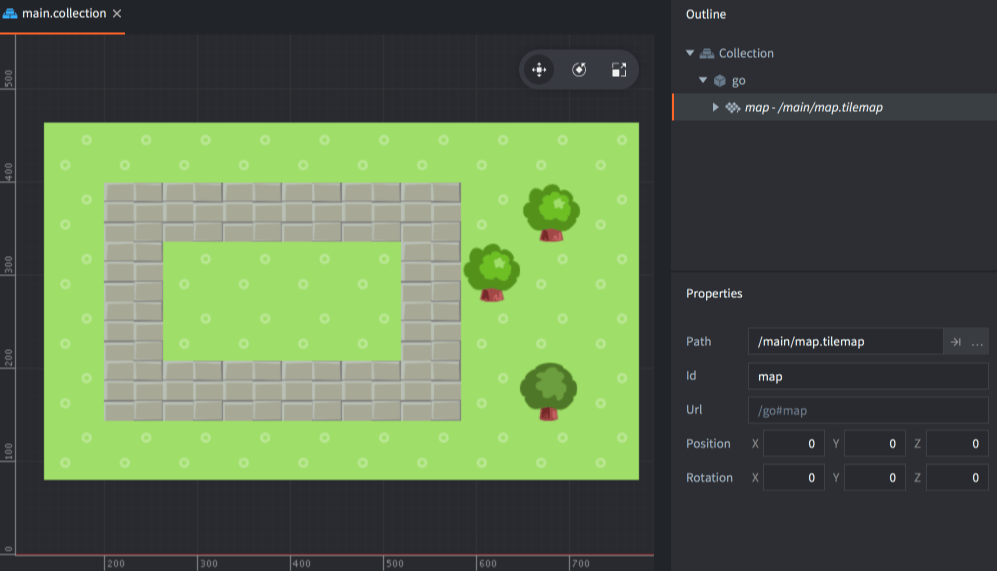
Learn more about tilemaps in the [Tilemap manual](#manuals:tilemap).
 Particle fx
: Particles that are spawned from a particle emitter consist of a still image or a flipbook animation from an atlas or tile source.
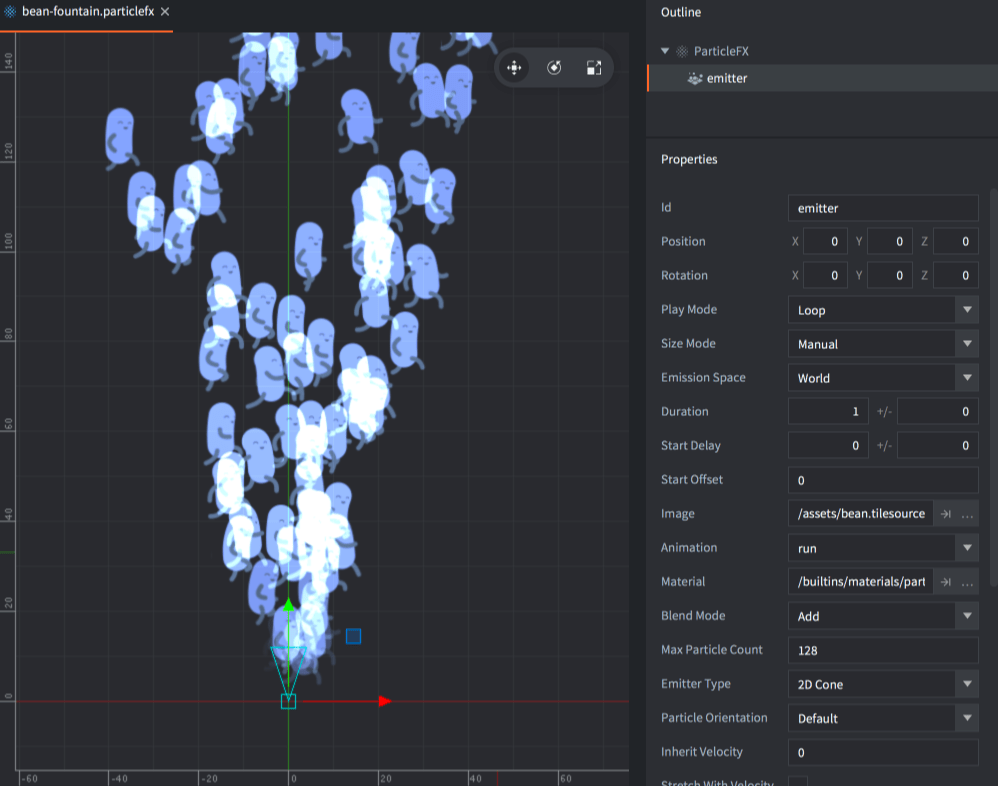
Learn more about particle effects in the [Particle fx manual](#manuals:particlefx).
 GUI
: GUI box nodes and pie nodes can use still images and flipbook animations from atlases and tile sources.

Learn more about GUIs in the [GUI manual](#manuals:gui).
# Importing 3D models {#manuals:importing-models}
Defold currently support models, skeletons and animations in GL Transmission Format *.glTF* and Collada *.dae* format. You can use tools such as Maya, 3D Max, Sketchup and Blender to create and/or convert 3D models into glTF and Collada format. Blender is a powerful and popular 3D modeling, animation and rendering program. It runs on Windows, macOS and Linux and is freely available for download at http://www.blender.org

## Importing to Defold
To import the model, simply drag and drop the *.gltf* file or *.dae* file and the corresponding texture image into the *Assets Pane* somewhere.

## Using a model
Once you have the model imported into Defold you can use it in a [Model component](#manuals:model).
## Exporting to glTF and Collada
The exported *.gltf* or *.dae* file contain all the vertices, edges and faces that make up the model, as well as _UV coordinates_ (what part of the texture image maps to a certain part of the mesh) if you have defined them, the bones in the skeleton and animation data.
* A detailed description on polygon meshes can be found on http://en.wikipedia.org/wiki/Polygon_mesh.
* UV coordinates and UV mapping is described at http://en.wikipedia.org/wiki/UV_mapping.
Defold imposes some limitations on exported animation data:
* Defold currently only supports baked animations. Animations need to have matrices for each animated bone each keyframe, and not position, rotation and scale as separate keys.
* Animations are also linearly interpolated. If you do more advanced curve interpolation the animations needs to be prebaked from the exporter.
* Animation clips in Collada are not supported. To use multiple animations per model, export them into separate *.dae* files and gather the files into an *.animationset* file in Defold.
### Requirements
When you export a model it's good to know that we don't yet support all features.
Currently known issues/not supported features from the glTF format:
* Morph target animations
* Material properties
* Embedded textures
While our ambition is to fully support the glTF format, we're not fully there yet.
If a feature is missing, please make a feature request for it in [our repo](https://github.com/defold/defold/issues)
### Exporting a texture
If you do not already have a texture for your model you can use Blender to generate a texture. You should do this before you remove extra materials from the model. Start by selecting the mesh and all of its vertices:

When all vertices are selected you unwrap the mesh to get the UV layout:

You can then proceed to export the UV layout to an image that can be used as a texture:
### Exporting using Blender
You export your model using the Export menu option. Select the model before you select the Export menu option and check "Selection Only" to only export the model.
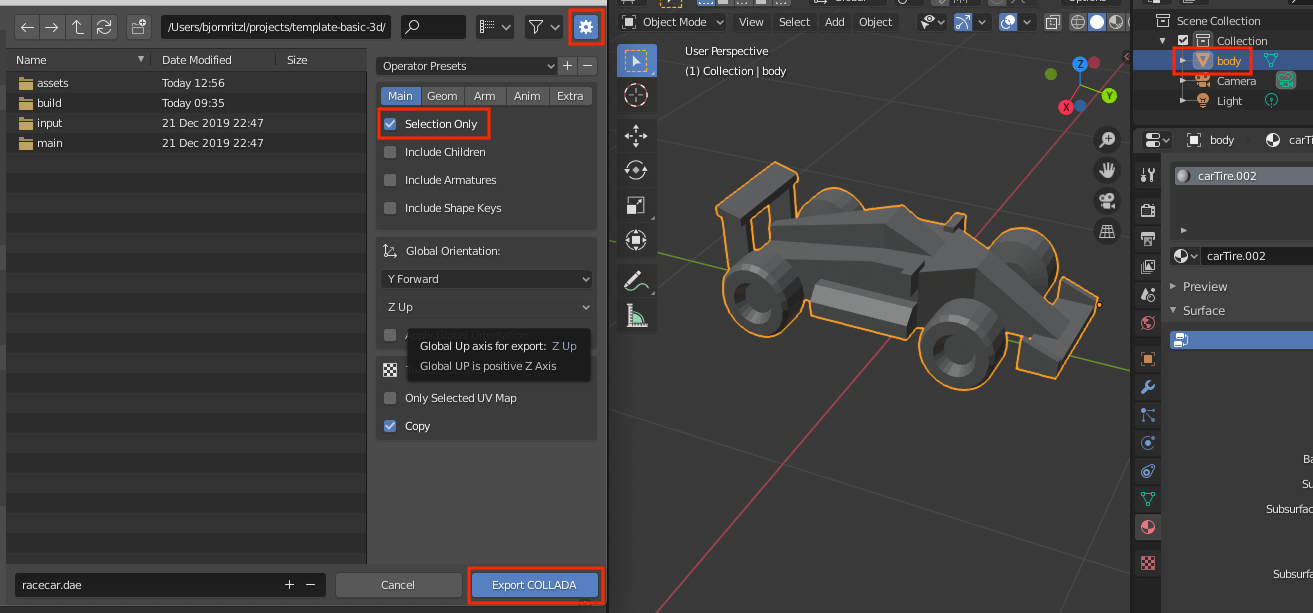
# Introduction {#manuals:adapting-graphics-to-screen-size}
There are several things to consider when adapting your game and graphics to different screen sizes:
* Is this a retro game with low resolution pixel perfect graphics or a modern game with HD quality graphics?
* How should the game behave when played in full screen on different screen sizes?
* Should the player see more of the game content on a high resolution screen or should the graphics adaptively zoom to always show the same content?
* How should the game deal with aspect ratios other than the one you have set in *game.project*?
* Should the player see more of the game content? Or maybe there should be black bars? Or maybe resized GUI elements?
* What kind of menus and on-screen gui components do you need and how should they adapt to different screen sizes and screen orientations?
* Should menus and other gui components change layout when the orientation changes or should they keep the same layout regardless of orientation?
This manual will address some of these things and suggest best practices.
## How to change how your content is rendered
The Defold render script give you total control over the entire rendering pipeline. The render script decides the order as well as what and how to draw things. The default behavior of the render script is to always draw the same area of pixels, defined by the width and height in the *game.project* file, regardless if the window is resized or the actual screen resolution doesn't match. This will result in the content being stretched if the aspect ratio changes and zoomed in or out if the window size changes. In some games this might be acceptable, but it is more likely that you want to show more or less game content if the screen resolution or aspect ratio is different, or at least make sure to zoom the content without changing the aspect ratio. The default stretch behavior can easily be changed and you can read more about how to do this in the [Render manual](#manuals:render).
## Retro/8-bit graphics
Retro/8-bit graphics often refer to games emulating the graphical style of old game consoles or computers with their low resolution and limited color palette. As an example the Nintendo Entertainment System (NES) had a screen resolution of 256x240, the Commodore 64 had 320x200 and the Gameboy had 160x144, all of which are only a fraction of the size of modern screens. In order to make games emulating this graphical style and screen resolution playable on a modern high resolution screen the graphics has to be upscaled or zoomed several times. One simple way of doing this is to draw all of your graphics in the low resolution and style that you wish to emulate and zoom the graphics when it is rendered. This can easily be achieved in Defold using the render script and the [Fixed Projection](#manuals:render) set to a suitable zoom value.
Let's take this tileset and player character ([source](https://ansimuz.itch.io/grotto-escape-game-art-pack)) and use them for an 8-bit retro game with a resolution of 320x200:

Setting 320x200 in the *game.project* file and launching the game would look like this:
The window is absolutely tiny on a modern high resolution screen! Increasing the window size four times to 1280x800 makes it more suitable for a modern screen:
Now that the window size is more reasonable we also need to do something about the graphics. It's so small it's very hard to see what is going on in the game. We can use the render script to set a fixed and zoomed projection:
```Lua
msg.post("@render:", "use_fixed_projection", { zoom = 4 })
```
The same result can be achieved by attaching a [Camera component](#manuals:camera) to a game object and check *Orthographic Projection* and set *Orthographic Zoom* to 4.0:
This will give the following result:
This is better. The window and graphics both have a good size, but if we look closer there is an obvious problem:
The graphics look blurred! This is caused by the way the zoomed in graphics is sampled from the texture when rendered by the GPU. The default setting in the *game.project* file under the Graphics section is *linear*:
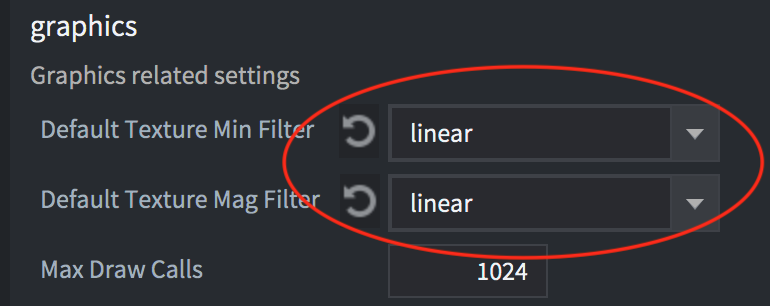
Changing this to *nearest* will give the result we are after:
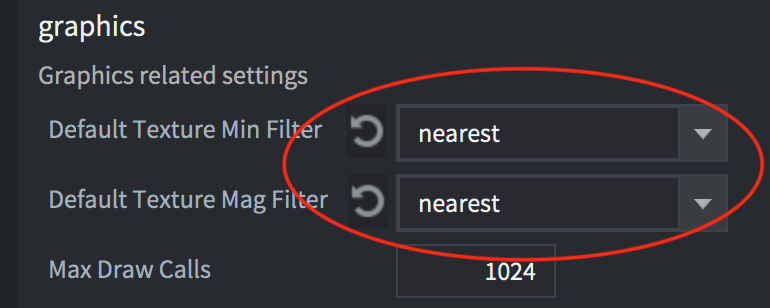
Now we have crisp pixel-perfect graphics for our retro game. There are even more things to consider, such as disabling sub-pixels for sprites in *game.project*:
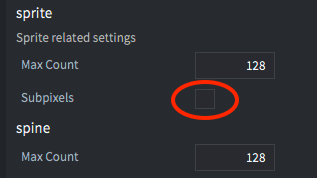
When the Subpixels option is disabled sprites will never get rendered on half pixels and instead always snap to the nearest full pixel.
## High resolution graphics
When dealing with high resolution graphics we need to approach project and content setup in a different way than for retro/8-bit graphics. With bitmap graphics you need to create your content in such a way that it looks good on a high resolution screen when shown at a 1:1 scale.
Just like for retro/8-bit graphics you need to change the render script. In this case you want the graphics to scale with the screen size while maintaining the original aspect ratio:
```Lua
msg.post("@render:", "use_fixed_fit_projection")
```
This will make sure that the screen will resize to always show the same amount of content as specified in the *game.project* file, possibly with additional content shown above and below or to the sides, depending on if the aspect ratio differs or not.
You should configure the width and height in the *game.project* file to a size that allows you to show your game content unscaled.
### High DPI setting and retina screens
If you also wish to support high resolution retina screens you can enable this in the *game.project* file in the Display section:
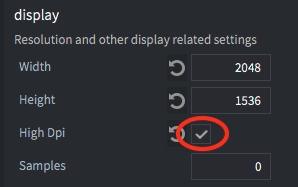
This will create a high dpi back buffer on displays that support it. The game will render in double the resolution than what is set in the Width and Height settings, which will still be the logical resolution used in scripts and properties. This means that all measurements stay the same and any content that is rendered at 1x scale will look the same. But if you import high res images and scale them to 0.5x they will be high dpi on screen.
## Creating an adaptive GUI
The system for creating GUI components is built around a number of basic building blocks, or [nodes](#manuals:gui), and while it may seem overly simple it can be used to create anything from buttons to complex menus and popups. The GUIs that you create can be configured to automatically adapt to screen size and orientation changes. You can for instance keep nodes anchored to the top, bottom or sides of the screen and nodes can either keep their size or stretch. The relationship between nodes as well as their size and appearance can also be configured to change when the screen size or orientation changes.
### Node properties
Each node in a gui has a pivot point, a horizontal and vertical anchor as well as an adjust mode.
* The pivot point defines the center point of a node.
* The anchor mode controls how the node’s vertical and horizontal position is altered when the scene boundaries, or the parent node’s boundaries are stretched to fit the physical screen size.
* The adjust mode setting controls what happens to a node when the scene boundaries, or the parent node’s boundaries, are adjusted to fit the physical screen size.
You can learn more about these properties [in the GUI manual](#manuals:gui).
### Layouts
Defold supports GUIs that automatically adapt to screen orientation changes on mobile devices. By using this feature you can design a GUI that can adapt to the orientation and aspect ratio of a range of screen sizes. It is also possible to create layouts that match particular device models. You can learn more about this system in the [GUI Layouts manual](#manuals:gui-layouts)
## Testing different screen sizes
The Debug menu contains an option to simulate the resolution of either a certain device model resolution or a custom resolution. While the application is running you can select Debug->Simulate Resolution and pick one of the device models from the list. The running application window will resize and you'll be able to see how your game looks in a different resolution or with a different aspect ratio.
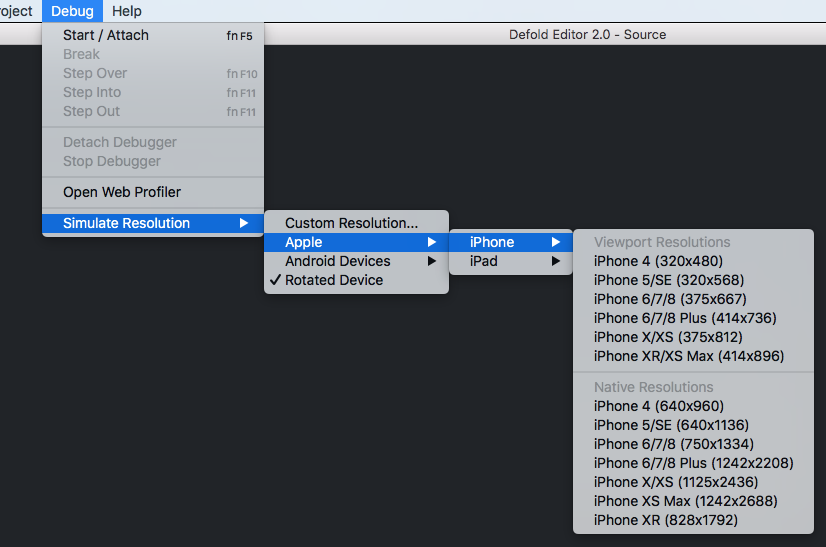
# Live update {#manuals:live-update}
When bundling a game, Defold packs all the game resources into the resulting platform specific package. In most cases this is preferred since the running engine has instant access to all resources and can load them swiftly from storage. However, there are instances where you might want to postpone the loading of resources to a later stage. For instance:
- Your game features a series of episodes and you wish to include only the first one for players to try out before they decide if they want to continue with the rest of the game.
- Your game is targeted for HTML5. On the browser, loading an application from storage means that the entire application package has to be downloaded before startup. On such a platform you may wish to send a minimal start package and get the app up and running quickly before you download the rest of the game resources.
- Your game contains very large resources (images, videos etc) that you wish to postpone the downloading of until they are about to show in the game. This is to keep the install size down.
The Live update functionality expands the concept of the collection proxy with a mechanism allowing the runtime to fetch and store resources to the application bundle that were intentionally left out of the bundle at build time.
It allows you to have your content split up into multiple archives:
* _Base Archive_
* Level Common Files
* Level Pack 1
* Level Pack 2
* ...
## Preparing content for Live update
Suppose we are making a game containing large, high resolution image resources. The game keeps these images in collections with a game object and a sprite with the image:
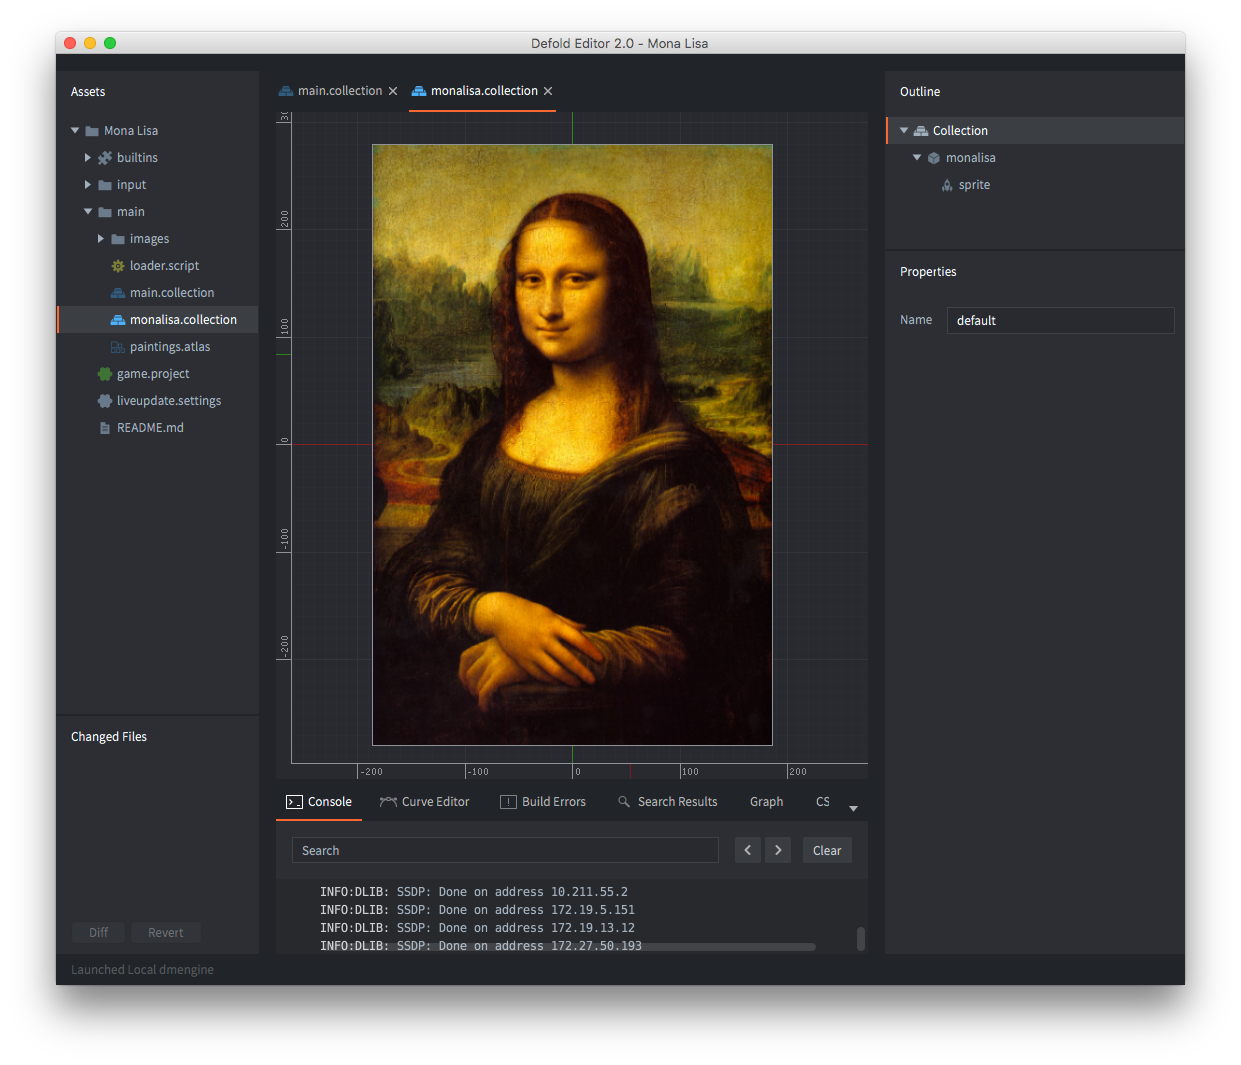
To have the engine load such a collection dynamically, we can simply add a collection proxy component and point it to *`monalisa.collection`*. Now the game can choose when to load the content in the collection from storage into memory by sending a `load` message to the collection proxy. However, we want to go further and control the loading of the resources contained in the collection ourselves.
This is done by simply checking the *Exclude* checkbox in the collection proxy properties, telling Defold to leave any content in *`monalisa.collection`* out when creating an application bundle.
Any resources referenced by the base game package, will not be excluded.
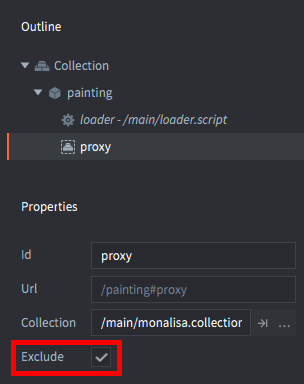
## Live update settings
When Defold creates an application bundle it needs to store any excluded resources somewhere. The project settings for Live update govern the location for those resources. The settings are found under Project ▸ Live update Settings.... This will create a settings file if none exists. In *game.project*, select which live-update settings file to use when bundling. This allows for using different live-update settings for different environments, for example live, QA, development etc.
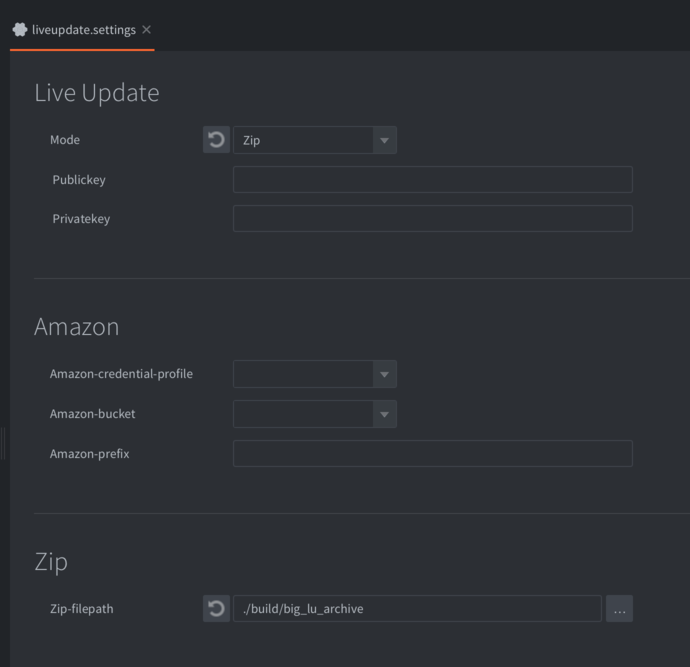
There are currently two ways that Defold can store the resources. Choose the method in the *Mode* dropdown in the settings window:
`Zip`
: This option tells Defold to create a Zip archive file with any excluded resources. The archive is saved at the location specified in the *Export path* setting.
`Folder`
: This option tells Defold to create a folder with all the excluded resources. It works exactly the same way as Zip, but uses a directory instead of an archive. This may be useful in cases where you need to post-process files before uploading and plan to pack them into an archive yourself.
`Amazon`
: This option tells Defold to automatically upload excluded resources to an Amazon Web Service (AWS) S3 bucket. Fill in your AWS *Credential profile* name, select the appropriate *Bucket* and provide a *Prefix* name. You can read more on how to setup an AWS account in this [aws guide](#manuals:live-update-aws)
## Bundling with Live update
Building and running from the editor (Project ▸ Build) does not support Live Update. In order to test Live Update you need to bundle the project.
To bundle with Live update is easy. Select Project ▸ Bundle ▸ ... and then the platform you want to create an application bundle for. This opens the bundling dialog:
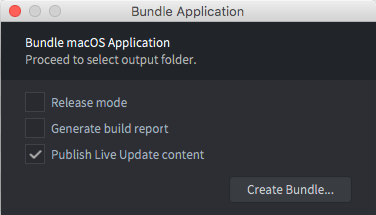
When bundling, any excluded resource will be left out of the application bundle. By checking the *Publish Live update content* checkbox, you tell Defold to either upload the excluded resources to Amazon or to create a Zip archive, depending on how you have set up your Live update settings (see above). The manifest file for the bundle will also be included in the excluded resources.
Click *Package* and select a location for the application bundle. Now you can start the application and check that everything works as expected.
## The .zip archives
A live update .zip file contains files that were excluded from the base game package.
While our current pipeline only supports creating a single .zip file, it is in fact possible to split that zip file into smaller .zip files. This allows for smaller downloads for a game: level packs, seasonal content etc. Each .zip file also contains a manifest file that describes the meta data for each resource contained within the .zip file.
## Splitting .zip archives
It is often desirable to split the excluded content into several smaller archives for more granular control over resource usage. One such example is to split a level based game into multiple level packs. Another is to put different holiday themed UI decorations into separate archives and load and mount only the theme currently active in the calendar.
The resource graph is stored in `build/default/game.graph.json` and it is automatically generated each time the project is bundled. The generated file contains a list of all resources in the project and the dependencies of each resource. Example entry:
```json
{
"path" : "/game/player.goc",
"hexDigest" : "caa342ec99794de45b63735b203e83ba60d7e5a1",
"children" : [ "/game/ship.spritec", "/game/player.scriptc" ]
}
```
Each entry has a `path` which represents the unique path of the resource within the project. The `hexDigest` represents the cryptographic fingerprint of the resource and it will be the filename used in the liveupdate .zip archive. Finally the `children` field is a list of other dependencies which this resource depends on. In the example above the `/game/player.goc` has a dependency to a sprite and a script component.
You can parse the `game.graph.json` file and use this information to identify groups of entries in the resource graph and store their corresponding resources in separate archives along with the original manifest file (the manifest file will be pruned at runtime so that it contains only the files in the archive).
## Live Update on Android
It is possible to use Play Asset Delivery to download and mount Live Update content. Learn more [in the official manual](https://defold.com/extension-pad/).
## Content verification
One of the major features of the live update system, is that you can now use many content archives, potentially from many different Defold versions.
The `liveupdate.add_mount()` default behavior, is to add an engine version check when attaching a mount.
This means that both the game base archive and live update archive(s) need to be created at the same time with the same engine version, using the bundle option. This will invalidate any previously downloaded archives by the client, forcing them to re-download the content.
This behavior can be turned off with an options flag.
When turned off, the content verification responsibility lies entirely with the developer, to guarantee that each live update archive will work with the running engine.
We recommend storing some metadata for each mount, so that _directly upon startup_, the developer can decide if the mount/archive should be removed.
One way to do so is to add an extra file to the zip archive after the game has been bundled. For instance by inserting a `metadata.json` with any relevant information that the game requires. Then, at startup, the game can retrieve with `sys.load_resource("/metadata.json")`. _Note that you will need a unique name for each mount's custom data, or the mounts will give you the file with the topmost priority_
Failure to do so, you may end up in a situation where the content is not compatible with the engine at all, forcing it to quit.
## Mounts
The live update system can use multiple content archives at the same time.
Each archive is "mounted" to the engine's resource system, with a name and priority.
If two archives have the same file `sprite.texturec`, the engine will load the file from the mount with the highest priority.
The engine doesn't keep a reference to any resource in a mount. Once a resource is loaded into memory, the archive may be unmounted. The resource will remain in memory until it is unloaded.
The mounts are automatically re-added upon engine restart.
Mounting an archive doesn't copy or move the archive. The engine only stores the path to the archive. Thus, the developer can remove the archive at any time, and the mount will also be removed at next startup.
## Scripting with Live Update
To actually use the live update content, you need to download and mount the data to your game.
Read more about about how to [script with live update here](#manuals:live-update-scripting).
## Development caveats
Debugging
: When running a bundled version of your game, you don't have direct access to a console. This causes problems for debugging. However, you can run the application from the command line or by double clicking the executable in the bundle directly:
Now the game starts with a shell window that will output any `print()` statements:
Forcing re-download of resources
: The developer can download the content to any file/folder they wish, but often they're located under the application path. The location of the application support folder depends on the operating system. It can be found with `print(sys.get_save_file("", ""))`.
The file liveupdate.mounts is located under the "local storage", and it's path is output to the console at start "INFO:LIVEUPDATE: Live update folder located at: ..."
# Atlas {#manuals:atlas}
While single images are often used as source for sprites, for performance reasons, images need to be combined into larger sets of images, called atlases. Combining sets of smaller images into atlases is especially important on mobile devices where memory and processing power is more scarce than on desktop machines or dedicated game consoles.
In Defold, an atlas resource is a list of separate images files, which are automatically combined into a larger image.
## Creating an Atlas
Select New... ▸ Atlas from the context menu in the *Assets* browser. Name the new atlas file. The editor will now open the file in the atlas editor. The atlas properties are shown in the
*Properties* pane so you can edit them (see below for details).
You need to populate an atlas with images or animations before you can use it as a graphics source for object components like Sprites and ParticleFX components.
Make sure that you have added your images to the project (drag and drop image files to the right location in the *Assets* browser)
Adding single images
: Drag and drop images from the *Asset* pane to the editor view.
Alternatively, Right click the root Atlas entry in the *Outline* pane.
Select Add Images from the pop up context menu to add single images.
A dialog opens from which you can find and select the images you want to add to the Atlas. Note that you can filter the image files and select multiple files at once.

The added images are listed in the *Outline* and the full atlas can be seen in the center editor view. You may need to press F (View ▸ Frame Selection from the menu) to frame the selection.
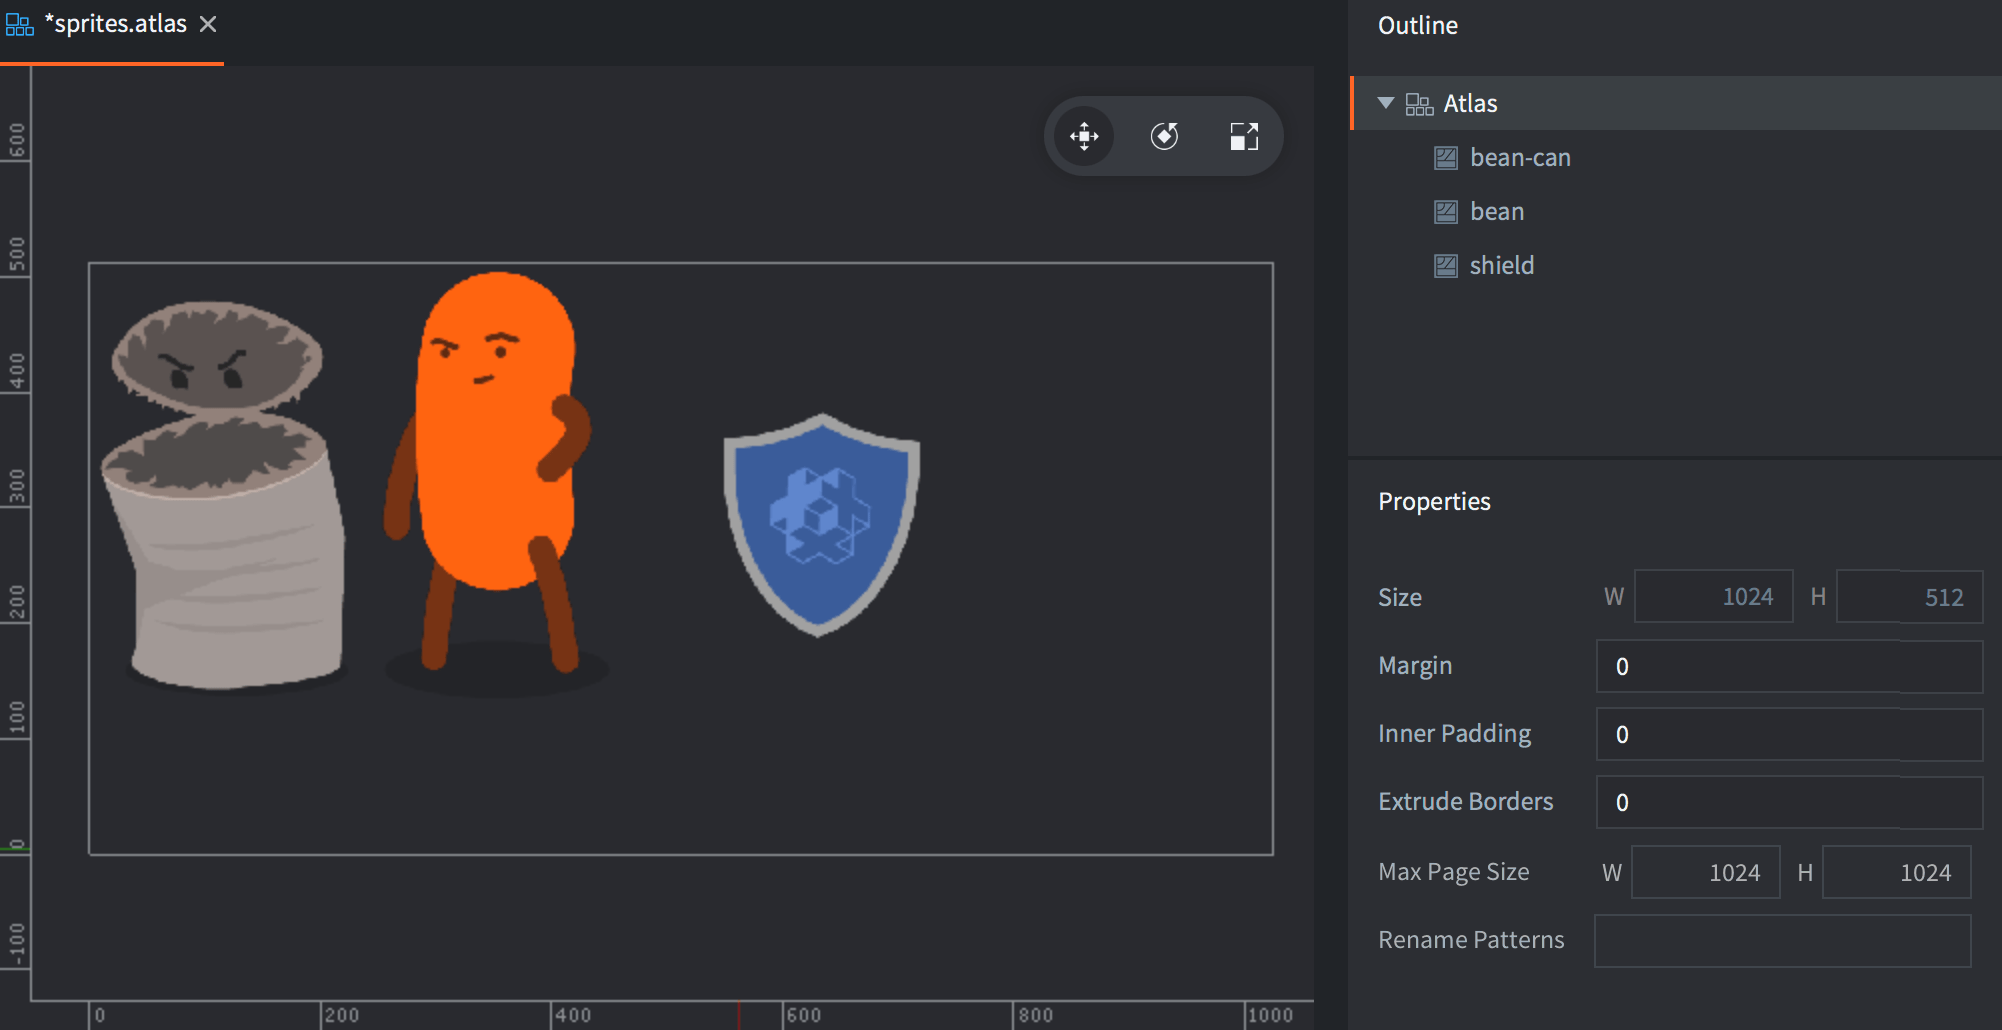
Adding flipbook animations
: Right click the root Atlas entry in the *Outline* pane.
Select Add Animation Group from the pop up context menu to create a flipbook animation group.
A new, empty, animation group with a default name ("New Animation") is added to the atlas.
Drag and drop images from the *Asset* pane to the editor view to add them to the currently selected group.
Alternatively, Right click the new group and select Add Images from the context menu.
A dialog opens from which you can find and select the images you want to add to the animation group.
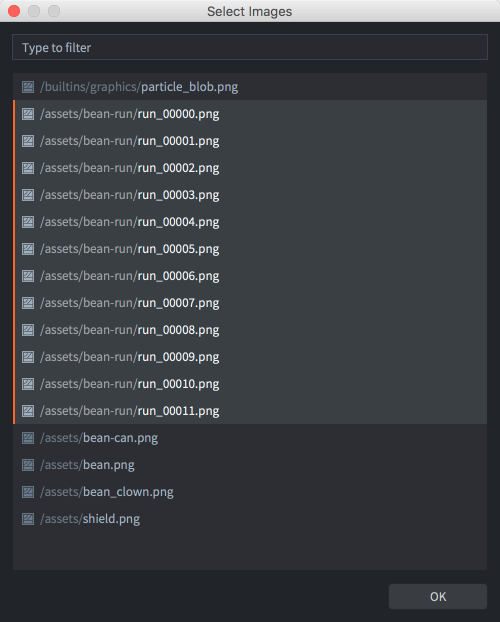
Press Space with the animation group selected to preview it, and Ctrl/Cmd+T to close the preview. Adjust the *Properties* for the animation as needed (see below).
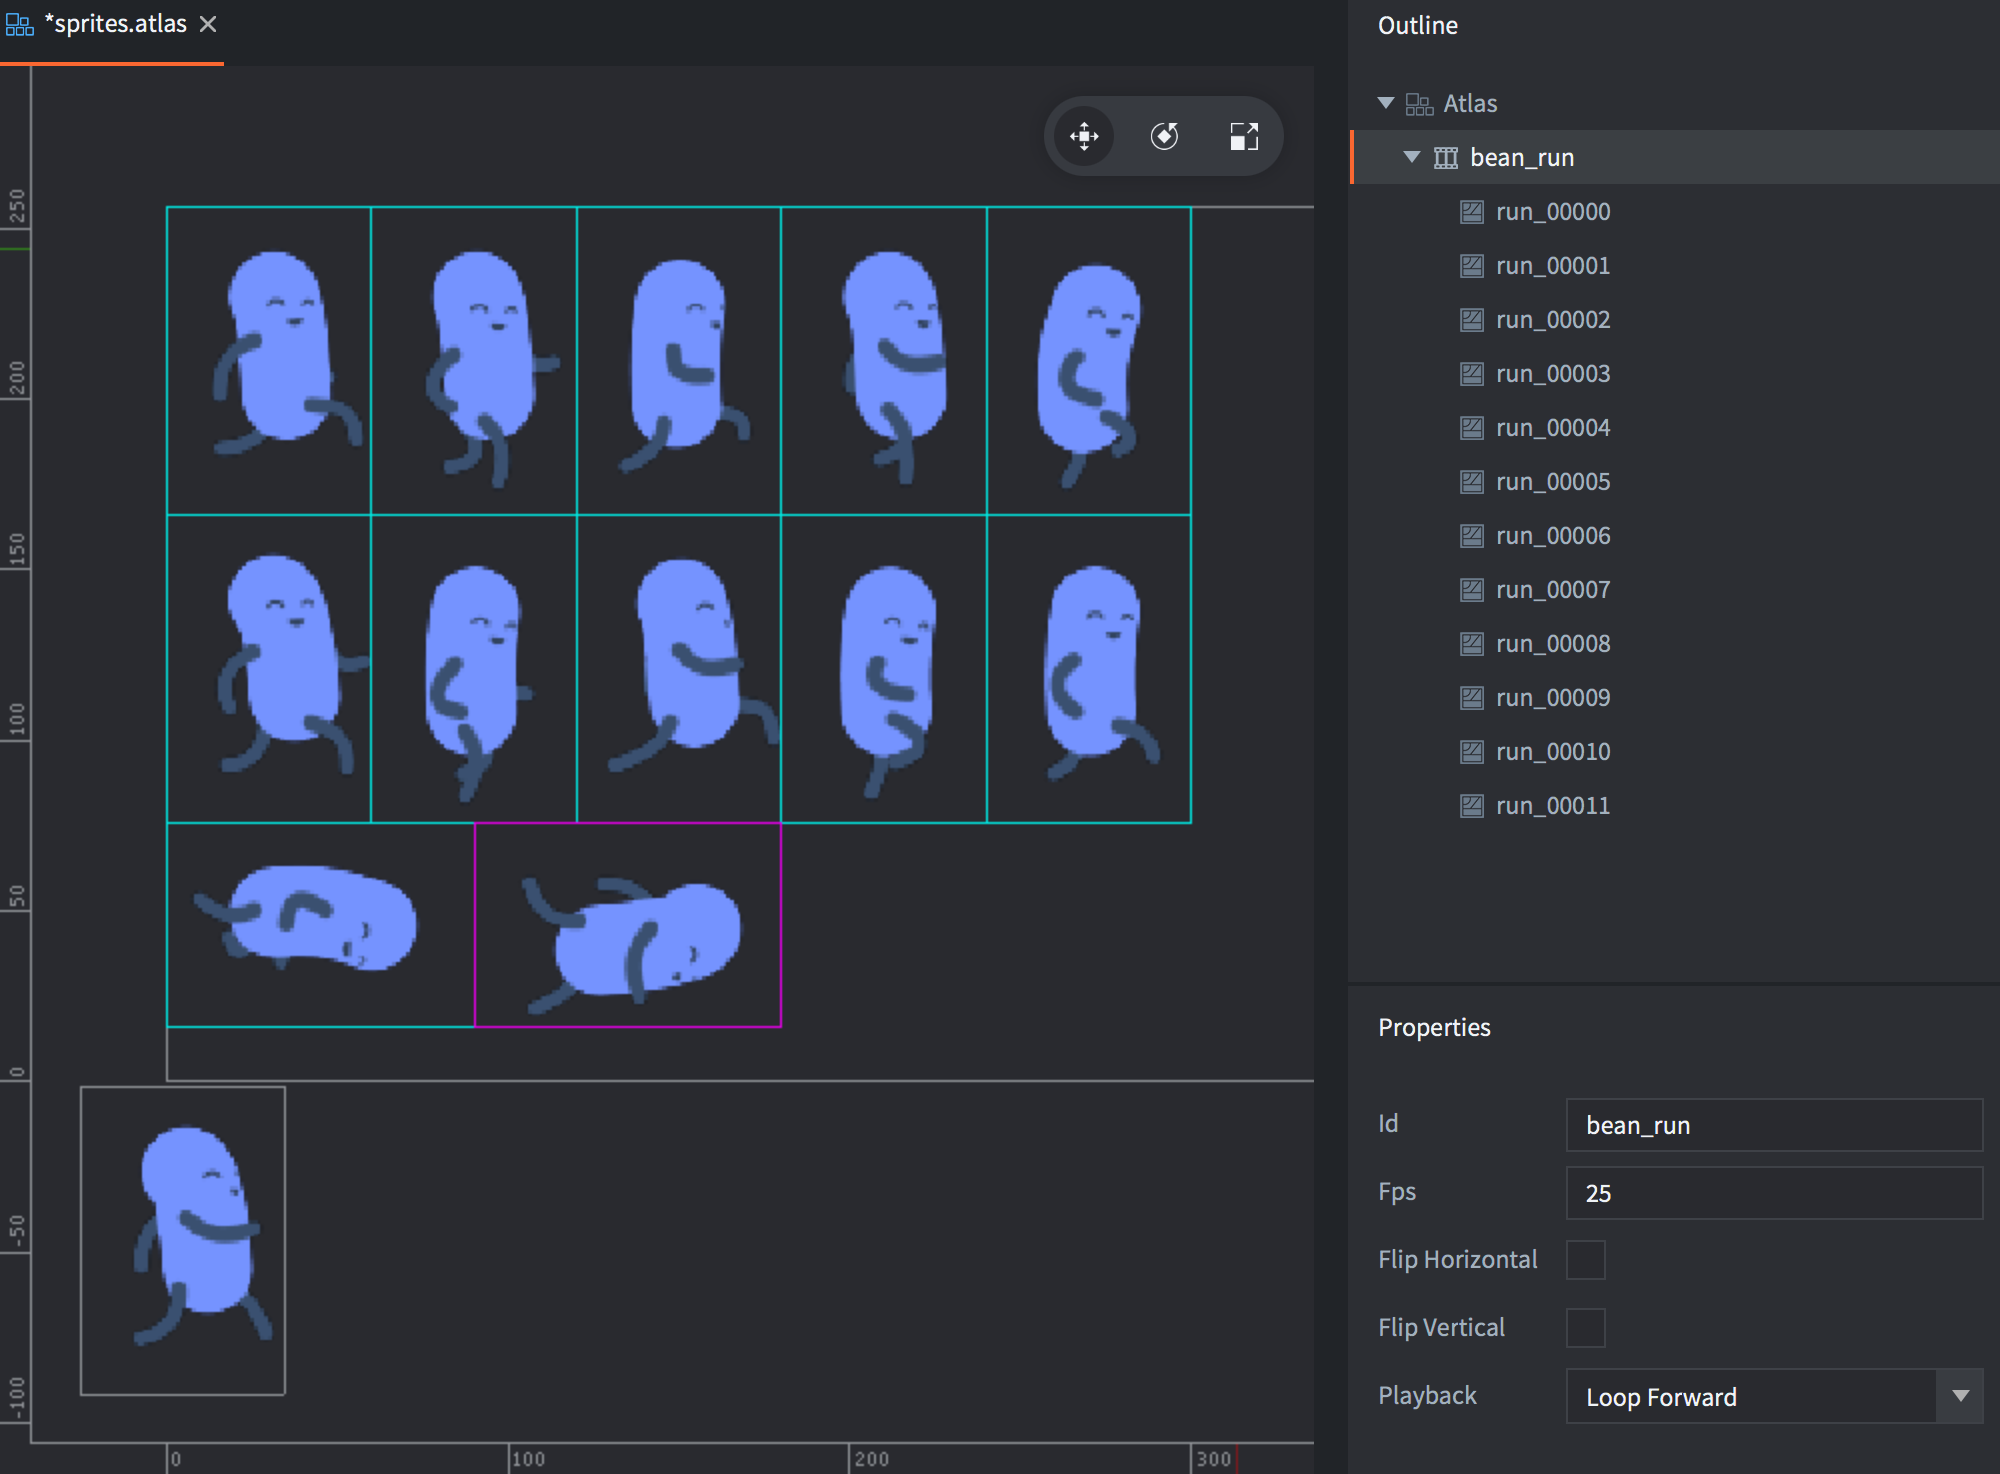
You can reorder the images in the Outline by selecting them and pressing Alt + Up/down. You can also easily create duplicates by copying and pasting images in the outline (From the Edit menu, the right click context menu or keyboard shortcuts).
## Atlas properties
Each atlas resource has a set of properties. These are shown in the *Properties* pane when you select the root item in the *Outline* view.
Size
: Shows the computed total size of the resulting texture resource. The width and height are set to the closest power of two. Note that if you enable texture compression, some formats require square textures. Non square textures will then be resized and filled with empty space to make the texture square. See the [Texture profiles manual](#manuals:texture-profiles) for details.
Margin
: The number of pixels that should be added between each image.
Inner Padding
: The number of empty pixels that should be padded around each image.
Extrude Borders
: The number of edge pixels that should be repeatedly padded around each image. When the fragment shader samples pixels at the edge of an image, pixels of a neighbor image (on the same atlas texture) may bleed over. Extruding the border solves this problem.
Max Page Size
: The maximum size of a page in a multi-page atlas. This can be used to split an atlas into multiple pages of the same atlas to restrict atlas size while still only using a single draw call. This feature must be used in combination with multi-page atlas enabled materials found in `/builtins/materials/*_paged_atlas.material`.
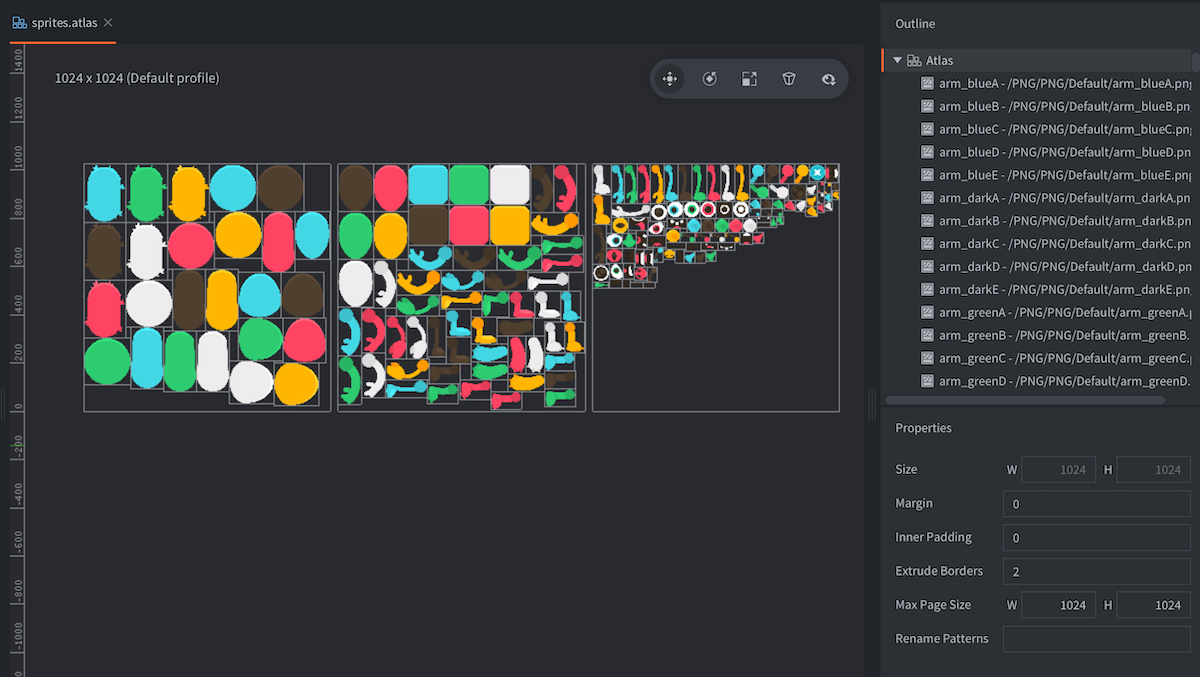
Rename Patterns
: A comma (´,´) separated list of search-and-replace patterns, where each pattern is of the form `search=replace`.
Each image's original name (the file base name) will be transformed using these patterns. (E.g. a pattern of `hat=cat,_normal=`, will rename an image of name `hat_normal` to `cat`). This is useful when matching animations between atlases.
Here are examples of the different property settings with four square images of size 64x64 added to an atlas. Notice how the atlas jumps to 256x256 as soon as the images won't fit 128x128, resulting in much wasted texture space.
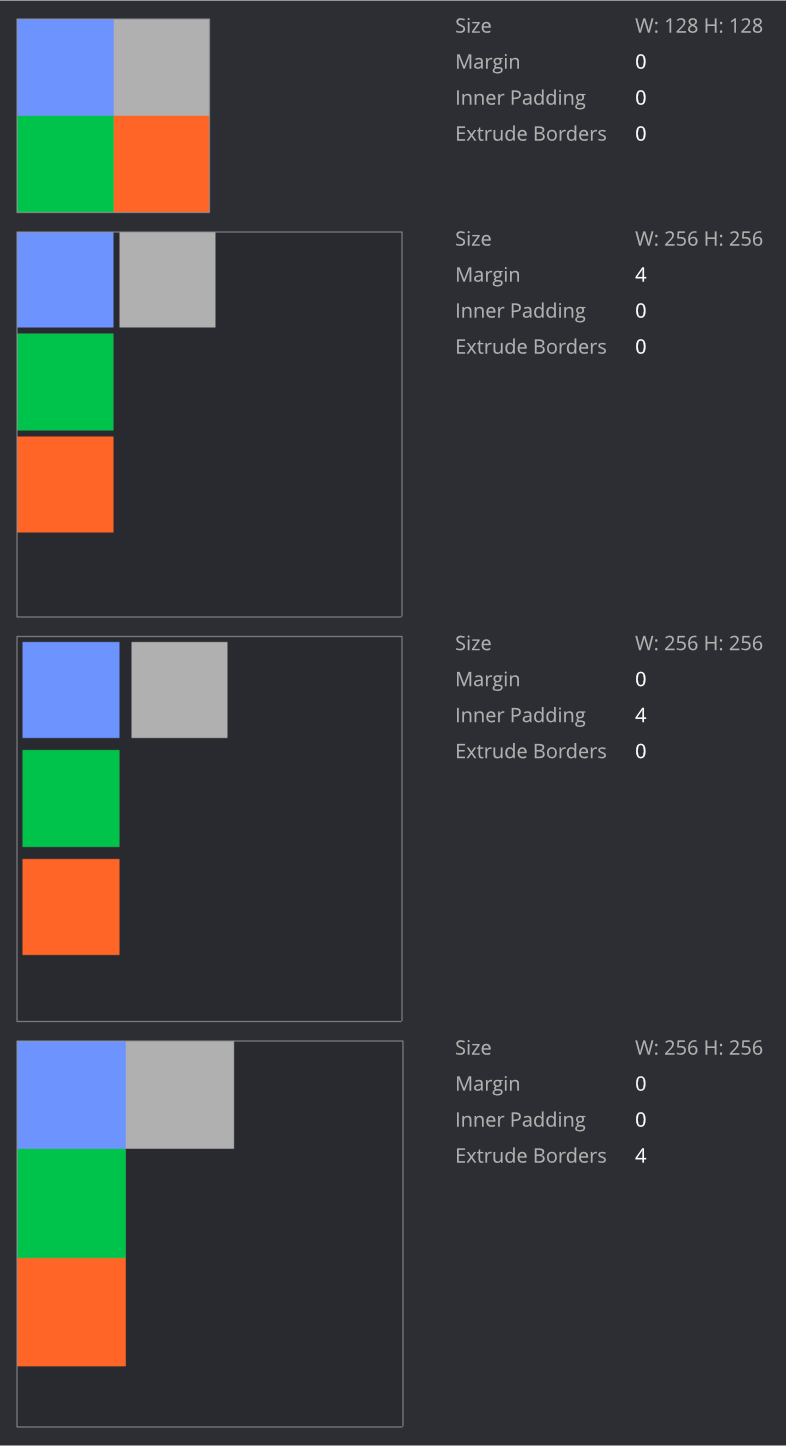
## Image properties
Each image in an atlas has a set of properties:
Id
: The id of the image (read-only).
Size
: The width and height of the image (read-only).
Pivot
: The pivot point of the image (in units). Top left is (0,0) and bottom right is (1,1). Default is (0.5, 0.5). The pivot may be outside of the 0-1 range. The pivot point is where the image will be centered when used in e.g. a sprite. You can modify the pivot point by dragging the pivot handle on the editor view. The handle will be visible, only when a single image is selected. Snapping can be enabled on Shift down while dragging.
Sprite Trim Mode
: How the sprite is rendered. The default is to render the sprite as a rectangle (Sprite Trim Mode set to Off). If the sprite contains a lot of transparent pixels it may be more efficient to render the sprite as a non rectangular shape using between 4 and 8 vertices. Note that sprite trimming does not work together with slice-9 sprites.
Image
: Path to the image itself.
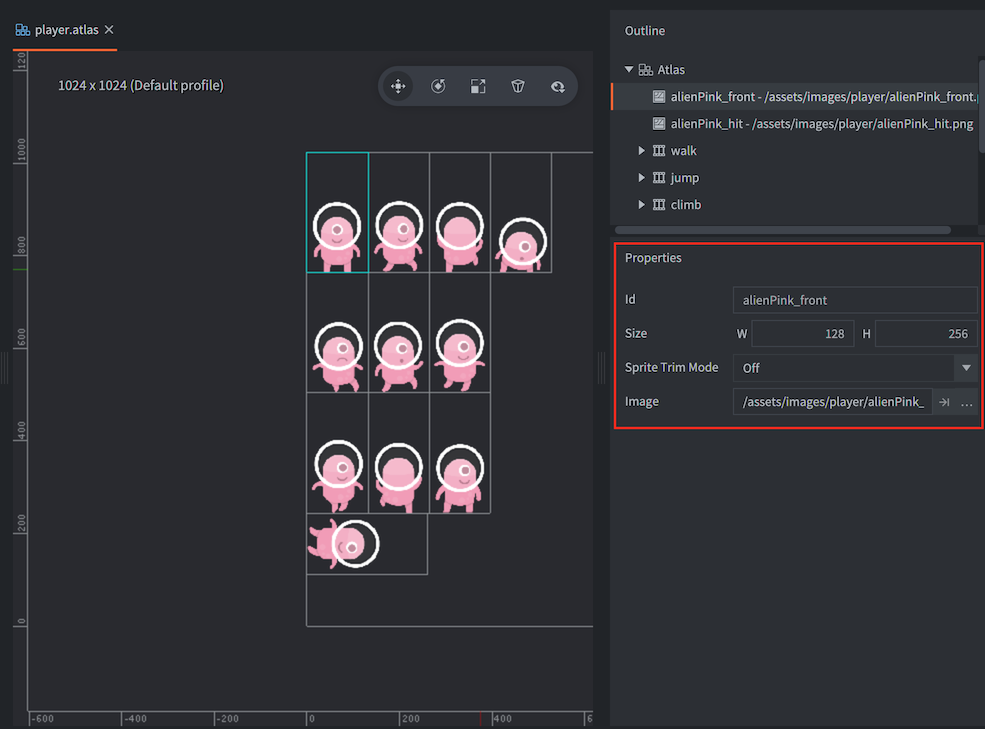
## Animation properties
In addition to the list of images that are part of an animation group, a set of properties are available:
Id
: The name of the animation.
Fps
: The playback speed of the animation, expressed in frames per second (FPS).
Flip horizontal
: Flips the animation horizontally.
Flip vertical
: Flips the animation vertically.
Playback
: Specifies how the animation should play:
- `None` does not play back at all, the first image is displayed.
- `Once Forward` plays the animation one time from the first to the last image.
- `Once Backward` plays the animation one time from the last to the first image.
- `Once Ping Pong` plays the animation one time from the first to the last image and then back to the first image.
- `Loop Forward` plays the animation repeatedly from the first to the last image.
- `Loop Backward` plays the animation repeatedly from the last to the first image.
- `Loop Ping Pong` plays the animation repeatedly from the first to the last image and then back to the first image.
## Runtime Texture and Atlas creation
Starting from Defold 1.4.2 it is possible to create a texture and an atlas at runtime.
### Creating a Texture resource at runtime
Use [`resource.create_texture(path, params)`](https://defold.com/ref/stable/resource/#resource.create_texture:path-table) to create a new texture resource:
```lua
local params = {
width = 128,
height = 128,
type = resource.TEXTURE_TYPE_2D,
format = resource.TEXTURE_FORMAT_RGBA,
}
local my_texture_id = resource.create_texture("/my_custom_texture.texturec", params)
```
Once the texture has been created you can use [`resource.set_texture(path, params, buffer)`](https://defold.com/ref/stable/resource/#resource.set_texture:path-table-buffer) to set the pixels of the texture:
```lua
local width = 128
local height = 128
local buf = buffer.create(width * height, { { name=hash("rgba"), type=buffer.VALUE_TYPE_UINT8, count=4 } } )
local stream = buffer.get_stream(buf, hash("rgba"))
for y=1, height do
for x=1, width do
local index = (y-1) * width * 4 + (x-1) * 4 + 1
stream[index + 0] = 0xff
stream[index + 1] = 0x80
stream[index + 2] = 0x10
stream[index + 3] = 0xFF
end
end
local params = { width=width, height=height, x=0, y=0, type=resource.TEXTURE_TYPE_2D, format=resource.TEXTURE_FORMAT_RGBA, num_mip_maps=1 }
resource.set_texture(my_texture_id, params, buf)
```
It is possible to use `resource.set_texture()` to also update a sub-region of the texture by using a buffer width and height less than the full size of the texture and by changing the x and y parameters to `resource.set_texture()`.
The texture can be used directly on a [model component](#manuals:model) using `go.set()`:
```lua
go.set("#model", "texture0", my_texture_id)
```
### Creating an Atlas at runtime
If the texture should be used on a [sprite component](#manuals:sprite) it first needs to be used by an atlas. Use [`resource.create_atlas(path, params)`](https://defold.com/ref/stable/resource/#resource.create_atlas:path-table) to create an Atlas:
```lua
local params = {
texture = texture_id,
animations = {
{
id = "my_animation",
width = width,
height = height,
frame_start = 1,
frame_end = 2,
}
},
geometries = {
{
vertices = {
0, 0,
0, height,
width, height,
width, 0
},
uvs = {
0, 0,
0, height,
width, height,
width, 0
},
indices = {0,1,2,0,2,3}
}
}
}
local my_atlas_id = resource.create_atlas("/my_atlas.texturesetc", params)
-- assign the atlas to the 'sprite' component on the same go
go.set("#sprite", "image", my_atlas_id)
-- play the "animation"
sprite.play_flipbook("#sprite", "my_animation")
```
# Buffer {#manuals:buffer}
The Buffer resource is used to describe one or more streams of values, for instance positions or colours. Each stream has a name, data type, count and the data itself. Example:
```
[
{
"name": "position",
"type": "float32",
"count": 3,
"data": [
-1.0,
-1.0,
-1.0,
-1.0,
-1.0,
1.0,
...
]
}
]
```
The above example describes a stream of positions in three dimensions, represented as 32-bit floating point numbers. The format of a Buffer file is JSON, with file extension `.buffer`.
Buffer resources are typically created using external tools or scripts, for instance when exporting from modeling tools such as Blender.
A Buffer resource can be used as input to a [Mesh component](#manuals:mesh). Buffer resources can also be created at runtime using the `buffer.create()` and [related API functions](https://defold.com/ref/stable/buffer/#buffer.create:element_count-declaration).
# Font files {#manuals:font}
Fonts are used to render text on Label components and GUI text nodes. Defold supports several font file formats:
- TrueType
- OpenType
- BMFont
Fonts added to your project are automatically converted into a texture format that Defold can render. Two font rendering techniques are available, each with its own specific benefits and drawbacks:
- Bitmap
- Distance field
## Offline or Runtime fonts
By default, the conversion to rasterized glyph images happens at build time (offline). This has the drawback that each font needs to rasterize all possible glyphs in the build stage, producing potentially very large textures that consume memory and also increase the bundle size.
By using "runtime fonts", the .ttf fonts will be bundled as-is, and the rasterization will happen on-demand at runtime. This minimizes both runtime memory usage and the bundle size.
## Text layout support (e.g. Right-to-left)
The runtime fonts also have the benefit of supporting full text layout, e.g. right-to-left.
We currently use the libraries [HarfBuzz](https://github.com/harfbuzz/harfbuzz), [SheenBidi](https://github.com/Tehreer/SheenBidi), [libunibreak](https://github.com/adah1972/libunibreak) and [SkriBidi](https://github.com/memononen/Skribidi).
See [Enabling Runtime Fonts](#manuals:font#enabling-runtime-fonts)
## Font collection
The `.fontc` file format is also known as a font collection. In offline mode, only one font is associated with it.
When using runtime fonts, you can associate more than one font file (.ttf) with the font collection.
This allows for using the a font collection when rendering multiple texts in different languages, while also keeping the memory footprint low.
E.g. loading a collection with the Japanese font, then associate that font with the current main font, followed by unloading the Japanese font collection.
## Creating a font
To create a font for use in Defold, create a new Font file by selecting File ▸ New... from the menu, then select Font. You can also right click a location in the *Assets* browser and select New... ▸ Font.
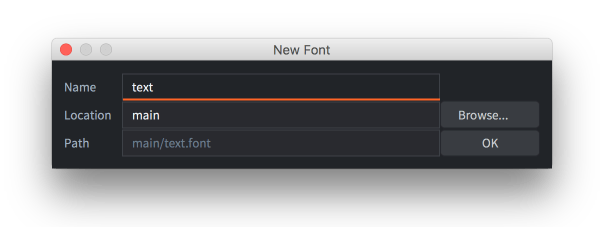
Give the new font file a name and click Ok. The new font file now opens in the editor.
Drag the font you wish to use into the *Assets* browser and drop it in a good spot.
Set the *Font* property to the font file and set the font properties as needed.
## Properties
*Font*
: The TTF, OTF or *`.fnt`* file to use for generating the font data.
*Material*
: The material to use when rendering this font. Make sure to change this for distance field and BMFonts (see below for details).
*Output Format*
: The type of font data that is generated.
- `TYPE_BITMAP` converts the imported OTF or TTF file into a font sheet texture where the bitmap data is used to render text nodes. The color channels are used to encode the face shape, outline and drop shadow. For *`.fnt`* files, the source texture bitmap is used as is.
- `TYPE_DISTANCE_FIELD` The imported font is converted into a font sheet texture where the pixel data represents not screen pixels but distances to the font edge. See below for details.
*Render Mode*
: The render mode to use for glyph rendering.
- `MODE_SINGLE_LAYER` produces a single quad for each character.
- `MODE_MULTI_LAYER` produces separate quads for the glyph shape, outline and shadows respectively. The layers are rendered in back-to-front order, which prevents a character from obscuring previously rendered characters if the outline is wider than the distance between glyphs. This render mode also enables proper drop shadow offsetting, as specified by the Shadow X/Y properties in the font resource.
*Size*
: The target size of the glyphs in pixels.
*Antialias*
: If the font should be antialiased when baked onto the target bitmap. Set to 0 if you want pixel perfect font rendering.
*Alpha*
: The transparency of the glyph. 0.0--1.0 where 0.0 means transparent and 1.0 opaque.
*Outline Alpha*
: The transparency of the generated outline. 0.0--1.0.
*Outline Width*
: The width of the generated outline in pixels. Set to 0 for no outline.
*Shadow Alpha*
: The transparency of the generated shadow. 0.0--1.0.
Shadow support is enabled by the built-in font material shaders and handles both the single and multi layered render mode. If you don't need layered font rendering or shadow support, it is best to use a simpler shader such as the *`builtins/font-singlelayer.fp`*.
*Shadow Blur*
: For bitmap fonts, this setting indicates the number of times a small blur kernel will be applied to each font glyph. For distance field fonts, this setting equals the actual pixel width of the blur.
*Shadow X/Y*
: The horizontal and vertical offset in pixels of the generated shadow. This setting will only affect the glyph shadow when the Render Mode is set to `MODE_MULTI_LAYER`.
*Characters*
: Which characters to include in the font. By default this field include the ASCII printable characters (character codes 32-126). You can add or remove characters from this field to include more or less characters in the font..
For runtime fonts, this text acts as a cache prewarming with the correct glyphs. This happens during load time. See `font.prewarm_text()`.
The ASCII printable characters are:
space ! " # $ % & ' ( ) * + , - . / 0 1 2 3 4 5 6 7 8 9 : ; < = > ? @ A B C D E F G H I J K L M N O P Q R S T U V W X Y Z [ \ ] ^ _ \` a b c d e f g h i j k l m n o p q r s t u v w x y z { | } ~
*All Chars*
: If you check this property all glyphs available in the source file will be included in the output.
*Cache Width/Height*
: Constrains the size of the glyph cache bitmap. When the engine renders text, it looks up the glyph from the cache bitmap. If it does not exist there, it will be added to the cache before rendering. If the cache bitmap is too small to contain all the glyphs the engine is asked to render, an error is signalled (`ERROR:RENDER: Out of available cache cells! Consider increasing cache_width or cache_height for the font.`).
If set to 0 the cache size is set automatically, and will grow to 2048x4096 max.
## Distance field fonts
Distance field fonts store the distance to the edge of the glyph in the texture instead of bitmap data. When the engine renders the font, a special shader is required to interpret the distance data and use that to draw the glyph. Distance field fonts are more resource intensive than bitmap fonts, but allow for greater sizing flexibility.
Make sure to change the *Material* property of the font to *`builtins/fonts/font-df.material`* (or any other material that can handle the distance field data) when you create the font---or the font will not use the correct shader when it is rendered to screen.
## Bitmap BMFonts
In addition to generated bitmaps Defold supports prebaked bitmap "BMFont" format fonts. These fonts consists of a PNG font sheet with all the glyphs. In addition, a *`.fnt`* file contains information on where on the sheet each glyph can be found as well as size and kerning information. (Note that Defold does not support the XML version of the *`.fnt`* format that is used by Phaser and some other tools)
These types of fonts provide no performance improvement from bitmap fonts generated from TrueType or OpenType font files, but can include arbitrary graphics, coloring and shadows right in the image.
Add the generated *`.fnt`* and *`.png`* files to your Defold project. These files should reside in the same folder. Create a new font file and set the *font* property to the *`.fnt`* file. Make sure that *output_format* is set to `TYPE_BITMAP`. Defold will not generate a bitmap but use the one provided in the PNG.
To create a BMFont, you need to use a tool that can generate the appropriate files. Several options exist:
* [Bitmap Font Generator](http://www.angelcode.com/products/bmfont/), a Windows only tool provided by AngelCode.
* [Shoebox](http://renderhjs.net/shoebox/), a free Adobe Air based app for Windows and macOS.
* [Hiero](https://libgdx.com/wiki/tools/hiero), an open source Java based tool.
* [Glyph Designer](https://71squared.com/glyphdesigner), a commercial macOS tool from 71 Squared.
* [bmGlyph](https://www.bmglyph.com), a commercial macOS tool from Sovapps.

For the font to render correctly, don't forget to set the material property to *`builtins/fonts/font-fnt.material`* when you create the font.
## Artifacts and best practices
Generally, bitmap fonts are best when the font is rendered with no scaling. They are faster to render to screen than distance field fonts.
Distance field fonts respond very good to upscaling. Bitmap fonts, on the other hand, being just pixelated images will increase in size so the pixels will grow as the font is scaled, resulting in blocky artifacts. The following is a sample at font size 48 pixels, scaled up 4 times.
When scaling down, bitmap textures can be nicely and efficiently scaled down and antialiased by the GPU. A bitmap font keeps its color better than a distance field font. Here is a zoom of the same sample font at size 48 pixels, scaled down to 1/5 of the size:

Distance field fonts need to be rendered to a target size that is big enough to hold distance information that can express the curves of the font glyphs. This is the same font as above, but at 18 pixels size and scaled up 10 times. It is clear that this is too small to encode the shapes of this typeface:

If you don't want shadow or outline support, set their respective alpha values to zero. Otherwise, shadow and outline data will still be generated, taking up unnecessary memory.
## Font Cache
A font resource in Defold will result in two things at runtime, a texture and the font data.
* The font data consist of a list of glyph entries, each containing some basic kerning info and the bitmap data for that glyph.
* The texture is internally called the "glyph cache texture" and it will be used when rendering text for a specific font.
At runtime, when rendering text, the engine will first loop through the glyphs to be rendered to check which glyphs are available in the texture cache. Each glyph that is missing from the glyph texture cache will trigger a texture upload from the bitmap data stored in the font data.
Each glyph is placed internally in the cache according to the font baseline, which enables calculating local texture coordinates of the glyph within its corresponding cache cell in a shader. This means that you can achieve certain text effects such as gradients or texture overlays dynamically. The engine exposes metrics about the cache to the shader via a special shader constant called `texture_size_recip`, which contains the following information in the vector components:
* `texture_size_recip.x` is the inverse of the cache width
* `texture_size_recip.y` is the inverse of the cache height
* `texture_size_recip.z` is the ratio of cache cell width to the cache width
* `texture_size_recip.w` is the ratio of cache cell height to the cache height
For example - to generate a gradient in a shader fragment, simply write:
`float horizontal_gradient = fract(var_texcoord0.y / texture_size_recip.w);`
For more information about shader uniforms, see the [Shader manual](#manuals:shader).
## Enabling Runtime Fonts
It is possible to use runtime generation for SDF type fonts, when using TrueType (.ttf) fonts.
This approach can greatly reduce the download size and runtime memory consumption of a Defold game.
The small downside is the asynchronous nature of generating each glyph.
* Enable the feature by setting `font.runtime_generation` in game.project.
* Add an [App Manifest](#manuals:app-manifest) and enable the `Use full text layout system` option.
This builds a custom engine that has this feature enabled.
This feature is currently experimental, but with the intention to be used as the default workflow in the future.
The `font.runtime_generation` setting affects all .ttf fonts in the project.
### Font Scripting
#### Prewarming glyph cache
In order to make the runtime fonts easier to use, they support prewarming of the glyph cache.
This means the font will generate the glyphs listed in *Characters* in the font.
If `All Chars` is selected, there will be no prewarming as it defeats the purpose of not having to generate all glyphs at the same time.
If the `Characters` field of the `.fontc` file is set, this is used as a text, to figure out which glyphs needs to be updated in the glyph cache.
It is also possible to manually update the glyph cache by calling `font.prewarm_text(font_collection, text, callback)`. It provides a callback to let you know when all the missing glyphs have been added to the glyph cache, and it's safe to present the text on screen.
### Adding/removing fonts to a font collection
For runtime fonts, it's possible to add or remove fonts (.ttf) to a font collection.
This is useful when a large font has been split up into multiple files for different character sets (e.g. CJK)
Adding a font to a font collection doesn't automatically load or render all the glyphs.
```lua
-- get the main font
local font_collection = go.get("#label", "font")
font.add_font(font_collection, self.language_ttf_hash)
-- get the selected language font
local font_collection_language = go.get("localization_japanese#label", "font")
local font_info = font.get_info(font_collection_language)
self.language_ttf_hash = font_info.fonts[1].path_hash -- get the first font (the one specified in the editor)
font.add_font(self.font_collection, self.language_ttf_hash) -- increases the reference count to the font
```
```lua
-- remove the font reference
font.add_font(self.font_collection, self.language_ttf_hash)
```
### Prewarming glyphs
To properly show a text with a runtime font, the glyphs need to be resolved. The `font.prewarm_text()` does this for you.
It is an asynchronous operation, and once it's done and you get the callback, it's safe to progress to show any message containing the glyphs.
If the glyph cache gets full, the oldest glyph in the cache will be evicted.
```lua
font.prewarm_text(self.font_collection, info.text, function (self, request_id, result, err)
if result then
print("PREWARMING OK!")
label.set_text(self.label, info.text)
else
print("Error prewarming text:", err)
end
end)
```
# Resource management {#manuals:resource}
If you make a very small game, the limitations of the target platform (memory footprint, bundle size, computing power and battery consumption) may not ever pose any problems. However, when making larger games, and especially on handheld devices, memory consumption will likely be one of the biggest constraints. An experienced team will carefully make resource budgets against platform constraints. Defold provides a range of features to help manage memory and bundle size. This manual gives an overview to these features.
## The static resource tree
When you build a game in Defold, you statically declare the resource tree. Every single part of the game is linked into the tree, starting with the bootstrap collection (usually called "main.collection"). The resource tree follows any reference and includes all resources associated with those references:
- Game object and component data (atlases, sounds etc).
- Factory component prototypes (game objects and collections).
- Collection proxy component references (collections).
- [Custom resources](#manuals:project-settings) declared in *game.project*.
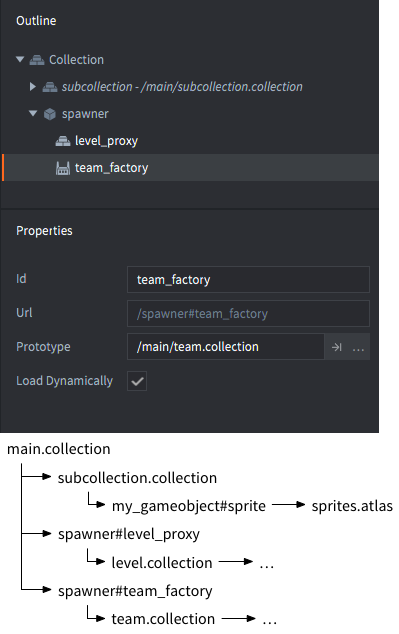
Defold also has a concept of [bundle resources](#manuals:project-settings). Bundle resources are included with the application bundle, but are not part of the resource tree. The bundle resources can be anything from platform specific support files to external files [loaded from the file system](#manuals:file-access) and used by your game (for instance FMOD sound banks).
When the game is *bundled*, only what is in the resource tree will be included. Anything that is not referenced in the tree is left out. There is no need to manually select what to include or exclude from the bundle.
When the game is *run*, the engine starts at the bootstrap root of the tree and pulls resources into memory:
- Any referenced collection and its content.
- Game objects and component data.
- Factory component prototypes (game objects and collections).
However, the engine will not automatically load the following types of referenced resources at runtime:
- Game world collections referenced through collection proxies. Game worlds are relatively large so you will need to manually trigger loading and unloading of these in code. See [the Collection proxy manual](#manuals:collection-proxy) for details.
- Files added via the *Custom Resources* setting in *game.project*. These files are manually loaded with the [`sys.load_resource()`](https://defold.com/ref/sys/#sys.load_resource) function.
The default way Defold bundles and loads resources can be altered to give fine grained control over how and when resources enter memory.

## Dynamically loading factory resources
Resources referenced by factory components are normally loaded into memory when the component is loaded. The resources are then ready for being spawned into the game as soon as the factory exists in the runtime. To change the default behavior and postpone the loading of factory resources you can simply mark a factory with the *Load Dynamically* checkbox.
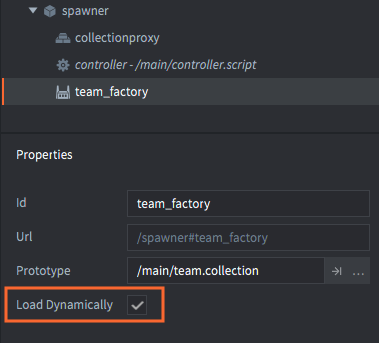
With this box checked, the engine will still include the referenced resources in the game bundle, but it will not automatically load the factory resources. Instead, you have two options:
1. Call [`factory.create()`](https://defold.com/ref/factory/#factory.create) or [`collectionfactory.create()`](https://defold.com/ref/collectionfactory/#collectionfactory.create) when you want to spawn objects. This will load the resources synchronously, then spawn new instances.
2. Call [`factory.load()`](https://defold.com/ref/factory/#factory.load) or [`collectionfactory.load()`](https://defold.com/ref/collectionfactory/#collectionfactory.load) to load the resources asynchronously. When the resources are ready for spawning, a callback is received.
Read the [Factory manual](#manuals:factory) and the [Collection factory manual](#manuals:collection-factory) for details on how this works.
## Unloading dynamically loaded resources
Defold keeps reference counters for all resources. If a resource's counter reaches zero it means that nothing refers to it anymore. The resource is then automatically unloaded from memory. For example, if you delete all objects spawned by a factory and you also delete the object holding the factory component, the resources previously referred to by the factory is unloaded from memory.
For factories that are marked *Load Dynamically* you can call the [`factory.unload()`](https://defold.com/ref/factory/#factory.unload) or [`collectionfactory.unload()`](https://defold.com/ref/collectionfactory/#collectionfactory.unload) function. This call removes the factory component's reference to the resource. If nothing else refers to the resource (all spawned objects are deleted, for instance), the resource will be unloaded from memory.
## Excluding resources from bundle
With collection proxies, it is possible to leave out all the resources the component refers to from the bundling process. This is useful if you need to keep the bundle size to a minimum. For instance, when running games on the web as HTML5 the browser will download the whole bundle before executing the game.
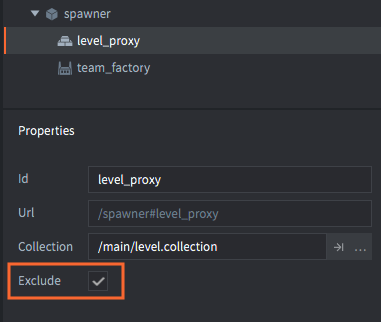
By marking a collection proxy as *Exclude* the referenced resource will be left out of the game bundle. Instead, you can store excluded collections on selected cloud storage. The [Live update manual](#manuals:live-update) explains how this feature works.
# Tile source {#manuals:tilesource}
A *Tile Source* can be used by a [Tilemap component](#manuals:tilemap) to paint tiles onto a grid area or it can be used as the graphics source for a [Sprite](#manuals:sprite) or [Particle Effect component](#manuals:particlefx). You can also use the *Collision Shapes* from the tile source in a Tilemap for [collision detection and physics simulation](#manuals:physics) ([example](https://defold.com/examples/tilemap/collisions/)).
## Creating a tile source
You need an image containing all the tiles. Each tile must have the exact same dimensions and be placed in a grid. Defold supports _spacing_ between the tiles and a _margin_ around each tile.
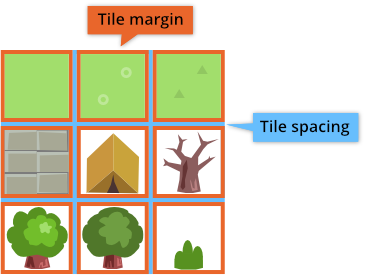
Once you have the source image created, you can create a Tile Source:
- Import the image to your project by dragging it into a project location in the *Assets* browser.
- Create a new tile source file (right click a location in the *Assets* browser, then select New... ▸ Tile Source).
- Name the new file.
- The file now opens in the tile source editor.
- Click the browse-button next to the *Image* property and select your image. Now you should see the image displayed in the editor.
- Adjust the *Properties* to match the source image. When everything is correct the tiles will line up perfectly.

Size
: The size of the source image.
Tile Width
: The width of each tile.
Tile Height
: The height of each tile.
Tile Margin
: The number of pixels surrounding each tile (orange in the image above).
Tile Spacing
: The number of pixels between each tile (blue in the image above).
Inner Padding
: Specifies how many empty pixels should be automatically added around the tile in the resulting texture used when the game is run.
Extrude Border
: Specifies how many times the edge pixels should be automatically replicated around the tile in the resulting texture used when the game is run.
Collision
: Specifies the image to use to automatically generate collision shapes for tiles.
## Tile source flip-book animations
To define an animation in a tile source the animation frame tiles must lie next to each other in a sequence left to right. The sequence can wrap from one row to the next. All newly created tile sources have a default animation named "`anim`". You can add new animations by right clicking the tile source root in the *Outline* and selecting Add ▸ Animation.
Selecting an animation displays the animation *Properties*.

Id
: The identity of the animation. Must be unique for the tile source.
Start Tile
: The first tile of the animation. Numbering starts at 1 in the top left corner and goes to the right, line by line down to the bottom right corner.
End Tile
: The last tile of the animation.
Playback
: Specifies how the animation should play:
- `None` does not play back at all, the first image is displayed.
- `Once Forward` plays the animation one time from the first to the last image.
- `Once Backward` plays the animation one time from the last to the first image.
- `Once Ping Pong` plays the animation one time from the first to the last image and then back to the first image.
- `Loop Forward` plays the animation repeatedly from the first to the last image.
- `Loop Backward` plays the animation repeatedly from the last to the first image.
- `Loop Ping Pong` plays the animation repeatedly from the first to the last image and then back to the first image.
Fps
: The playback speed of the animation, expressed in frames per second (FPS).
Flip horizontal
: Flips the animation horizontally.
Flip vertical
: Flips the animation vertically.
## Tile source collision shapes
Defold uses an image specified in the *Collision* property to generate a _convex_ shape for each tile. The shape will outline the part of the tile that has color information, i.e. is not 100% transparent.
Often it is sensible to use the same image for collision as the one containing the actual graphics, but you are free to specify a separate image if you want collision shapes that differ from the visuals. When you specify a collision image, the preview is updated with an outline on each tile indicating the generated collision shapes.
The tile source outline lists collision groups that you have added to the tile source. New tile source files will get one "default" collision group added. You can add new groups by right clicking the tile source root in the *Outline* and selecting Add ▸ Collision Group.
To select the tile shapes that should belong to a certain group, select the group in th *Outline*, then click each tile that you wish to assign to the group. The outline of the tile and shape is colored with the group's color. The color is automatically assigned to the group in the editor.
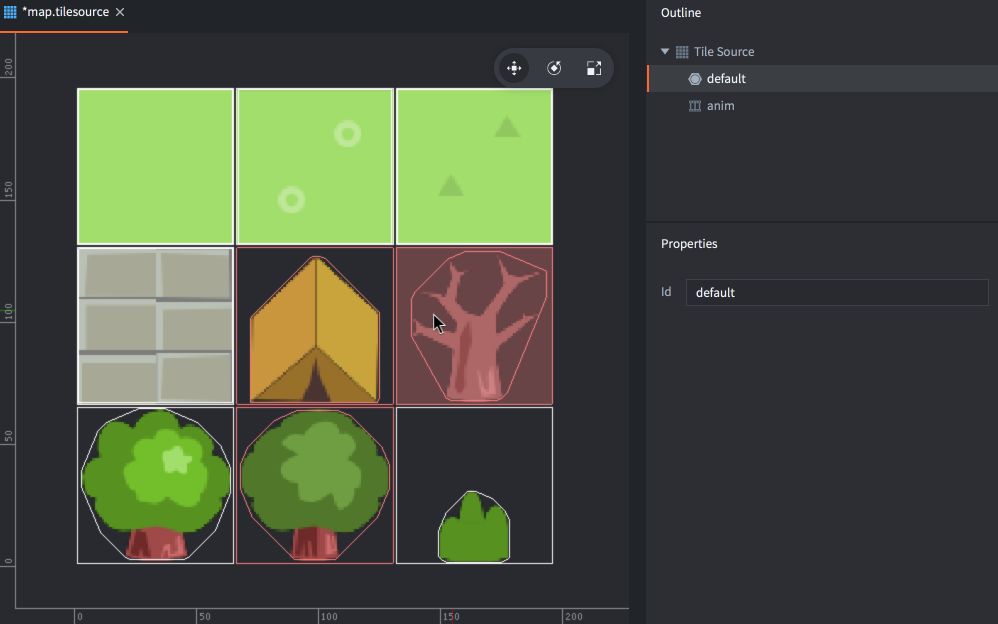
To remove a tile from its collision group, select the tile source root element in the *Outline*, then click the tile.
# Texture filtering and sampling {#manuals:texture-filtering}
Texture filtering decides the visual result in cases when a _texel_ (a pixel in a texture) is not perfectly aligned with a screen pixel. This happens when you move a graphical element that contains the texture less than a pixel. The following filter methods are available:
Nearest
: The nearest texel will be picked to color the screen pixel. This sampling method should be chosen if you want a perfect one-to-one pixel mapping from your textures to what you see on screen. With nearest filtering everything will snap from pixel to pixel when moving. This may look twitchy if the Sprite moves slowly.
Linear
: The texel will be averaged with its neighbors before coloring the screen pixel. This produces smooth appearances for slow, continuous motions as a Sprite will bleed into the pixels before fully coloring them--thus it is possible to move a Sprite less than a whole pixel.
The setting for which filtering to use is stored in the [Project Settings](#manuals:project-settings) file. There are two settings:
default_texture_min_filter
: Minifying filtering applies whenever the texel is smaller than the screen pixel.
default_texture_mag_filter
: Magnifying filtering applies whenever the texel is larger than the screen pixel.
Both settings accept the values `linear`, `nearest`, `nearest_mipmap_nearest`, `nearest_mipmap_linear`, `linear_mipmap_nearest` or `linear_mipmap_linear`. For example:
```ini
[graphics]
default_texture_min_filter = nearest
default_texture_mag_filter = nearest
```
If you don’t specify anything, both are set to `linear` by default.
Note that the setting in *game.project* is used by in the default samplers. If you specify samplers in a custom material, you can set the filter method on each sampler specifically. See the [Materials manual](#manuals:material) for details.
# Texture profiles {#manuals:texture-profiles}
Defold supports automatic texture processing and compression of image data (in *Atlas*, *Tile sources*, *Cubemaps* and stand-alone textures used for models, GUI etc).
There are two types of compression, software image compression and hardware texture compression.
1. Software compression (such as PNG and JPEG) reduces the storage size of image resources. This makes the the final bundle size smaller. However, the image files need to be uncompressed when read into memory so even though an image is small on disk, it can have a large memory footprint.
2. Hardware texture compression also reduces the storage size of image resources. But, unlike software compression, it reduces the in-memory footprint for textures. This is because the graphics hardware is able to directly manage compressed textures without first having to uncompress them.
The processing of textures is configured through a specific texture profile. In this file you create _profiles_ that express what compressed format(s) and type should be used when creating bundles for a specific platform. _Profiles_ are then tied to matching file _paths patterns_, allowing fine tuned control over what files in your project should be compressed and exactly how.
Since all available hardware texture compression is lossy, you will get artifacts in your texture data. These artifacts are highly dependent on how your source material looks and what compression method is used. You should test your source material and experiment to get the best results. Google is your friend here.
You can select what software image compression is applied on the final texture data (compressed or raw) in the bundle archives. Defold supports [Basis Universal](https://github.com/BinomialLLC/basis_universal) and [ASTC](https://www.khronos.org/opengl/wiki/ASTC_Texture_Compression) compression formats.
Compression is a resource intensive and time consuming operation that can cause _very_ long build times depending on the number of texture images to compress and also the chosen texture formats and type of software compression.
### Basis Universal
Basis Universal (or BasisU for short) compresses the image into a intermediary format that is transcoded at runtime to a hardware format appropriate for the current device's GPU. The Basis Universal format is a high quality but lossy format.
All images are also compressed using LZ4 for further reduction of file size when stored in the game archive.
### ASTC
ASTC is a flexible and efficient texture compression format developed by ARM and standardized by the Khronos Group. It offers a wide range of block sizes and bit rates, allowing developers to balance image quality and memory usage effectively. ASTC supports various block sizes, from 4×4 to 12×12 texels, corresponding to bit rates ranging from 8 bits per texel down to 0.89 bits per texel. This flexibility enables fine-grained control over the trade-off between texture quality and storage requirements.
ASTC supports various block sizes, from 4×4 to 12×12 texels, corresponding to bit rates ranging from 8 bits per texel down to 0.89 bits per texel. This flexibility enables fine-grained control over the trade-off between texture quality and storage requirements. The following table shows the supported block sizes and their corresponding bit rates:
| Block Size (width x height) | Bits per pixel |
| --------------------------- | -------------- |
| 4x4 | 8.00 |
| 5x4 | 6.40 |
| 5x5 | 5.12 |
| 6x5 | 4.27 |
| 6x6 | 3.56 |
| 8x5 | 3.20 |
| 8x6 | 2.67 |
| 10x5 | 2.56 |
| 10x6 | 2.13 |
| 8x8 | 2.00 |
| 10x8 | 1.60 |
| 10x10 | 1.28 |
| 12x10 | 1.07 |
| 12x12 | 0.89 |
#### Supported devices
While ASTC provides great results, it is not supported by all graphics cards. Here is a small list of supported devices based on vendor:
| GPU vendor | Support |
| ------------------ | --------------------------------------------------------------------- |
| ARM (Mali) | All ARM Mali GPUs that support OpenGL ES 3.2 or Vulkan support ASTC. |
| Qualcomm (Adreno) | Adreno GPUs supporting OpenGL ES 3.2 or Vulkan support ASTC. |
| Apple | Apple GPUs since the A8 chip support ASTC. |
| NVIDIA | ASTC support is mostly for mobile GPUs (e.g., Tegra-based chips). |
| AMD (Radeon) | AMD GPUs that support Vulkan generally support ASTC via software. |
| Intel (Integrated) | ASTC is supported in modern Intel GPUs via software. |
## Texture profiles
Each project contains a specific *.texture_profiles* file that contains the configuration used when compressing textures. By default, this file is *builtins/graphics/default.texture_profiles* and it has a configuration matching every texture resource to a profile using RGBA with no hardware texture compression and using the default ZLib file compression.
To add texture compression:
- Select File ▸ New... and choose *Texture Profiles* to create a new texture profiles file. (Alternatively copy *default.texture_profiles* to a location outside of *builtins*)
- Choose a name and location for the new file.
- Change the *texture_profiles* entry in *game.project* to point to the new file.
- Open the *.texture_profiles* file and configure it according to your requirements.
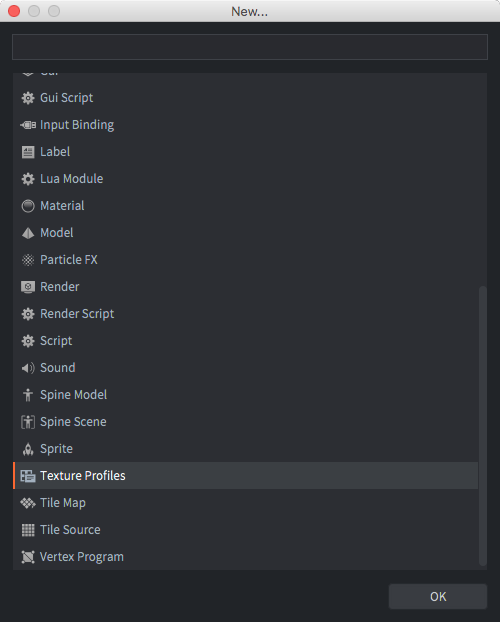
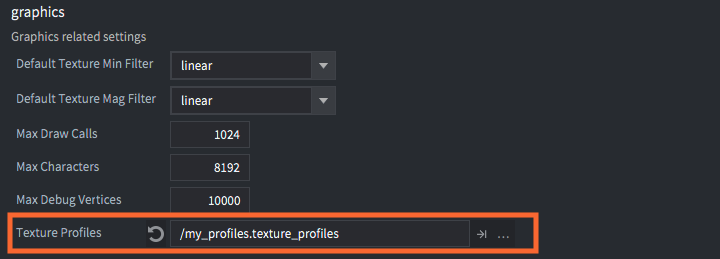
You can turn on and off the use of texture profiles in the editor preferences. Select File ▸ Preferences.... The *General* tab contains a checkbox item *Enable texture profiles*.
## Path Settings
The *Path Settings* section of the texture profiles file contains a list of path patterns and which *profile* to use when processing resources that match the path. The paths are expressed as "Ant Glob" patterns (see [documentation](http://ant.apache.org/manual/dirtasks.html#patterns) for details). Patterns can be expressed using the following wildcards:
`*`
: Matches zero or more characters. For instance `sprite*.png` matches the files *`sprite.png`*, *`sprite1.png`* and *`sprite_with_a_long_name.png`*.
`?`
: Matches exactly one character. For instance: `sprite?.png` matches the files *sprite1.png*, *`spriteA.png`* but not *`sprite.png`* or *`sprite_with_a_long_name.png`*.
`**`
: Matches a complete directory tree, or---when used as the name of a directory---zero or more directories. For instance: `/gui/**` matches all files in the directory */gui* and all its subdirectories.

This example contains two path patterns and their corresponding profiles.
`/gui/**/*.atlas`
: All *.atlas* files in directory *`/gui`* or any of its subdirectories will be processed according to profile "gui_atlas".
`/**/*.atlas`
: All *.atlas* files anywhere in the project will be process according to the profile "atlas".
Note that the more generic path is put last. The matching algorithm works top down. The first occurrence that matches the resource path will be used. A matching path expression further down the list never overrides the first match. Had the paths been put in the opposite order every atlas would have been processed with profile "atlas", even the ones in directory *`/gui`*.
Texture resources that _do not_ match any path in the profiles file will be compiled and scaled to the closest power of 2, but will otherwise be left intact.
## Profiles
The *profiles* section of the texture profiles file contains a list of named profiles. Each profile contains one or more *platforms*, each platform being described by a list of properties.

*Platforms*
: Specifies a matching platform. `OS_ID_GENERIC` matches all platforms, `OS_ID_WINDOWS` matches Windows target bundles, `OS_ID_IOS` matches iOS bundles and so on. Note that if `OS_ID_GENERIC` is specified, it will be included for all platforms.
If two [path settings](#path-settings) matches the same file and the path uses different profiles with different platforms **both** profiles will be used and **two** texture will be generated.
*Formats*
: One or more texture formats to generate. If several formats are specified, textures for each format are generated and included in the bundle. The engine selects textures of a format that is supported by the runtime platform.
*Mipmaps*
: If checked, mipmaps are generated for the platform. Unchecked by default.
*Premultiply alpha*
: If checked, alpha is premultiplied into the texture data. Checked by default.
*Max Texture Size*
: If set to a non-zero value, textures are limited in pixel size to the specified number. Any texture that has a width or height larger than the specified value will be scaled down.
The *Formats* added to a profile each have the following properties:
*Format*
: The format to use when encoding the texture. See below for all available texture formats.
*Compressor*
: The compressor to use when encoding the texture.
*Compressor Preset*
: Selects a compression preset to use for encoding the resulting compressed image. Each compressor preset is unique to the compressor and its settings depend on the compressor itself. To simplify these settings, the current compression presets come in four levels:
| Preset | Note |
| --------- | --------------------------------------------- |
| `LOW` | Fastest compression. Low image quality |
| `MEDIUM` | Default compression. Best image quality |
| `HIGH` | Slowest compression. Smaller file size |
| `HIGHEST` | Slow compression. Smallest file size |
Note that the `uncompressed` compressor only has one preset called `uncompressed`, which means no compression will be applied to the textures.
To see the list of available compressors, see [Compressors](#compressors)
## Texture formats
Graphics hardware textures can be processed into uncompressed or *lossy* compressed data with various numbers of channels and bit depths. Hardware compression that is fixed means that the resulting image will be of a fixed size, regardless of the image content. This means that the quality loss during compression depends on the content of the original texture.
Since Basis Universal compression transcoding is dependent on the device's GPU capabilities, the recommended formats for use with the Basis Universal compression is the generic formats like:
`TEXTURE_FORMAT_RGB`, `TEXTURE_FORMAT_RGBA`, `TEXTURE_FORMAT_RGB_16BPP`, `TEXTURE_FORMAT_RGBA_16BPP`, `TEXTURE_FORMAT_LUMINANCE` and `TEXTURE_FORMAT_LUMINANCE_ALPHA`.
The Basis Universal transcoder supports many output formats, like `ASTC4x4`, `BCx`, `ETC2`, `ETC1` and `PVRTC1`.
The following lossy compression formats are currently supported:
| Format | Compression | Details |
| --------------------------------- | ----------- | -------------------------------- | ---- |
| `TEXTURE_FORMAT_RGB` | none | 3 channel color. Alpha is discarded |
| `TEXTURE_FORMAT_RGBA` | none | 3 channel color and full alpha. |
| `TEXTURE_FORMAT_RGB_16BPP` | none | 3 channel color. 5+6+5 bits. |
| `TEXTURE_FORMAT_RGBA_16BPP` | none | 3 channel color and full alpha. 4+4+4+4 bits. |
| `TEXTURE_FORMAT_LUMINANCE` | none | 1 channel gray-scale, no alpha. RGB channels multiplied into one. Alpha is discarded. |
| `TEXTURE_FORMAT_LUMINANCE_ALPHA` | none | 1 channel gray-scale and full alpha. RGB channels multiplied into one. |
For ASTC, the number of channels will always be 4 (RGB + alpha), and the format itself defines the size of the block compression.
Note that these formats are only compatible with an ASTC compressor - any other combination will produce a build error.
`TEXTURE_FORMAT_RGBA_ASTC_4X4`
`TEXTURE_FORMAT_RGBA_ASTC_5X4`
`TEXTURE_FORMAT_RGBA_ASTC_5X5`
`TEXTURE_FORMAT_RGBA_ASTC_6X5`
`TEXTURE_FORMAT_RGBA_ASTC_6X6`
`TEXTURE_FORMAT_RGBA_ASTC_8X5`
`TEXTURE_FORMAT_RGBA_ASTC_8X6`
`TEXTURE_FORMAT_RGBA_ASTC_8X8`
`TEXTURE_FORMAT_RGBA_ASTC_10X5`
`TEXTURE_FORMAT_RGBA_ASTC_10X6`
`TEXTURE_FORMAT_RGBA_ASTC_10X8`
`TEXTURE_FORMAT_RGBA_ASTC_10X10`
`TEXTURE_FORMAT_RGBA_ASTC_12X10`
`TEXTURE_FORMAT_RGBA_ASTC_12X12`
## Compressors
The following texture compressors are supported by default. The data is uncompressed when the texture file is loaded into memory.
| Name | Formats | Note |
| --------------------------------- | ------------------------- | --------------------------------------------------------------------------------------------- |
| `Uncompressed` | All formats | No compression will be applied. Default. |
| `BasisU` | All RGB/RGBA formats | Basis Universal high quality, lossy compression. Lower quality level results in smaller size. |
| `ASTC` | All ASTC formats | ASTC lossy compression. Lower quality level results in smaller size. |
Defold 1.9.7 refactored the texture compressor pipeline to support installable compressors, which is the first step in
enabling implementing a texture compression algorithm in an extension (such as WEBP, or something completely custom).
## Example image
To better give an understanding of the output, here is an example.
Note that the image quality, compression time and compression size are always dependent on the input image and may vary.
Base image (1024x512):
### Compression times
| Preset | Compression time | Relative time |
| ----------------------------- | --------------- |
| `LOW` | 0m0.143s | 0.5x |
| `MEDIUM` | 0m0.294s | 1.0x |
| `HIGH` | 0m1.764s | 6.0x |
| `HIGHEST` | 0m1.109s | 3.8x |
### Signal loss
The comparison is done using the `basisu` tool (measuring the PSNR)
100 dB means no signal loss (i.e. it's the same as the original image).
| Preset | Signal |
| ------------------------------------------------------------ |
| `LOW` | Max: 34 Mean: 0.470 RMS: 1.088 PSNR: 47.399 dB |
| `MEDIUM` | Max: 35 Mean: 0.439 RMS: 1.061 PSNR: 47.620 dB |
| `HIGH` | Max: 37 Mean: 0.898 RMS: 1.606 PSNR: 44.018 dB |
| `HIGHEST` | Max: 51 Mean: 1.298 RMS: 2.478 PSNR: 40.249 dB |
### Compression file sizes
Original file size is 1572882 bytes.
| Preset | File Sizes | Ratio |
| ---------------------------------- |
| `LOW` | 357225 | 22.71 % |
| `MEDIUM` | 365548 | 23.24 % |
| `HIGH` | 277186 | 17.62 % |
| `HIGHEST` | 254380 | 16.17 % |
### Image quality
Here are the resulting images (retrieved from the ASTC encoding using the `basisu` tool)
`LOW`
`MEDIUM`
`HIGH`
`HIGHEST`
# Animation {#manuals:animation}
Defold has built-in support for many types of animation that you can use as a source of graphics for components:
* [Flip-book animation](#manuals:flipbook-animation) - Playing a series of still images in succession
* [Model animation](#manuals:model-animation) - Playing 3D skinned animations
* [Property animation](#manuals:property-animation) - Animate properties such as position, scale, rotation and many others
Additional animation formats can be added through extensions:
* [Rive animation](/extension-rive) - Playing vector based 2D skeletal animations
* [Spine animation](/extension-spine) - Playing textured 2D skeletal animations
# Flip-book animation {#manuals:flipbook-animation}
A flipbook animation consists of a series of still images that are shown in succession. The technique is very similar to traditional cell animation (see http://en.wikipedia.org/wiki/Traditional_animation). The technique offers limitless opportunities since each frame can be manipulated individually. However, since each frame is stored in a unique image, the memory footprint can be high. The smoothness of animation is also dependent on the number of images shown each second but increasing the number of images usually also increase the amount of work. Defold flipbook animations are either stored as individual images added to an [Atlas](#manuals:atlas), or as a [Tile Source](#manuals:tilesource) with all frames laid out in a horizontal sequence.
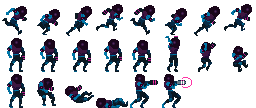

## Playing flip-book animations
Sprites and GUI box nodes can play flip-book animations and you have great control over them at runtime.
Sprites
: To run an animation during runtime you use the [`sprite.play_flipbook()`](https://defold.com/ref/sprite/?q=play_flipbook#sprite.play_flipbook:url-id-[complete_function]-[play_properties]) function. See below for an example.
GUI box nodes
: To run an animation during runtime you use the [`gui.play_flipbook()`](https://defold.com/ref/gui/?q=play_flipbook#gui.play_flipbook:node-animation-[complete_function]-[play_properties]) function. See below for an example.
The playback mode once ping-pong will play the animation until the last frame and then reverse the order and play back until the **second** frame of the animation, not back to the first frame. This is done so that chaining of animations becomes easier.
### Sprite example
Suppose that your game has a "dodge" feature that allows the player to press a specific button to dodge. You have created four animations to support the feature with visual feedback:
"idle"
: A looping animation of the player character idling.
"dodge_idle"
: A looping animation of the player character idling while being in the dodging stance.
"start_dodge"
: A play-once transition animation taking the player character from standing to dodging.
"stop_dodge"
: A play-once transition animation taking the player character from dodging back to standing.
The following script provides the logic:
```lua
local function play_idle_animation(self)
if self.dodge then
sprite.play_flipbook("#sprite", hash("dodge_idle"))
else
sprite.play_flipbook("#sprite", hash("idle"))
end
end
function on_input(self, action_id, action)
-- "dodge" is our input action
if action_id == hash("dodge") then
if action.pressed then
sprite.play_flipbook("#sprite", hash("start_dodge"), play_idle_animation)
-- remember that we are dodging
self.dodge = true
elseif action.released then
sprite.play_flipbook("#sprite", hash("stop_dodge"), play_idle_animation)
-- we are not dodging anymore
self.dodge = false
end
end
end
```
### GUI box node example
When selecting an animation or image for a node, you are in fact assigning the image source (atlas or tile source) and default animation in one go. The image source is statically set in the node, but the current animation to play can be changed in runtime. Still images are treated as one frame animations so changing an image means in run time is equivalent to playing a different flipbook animation for the node:
```lua
function init(self)
local character_node = gui.get_node("character")
-- This requires that the node has a default animation in the same atlas or tile source as
-- the new animation/image we're playing.
gui.play_flipbook(character_node, "jump_left")
end
```
## Completion callbacks
The `sprite.play_flipbook()` and `gui.play_flipbook()` functions support an optional Lua callback function as the last argument. This function will be called when the animation has played to the end. The function is never called for looping animations. The callback can be used to trigger events on animation completion or to chain multiple animations together. Examples:
```lua
local function flipbook_done(self)
msg.post("#", "jump_completed")
end
function init(self)
sprite.play_flipbook("#character", "jump_left", flipbook_done)
end
```
```lua
local function flipbook_done(self)
msg.post("#", "jump_completed")
end
function init(self)
gui.play_flipbook(gui.get_node("character"), "jump_left", flipbook_done)
end
```
# 3D skinned animation {#manuals:model-animation}
Skeletal animation of 3D models use the bones of the model to apply deformation to vertices in the model.
For details on how to import 3D data into a Model for animation, see the [Model documentation](#manuals:model).
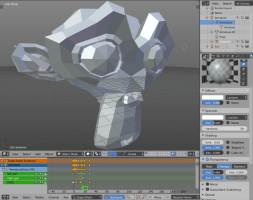
## Playing animations
Models are animated with the [`model.play_anim()`](https://defold.com/ref/model#model.play_anim) function:
```lua
function init(self)
-- Start the "wiggle" animation back and forth on #model
model.play_anim("#model", "wiggle", go.PLAYBACK_LOOP_PINGPONG)
end
```
Defold currently supports only baked animations. Animations need to have matrices for each animated bone each keyframe, and not position, rotation and scale as separate keys.
Animations are also linearly interpolated. If you do more advanced curve interpolation the animations needs to be prebaked from the exporter.
Animation clips in Collada are not supported. To use multiple animations per model, export them into separate *.dae* files and gather the files into an *.animationset* file in Defold.
### The bone hierarchy
The bones in the Model skeleton are represented internally as game objects.
You can retrieve the instance id of the bone game object in runtime. The function [`model.get_go()`](https://defold.com/ref/model#model.get_go) returns the id of the game object for the specified bone.
```lua
-- Get the middle bone go of our wiggler model
local bone_go = model.get_go("#wiggler", "Bone_002")
-- Now do something useful with the game object...
```
### Cursor animation
In addition to using the `model.play_anim()` to advance a model animation, *Model* components expose a "cursor" property that can be manipulated with `go.animate()` (more about [property animations](#manuals:property-animation)):
```lua
-- Set the animation on #model but don't start it
model.play_anim("#model", "wiggle", go.PLAYBACK_NONE)
-- Set the cursor to the beginning of the animation
go.set("#model", "cursor", 0)
-- Tween the cursor between 0 and 1 pingpong with in-out quad easing.
go.animate("#model", "cursor", go.PLAYBACK_LOOP_PINGPONG, 1, go.EASING_INOUTQUAD, 3)
```
## Completion callbacks
The model animation `model.play_anim()`) support an optional Lua callback function as the last argument. This function will be called when the animation has played to the end. The function is never called for looping animations, nor when an animation is manually canceled via `go.cancel_animations()`. The callback can be used to trigger events on animation completion or to chain multiple animations together.
```lua
local function wiggle_done(self, message_id, message, sender)
-- Done animating
end
function init(self)
model.play_anim("#model", "wiggle", go.PLAYBACK_ONCE_FORWARD, nil, wiggle_done)
end
```
## Playback Modes
Animations can be played either once or in a loop. How the animation plays is determined by the playback mode:
* `go.PLAYBACK_NONE`
* `go.PLAYBACK_ONCE_FORWARD`
* `go.PLAYBACK_ONCE_BACKWARD`
* `go.PLAYBACK_ONCE_PINGPONG`
* `go.PLAYBACK_LOOP_FORWARD`
* `go.PLAYBACK_LOOP_BACKWARD`
* `go.PLAYBACK_LOOP_PINGPONG`
# Property animation {#manuals:property-animation}
All numeric properties (numbers, vector3, vector4 and quaternions) and shader constants can be animated with the built-in animation system, using the function `go.animate()`. The engine will automatically "tween" properties for you according to given playback modes and easing functions. You can also specify custom easing functions.
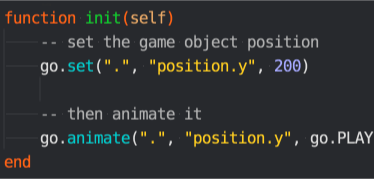

## Property animation
To animate a game object or component property, use the function `go.animate()`. For GUI node properties, the corresponding function is `gui.animate()`.
```lua
-- Set the position property y component to 200
go.set(".", "position.y", 200)
-- Then animate it
go.animate(".", "position.y", go.PLAYBACK_LOOP_PINGPONG, 100, go.EASING_OUTBOUNCE, 2)
```
To stop all animations of a given property, call `go.cancel_animations()`, or for GUI nodes, `gui.cancel_animation()`:
```lua
-- Stop euler z rotation animation on the current game object
go.cancel_animations(".", "euler.z")
```
If you cancel the animation of a composite property, like `position`, any animations of the sub-components (`position.x`, `position.y` and `position.z`) will be cancelled as well.
The [Properties Manual](#manuals:properties) contains all the available properties on game objects, components and GUI nodes.
## GUI node property animation
Almost all GUI node properties are possible to animate. You can, for instance, make a node invisible by setting its `color` property to full transparency and then fade it into view by animating the color to white (i.e. no tint color).
```lua
local node = gui.get_node("button")
local color = gui.get_color(node)
-- Animate the color to white
gui.animate(node, gui.PROP_COLOR, vmath.vector4(1, 1, 1, 1), gui.EASING_INOUTQUAD, 0.5)
-- Animate the outline red color component
gui.animate(node, "outline.x", 1, gui.EASING_INOUTQUAD, 0.5)
-- And move to x position 100
gui.animate(node, hash("position.x"), 100, gui.EASING_INOUTQUAD, 0.5)
```
## Completion callbacks
The property animation functions `go.animate()` and `gui.animate()` support an optional Lua callback function as the last argument. This function will be called when the animation has played to the end. The function is never called for looping animations, nor when an animation is manually canceled via `go.cancel_animations()` or `gui.cancel_animation()`. The callback can be used to trigger events on animation completion or to chain multiple animations together.
## Easing
Easing defines how the animated value changes over time. The images below describe the functions applied over time to create the easing.
The following are valid easing values for `go.animate()`:
|---|---|
| `go.EASING_LINEAR` | |
| `go.EASING_INBACK` | `go.EASING_OUTBACK` |
| `go.EASING_INOUTBACK` | `go.EASING_OUTINBACK` |
| `go.EASING_INBOUNCE` | `go.EASING_OUTBOUNCE` |
| `go.EASING_INOUTBOUNCE` | `go.EASING_OUTINBOUNCE` |
| `go.EASING_INELASTIC` | `go.EASING_OUTELASTIC` |
| `go.EASING_INOUTELASTIC` | `go.EASING_OUTINELASTIC` |
| `go.EASING_INSINE` | `go.EASING_OUTSINE` |
| `go.EASING_INOUTSINE` | `go.EASING_OUTINSINE` |
| `go.EASING_INEXPO` | `go.EASING_OUTEXPO` |
| `go.EASING_INOUTEXPO` | `go.EASING_OUTINEXPO` |
| `go.EASING_INCIRC` | `go.EASING_OUTCIRC` |
| `go.EASING_INOUTCIRC` | `go.EASING_OUTINCIRC` |
| `go.EASING_INQUAD` | `go.EASING_OUTQUAD` |
| `go.EASING_INOUTQUAD` | `go.EASING_OUTINQUAD` |
| `go.EASING_INCUBIC` | `go.EASING_OUTCUBIC` |
| `go.EASING_INOUTCUBIC` | `go.EASING_OUTINCUBIC` |
| `go.EASING_INQUART` | `go.EASING_OUTQUART` |
| `go.EASING_INOUTQUART` | `go.EASING_OUTINQUART` |
| `go.EASING_INQUINT` | `go.EASING_OUTQUINT` |
| `go.EASING_INOUTQUINT` | `go.EASING_OUTINQUINT` |
The following are valid easing values for `gui.animate()`:
|---|---|
| `gui.EASING_LINEAR` | |
| `gui.EASING_INBACK` | `gui.EASING_OUTBACK` |
| `gui.EASING_INOUTBACK` | `gui.EASING_OUTINBACK` |
| `gui.EASING_INBOUNCE` | `gui.EASING_OUTBOUNCE` |
| `gui.EASING_INOUTBOUNCE` | `gui.EASING_OUTINBOUNCE` |
| `gui.EASING_INELASTIC` | `gui.EASING_OUTELASTIC` |
| `gui.EASING_INOUTELASTIC` | `gui.EASING_OUTINELASTIC` |
| `gui.EASING_INSINE` | `gui.EASING_OUTSINE` |
| `gui.EASING_INOUTSINE` | `gui.EASING_OUTINSINE` |
| `gui.EASING_INEXPO` | `gui.EASING_OUTEXPO` |
| `gui.EASING_INOUTEXPO` | `gui.EASING_OUTINEXPO` |
| `gui.EASING_INCIRC` | `gui.EASING_OUTCIRC` |
| `gui.EASING_INOUTCIRC` | `gui.EASING_OUTINCIRC` |
| `gui.EASING_INQUAD` | `gui.EASING_OUTQUAD` |
| `gui.EASING_INOUTQUAD` | `gui.EASING_OUTINQUAD` |
| `gui.EASING_INCUBIC` | `gui.EASING_OUTCUBIC` |
| `gui.EASING_INOUTCUBIC` | `gui.EASING_OUTINCUBIC` |
| `gui.EASING_INQUART` | `gui.EASING_OUTQUART` |
| `gui.EASING_INOUTQUART` | `gui.EASING_OUTINQUART` |
| `gui.EASING_INQUINT` | `gui.EASING_OUTQUINT` |
| `gui.EASING_INOUTQUINT` | `gui.EASING_OUTINQUINT` |
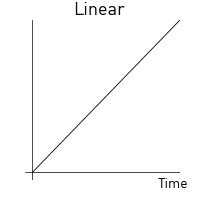
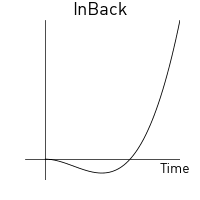
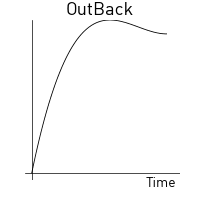
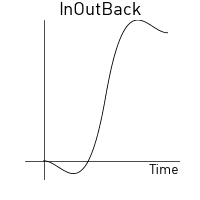
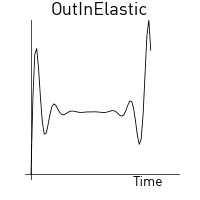
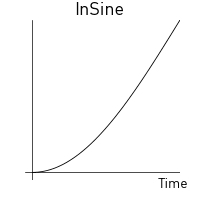
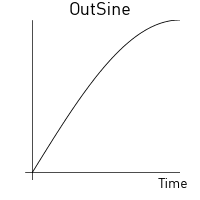
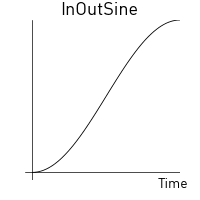
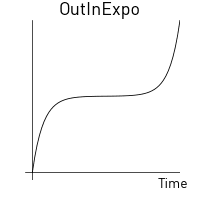
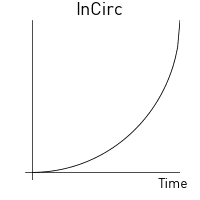
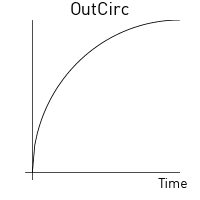
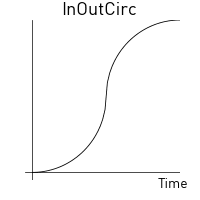
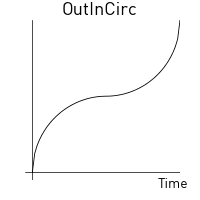
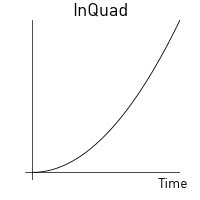
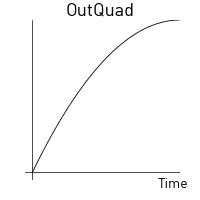
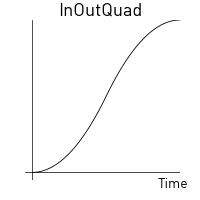
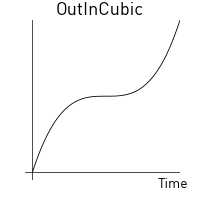
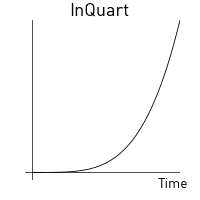
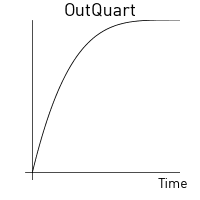
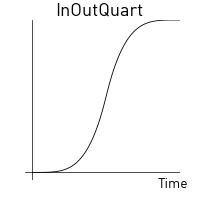
## Custom easing
You can create custom easing curves by defining a `vector` with a set of values and then provide the vector instead of one of the predefined easing constants above. The vector values express a curve from the start value (`0`) to the target value (`1`). The runtime samples values from the vector and linearly interpolates when calculating values in between the points expressed in the vector.
For example, the vector:
```lua
local values = { 0, 0.4, 0.2, 0.2, 0.5, 1 }
local my_easing = vmath.vector(values)
```
yields the following curve:
The following example causes the y position of a game object to jump between the current position and 200 according to a square curve:
```lua
local values = { 0, 0, 0, 0, 0, 0, 0, 0,
1, 1, 1, 1, 1, 1, 1, 1,
0, 0, 0, 0, 0, 0, 0, 0,
1, 1, 1, 1, 1, 1, 1, 1,
0, 0, 0, 0, 0, 0, 0, 0,
1, 1, 1, 1, 1, 1, 1, 1,
0, 0, 0, 0, 0, 0, 0, 0,
1, 1, 1, 1, 1, 1, 1, 1 }
local square_easing = vmath.vector(values)
go.animate("go", "position.y", go.PLAYBACK_LOOP_PINGPONG, 200, square_easing, 2.0)
```
# Components {#manuals:components}
Components are used to give specific expression and/or functionality to game objects. Components have to be contained inside game objects and are affected by the position, rotation and scale of the game object that contains the component:

Many components have type specific properties that can be manipulated and there are component type specific functions available for interacting with them in runtime:
```lua
-- disable the can "body" sprite
msg.post("can#body", "disable")
-- play "hoohoo" sound on "bean" in 1 second
sound.play("bean#hoohoo", { delay = 1, gain = 0.5 } )
```
Components are either added in-place in a game object, or added to a game object as a reference to a component file:
Right-click the game object in the *Outline* view and select Add Component (add in-place) or Add Component File (add as file reference).
In most cases it makes most sense to create components in-place, but the following component types must be created in separate resource files before being added by reference to a game object:
* Script
* GUI
* Particle FX
* Tile Map
## Component types
Defold supports the following component types:
* [Collection factory](#manuals:collection-factory) - Spawn collections
* [Collection proxy](#manuals:collection-proxy) - Load and unload collections
* [Collision object](#manuals:physics) - 2D and 3D physics
* [Camera](#manuals:camera) - Change the viewport and projection of the game world
* [Factory](#manuals:factory) - Spawn game objects
* [GUI](#manuals:gui) - Render a graphical user interface
* [Label](#manuals:label) - Render a piece of text
* [Mesh](#manuals:mesh) Show a 3D mesh (with run-time creation and manipulation)
* [Model](#manuals:model) Show a 3D model (with optional animations)
* [Particle FX](#manuals:particlefx) - Spawn particles
* [Script](#manuals:script) - Add game logic
* [Sound](#manuals:sound) - Play sound or music
* [Sprite](#manuals:sprite) - Show a 2D image (with optional flipbook animation)
* [Tilemap](#manuals:tilemap) - Show a grid of tiles
Additional components can be added through extensions:
* [Rive model](/extension-rive) - Render a Rive animation
* [Spine model](/extension-spine) - Render a Spine animation
## Enabling and disabling components
The components of a game object are enabled when the game object is created. If you wish to disable a component this is done by sending a [`disable`](https://defold.com/ref/go/#disable) message to the component:
```lua
-- disable the component with id 'weapon' on the same game object as this script
msg.post("#weapon", "disable")
-- disable the component with id 'shield' on the 'enemy' game object
msg.post("enemy#shield", "disable")
-- disable all components on the current game object
msg.post(".", "disable")
-- disable all components on the 'enemy' game object
msg.post("enemy", "disable")
```
To enable a component again you can post an [`enable`](https://defold.com/ref/go/#enable) message to the component:
```lua
-- enable the component with id 'weapon'
msg.post("#weapon", "enable")
```
## Component properties
The Defold components types all have different properties. The [Properties pane](#manuals:editor) in the editor will show the properties of the currently selected component in the [Outline pane](#manuals:editor). Refer to the manuals of the different component types to learn more about the available component properties.
## Component position, rotation and scale
Visual components usually have a position and rotation property and most often also a scale property. These properties can be changed from the editor and in almost all cases the properties can't be changed at run-time (the only exception is sprite and label component scale which can be changed at run-time).
If you need to change the position, rotation or scale of a component at run-time you instead modify the position, rotation or scale of the game object that the component belongs to. This has the side effect that all components on the game object will be affected. If you wish to only manipulate a single component out of many attached to a game object it is recommended that the component in question is moved to a separate game object and added as a child game object to the game object the component originally belonged to.
## Component draw order
The draw order of visual components depend on two things:
### Render script predicates
Each component is assigned a [material](#manuals:material) and each material has one or more tags. The render script will in turn define a number of predicates, each matching one or more material tags. The render script [predicates are drawn one by one](#manuals:render) in the *update()* function of the render script and the components matching the tags defined in each predicate will be drawn. The default render script will first draw sprites and tilemaps in one pass, then particle effects in another pass, both in world space. The render script will then proceed to draw GUI components in a separate pass in screen space.
### Component z-value
All game objects and components are positioned in 3D space with positions expressed as vector3 objects. When you view your game's graphics content in 2D, the X and Y value determine the position of an object along the "width" and "height" axis, and the Z position determines the position along the "depth" axis. The Z position allows you to control the visibility of overlapping objects: a sprite with a Z value of 1 will appear in front of a sprite at Z position 0. By default, Defold uses a coordinate system allowing Z values between -1 and 1:
The components matching a [render predicate](#manuals:render) are drawn together, and the order in which they are drawn depends on the final z-value of the component. The final z-value of a component is the sum of the z-values of the component itself, the game object it belongs to and the z-value of any parent game objects.
The order in which multiple GUI components are drawn is **not** determined by the z-value of the GUI components. GUI component draw order is controlled by the [gui.set_render_order()](https://defold.com/ref/gui/#gui.set_render_order:order) function.
Example: Two game objects A and B. B is a child of A. B has a sprite component.
| What | Z-value |
|----------|---------|
| A | 2 |
| B | 1 |
| B#sprite | 0.5 |
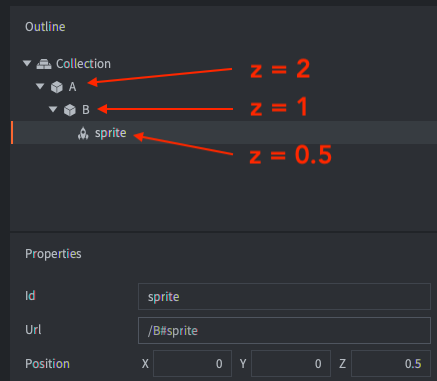
With the above hierarchy the final z-value of the sprite component on B is 2 + 1 + 0.5 = 3.5.
If two components have the exact same z-value the order is undefined and you may end up with components flickering back and forth or components being rendered in one order on one platform and in another order on another platform.
The render script defines a near and far plane for z-values. Any component with a z-value that falls outside of this range will not be rendered. The default range is -1 to 1 but [it can easily be changed](#manuals:render). The numerical precision on the Z values with a near and far limit of -1 and 1 is very high. When working with 3D assets, you may need to change the near and far limits of the default projection in a custom render script. See the [Render manual](#manuals:render) for more information.
## Component max count optimizations
The *game.project* settings file contains many values specifying the maximum number of a certain resource that can exist at the same time, often counted per loaded collection (also called world). The Defold engine will use these max values to preallocate memory for this amount of memory to avoid dynamic allocations and memory fragmentation while the game is running.
The Defold data structures used to represent components and other resources are optimized to use as little memory as possible but care should still be taken when setting the values to avoid allocating more memory than is actually necessary.
To further optimize memory usage the Defold build process will analyse the content of the game and override the max counts if it is possible to know for certain the exact amount:
* If a collection doesn't contain any factory components the exact amount of each component and Game Object will be allocated and the max count values will be ignored.
* If a collection contains a factory component the spawned objects will be analysed and the max count will be used for components that can be spawned from the factories and for Game Objects.
* If a collection contains a factory or a collection factory with activated "Dynamic Prototype" option, this collection will use the max counters.
# Collection factories {#manuals:collection-factory}
The collection factory component is used to spawn groups and hierarchies of game objects stored in collection files into a running game.
Collections provide a powerful mechanism to create reusable templates, or "prefabs" in Defold. For an overview on Collections, see the [Building blocks documentation](#manuals:building-blocks#collections). Collections can be placed in the editor, or they can be dynamically inserted into your game.
With a collection factory component you can spawn the contents of a collection file into a game world. This is analogous to performing factory spawning of all game objects inside the collection and then building the parent-child hierarchy between the objects. A typical use case is to spawn enemies consisting of multiple game objects (enemy + weapon, for instance).
## Spawning a collection
Suppose we want a character game object and a separate shield game object childed to the character. We build the game object hierarchy in a collection file and save it as "bean.collection".
The *collection proxy* component is used to create a new game world, including a separate physics world, based on a collection. The new world is accessed through a new socket. All assets contained in the collection are loaded through the proxy when you message the proxy to start loading. This makes them very useful to, for instance, change levels in a game. New game worlds come with quite a lot of overhead though so do not use them for dynamic loading of small stuff. For more information, see the [Collection proxy documentation](#manuals:collection-proxy).

We then add a *Collection factory* to a gameobject that will take care of the spawning and set "bean.collection" as the component's *Prototype*:
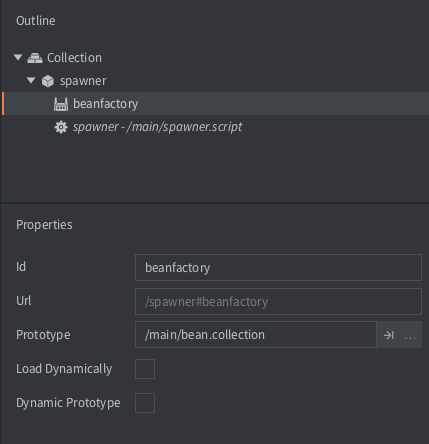
Spawning a bean and shield is now just a matter of calling the `collectionfactory.create()` function:
```lua
local bean_ids = collectionfactory.create("#bean_factory")
```
The function takes 5 parameters:
`url`
: The id of the collection factory component that should spawn the new set of game objects.
`[position]`
: (optional) The world position of the spawned game objects. This should be a `vector3`. If you do not specify a position, the objects are spawned at the position of the collection factory component.
`[rotation]`
: (optional) The world rotation of the new game objects. This should be a `quat`.
`[properties]`
: (optional) A Lua table with `id`-`table` pairs used to initiate the spawned game objects. See below for how to construct this table.
`[scale]`
: (optional) The scale of the spawned game objects. The scale can be expressed as a `number` (greater than 0) which specifies uniform scaling along all axes. You can also provide a `vector3` where each component specifies scaling along the corresponding axis.
`collectionfactory.create()` returns the identities of the spawned game objects as a table. The table keys map the hash of the collection-local id of each object to the runtime id of each object:
The parent-child relationship between "bean" and "shield" is *not* reflected in the returned table. This relation only exist in the runtime scene-graph, i.e. how objects are transformed together. Re-parenting an object never changes its id.
```lua
local bean_ids = collectionfactory.create("#bean_factory")
go.set_scale(0.5, bean_ids[hash("/bean")])
pprint(bean_ids)
-- DEBUG:SCRIPT:
-- {
-- hash: [/shield] = hash: [/collection0/shield], -- <1>
-- hash: [/bean] = hash: [/collection0/bean],
-- }
```
1. A prefix `/collection[N]/`, where `[N]` is a counter, is added to the id to uniquely identify each instance:
## Properties
When spawning a collection, you can pass property parameters to each game object by constructing a table where the keys are object ids and the values are tables with the script properties to set.
```lua
local props = {}
props[hash("/bean")] = { shield = false }
local ids = collectionfactory.create("#bean_factory", nil, nil, props)
```
Supposing the "bean" game object in "bean.collection" defines the "shield" property. [The Script property manual](#manuals:script-properties) contains information on script properties.
```lua
-- bean/controller.script
go.property("shield", true)
function init(self)
if not self.shield then
go.delete("shield")
end
end
```
## Dynamic loading of factory resources
By checking the *Load Dynamically* checkbox in the collection factory properties, the engine postpones the loading of the resources associated with the factory.

With the box unchecked the engine loads the prototype resources when the collection factory component is loaded so they are immediately ready for spawning.
With the box checked, you have two options for usage:
Synchronous loading
: Call [`collectionfactory.create()`](https://defold.com/ref/collectionfactory/#collectionfactory.create:url-[position]-[rotation]-[properties]-[scale]) when you want to spawn objects. This will load the resources synchronously, which may cause a hitch, then spawn new instances.
```lua
function init(self)
-- No factory resources are loaded when the collection factory’s
-- parent collection is loaded. Calling create without
-- having called load will create the resources synchronously.
self.go_ids = collectionfactory.create("#collectionfactory")
end
function final(self)
-- Delete game objects. Will decref resources.
-- In this case resources are deleted since the collection
-- factory component holds no reference.
go.delete(self.go_ids)
-- Calling unload will do nothing since factory holds
-- no references
collectionfactory.unload("#factory")
end
```
Asynchronous loading
: Call [`collectionfactory.load()`](https://defold.com/ref/collectionfactory/#collectionfactory.load:[url]-[complete_function]) to explicitly load the resources asynchronously. When the resources are ready for spawning, a callback is received.
```lua
function load_complete(self, url, result)
-- Loading is complete, resources are ready to spawn
self.go_ids = collectionfactory.create(url)
end
function init(self)
-- No factory resources are loaded when the collection factory’s
-- parent collection is loaded. Calling load will load the resources.
collectionfactory.load("#factory", load_complete)
end
function final(self)
-- Delete game object. Will decref resources.
-- In this case resources aren’t deleted since the collection factory
-- component still holds a reference.
go.delete(self.go_ids)
-- Calling unload will decref resources held by the factory component,
-- resulting in resources being destroyed.
collectionfactory.unload("#factory")
end
```
## Dynamic prototype
It is possible to change which *Prototype* a collection factory can create by checking the *Dynamic Prototype* checkbox in the collection factory properties.
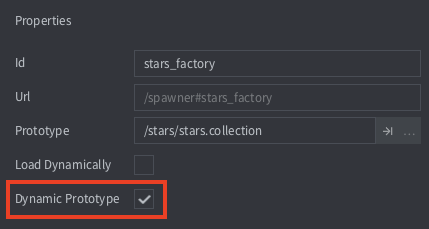
When the *Dynamic Prototype* option is checked the collection factory component can change prototype using the `collectionfactory.set_prototype()` function. Example:
```lua
collectionfactory.unload("#factory") -- unload the previous resources
collectionfactory.set_prototype("#factory", "/main/levels/level1.collectionc")
local ids = collectionfactory.create("#factory")
```
When the *Dynamic Prototype* option is set the collection component count cannot be optimized, and the owning collection will use the default component counts from the *game.project* file.
# Collection proxy {#manuals:collection-proxy}
The collection proxy component is used to load and unload new game "worlds" dynamically based on the content of a collection file. They can be used to implement switching between game levels, GUI screens, loading and unloading of narrative "scenes" throughout a level, loading/unloading of mini-games and more.
Defold organizes all game objects in collections. A collection can contain game objects and other collections (i.e. sub-collections). Collection proxies allow you to split your content into separate collections and then dynamically manage the loading and unloading of these collections through scripting.
Collection proxies differ from [collection factory components](#manuals:collection-factory). A collection factory instantiates the contents of a collection into the current game world. Collection proxies create a new game world at runtime and thus have different use-cases.
## Creating a collection proxy component
1. Add a collection proxy component to a game object by right-clicking a game object and selecting Add Component ▸ Collection Proxy from the context menu.
2. Set the *Collection* property to reference a collection that you wish to dynamically load into the runtime at a later point. The reference is static and makes sure that all the content of the referenced collection end up in the final game.
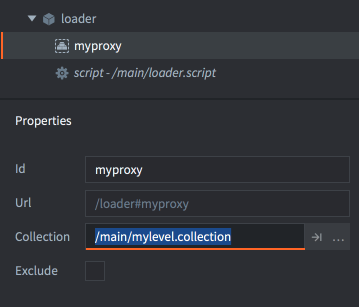
(You can exclude the content in the build and download it with code instead by checking the *Exclude* box and using the [Live update feature](#manuals:live-update).)
## Bootstrap
When the Defold engine starts it loads and instantiates all game objects from a *bootstrap collection* into the runtime. It then initializes and enables the game objects and their components. Which bootstrap collection the engine should use is set in the [project settings](#manuals:project-settings). By convention this collection file is usually named "main.collection".

To fit the game objects and their components the engine allocates the memory needed for the whole "game world" into which the contents of the bootstrap collection are instantiated. A separate physics world is also created for any collision objects and physics simulation.
Since script components need to be able to address all objects in the game, even from outside the bootstrap world, it is given a unique name: the *Name* property that you set in the collection file:
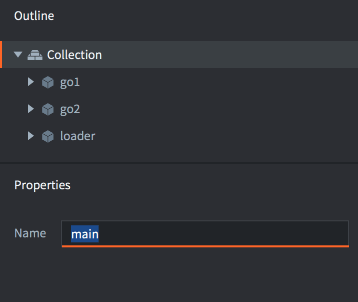
If the collection that is loaded contains collection proxy components, the collections that those refer to are *not* loaded automatically. You need to control the loading of these resources through scripts.
## Loading a collection
Dynamically loading a collection via proxy is done by sending a message called `"load"` to the proxy component from a script:
```lua
-- Tell the proxy "myproxy" to start loading.
msg.post("#myproxy", "load")
```
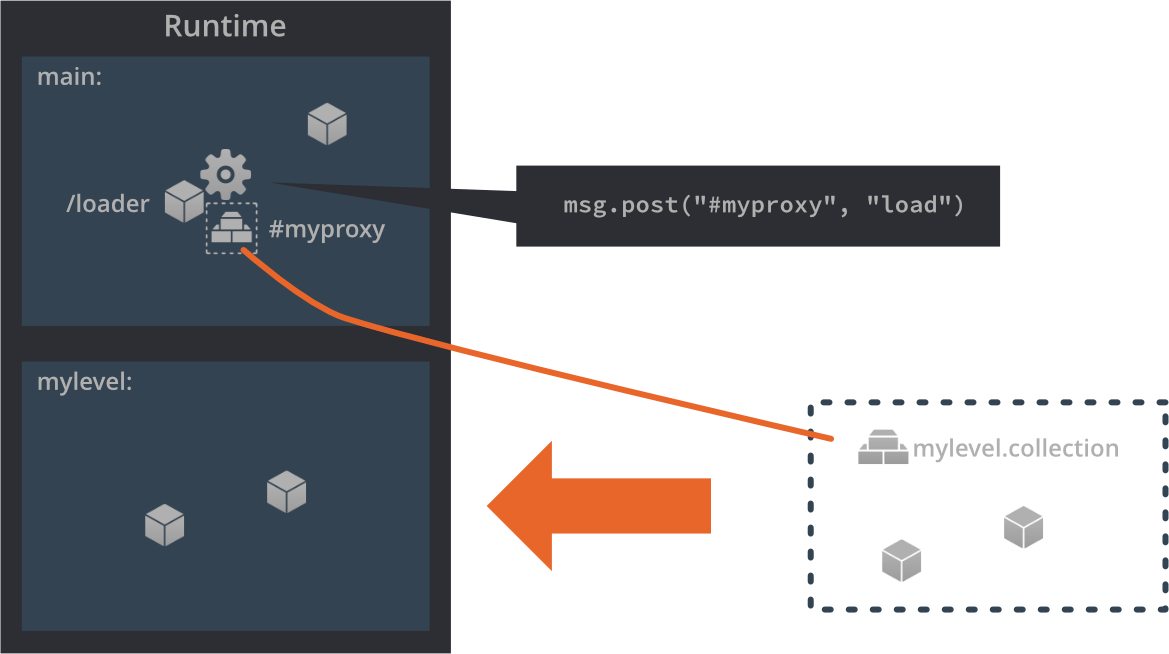
The proxy component will instruct the engine to allocate space for a new world. A separate runtime physics world is also created and all the game objects in the collection "`mylevel.collection`" are instantiated.
The new world gets its name from the *Name* property in the collection file, in this example it is set to "`mylevel`". The name has to be unique. If the *Name* set in the collection file is already used for a loaded world, the engine will signal a name collision error:
```txt
ERROR:GAMEOBJECT: The collection 'default' could not be created since there is already a socket with the same name.
WARNING:RESOURCE: Unable to create resource: build/default/mylevel.collectionc
ERROR:GAMESYS: The collection /mylevel.collectionc could not be loaded.
```
When the engine has finished loading the collection, the collection proxy component will send a message named `"proxy_loaded"` back to the script that sent the `"load"` message. The script can then initialize and enable the collection as a reaction to the message:
```lua
function on_message(self, message_id, message, sender)
if message_id == hash("proxy_loaded") then
-- New world is loaded. Init and enable it.
msg.post(sender, "init")
msg.post(sender, "enable")
...
end
end
```
`"load"`
: This message tells the collection proxy component to start loading its collection into a new world. The proxy will send back a message called `"proxy_loaded"` when it's done.
`"async_load"`
: This message tells the collection proxy component to start background loading its collection into a new world. The proxy will send back a message called `"proxy_loaded"` when it's done.
`"init"`
: This message tells the collection proxy component that all the game objects and components that has been instantiated should be initialized. All script `init()` functions are called at this stage.
`"enable"`
: This message tells the collection proxy component that all the game objects and components should be enabled. All sprite components begin to draw when enabled, for instance.
## Addressing into the new world
The *Name* set in the collection file properties is used to address game objects and components in the loaded world. If you, for instance, create a loader object in the bootstrap collection you may need to communicate with it from any loaded collection:
```lua
-- tell the loader to load the next level:
msg.post("main:/loader#script", "load_level", { level_id = 2 })
```

And if you need to communicate with a game object in the loaded collection from the loader you can send a message using the [full URL to the object](#manuals:addressing):
```lua
msg.post("mylevel:/myobject", "hello")
```
It is not possible to directly access game objects in a loaded collection from outside of the collection:
```lua
local position = go.get_position("mylevel:/myobject")
-- loader.script:42: function called can only access instances within the same collection.
```
## Unloading a world
To unload a loaded collection, you send messages corresponding to the converse steps of the loading:
```lua
-- unload the level
msg.post("#myproxy", "disable")
msg.post("#myproxy", "final")
msg.post("#myproxy", "unload")
```
`"disable"`
: This message tells the collection proxy component to disable all the game object and components in the world. Sprites stop being rendered at this stage.
`"final"`
: This message tells the collection proxy component to finalize all the game object and components in the world. All scripts' `final()` functions are called at this stage.
`"unload"`
: This message tells the collection proxy to remove the world completely from memory.
If you don’t need the finer grained control, you can send the `"unload"` message directly without first disabling and finalizing the collection. The proxy will then automatically disable and finalize the collection before it’s unloaded.
When the collection proxy has finished unloading the collection it will send a `"proxy_unloaded"` message back to the script that sent the `"unload"` message:
```lua
function on_message(self, message_id, message, sender)
if message_id == hash("proxy_unloaded") then
-- Ok, the world is unloaded...
...
end
end
```
## Time step
Collection proxy updates can be scaled by altering the _time step_. This means that even though the game ticks at a steady 60 FPS, a proxy can update at a higher or lower pace, affecting things such as:
* Physics simulation speed
* The `dt` passed to `update()`
* [Game object and gui property animations](#manuals:animation)
* [Flipbook animations](#manuals:animation)
* [Particle FX simulations](#manuals:particlefx)
* Timer speed
You can also set the update mode, which allows you to control if the scaling should be performed discretely (which only makes sense with a scale factor below 1.0) or continuously.
You control the scale factor and the scaling mode by sending the proxy a `set_time_step` message:
```lua
-- update loaded world at one-fifth-speed.
msg.post("#myproxy", "set_time_step", {factor = 0.2, mode = 1}
```
To see what's happening when changing the time step, we can create an object with the following code in a script component and put it in the collection we're altering the timestep of:
```lua
function update(self, dt)
print("update() with timestep (dt) " .. dt)
end
```
With a time step of 0.2, we get the following result in the console:
```txt
INFO:DLIB: SSDP started (ssdp://192.168.0.102:54967, http://0.0.0.0:62162)
INFO:ENGINE: Defold Engine 1.2.37 (6b3ae27)
INFO:ENGINE: Loading data from: build/default
DEBUG:SCRIPT: update() with timestep (dt) 0
DEBUG:SCRIPT: update() with timestep (dt) 0
DEBUG:SCRIPT: update() with timestep (dt) 0
DEBUG:SCRIPT: update() with timestep (dt) 0
DEBUG:SCRIPT: update() with timestep (dt) 0.016666667535901
DEBUG:SCRIPT: update() with timestep (dt) 0
DEBUG:SCRIPT: update() with timestep (dt) 0
DEBUG:SCRIPT: update() with timestep (dt) 0
DEBUG:SCRIPT: update() with timestep (dt) 0
DEBUG:SCRIPT: update() with timestep (dt) 0.016666667535901
```
`update()` is still called 60 times a second, but the value of `dt` changes. We see that only 1/5 (0.2) of the calls to `update()` will have a `dt` of 1/60 (corresponding to 60 FPS)---the rest is zero. All physics simulations will also be updated according to that `dt` and advance only in one fifth of the frames.
You can use the collection time step functionality to pause your game, for instance while showing a popup or when the window has lost focus. Use `msg.post("#myproxy", "set_time_step", {factor = 0, mode = 0})` to pause and `msg.post("#myproxy", "set_time_step", {factor = 1, mode = 1})` to resume.
See [`set_time_step`](https://defold.com/ref/collectionproxy#set_time_step) for more details.
## Caveats and common issues
Physics
: Through collection proxies it is possible to load more than one top level collection, or *game world* into the engine. When doing so, it is important to know that each top level collection is a separate physical world. Physics interactions (collisions, triggers, ray-casts) only happen between objects belonging to the same world. So even if the collision objects from two worlds visually sits right on top of each other, there cannot be any physics interaction between them.
Memory
: Each loaded collection creates a new game world which comes with a relatively large memory footprint. If you load dozens of collections simultaneously through proxies, you might want to reconsider your design. To spawn many instances of game object hierarchies, [collection factories](#manuals:collection-factory) are more suitable.
Input
: If you have objects in your loaded collection that require input actions, you need to make sure that the game object that contains the collection proxy acquires input. When the game object receives input messages these are propagated to the components of that object, i.e. the collection proxies. The input actions are sent via the proxy into the loaded collection.
# Collision objects {#manuals:physics-objects}
A collision object is a component you use to give a game object physical behaviour. A collision object has physical properties like weight, restitution and friction and its spatial extension is defined by one or more _shapes_ that you attach to the component. Defold supports the following types of collision objects:
Static objects
: Static objects never move but a dynamic object that collides with a static object will react by bouncing and/or sliding. Static objects are very useful for building level geometry (i.e. ground and walls) that does not move. They are also cheaper performance-wise than dynamic objects. You cannot move or otherwise change static objects.
Dynamic objects
: Dynamic objects are simulated by the physics engine. The engine solves all collisions and applies resulting forces. Dynamic objects are good for objects that should behave realistically. The most common way to affect them is indirectly, by [applying forces](https://defold.com/ref/physics/#apply_force) or changing the angular [damping](https://defold.com/ref/stable/physics/#angular_damping) and [velocity](https://defold.com/ref/stable/physics/#linear_velocity) and the linear [damping](https://defold.com/ref/stable/physics/#linear_damping) and [velocity](https://defold.com/ref/stable/physics/#angular_velocity). It is also possible to directly manipulate the position and orientation of a dynamic object when the [Allow Dynamic Transforms setting](#manuals:project-settings) is enabled in *game.project*.
Kinematic objects
: Kinematic objects register collisions with other physics objects, but the physics engine do not perform any automatic simulation. The job of resolving collisions, or ignoring them, is left to you ([learn more](#manuals:physics-resolving-collisions)). Kinematic objects are very good for player or script controlled objects that require fine grained control of the physical reactions, like a player character.
Triggers
: Triggers are objects that register simple collisions. Triggers are light weight collision objects. They are similar to [ray casts](#manuals:physics-ray-casts) in that they read the physics world as opposed to interacting with it. They are good for objects that just need to register a hit (like a bullet) or as part of game logic where you want to trigger certain actions when an object reaches a specific point. Trigger are computationally cheaper than kinematic objects and should be used in favor of those if possible.
## Adding a collision object component
A collision object component has a set of *Properties* that sets its type and physics properties. It also contains one or more *Shapes* that define the whole shape of the physics object.
To add a collision object component to a game object:
1. In the *Outline* view, right click the game object and select Add Component ▸ Collision Object from the context menu. This creates a new component with no shapes.
2. Right click the new component and select Add Shape ▸ Box / Capsule / Sphere. This adds a new shape to the collision object component. You can add any number of shapes to the component. You can also use a tilemap or a convex hull to define the shape of the physics object.
3. Use the move, rotate and scale tools to edit the shapes.
4. Select the component in the *Outline* and edit the collision object's *Properties*.
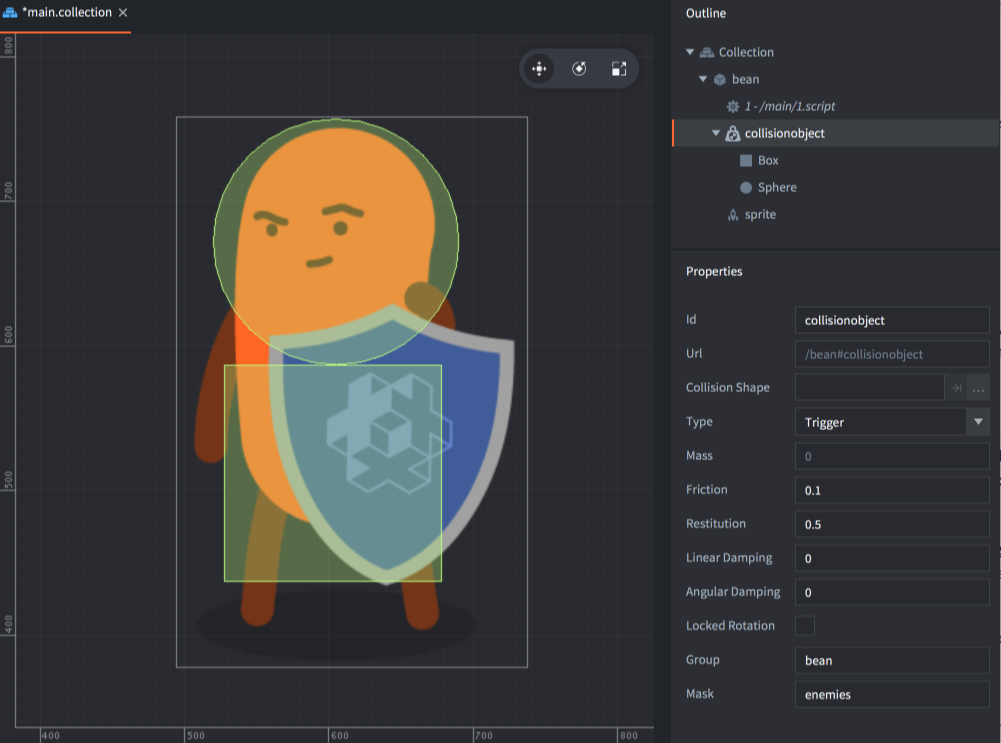
## Adding a collision shape
A collision component can either use several primitive shapes or a single complex shape. Learn more about the various shapes and how to add them to a collision component in the [Collision Shapes manual](#manuals:physics-shapes).
## Collision object properties
Id
: The identity of the component.
Collision Shape
: This property is used for tile map geometry or convex shapes that does not use primitive shapes. See [Collision Shapes for more information](#manuals:physics-shapes).
Type
: The type of collision object: `Dynamic`, `Kinematic`, `Static` or `Trigger`. If you set the object to dynamic you _must_ set the *Mass* property to a non zero value. For dynamic or static objects you should also check that the *Friction* and *Restitution* values are good for your use-case.
Friction
: Friction makes it possible for objects to slide realistically against each other. The friction value is usually set between `0` (no friction at all---a very slippery object) and `1` (strong friction---an abrasive object). However, any positive value is valid.
The friction strength is proportional to the normal force (this is called Coulomb friction). When the friction force is computed between two shapes (`A` and `B`), the friction values of both objects are combined by the geometric mean:
```math
F = sqrt( F_A * F_B )
```
This means that if one of the objects has zero friction then the contact between them will have zero friction.
Restitution
: The restitution value sets the "bounciness" of the object. The value is usually between 0 (inelastic collision—the object does not bounce at all) and 1 (perfectly elastic collision---the object's velocity will be exactly reflected in the bounce)
Restitution values between two shapes (`A` and `B`) are combined using the following formula:
```math
R = max( R_A, R_B )
```
When a shape develops multiple contacts, restitution is simulated approximately because Box2D uses an iterative solver. Box2D also uses inelastic collisions when the collision velocity is small to prevent bounce-jitter
Linear damping
: Linear damping reduces the linear velocity of the body. It is different from friction, which only occurs during contact, and can be used to give objects a floating appearance, like they are moving through something thicker than air. Valid values are between 0 and 1.
Box2D approximates damping for stability and performance. At small values, the damping effect is independent of the time step while at larger damping values, the damping effect varies with the time step. If you run your game with a fixed time step, this never becomes an issue.
Angular damping
: Angular damping works like linear damping but reduces the angular velocity of the body. Valid values are between 0 and 1.
Locked rotation
: Setting this property totally disables rotation on the collision object, no matter what forces are brought to it.
Bullet
: Setting this property enables continuous collision detection (CCD) between the collision object and other dynamic collision objects. The Bullet property is ignored if the Type is not set to `Dynamic`.
Group
: The name of the collision group the object should belong to. You can have 16 different groups and you name them as you see fit for your game. For example "players", "bullets", "enemies" and "world". If the *Collision Shape* is set to a tile map, this field is not used but the groups names are taken from the tile source. [Learn more about collision groups](#manuals:physics-groups).
Mask
: The other _groups_ this object should collide with. You can name one group or specify multiple groups in a comma separated list. If you leave the Mask field empty, the object will not collide with anything. [Learn more about collision groups](#manuals:physics-groups).
Generate Collision Events
: If enabled, will allow this object to send collision events
Generate Contact Events
: If enabled, will allow this object to send contact events
Generate Trigger Events
: If enabled, will allow this object to send trigger events
## Runtime properties
A physics object has a number of different properties that can be read and changed using `go.get()` and `go.set()`:
`angular_damping`
: The angular damping value for the collision object component (`number`). [API reference](https://defold.com/ref/physics/#angular_damping).
`angular_velocity`
: The current angular velocity of the collision object component (`vector3`). [API reference](https://defold.com/ref/physics/#angular_velocity).
`linear_damping`
: The linear damping value for the collision object (`number`). [API reference](https://defold.com/ref/physics/#linear_damping).
`linear_velocity`
: The current linear velocity of the collision object component (`vector3`). [API reference](https://defold.com/ref/physics/#linear_velocity).
`mass`
: The defined physical mass of the collision object component. READ ONLY. (`number`). [API reference](https://defold.com/ref/physics/#mass).
# Cameras {#manuals:camera}
A camera in Defold is a component that changes the viewport and projection of the game world. The camera component defines a bare bones perspective or orthographic camera that provides a view and projection matrix to the render script.
A perspective camera is typically used for 3D games where the view of the camera and the size and perspective of objects is based on a view frustum and the distance and view angle from the camera to the objects in the game.
For 2D games, it is often desirable to render the scene with an orthographic projection. This means that the view of the camera is no longer dictated by a view frustum, but by a box. Orthographic projection is unrealistic in that it does not alter the size of objects based on their distance. An object 1000 units away will render at the same size as an object right in front of the camera.
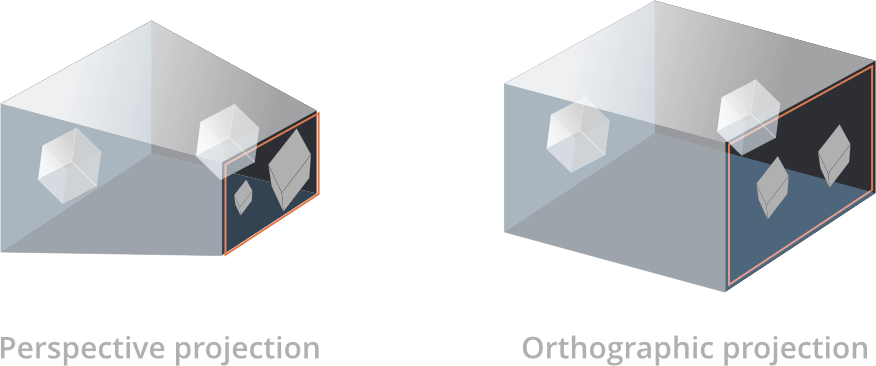
## Creating a camera
To create a camera, right click a game object and select Add Component ▸ Camera. You can alternatively create a component file in your project hierarchy and add the component file to the game object.

The camera component has the following properties that defines the camera *frustum*:

Id
: The id of the component
Aspect Ratio
: (**Perspective camera only**) - The ratio between the frustum width and height. 1.0 means that you assume a quadratic view. 1.33 is good for a 4:3 view like 1024x768. 1.78 is good for a 16:9 view. This setting is ignored if *Auto Aspect Ratio* is set.
Fov
: (**Perspective camera only**) - The *vertical* camera field of view expressed in _radians_. The wider the field of view, the more the camera will see.
Near Z
: The Z-value of the near clipping plane.
Far Z
: The Z-value of the far clipping plane.
Auto Aspect Ratio
: (**Perspective camera only**) - Set this to let the camera automatically calculate the aspect ratio.
Orthographic Projection
: Set this to switch the camera to an orthographic projection (see below).
Orthographic Zoom
: (**Orthographic camera only**) - The zoom used for the orthographic projection (> 1 = zoom in, < 1 = zoom out).
Orthographic Mode
: (**Orthographic camera only**) - Controls how the orthographic camera determines zoom relative to the window size and your design resolution (the values in `game.project` → `display.width/height`).
- `Fixed` (uses constant zoom): Uses the current `Orthographic Zoom` value as-is.
- `Auto Fit` (contain): Automatically adjusts zoom so the full design area fits inside the window. May show extra content on sides or top/bottom.
- `Auto Cover` (cover): Automatically adjusts zoom so the design area covers the entire window. May crop on sides or top/bottom.
Available only when `Orthographic Projection` is enabled.
## Using the camera
All cameras are automatically enabled and updated during a frame, and the lua `camera` module is available in all script contexts. Since Defold 1.8.1 there is no longer a need to explicitly enable a camera via sending an `acquire_camera_focus` message to the camera component. The old acquire and release messages are still available, but it is recommended to instead use the "enable" and "disable" messages like for any other component that you wish to enable or disable:
```lua
msg.post("#camera", "disable")
msg.post("#camera", "enable")
```
To list all currently available cameras, you can use camera.get_cameras():
```lua
-- Note: The render calls are only available in a render script.
-- The camera.get_cameras() function can be used anywhere,
-- but render.set_camera can only be used in a render script.
for k,v in pairs(camera.get_cameras()) do
-- the camera table contains the URLs of all cameras
render.set_camera(v)
-- do rendering here - anything rendered here that uses materials with
-- view and projection matrices specified, will use matrices from the camera.
end
-- to disable a camera, pass in nil (or no arguments at all) to render.set_camera.
-- after this call, all render calls will use the view and projection matrices
-- that are specified on the render context (render.set_view and render.set_projection)
render.set_camera()
```
The scripting `camera` module has multiple functions that can be used to manipulate the camera. Here's just a few functions that can be used, to see all of the available functions, please consult the manual at the [API docs](https://defold.com/ref/camera/)).
```lua
camera.get_aspect_ratio(camera) -- get aspect ratio
camera.get_far_z(camera) -- get far z
camera.get_fov(camera) -- get field of view
camera.get_orthographic_mode(camera) -- get orthographic mode (one of camera.ORTHO_MODE_*)
camera.set_aspect_ratio(camera, ratio) -- set aspect ratio
camera.set_far_z(camera, far_z) -- set far z
camera.set_near_z(camera, near_z) -- set near z
camera.set_orthographic_mode(camera, camera.ORTHO_MODE_AUTO_FIT) -- set orthographic mode
... And so forth
```
A camera is identified by a URL, which is the full scene path of the component, including the collection, the gameobject it belongs to and the component id. In this example, you would use the URL `/go#camera` to identify the camera component from within the same collection, and `main:/go#camera` when accessing a camera from a different collection, or the render script.

```lua
-- Accessing a camera from a script in the same collection:
camera.get_fov("/go#camera")
-- Accessing a camera from a script in a different collection:
camera.get_fov("main:/go#camera")
-- Accessing a camera from the render script:
render.set_camera("main:/go#camera")
```
Each frame, the camera component that currently has camera focus will send a `set_view_projection` message to the "@render" socket:
```lua
-- builtins/render/default.render_script
--
function on_message(self, message_id, message)
if message_id == hash("set_view_projection") then
self.view = message.view -- [1]
self.projection = message.projection
end
end
```
1. The message posted from the camera component includes a view matrix and a projection matrix.
The camera component supplies the render script with either a perspective or orthographic projection matrix depending on the *Orthographic Projection* property of the camera. The projection matrix also takes into account the defined near and far clipping plane, the field of view and the aspect ratio settings of the camera.
The view matrix provided by the camera defines the position and orientation of the camera. A camera with an *Orthographic Projection* will center the view on the position of the game object it is attached to, while a camera with a *Perspective Projection* will have the lower left corner of the view positioned on the game object it is attached to.
### Render script
When using the default render script Defold will automatically set the last enabled camera that should be used for rendering. Before this change, a script somewhere in the project needed to explicitly send the `use_camera_projection` message to the renderer to notify it that the view and projection from camera components should be used. This is no longer necessary, but it is still possible to do so for backwards compatibility purposes.
Alternatively, you can set a specific camera that should be used for rendering in a render script. This could be useful in cases where you need to control more specifically which camera should be used for rendering, for example in a multiplayer game.
```lua
-- render.set_camera will automatically use the view and projection matrices
-- for any rendering happening until render.set_camera() is called.
render.set_camera("main:/my_go#camera")
```
To check if a camera is active or not, you can use the `get_enabled` function from the [Camera API](https://defold.com/ref/alpha/camera/#camera.get_enabled:camera):
```lua
if camera.get_enabled("main:/my_go#camera") then
-- camera is enabled, use it for rendering!
render.set_camera("main:/my_go#camera")
end
```
To use the `set_camera` function together with frustum culling, you need to pass this as an option to the function:
`render.set_camera("main:/my_go#camera", {use_frustum = true})`
### Panning the camera
You pan/move the camera around the game world by moving the game object the camera component is attached to. The camera component will automatically send an updated view matrix based on the current x and y axis position of the camera.
### Zooming the camera
You can zoom in and out when using a perspective camera by moving the game object the camera is attached to along the z-axis. The camera component will automatically send an updated view matrix based on the current z-position of the camera.
You can zoom in and out when using an orthographic camera by changing the *Orthographic Zoom* property of the camera:
```lua
go.set("#camera", "orthographic_zoom", 2)
```
When using an orthographic camera you can also switch how zoom is determined using the `Orthographic Mode` setting or via script:
```lua
-- get current mode (one of camera.ORTHO_MODE_FIXED, _AUTO_FIT, _AUTO_COVER)
local mode = camera.get_orthographic_mode("#camera")
-- switch to auto-fit (contain) to always keep the full design area visible
camera.set_orthographic_mode("#camera", camera.ORTHO_MODE_AUTO_FIT)
-- switch to auto-cover to ensure the design area covers the window
camera.set_orthographic_mode("#camera", camera.ORTHO_MODE_AUTO_COVER)
-- switch back to fixed mode to control zoom manually via orthographic_zoom
camera.set_orthographic_mode("#camera", camera.ORTHO_MODE_FIXED)
```
### Adaptive zoom
The concept behind adaptive zoom is to adjust the camera zoom value when the resolution of the display change from the initial resolution set in *game.project*.
Two common approaches to adaptive zoom are:
1. Max zoom - Calculate a zoom value such that the content covered by the initial resolution in *game.project* will fill and expand beyond the screen bounds, possibly hiding some content to the sides or above and below.
2. Min zoom - Calculate a zoom value such that the content covered by the initial resolution in *game.project* will be completely contained within the screen bounds, possibly showing additional content to the sides or above and below.
Example:
```lua
local DISPLAY_WIDTH = sys.get_config_int("display.width")
local DISPLAY_HEIGHT = sys.get_config_int("display.height")
function init(self)
local initial_zoom = go.get("#camera", "orthographic_zoom")
local display_scale = window.get_display_scale()
window.set_listener(function(self, event, data)
if event == window.WINDOW_EVENT_RESIZED then
local window_width = data.width
local window_height = data.height
local design_width = DISPLAY_WIDTH / initial_zoom
local design_height = DISPLAY_HEIGHT / initial_zoom
-- max zoom: ensure that the initial design dimensions will fill and expand beyond the screen bounds
local zoom = math.max(window_width / design_width, window_height / design_height) / display_scale
-- min zoom: ensure that the initial design dimensions will shrink and be contained within the screen bounds
--local zoom = math.min(window_width / design_width, window_height / design_height) / display_scale
go.set("#camera", "orthographic_zoom", zoom)
end
end)
end
```
A complete example of adaptive zoom can be seen in [this sample project](https://github.com/defold/sample-adaptive-zoom).
Note: With an orthographic camera you can now achieve contain/cover behavior without custom code by setting `Orthographic Mode` to `Auto Fit` (contain) or `Auto Cover` (cover). In these modes the effective zoom is computed automatically based on window size and your design resolution.
### Following a game object
You can have the camera follow a game object by setting the game object the camera component is attached to as a child of the game object to follow:

An alternative way is to update the position of the game object the camera component is attached to every frame as the game object to follow moves.
### Converting mouse to world coordinates
When the camera has panned, zoomed or changed it's projection from the default orthographic Stretch projection the mouse coordinates provided in the `on_input()` lifecycle function will no longer match to the world coordinates of your game objects. You need to manually account for the change in view or projection. The code to convert from mouse/screen coordinates to world coordinates looks like this:
```Lua
--- Convert screen to world coordinates taking into account
-- the view and projection of a specific camera
-- @param camera URL of camera to use for conversion
-- @param screen_x Screen x coordinate to convert
-- @param screen_y Screen y coordinate to convert
-- @param z optional z coordinate to pass through the conversion, defaults to 0
-- @return world_x The resulting world x coordinate of the screen coordinate
-- @return world_y The resulting world y coordinate of the screen coordinate
-- @return world_z The resulting world z coordinate of the screen coordinate
function M.screen_to_world(camera, screen_x, screen_y, z)
local projection = go.get(camera, "projection")
local view = go.get(camera, "view")
local w, h = window.get_size()
-- https://defold.com/manuals/camera/#converting-mouse-to-world-coordinates
local inv = vmath.inv(projection * view)
local x = (2 * screen_x / w) - 1
local y = (2 * screen_y / h) - 1
local x1 = x * inv.m00 + y * inv.m01 + z * inv.m02 + inv.m03
local y1 = x * inv.m10 + y * inv.m11 + z * inv.m12 + inv.m13
return x1, y1, z or 0
end
```
Keep in mind that the values `action.screen_x` and `action.screen_y` from `on_input()` should be used as arguments for this function. Visit the [Examples page](https://defold.com/examples/render/screen_to_world/) to see screen to world coordinate conversion in action. There is also a [sample project](https://github.com/defold/sample-screen-to-world-coordinates/) showing how to do screen to world coordinate conversion.
The [third-party camera solutions mentioned in this manual](#manuals:camera) provides functions for converting to and from screen coordinates.
## Runtime manipulation
You can manipulate cameras in runtime through a number of different messages and properties (refer to the [API docs for usage](https://defold.com/ref/camera/)).
A camera has a number of different properties that can be manipulated using `go.get()` and `go.set()`:
`fov`
: The camera field-of-view (`number`).
`near_z`
: The camera near Z-value (`number`).
`far_z`
: The camera far Z-value (`number`).
`orthographic_zoom`
: The orthographic camera zoom (`number`).
`aspect_ratio`
: The ratio between the frustum width and height. Used when calculating the projection of a perspective camera. (`number`).
`view`
: The calculated view matrix of the camera. READ ONLY. (`matrix4`).
`projection`
: The calculated projection matrix of the camera. READ ONLY. (`matrix4`).
## Third-party camera solutions
There are community-made camera solutions that implement common features such as screen shake, following game objects, screen-to-world coordinate conversion and much more. They can be downloaded from the Defold asset portal:
- [Orthographic camera](https://defold.com/assets/orthographic/) (2D only) by Björn Ritzl.
- [Defold Rendy](https://defold.com/assets/defold-rendy/) (2D and 3D) by Klayton Kowalski.
# Factory components {#manuals:factory}
Factory components are used to dynamically spawn game objects from a pool of objects into a running game.
When you add a factory component to a game object you specify in the *Prototype* property what game object file the factory should use as a prototype (also known as "prefabs" or "blueprints" in other engines) for all new game objects it creates.
To trigger the creation of a game object, call `factory.create()`:
```lua
-- factory.script
local p = go.get_position()
p.y = vmath.lerp(math.random(), min_y, max_y)
local component = "#star_factory"
factory.create(component, p)
```
`factory.create()` takes 5 parameters:
`url`
: The id of the factory component that should spawn a new game object.
`[position]`
: (optional) The world position of the new game object. This should be a `vector3`. If you do not specify a position, the game object is spawned at the position of the factory component.
`[rotation]`
: (optional) The world rotation of the new game object. This should be a `quat`.
`[properties]`
: (optional) A Lua table with any script property values to initiate the game object with. See the [Script property manual](#manuals:script-properties) for information on script properties.
`[scale]`
: (optional) The scale of the spawned game object. The scale can be expressed as a `number` (greater than 0) which specifies uniform scaling along all axes. You can also provide a `vector3` where each component specifies scaling along the corresponding axis.
For example:
```lua
-- factory.script
local p = go.get_position()
p.y = vmath.lerp(math.random(), min_y, max_y)
local component = "#star_factory"
-- Spawn with no rotation but double scale.
-- Set the score of the star to 10.
factory.create(component, p, nil, { score = 10 }, 2.0) -- <1>
```
1. Sets the "score" property of the star game object.
```lua
-- star.script
go.property("score", 1) -- <1>
local speed = -240
function update(self, dt)
local p = go.get_position()
p.x = p.x + speed * dt
if p.x < -32 then
go.delete()
end
go.set_position(p)
end
function on_message(self, message_id, message, sender)
if message_id == hash("collision_response") then
msg.post("main#gui", "add_score", {amount = self.score}) -- <2>
go.delete()
end
end
```
1. The "score" script property is defined with a default value.
2. Reference the "score" script property as a value stored in "self".
Defold does not currently support non uniform scaling of collision shapes. If you provide a non uniform scale value, for instance `vmath.vector3(1.0, 2.0, 1.0)` the sprite will scale correctly but the collision shapes won't.
## Addressing of factory created objects
Defold's addressing mechanism makes it possible to access every object and component in a running game. The [Addressing manual](#manuals:addressing) goes into quite a bit of detail how the system works. It is possible to use the same addressing mechanism for spawned game objects and their components. It is quite often enough to use the id of the spawned object, for instance when sending a message:
```lua
local function create_hunter(target_id)
local id = factory.create("#hunterfactory")
msg.post(id, "hunt", { target = target_id })
return id
end
```
Message passing to the game object itself instead of a specific component will in fact send the message to all components. This is usually not a problem but it's good to keep in mind if the object has a lot of components.
But what if you need to access a specific component on a spawned game object, for instance to disable a collision object or change a sprite image? The solution is to construct a URL from the game object id and the id of the component.
```lua
local function create_guard(unarmed)
local id = factory.create("#guardfactory")
if unarmed then
local weapon_sprite_url = msg.url(nil, id, "weapon")
msg.post(weapon_sprite_url, "disable")
local body_sprite_url = msg.url(nil, id, "body")
sprite.play_flipbook(body_sprite_url, hash("red_guard"))
end
end
```
## Tracking spawned and parent objects
When you call `factory.create()` you get back the id of the new game object, allowing you to store the id for future reference. One common use is to spawn objects and add their id's to a table so you can delete them all at a later point, for instance when resetting a level layout:
```lua
-- spawner.script
self.spawned_coins = {}
...
-- Spawn a coin and store it in the "coins" table.
local id = factory.create("#coinfactory", coin_position)
table.insert(self.spawned_coins, id)
```
And then later:
```lua
-- spawner.script
-- Delete all spawned coins.
for _, coin_id in ipairs(self.spawned_coins) do
go.delete(coin_id)
end
-- or alternatively
go.delete(self.spawned_coins)
```
It is also common that you want the spawned object to be aware of the game object that spawned it. One case would be some type of autonomous object that can be spawned only one at a time. The spawned object then needs to inform the spawner when it is deleted or inactivated so another one can be spawned:
```lua
-- spawner.script
-- Spawn a drone and set its parent to the url of this script component
self.spawned_drone = factory.create("#dronefactory", drone_position, nil, { parent = msg.url() })
...
function on_message(self, message_id, message, sender)
if message_id == hash("drone_dead") then
self.spawned_drone = nil
end
end
```
And the spawned object's logic:
```lua
-- drone.script
go.property("parent", msg.url())
...
function final(self)
-- I'm dead.
msg.post(self.parent, "drone_dead")
end
```
## Dynamic loading of factory resources
By checking the *Load Dynamically* checkbox in the factory properties, the engine postpones the loading of the resources associated with the factory.

With the box unchecked the engine loads the prototype resources when the factory component is loaded so they are immediately ready for spawning.
With the box checked, you have two options for usage:
Synchronous loading
: Call [`factory.create()`](https://defold.com/ref/factory/#factory.create) when you want to spawn objects. This will load the resources synchronously, which may cause a hitch, then spawn new instances.
```lua
function init(self)
-- No factory resources are loaded when the factory’s parent
-- collection is loaded. Calling create without having called
-- load will create the resources synchronously.
self.go_id = factory.create("#factory")
end
function final(self)
-- Delete game objects. Will decref resources.
-- In this case resources are deleted since the factory component
-- holds no reference.
go.delete(self.go_id)
-- Calling unload will do nothing since factory holds no references
factory.unload("#factory")
end
```
Asynchronous loading
: Call [`factory.load()`](https://defold.com/ref/factory/#factory.load) to explicitly load the resources asynchronously. When the resources are ready for spawning, a callback is received.
```lua
function load_complete(self, url, result)
-- Loading is complete, resources are ready to spawn
self.go_id = factory.create(url)
end
function init(self)
-- No factory resources are loaded when the factory’s parent
-- collection is loaded. Calling load will load the resources.
factory.load("#factory", load_complete)
end
function final(self)
-- Delete game object. Will decref resources.
-- In this case resources aren’t deleted since the factory component
-- still holds a reference.
go.delete(self.go_id)
-- Calling unload will decref resources held by the factory component,
-- resulting in resources being destroyed.
factory.unload("#factory")
end
```
## Dynamic prototype
It is possible to change which *Prototype* a factory can create by checking the *Dynamic Prototype* checkbox in the factory properties.

When the *Dynamic Prototype* option is checked the factory component can change prototype using the `factory.set_prototype()` function. Example:
```lua
factory.unload("#factory") -- unload the previous resources
factory.set_prototype("#factory", "/main/levels/enemyA.goc")
local enemy_id = factory.create("#factory")
```
When the *Dynamic Prototype* option is set the collection component count cannot be optimized, and the owning collection will use the default component counts from the *game.project* file.
## Instance limits
The project setting *max_instances* in *Collection related settings* limits the total number of game object instances that can exist in a world (the main.collection loaded at startup or any world loaded via a collection proxy). All game objects that exist in the world are counted against that limit and it does not matter if they are placed by hand in the editor or spawned in runtime through a script.

If you set *max_instances* to 1024 and have 24 manually placed game objects in your main collection, you can spawn an additional 1000 game objects. As soon as you delete a game object, you are free to spawn another instance.
## Pooling of game objects
It may seem like a good idea to save spawned game objects in a pool and reuse them. However, the engine is already doing object pooling under the hood so additional overhead will only slow things down. It is both faster and cleaner to delete game objects and spawn new ones.
# Label {#manuals:label}
A *Label* component renders a piece of text on screen, in game space. By default it is sorted and drawn with all sprite and tile graphics. The component has a set of properties that governs how the text is rendered. Defold's GUI supports text but it can be tricky to place GUI elements in the game world. Labels make this easier.
## Creating a label
To create a Label component, right click the game object and selecting Add Component ▸ Label.
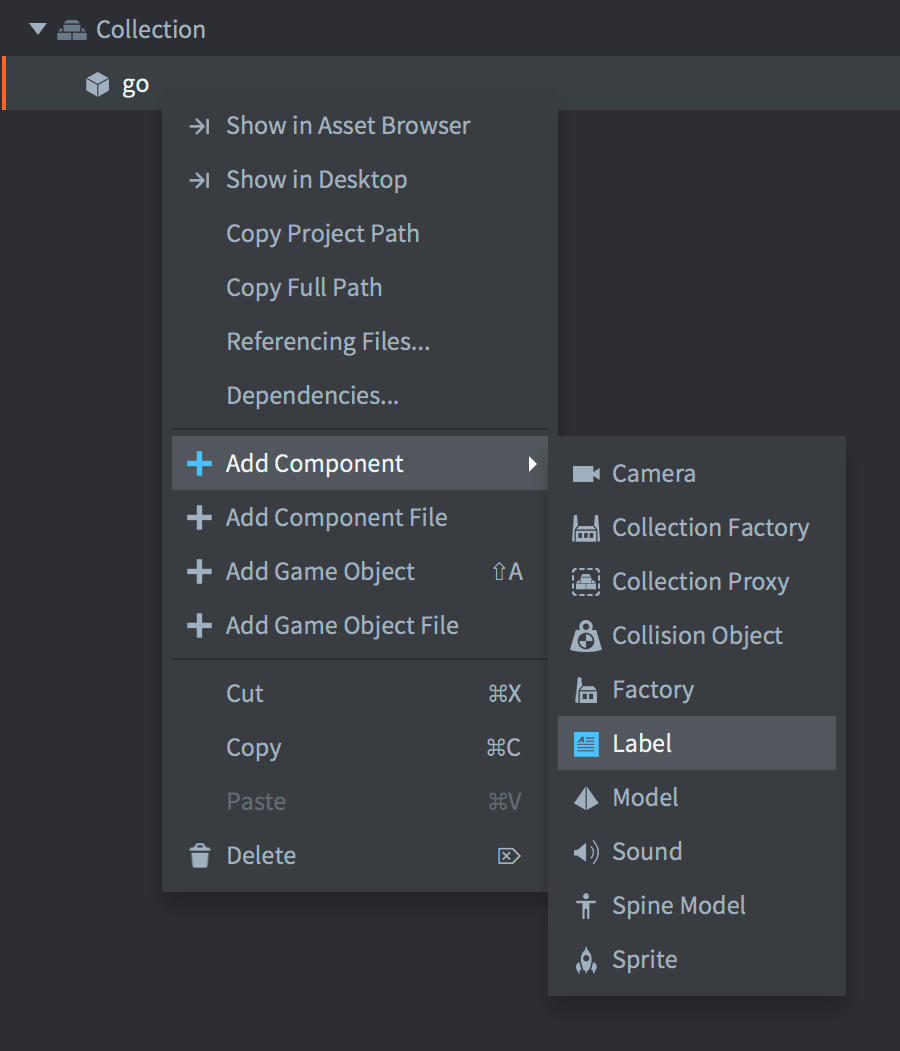
(If you want to instantiate several labels from the same template you can alternatively make a new label component file: right click a folder in the *Assets* browser and select New... ▸ Label, then add the file as component to any game objects)

Set the *Font* property to the font you want to use and make sure to set the *Material* property to a material that matches the font type:

## Label properties
Apart from the properties *Id*, *Position*, *Rotation* and *Scale* the following component specific properties exist:
*Text*
: The text content of the label.
*Size*
: The size of the text bounding box. If *Line Break* is set the width specifies at what point the text should break.
*Color*
: The color of the text.
*Outline*
: The color of the outline.
*Shadow*
: The color of the shadow.
Note that the default material has shadow rendering disabled for performance reasons.
*Leading*
: A scaling number for the line spacing. A value of 0 gives no line spacing. Defaults to 1.
*Tracking*
: A scaling number for the letter spacing. Defaults to 0.
*Pivot*
: The pivot of the text. Use this to change text alignment (see below).
*Blend Mode*
: The blend mode to use when rendering the label.
*Line Break*
: Text alignment follows the pivot setting and setting the this property allows the text to flow over several lines. The width of the component determines where the text will wrap. Note that there has to be a space in the text for it to break.
*Font*
: The font resource to use for this label.
*Material*
: The material to use for rendering this label. Make sure to select a material that is created for the font type that you use (bitmap, distance field or BMFont).
### Blend modes
The *Blend Mode* property defines how the component graphics should be blended with the graphics behind it. These are the available blend modes and how they are calculated:
Alpha
: Normal blending: `src.a * src.rgb + (1 - src.a) * dst.rgb`
Add
: Brighten the background with the color values of the corresponding pixels of the component: `src.rgb + dst.rgb`
Multiply
: Darken the background with values of the corresponding pixels of the component: `src.rgb * dst.rgb`
Screen
: Opposite of Multiply. Brighten background and values of the corresponding pixels of the component: `src.rgb - dst.rgb * dst.rgb`
### Pivot and alignment
By setting the *Pivot* property you can change the alignment mode for the text.
*Center*
: If the pivot is set to `Center`, `North` or `South`, the text is center-aligned.
*Left*
: If the pivot is set to any of the `West` modes, the text is left-aligned.
*Right*
: If the pivot is set to any of the `East` modes, the text is right-aligned.

## Runtime manipulation
You can manipulate labels in runtime by getting and setting the label text as well as the various other properties.
`color`
: The label color (`vector4`)
`outline`
: The label outline color (`vector4`)
`shadow`
: The label shadow color (`vector4`)
`scale`
: The label scale, either a `number` for uniform scaling or a `vector3` for individual scaling along each axis.
`size`
: The label size (`vector3`)
```lua
function init(self)
-- Set the text of the "my_label" component in the same game object
-- as this script.
label.set_text("#my_label", "New text")
end
```
```lua
function init(self)
-- Set the color of the "my_label" component in the same game object
-- as this script. Color is a RGBA value stored in a vector4.
local grey = vmath.vector4(0.5, 0.5, 0.5, 1.0)
go.set("#my_label", "color", grey)
-- ...and remove the outline, by setting its alpha to 0...
go.set("#my_label", "outline.w", 0)
-- ...and scale it x2 along x axis.
local scale_x = go.get("#my_label", "scale.x")
go.set("#my_label", "scale.x", scale_x * 2)
end
```
## Project configuration
The *game.project* file has a few [project settings](#manuals:project-settings#label) related to labels.
# Mesh component {#manuals:mesh}
Defold is at its core a 3D engine. Even when you work with 2D material only all rendering is done in 3D, but orthographically projected onto the screen. Defold allows you to utilize full 3D content by adding and creating 3D meshes at run-time in your collections. You can build games in strictly 3D with only 3D assets, or you can mix 3D and 2D content as you wish.
## Creating a mesh component
Mesh components are created just like any other game object component. You can do it two ways:
- Create a *Mesh file* by right-clicking a location in the *Assets* browser and select New... ▸ Mesh.
- Create the component embedded directly into a game object by right-clicking a game object in the *Outline* view and selecting Add Component ▸ Mesh.

With the mesh created you need to specify a number of properties:
### Mesh properties
Apart from the properties *Id*, *Position* and *Rotation* the following component specific properties exist:
*Material*
: The material to use for rendering the mesh.
*Vertices*
: A buffer file describing the mesh data per stream.
*Primitive Type*
: Lines, Triangles or Triangle Strip.
*Position Stream*
: This property should be the name of the *position* stream. The stream is automatically provided as input to the vertex shader.
*Normal Stream*
: This property should be the name of the *normal* stream. The stream is automatically provided as input to the vertex shader.
*tex0*
: Set this to texture to use for the mesh.
## Editor manipulation
With the mesh component in place you are free to edit and manipulate the component and/or the encapsulating game object with the regular *Scene Editor* tools to move, rotate and scale the mesh to your liking.
## Runtime manipulation
You can manipulate meshes at runtime using Defold buffers. Example of creating a cube from triangle strips:
```Lua
-- cube
local vertices = {
0, 0, 0,
0, 1, 0,
1, 0, 0,
1, 1, 0,
1, 1, 1,
0, 1, 0,
0, 1, 1,
0, 0, 1,
1, 1, 1,
1, 0, 1,
1, 0, 0,
0, 0, 1,
0, 0, 0,
0, 1, 0
}
-- create a buffer with a position stream
local buf = buffer.create(#vertices / 3, {
{ name = hash("position"), type=buffer.VALUE_TYPE_FLOAT32, count = 3 }
})
-- get the position stream and write the vertices
local positions = buffer.get_stream(buf, "position")
for i, value in ipairs(vertices) do
positions[i] = vertices[i]
end
-- set the buffer with the vertices on the mesh
local res = go.get("#mesh", "vertices")
resource.set_buffer(res, buf)
```
Refer to the [forum announcement post for more information](https://forum.defold.com/t/mesh-component-in-defold-1-2-169-beta/65137) on how to use the Mesh component, including sample projects and code snippets.
## Frustum culling
Mesh components are not automatically culled due to their dynamic nature and the fact that it is not possible to know for sure how the positional data is encoded. In order to cull a mesh the axis-aligned bounding box of the mesh needs to be set as meta data on the buffer using 6 floats (AABB min/max):
```lua
buffer.set_metadata(buf, hash("AABB"), { 0, 0, 0, 1, 1, 1 }, buffer.VALUE_TYPE_FLOAT32)
```
## Material constants
The default mesh material has the following constants that can be changed using [go.set()](https://defold.com/ref/stable/go/#go.set) or [go.animate()](https://defold.com/ref/stable/go/#go.animate) (refer to the [Material manual for more details](#manuals:material)). Examples:
```lua
go.set("#mesh", "tint", vmath.vector4(1,0,0,1))
go.animate("#mesh", "tint", go.PLAYBACK_LOOP_PINGPONG, vmath.vector4(1,0,0,1), go.EASING_LINEAR, 2)
```
`tint`
: The color tint of the mesh (`vector4`). The vector4 is used to represent the tint with x, y, z, and w corresponding to the red, green, blue and alpha tint.
## Vertex local vs world space
If the Vertex Space setting of the mesh material is set to Local Space the data will be provided as-is to you in your shader, and you will have to transform vertices/normals as usual on the GPU.
If the Vertex Space setting of the mesh material is set to World Space you have to either provide a default “position” and “normal”, stream, or you can select it from the dropdown, when editing the mesh. This is so that the engine can transform the data to world space for batching with other objects.
# Model component {#manuals:model}
Defold is at its core a 3D engine. Even when you work with 2D material only all rendering is done in 3D, but orthographically projected onto the screen. Defold allows you to utilize full 3D content by including 3D assets, or _Models_ into your collections. You can build games in strictly 3D with only 3D assets, or you can mix 3D and 2D content as you wish.
## Creating a model component
Model components are created just like any other game object component. You can do it two ways:
- Create a *Model file* by right-clicking a location in the *Assets* browser and select New... ▸ Model.
- Create the component embedded directly into a game object by right-clicking a game object in the *Outline* view and selecting Add Component ▸ Model.

With the model created you need to specify a number of properties:
### Model properties
Apart from the properties *Id*, *Position* and *Rotation* the following component specific properties exist:
*Mesh*
: This property should refer to the glTF *.gltf* or Collada *.dae* file that contains the mesh to use. If the file contains multiple meshes, only the first one is read.
*Material*
: Set this property to a material you have created that is suitable for a textured 3D object. There are a number of built-in materials that you can use as a starting point:
* Use *model.material* for static non-instanced models
* Use *model_instances.material* for static instanced models
* Use *model_skinned.material* for skinned (animated) non-instanced models
* Use *model_skinned_instances.material* for skinned (animated) instanced models
*Texture*
: This property should point to the texture image file that you want applied to the object.
*Skeleton*
: This property should refer to the glTF *.gltf* or Collada *.dae* file that contains the skeleton to use for animation. Note that Defold requires a single root bone in your hierarchy.
*Animations*
: Set this to the *Animation Set File* that contains the animations you want to use on the model.
*Default Animation*
: This is the animation (from the animation set) that will be automatically played on the model.
## Editor manipulation
With the model component in place you are free to edit and manipulate the component and/or the encapsulating game object with the regular *Scene Editor* tools to move, rotate and scale the model to your liking.
## Runtime manipulation
You can manipulate models in runtime through a number of different functions and properties (refer to the [API docs for usage](https://defold.com/ref/model/)).
### Runtime animation
Defold provides powerful support for controlling animation in runtime. More in the [model animation manual](#manuals:model-animation):
```lua
local play_properties = { blend_duration = 0.1 }
model.play_anim("#model", "jump", go.PLAYBACK_ONCE_FORWARD, play_properties)
```
The animation playback cursor can be animated either by hand or through the property animation system:
```lua
-- set the run animation
model.play_anim("#model", "run", go.PLAYBACK_NONE)
-- animate the cursor
go.animate("#model", "cursor", go.PLAYBACK_LOOP_PINGPONG, 1, go.EASING_LINEAR, 10)
```
### Changing properties
A model also has a number of different properties that can be manipulated using `go.get()` and `go.set()`:
`animation`
: The current model animation (`hash`) (READ ONLY). You change animation using `model.play_anim()` (see above).
`cursor`
: The normalized animation cursor (`number`).
`material`
: The model material (`hash`). You can change this using a material resource property and `go.set()`. Refer to the [API reference for an example](https://defold.com/ref/model/#material).
`playback_rate`
: The animation playback rate (`number`).
`textureN`
: The model textures where N is 0-7 (`hash`). You can change this using a texture resource property and `go.set()`. Refer to the [API reference for an example](https://defold.com/ref/model/#textureN).
## Material
3D software commonly allows you to set properties on your object vertices, like coloring and texturing. This information goes into the glTF *.gltf* or Collada *.dae* file that you export from your 3D software. Depending on the requirements of your game you will have to select and/or create appropriate and _performant_ materials for your objects. A material combines _shader programs_ with a set of parameters for rendering of the object.
There are a number of built-in materials that you can use as a starting point:
* Use *model.material* for static non-instanced models
* Use *model_instances.material* for static instanced models
* Use *model_skinned.material* for skinned (animated) non-instanced models
* Use *model_skinned_instances.material* for skinned (animated) instanced models
If you need to create custom materials for your models, see the [Material documentation](#manuals:material) for information. The [Shader manual](#manuals:shader) contains information on how shader programs work.
### Material constants
The default model material has the following constants that can be changed using [go.set()](https://defold.com/ref/stable/go/#go.set) or [go.animate()](https://defold.com/ref/stable/go/#go.animate) (refer to the [Material manual for more details](#manuals:material)). Examples:
```lua
go.set("#model", "tint", vmath.vector4(1,0,0,1))
go.animate("#model", "tint", go.PLAYBACK_LOOP_PINGPONG, vmath.vector4(1,0,0,1), go.EASING_LINEAR, 2)
```
`tint`
: The color tint of the model (`vector4`). The vector4 is used to represent the tint with x, y, z, and w corresponding to the red, green, blue and alpha tint.
## Rendering
The default render script is tailor made for 2D games and does not work with 3D models. But by copying the default render script and adding a handful of lines of code to the render script you can enable rendering of your models. For instance:
```lua
function init(self)
self.model_pred = render.predicate({"model"})
...
end
function update()
...
render.set_depth_mask(true)
render.enable_state(render.STATE_DEPTH_TEST)
render.set_projection(stretch_projection(-1000, 1000)) -- orthographic
render.draw(self.model_pred)
render.set_depth_mask(false)
...
end
```
See the [Render documentation](#manuals:render) for details on how render scripts work.
# Particle FX {#manuals:particlefx}
Particle effects are used to visually enhance games. You can use them to create explosions, blood splatter, trails, weather or any other effect.

Particle effects consists of a number of emitters and optional modifiers:
Emitter
: An emitter is a positioned shape that emits particles uniformly distributed over the shape. The emitter contains properties that controls the particle spawning as well as the image or animation, lifespan, color, shape and velocity of the individual particles.
Modifier
: A modifier affects the velocity of spawned particles to make them accelerate or slow down in a particular direction, move radially or swirl around a point. Modifiers can affect a single emitter's particles or a particular emitter.
## Creating an effect
Select New... ▸ Particle FX from the context menu in the *Assets* browser. Name the new particle effect file. The editor will now open the file using the [Scene Editor](#manuals:editor).
The *Outline* pane shows the default emitter. Select the emitter to bring up its properties in the *Properties* pane below.

To add a new emitter to the effect, right click the root of the *Outline* and select Add Emitter ▸ [type] from the context menu. Note that you can change the type of the emitter in the emitter properties.
To add a new modifier, right click the location of the modifier in the *Outline* (the effect root or a particular emitter) and select Add Modifier, then select the modifier type.
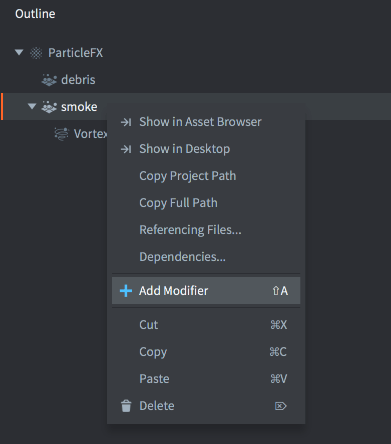
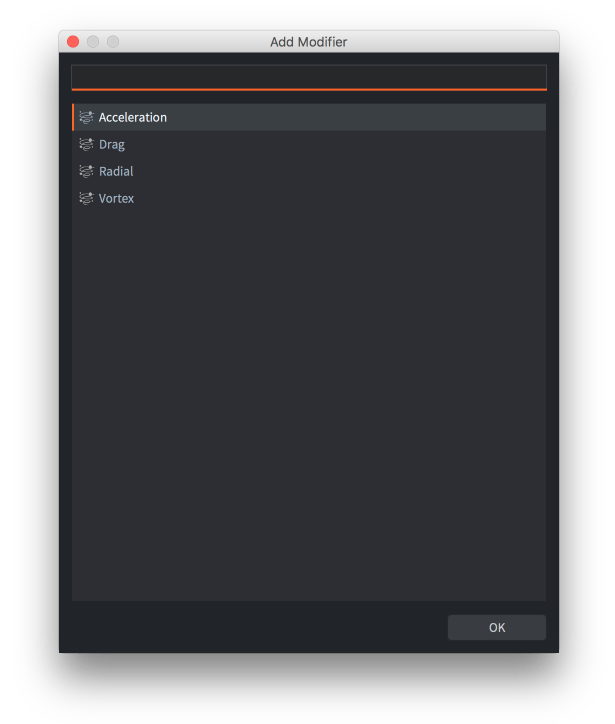
A modifier that sits on the effect root (not childed to an emitter) affects all particles in the effect.
A modifier that is added as a child to an emitter affects only that emitter.
## Previewing an effect
* Select View ▸ Play from the menu to preview the effect. You may need to zoom out the camera to see the effect properly.
* Select View ▸ Play again to pause the effect.
* Select View ▸ Stop to stop the effect. Playing it again restarts it from its initial state.
When editing an emitter or modifier the result is immediately visible in the editor, even with the effect paused:

## Emitter properties
Id
: Emitter identifier (used when setting render constants for specific emitters).
Position/Rotation
: Transform of the emitter relative the ParticleFX component.
Play Mode
: Controls how the emitter plays:
- `Once` stops the emitter after reaching its duration.
- `Loop` restarts the emitter after reaching its duration.
Size Mode
: Controls how flipbook animations will be sized:
- `Auto` keeps the size of each flipbook animation frame to the source image.
- `Manual` sets the particle size according to the size property.
Emission Space
: Which geometrical space the spawned particles will exist:
- `World` moves the particles independent of the emitter.
- `Emitter` moves the particles relative to the emitter.
Duration
: The number of seconds the emitter should emit particles.
Start Delay
: The number of seconds the emitter should wait before emitting particles.
Start Offset
: The number of seconds into the particle simulation the emitter should start, or in other words how long the emitter should prewarm the effect for.
Image
: The image file (Tile source or Atlas) to use for texturing and animating the particles.
Animation
: The animation from the *Image* file to use on the particles.
Material
: The material to use for shading the particles.
Blend Mode
: Available blend modes are `Alpha`, `Add` and `Multiply`.
Max Particle Count
: How many particles originating from this emitter that can exist at the same time.
Emitter Type
: The shape of the emitter
- `Circle` emits particles from a random location inside a circle. The particles are directed outwards from the center. The circle diameter is defined by *Emitter Size X*.
- `2D Cone` emits particles from a random location inside a flat cone (a triangle). The particles are directed out of the top of the cone. *Emitter Size X* defines the width of the top and *Y* defines the height.
- `Box` emits particles from a random location inside a box. The particles are directed up along the box' local Y-axis. *Emitter Size X*, *Y* and *Z* defines width, height and depth respectively. For a 2D rectangle, keep the Z size at zero.
- `Sphere` emits particles from a random location inside a sphere. The particles are directed outwards from the center. The sphere diameter is defined by *Emitter Size X*.
- `Cone` emits particles from a random location inside a 3D cone. The particles are directed out through the top disc of the cone. *Emitter Size X* defines the diameter of the top disc and *Y* defines the height of the cone.
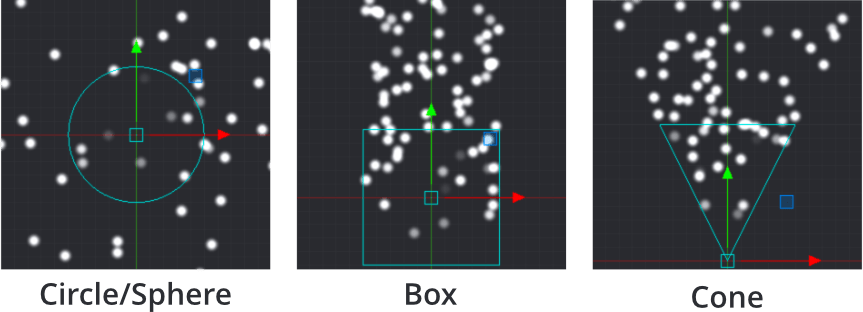
Particle Orientation
: How the emitted particles are oriented:
- `Default` sets the orientation to unit orientation
- `Initial Direction` keeps the initial orientation of the emitted particles.
- `Movement Direction` adjusts the orientation of the particles according to their velocity.
Inherit Velocity
: A scale value of how much of the velocity of the emitter the particles should inherit. This value is only available when *Space* is set to `World`. The velocity of the emitter is estimated every frame.
Stretch With Velocity
: Check to scale any particle stretch in the direction of movement.
### Blend modes
The *Blend Mode* property defines how the component graphics should be blended with the graphics behind it. These are the available blend modes and how they are calculated:
Alpha
: Normal blending: `src.a * src.rgb + (1 - src.a) * dst.rgb`
Add
: Brighten the background with the color values of the corresponding pixels of the component: `src.rgb + dst.rgb`
Multiply
: Darken the background with values of the corresponding pixels of the component: `src.rgb * dst.rgb`
Screen
: Opposite of Multiply. Brighten background and values of the corresponding pixels of the component: `src.rgb - dst.rgb * dst.rgb`
## Keyable emitter properties
These properties have two fields: a value and a spread. The spread is a variation which is applied randomly for each spawned particle. E.g. if the value is 50 and the spread is 3, each spawned particle will get a value between 47 and 53 (50 +/- 3).

By checking the key button, the value of the property is controlled by a curve over the duration of the emitter. To reset a keyed property, uncheck the key button.

The *Curve Editor* (available among the tabs in the bottom view) is used to modify the curve. Keyed properties can't be edited in the *Properties* view, only in the *Curve Editor*. Click and drag the points and tangents to modify the shape of the curve. Double-click on the curve to add control points. To remove a control point, double click on it.
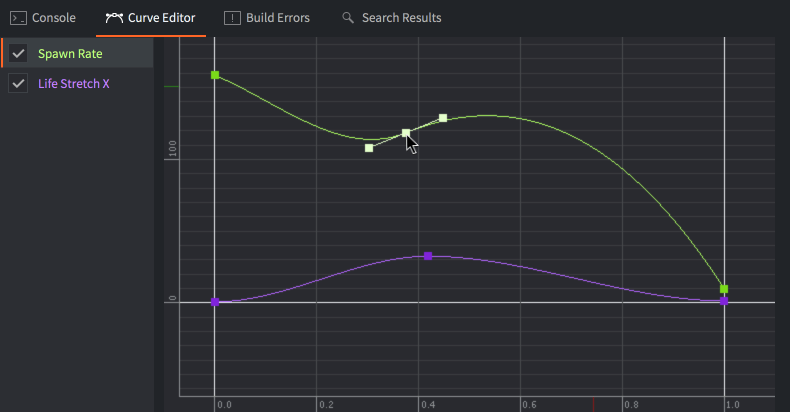
To auto-zoom the Curve Editor to display all curves, press F.
The following properties can be keyed over the play time of the emitter:
Spawn Rate
: The number of particles to emit per second.
Emitter Size X/Y/Z
: The dimensions of the emitter shape, see *Emitter Type* above.
Particle Life Time
: The lifespan of each spawned particle, in seconds.
Initial Speed
: The initial velocity of each spawned particle.
Initial Size
: The initial size of each spawned particle. If you set *Size Mode* to `Automatic` and use a flipbook animation as image source, this property is ignored.
Initial Red/Green/Blue/Alpha
: The initial color component tint values for the particles.
Initial Rotation
: The initial rotation values (in degrees) for the particles.
Initial Stretch X/Y
: The initial stretch values (in units) for the particles.
Initial Angular Velocity
: The initial angular velocity (in degrees/second) of each spawned particle.
The following properties can be keyed over the life time of the particles:
Life Scale
: The scale value over each particle's life.
Life Red/Green/Blue/Alpha
: The color component tint value over each particle's life.
Life Rotation
: The rotation value (in degrees) over each particle's life.
Life Stretch X/Y
: The stretch value (in units) over each particle's life.
Life Angular Velocity
: The angular velocity (in degrees/second) over each particle's life.
## Modifiers
There are four types of modifiers available that affect the velocity of particles:
`Acceleration`
: Acceleration in a general direction.
`Drag`
: Reduces the acceleration of particles proportional to the particle velocity.
`Radial`
: Either attracts or repels particles towards/from a position.
`Vortex`
: Affects particles in a circular or spiraling direction around its position.

## Modifier properties
Position/Rotation
: The transform of the modifier relative its parent.
Magnitude
: The amount of effect the modifier has on the particles.
Max Distance
: The maximum distance within which particles are affected at all by this modifier. Only used for Radial and Vortex.
## Controlling a particle effect
To start and stop a particle effect from a script:
```lua
-- start the effect component "particles" in the current game object
particlefx.play("#particles")
-- stop the effect component "particles" in the current game object
particlefx.stop("#particles")
```
To start and stop a particle effect from a GUI script see the [GUI Particle FX manual](#manuals:gui-particlefx#controlling-the-effect) for more information.
A particle effect will continue to emit particles even if the game object the particle effect component belonged to is deleted.
See the [Particle FX reference documentation](https://defold.com/ref/particlefx) for more information.
## Material constants
The default particle effect material has the following constants that can be changed using `particlefx.set_constant()` and reset using `particlefx.reset_constant()` (refer to the [Material manual for more details](#manuals:material)):
`tint`
: The color tint of the particle effect (`vector4`). The vector4 is used to represent the tint with x, y, z, and w corresponding to the red, green, blue and alpha tint. Refer to the [API reference for an example](https://defold.com/ref/particlefx/#particlefx.set_constant:url-constant-value).
## Project configuration
The *game.project* file has a few [project settings](#manuals:project-settings#particle-fx) related to particles.
# Sound {#manuals:sound}
Defold's sound implementation is simple but powerful. There are only two concepts that you need to be aware of:
Sound components
: These components contain an actual sound that should be played and are able to play back the sound.
Sound groups
: Each sound component can be designated to belong to a _group_. Groups offer an easy way to manage sounds that belong together in an intuitive way. For instance, a group "sound_fx" can be set up and any sound belonging to that group can be ducked by a simple function call.
## Creating a sound component
Sound components can only be instanced in-place in a game object. Create a new game object, right click on it and select Add Component ▸ Sound and press *OK*.
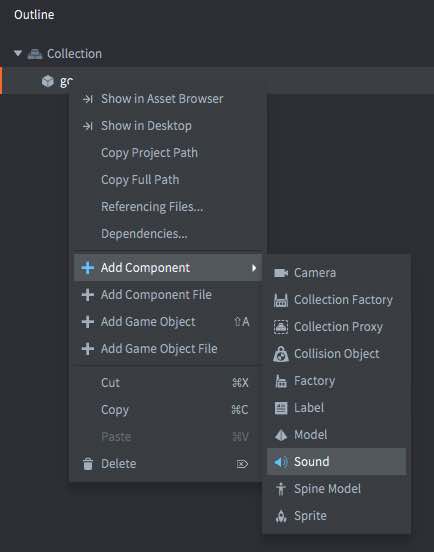
The created component has a set of properties that should be set:
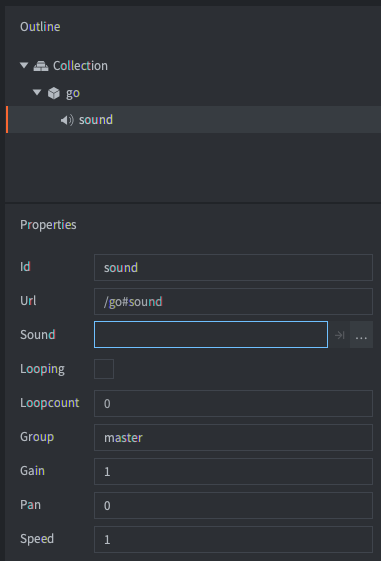
*Sound*
: Should be set to a sound file in your project. The file should be in _Wave_, _Ogg Vorbis_ or _Ogg Opus_ format. Defold supports sound files saved at 16bit bit depth.
*Looping*
: If checked the sound will play back in _Loopcount_ times or until explicitly stopped.
*Loopcount*
: The number of times a looping sound will play before stopping (0 means the sound should loop until explicitly stopped).
*Group*
: The name of the sound group the sound should belong to. If this property is left empty, the sound will be assigned to the built-in "master" group.
*Gain*
: You can set the gain for the sound directly on the component. This allows you to easily tweak the gain for a sound without going back to your sound program and performing a re-export. See below for details on how gain is calculated.
*Pan*
: You can set the pan value for the sound directly on the component. The pan must be a value between -1 (-45 degrees left) and 1 (45 degrees right).
*Speed*
: You can set the speed value for the sound directly on the component. A value of 1.0 is normal speed, 0.5 is half speed and 2.0 is double speed.
## Playing the sound
When you have a sound component set up properly, you can cause it to play its sound by calling [`sound.play()`](https://defold.com/ref/sound/#sound.play:url-[play_properties]-[complete_function]):
```lua
sound.play("go#sound", {delay = 1, gain = 0.5, pan = -1.0, speed = 1.25})
```
A sound will continue to play even if the game object the sound component belonged to is deleted. You can call [`sound.stop()`](https://defold.com/ref/sound/#sound.stop:url) to stop the sound (see below).
Each message sent to a component will cause it to play another instance of the sound, until the available sound buffer is full and the engine will print errors in the console. It is advised that you implement some sort of gating and sound grouping mechanism.
## Stopping the sound
If you wish to stop playing a sound you can call [`sound.stop()`](https://defold.com/ref/sound/#sound.stop:url):
```lua
sound.stop("go#sound")
```
## Gain

The sound system has 4 levels of gain:
- The gain set on the sound component.
- The gain set when starting the sound via a call to `sound.play()` or when changing the gain on the voice via a call to `sound.set_gain()`.
- The gain set on the group via a [`sound.set_group_gain()`](https://defold.com/ref/sound#sound.set_group_gain) function call.
- The gain set on the "master" group. This can be altered by `sound.set_group_gain(hash("master"))`.
The output gain is the result of these 4 gains multiplied. The default gain is 1.0 everywhere (0 dB).
## Sound groups
Any sound component with a sound group name specified will be put in a sound group with that name. If you don't specify a group the sound will be assigned to the "master" group. You can also explicitly set the group on a sound component to "master" which has the same effect.
A few functions are available to get all available groups, get the string name, get and set gain, rms (see http://en.wikipedia.org/wiki/Root_mean_square) and peak gain. There is also a function that allows you to test if the target device's music player is running:
```lua
-- If sound playing on this iPhone/Android device, silence everything
if sound.is_music_playing() then
for i, group_hash in ipairs(sound.get_groups()) do
sound.set_group_gain(group_hash, 0)
end
end
```
The groups are identified with a hash value. The string name can be retrieved with [`sound.get_group_name()`](https://defold.com/ref/sound#sound.get_group_name) which can be used to display group names in development tools, for instance a mixer to test group levels.
You should not write code that relies on the string value of a sound group since they are not available in release builds.
All values are linear between 0 and 1.0 (0 dB). To convert to decibel, simply use the standard formula:
```math
db = 20 \times \log \left( gain \right)
```
```lua
for i, group_hash in ipairs(sound.get_groups()) do
-- The name string is only available in debug. Returns "unknown_*" in release.
local name = sound.get_group_name(group_hash)
local gain = sound.get_group_gain(group_hash)
-- Convert to decibel.
local db = 20 * math.log10(gain)
-- Get RMS (gain Root Mean Square). Left and right channel separately.
local left_rms, right_rms = sound.get_rms(group_hash, 2048 / 65536.0)
left_rmsdb = 20 * math.log10(left_rms)
right_rmsdb = 20 * math.log10(right_rms)
-- Get gain peak. Left and right separately.
left_peak, right_peak = sound.get_peak(group_hash, 2048 * 10 / 65536.0)
left_peakdb = 20 * math.log10(left_peak)
right_peakdb = 20 * math.log10(right_peak)
end
-- Set the master gain to +6 dB (math.pow(10, 6/20)).
sound.set_group_gain("master", 1.995)
```
## Gating sounds
If your game plays the same sound on an event and that event is triggered often, you run the risk of playing the same sound two times or more almost at the same time. If that happens, the sounds will be _phase shifted_ which can result in some very noticeable artifacts.
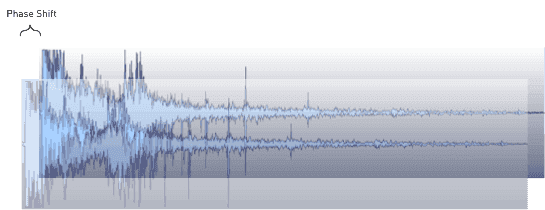
The easiest way to deal with this problem is to build a gate that filters sound messages and does not allow the same sound to be played more than once within a set interval:
```lua
-- Don't allow the same sound to be played within "gate_time" interval.
local gate_time = 0.3
function init(self)
-- Store played sound timers in a table and count down each frame until they have been
-- in the table for "gate_time" seconds. Then remove them.
self.sounds = {}
end
function update(self, dt)
-- Count down the stored timers
for k,_ in pairs(self.sounds) do
self.sounds[k] = self.sounds[k] - dt
if self.sounds[k] < 0 then
self.sounds[k] = nil
end
end
end
function on_message(self, message_id, message, sender)
if message_id == hash("play_gated_sound") then
-- Only play sounds that are not currently in the gating table.
if self.sounds[message.soundcomponent] == nil then
-- Store sound timer in table
self.sounds[message.soundcomponent] = gate_time
-- Play the sound
sound.play(message.soundcomponent, { gain = message.gain })
else
-- An attempt to play a sound was gated
print("gated " .. message.soundcomponent)
end
end
end
```
To use the gate, simply send it a `play_gated_sound` message and specify the target sound component and sound gain. The gate will call `sound.play()` with the target sound component if the gate is open:
```lua
msg.post("/sound_gate#script", "play_gated_sound", { soundcomponent = "/sounds#explosion1", gain = 1.0 })
```
It does not work to have the gate listen to `play_sound` messages since that name is reserved by the Defold engine. You will get unexpected behavior if you use reserved message names.
## Runtime manipulation
You can manipulate sounds in runtime through a number of different properties (refer to the [API docs for usage](https://defold.com/ref/sound/)). The following properties can be manipulated using `go.get()` and `go.set()`:
`gain`
: The gain for the sound component (`number`).
`pan`
: The pan for the sound component (`number`). The pan must be a value between -1 (-45 degrees left) and 1 (45 degrees right).
`speed`
: The speed for the sound component (`number`). A value of 1.0 is normal speed, 0.5 is half speed and 2.0 is double speed.
`sound`
: The resource path to the sound (`hash`). You can use the resource path to change the sound using `resource.set_sound(path, buffer)`. Example:
```lua
local boom = sys.load_resource("/sounds/boom.wav")
local path = go.get("#sound", "sound")
resource.set_sound(path, boom)
```
## Project configuration
The *game.project* file has a few [project settings](#manuals:project-settings#sound) related to sound components.
## Sound Streaming
It is also possible to support [streaming sounds](#manuals:sound-streaming)
# Sprites {#manuals:sprite}
A Sprite component is a simple image or flipbook animation that is displayed on screen.

The Sprite component can use either an [Atlas](#manuals:atlas) or a [Tile Source](#manuals:tilesource) for it's graphics.
## Sprite properties
Apart from the properties *Id*, *Position* and *Rotation* the following component specific properties exist:
*Image*
: If the shader has a single sampler, this field is named `Image`. Otherwise, each slot is named after the texture sampler in the material.
Each slot specifies the atlas or tilesource resource to use for the sprite on that texture sampler.
*Default Animation*
: The animation to use for the sprite. The animation information is taken from the first atlas or tilesource.
*Material*
: The material to use for rendering the sprite.
*Blend Mode*
: The blend mode to use when rendering the sprite.
*Size Mode*
: If set to `Automatic` the editor will set a size of the sprite. If set to `Manual` you can set the size yourself.
*Slice 9*
: Set to preserve the pixel size of the sprite's texture around the edges when the sprite is resized.
## Slice-9 texturing
GUI box nodes and Sprite components sometimes feature elements that are context sensitive in regard to their size: panels and dialogs that need to be resized to fit the containing content or a health bar that need to be resized to show the remaining health of an enemy. These may cause visual problems when you apply texturing to the resized node or sprite.
Normally, the engine scales the texture to fit the rectangular boundaries, but by defining slice-9 edge areas it is possible to limit what parts of the texture that should scale:
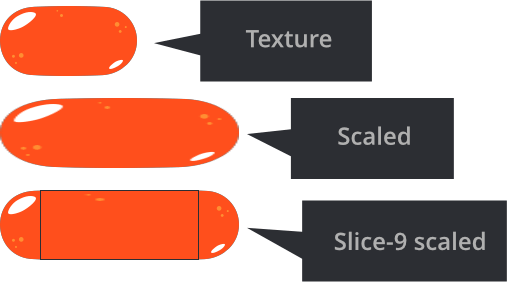
The *Slice9* box node consists of 4 numbers that specify the number of pixels for the left, top, right and bottom margin that should not be regularly scaled:

The margins are set clockwise, starting on the left edge:
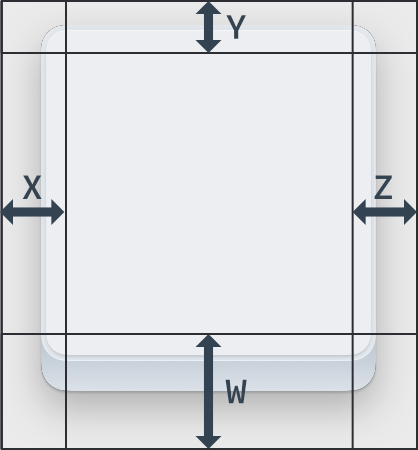
- Corner segments are never scaled.
- Edge segments are scaled along a single axis. The left and right edge segments are scaled vertically. The top and bottom edge segments are scaled horizontally.
- The central texture area is scaled horizontally and vertically as needed.
The *Slice9* texture scaling described above is only applied when you change box node's or sprite's size:

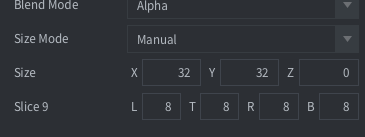
If you change scale parameter of the box node or sprite (or on the game object) - the node or sprite and texture is scaled without applying *Slice9* parameters.
When using slice-9 texturing on Sprites the [Sprite Trim Mode of the image](#manuals:atlas) must be set to Off.
### Mipmaps and slice-9
Due to the way mipmapping works in the renderer, scaling of texture segments can sometimes exhibit artifacts. This happens when you _scale down_ segments below the original texture size. The renderer then selects a lower resolution mipmap for the segment, resulting in visual artifacts.
To avoid this problem, make sure that the texture's segments that will be scaled are small enough never to be scaled down, only up.
### Blend modes
The *Blend Mode* property defines how the component graphics should be blended with the graphics behind it. These are the available blend modes and how they are calculated:
Alpha
: Normal blending: `src.a * src.rgb + (1 - src.a) * dst.rgb`
Add
: Brighten the background with the color values of the corresponding pixels of the component: `src.rgb + dst.rgb`
Multiply
: Darken the background with values of the corresponding pixels of the component: `src.rgb * dst.rgb`
Screen
: Opposite of Multiply. Brighten background and values of the corresponding pixels of the component: `src.rgb - dst.rgb * dst.rgb`
## Runtime manipulation
You can manipulate sprites in runtime through a number of different functions and properties (refer to the [API docs for usage](https://defold.com/ref/sprite/)). Functions:
* `sprite.play_flipbook()` - Play an animation on a sprite component.
* `sprite.set_hflip()` and `sprite.set_vflip()` - Set horizontal and vertical flipping on a sprite's animation.
A sprite also has a number of different properties that can be manipulated using `go.get()` and `go.set()`:
`cursor`
: The normalized animation cursor (`number`).
`image`
: The sprite image (`hash`). You can change this using an atlas or tile source resource property and `go.set()`. Refer to the [API reference for an example](https://defold.com/ref/sprite/#image).
`material`
: The sprite material (`hash`). You can change this using a material resource property and `go.set()`. Refer to the [API reference for an example](https://defold.com/ref/sprite/#material).
`playback_rate`
: The animation playback rate (`number`).
`scale`
: The non-uniform scale of the sprite (`vector3`).
`size`
: The size of the sprite (`vector3`). Can only be changed if sprite size-mode is set to manual.
## Material constants
The default sprite material has the following constants that can be changed using [go.set()](https://defold.com/ref/stable/go/#go.set) or [go.animate()](https://defold.com/ref/stable/go/#go.animate) (refer to the [Material manual for more details](#manuals:material)). Examples:
```lua
go.set("#sprite", "tint", vmath.vector4(1,0,0,1))
go.animate("#sprite", "tint", go.PLAYBACK_LOOP_PINGPONG, vmath.vector4(1,0,0,1), go.EASING_LINEAR, 2)
```
`tint`
: The color tint of the sprite (`vector4`). The vector4 is used to represent the tint with x, y, z, and w corresponding to the red, green, blue and alpha tint.
## Material attributes
A sprite can override vertex attributes from the currently assigned material and will be passed into the vertex shader from the component (refer to the [Material manual for more details](#manuals:material)).
The attributes specified in the material will show up as regular properties in the inspector and can be set on individual sprite components. If any of the attributes are overridden, it will show up as an overridden property and stored in the sprite file on disk:
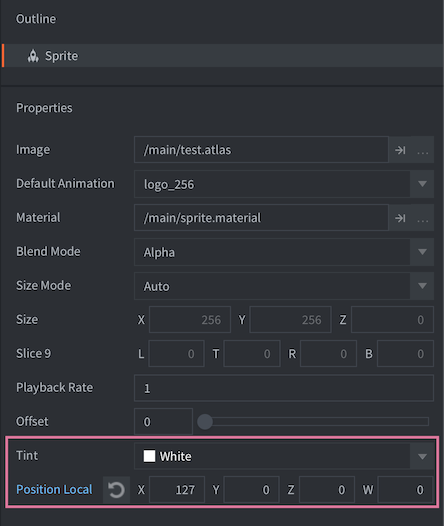
## Project configuration
The *game.project* file has a few [project settings](#manuals:project-settings#sprite) related to sprites.
## Multi textured sprites
When a sprite uses multiple textures there are some things to note.
### Animations
The animation data (fps, frame names) is currently taken from the first texture. We'll call this the "driving animation".
The image id's of the driving animation are used to lookup the images in another texture.
So it's important to make sure the frame ids match between textures.
E.g. if your `diffuse.atlas` has a `run` animation like so:
```
run:
/main/images/hero_run_color_1.png
/main/images/hero_run_color_2.png
...
```
Then the frame id's would be `run/hero_run_color_1` which is not likely to be found in for instance a `normal.atlas`:
```
run:
/main/images/hero_run_normal_1.png
/main/images/hero_run_normal_2.png
...
```
So we use the `Rename patterns` in the [atlas](#manuals:material) to rename them.
Set `_color=` and `_normal=` in the corresponding atlases, and you'll get frame names like this in both atlases:
```
run/hero_run_1
run/hero_run_2
...
```
### UVs
The UVs are taken from the first texture. Since there is only one set of vertices, we cannot guarantee
a good match anyways if the secondary textures have either more UV coordinates or a different shape.
This is important to note, so make sure the images have similar enough shapes, or you might experience texture bleeding.
The dimensions of the images in each texture may be different.
# Tile map {#manuals:tilemap}
A *Tile Map* is a component that allows you to assemble, or paint, tiles from a *Tile Source* onto a large grid area. Tile maps are commonly used to build game level environments. You can also use the *Collision Shapes* from the tile source in your maps for collision detection and physics simulation ([example](https://defold.com/examples/tilemap/collisions/)).
Before you can create a tile map you need to create a Tile Source. Refer to the [Tile Source manual](#manuals:tilesource) to learn how to create a Tile Source.
## Creating a tile map
To create a new tile map:
- Right click a location in the *Assets* browser, then select New... ▸ Tile Map).
- Name the file.
- The new tile map automatically opens in the tile map editor.

- Set the *Tile Source* property to a tile source file that you have prepared.
To paint tiles on your tile map:
1. Select or create a *Layer* to paint on in the *Outline* view.
2. Select a tile to use as a brush (press Space to show the tile palette) or select a few tiles by clicking and dragging in the palette to create a rectangle brush with multiple tiles.

3. Paint with the selected brush. To erase a tile, either pick an empty tile and use it as brush, or select the eraser (Edit ▸ Select Eraser).
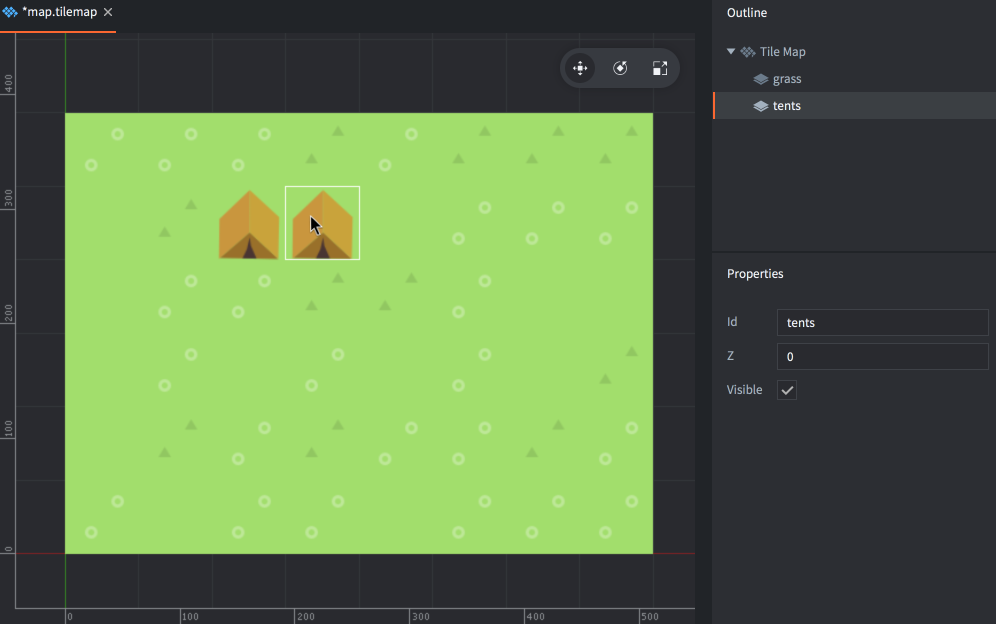
You can pick tiles directly from a layer and use the selection as a brush. Hold Shift and click a tile to pick it up as the current brush. While holding Shift you can also click and drag to select a block of tiles to use as a larger brush. Also, it is possible to cut tiles in a similar way by holding Shift+Ctrl or erase them by holding Shift+Alt.
For clockwise brush rotation, use Z. Use X for horizontal flipping and Y for vertical flipping of the brush.
## Adding a tile map to your game
To add a tile map to your game:
1. Create a game object to hold the tile map component. The game object can be in a file or created directly in a collection.
2. Right-click the root of the game object and select Add Component File.
3. Select the tile map file.
## Runtime manipulation
You can manipulate tilemaps in runtime through a number of different functions and properties (refer to the [API docs for usage](https://defold.com/ref/tilemap/)).
### Changing tiles from script
You can read and write the content of a tile map dynamically while your game is running. To do so, use the [`tilemap.get_tile()`](https://defold.com/ref/tilemap/#tilemap.get_tile) and [`tilemap.set_tile()`](https://defold.com/ref/tilemap/#tilemap.set_tile) functions:
```lua
local tile = tilemap.get_tile("/level#map", "ground", x, y)
if tile == 2 then
-- Replace grass-tile (2) with dangerous hole tile (number 4).
tilemap.set_tile("/level#map", "ground", x, y, 4)
end
```
## Tilemap properties
Apart from the properties *Id*, *Position*, *Rotation* and *Scale* the following component specific properties exist:
*Tile Source*
: The tilesource resource to use for the tilemap.
*Material*
: The material to use for rendering the tilemap.
*Blend Mode*
: The blend mode to use when rendering the tilemap.
### Blend modes
The *Blend Mode* property defines how the component graphics should be blended with the graphics behind it. These are the available blend modes and how they are calculated:
Alpha
: Normal blending: `src.a * src.rgb + (1 - src.a) * dst.rgb`
Add
: Brighten the background with the color values of the corresponding pixels of the component: `src.rgb + dst.rgb`
Multiply
: Darken the background with values of the corresponding pixels of the component: `src.rgb * dst.rgb`
Screen
: Opposite of Multiply. Brighten background and values of the corresponding pixels of the component: `src.rgb - dst.rgb * dst.rgb`
### Changing properties
A tilemap has a number of different properties that can be manipulated using `go.get()` and `go.set()`:
`tile_source`
: The tile map tile source (`hash`). You can change this using a tile source resource property and `go.set()`. Refer to the [API reference for an example](https://defold.com/ref/tilemap/#tile_source).
`material`
: The tile map material (`hash`). You can change this using a material resource property and `go.set()`. Refer to the [API reference for an example](https://defold.com/ref/tilemap/#material).
### Material constants
The default tilemap material has the following constants that can be changed using [go.set()](https://defold.com/ref/stable/go/#go.set) or [go.animate()](https://defold.com/ref/stable/go/#go.animate) (refer to the [Material manual for more details](#manuals:material)). Examples:
```lua
go.set("#tilemap", "tint", vmath.vector4(1,0,0,1))
go.animate("#tilemap", "tint", go.PLAYBACK_LOOP_PINGPONG, vmath.vector4(1,0,0,1), go.EASING_LINEAR, 2)
```
`tint`
: The color tint of the tile map (`vector4`). The vector4 is used to represent the tint with x, y, z, and w corresponding to the red, green, blue and alpha tint.
## Project configuration
The *game.project* file has a few [project settings](#manuals:project-settings#tilemap) related to tilemaps.
## External tools
There are external map/level editors that can export directly to Defold tilemaps:
### Tiled
[Tiled](https://www.mapeditor.org/) is a well-known and widely used map editor for orthogonal, isometric and hexagonal maps. Tiled has support for a wide array of features and can [export directly to Defold](https://doc.mapeditor.org/en/stable/manual/export-defold/). Learn more about how to export tilemap data and additional meta-data in [this blog post by Defold user "goeshard"](https://goeshard.org/2025/01/01/using-tiled-object-layers-with-defold-tilemaps/)
### Tilesetter
[Tilesetter](https://www.tilesetter.org/docs/exporting#defold) can be used to automatically create full tilesets from simple base tiles and it has a map editor which can export directly to Defold.
# GUI {#manuals:gui}
Defold provides you with a custom GUI editor and powerful scripting possibilities that are tailor made for the construction and implementation of user interfaces.
A graphical user interface in Defold is a component that you build and attach to a game object and place in a collection. This component has the following properties:
* It has simple, but powerful, layout features that allow resolution and aspect ratio independent rendering of your user interface.
* It can have logic behavior attached to it through a *GUI script*.
* It is (by default) rendered on top of other content, independent of camera view so even if you have a moving camera, your GUI elements will stay put on the screen. The rendering behavior can be changed.
GUI components are rendered independently of the game view. Because of this it is not placed in a particular location in the collection editor, nor does it have a visual representation in the collection editor. However, GUI components have to reside in a game object that has a location in a collection. Changing that location has no effect on the GUI.
## Creating a GUI component
GUI components are created from a GUI scene prototype file (also known as "prefabs" or "blueprints" in other engines). To create a new GUI component, right click a location in the *Assets* browser and select New ▸ Gui. Type a name for the new GUI file and press Ok.
Defold now automatically opens the file in the GUI scene editor.
The *Outline* lists all the GUI's content: it's list of nodes and any dependencies (see below).
The central editing area shows the GUI. The toolbar in the top right corner of the editing area contains *Move*, *Rotate* and *Scale* tools, as well as a [layout](#manuals:gui-layouts) selector.

A white rectangle shows the bounds of the currently selected layout, of the default display width and height as set in the project settings.
## Gui properties
Selecting the root "Gui" node in the *Outline* shows the *Properties* for the GUI component:
*Script*
: The GUI script bound to this GUI component.
*Material*
: The material used when rendering this GUI. Note that it is also possible to add multiple materials to a Gui from the Outline panel and assign these to individual nodes.
*Adjust Reference*
: Controls how each node's *Adjust Mode* should be calculated:
- `Per Node` adjusts each node against the adjusted size of the parent node, or the resized screen.
- `Disable` turns off node adjust mode. This forces all nodes to keep their set size.
*Current Nodes*
: The number of nodes currently being used in this GUI.
*Max Nodes*
: The maximum number of nodes for this GUI.
*Max Dynamic Textures*
: The maximum number of textures that can be created using [`gui.new_texture()`](https://defold.com/ref/stable/gui/#gui.new_texture:texture_id-width-height-type-buffer-flip)
## Runtime manipulation
You can manipulate GUI properties in runtime from a script component using `go.get()` and `go.set()`:
Fonts
: Get or set a font used in a GUI.
```lua
go.property("mybigfont", resource.font("/assets/mybig.font"))
function init(self)
-- get the font file currently assigned to the font with id 'default'
print(go.get("#gui", "fonts", { key = "default" })) -- /builtins/fonts/default.font
-- set the font with id 'default' to the font file assigned to the resource property 'mybigfont'
go.set("#gui", "fonts", self.mybigfont, { key = "default" })
-- get the new font file assigned to the font with id 'default'
print(go.get("#gui", "fonts", { key = "default" })) -- /assets/mybig.font
end
```
Materials
: Get or set a material used in a GUI.
```lua
go.property("myeffect", resource.material("/assets/myeffect.material"))
function init(self)
-- get the material file currently assigned to the material with id 'effect'
print(go.get("#gui", "materials", { key = "effect" })) -- /effect.material
-- set the material id 'effect' to the material file assigned to the resource property 'myeffect'
go.set("#gui", "materials", self.myeffect, { key = "effect" })
-- get the new material file assigned to the material with id 'effect'
print(go.get("#gui", "materials", { key = "effect" })) -- /assets/myeffect.material
end
```
Textures
: Get or set a texture (atlas) used in a GUI.
```lua
go.property("mytheme", resource.atlas("/assets/mytheme.atlas"))
function init(self)
-- get the texture file currently assigned to the texture with id 'theme'
print(go.get("#gui", "textures", { key = "theme" })) -- /theme.atlas
-- set the texture with id 'theme' to the texture file assigned to the resource property 'mytheme'
go.set("#gui", "textures", self.mytheme, { key = "theme" })
-- get the new texture file assigned to the texture with id 'theme'
print(go.get("#gui", "textures", { key = "theme" })) -- /assets/mytheme.atlas
end
```
## Dependencies
The resource tree in a Defold game is static so any dependencies that you need for your GUI nodes need to be added to the component. The *Outline* groups all dependencies by type under "folders":

To add a new dependency, drag and drop it from the *Asset* pane to the editor view.
Alternatively, right click the "Gui" root in the *Outline*, then select Add ▸ [type] from the popup context menu.
You can also right click on the folder icon for the type you want to add and select Add ▸ [type].
## Node types
A GUI component is built from a set of nodes. Nodes are simple elements. They can be translated (moved, scaled and rotated) and ordered in parent-child hierarchies either in the editor or at runtime through scripting. The following node types exist:
Box node
: 
Rectangular node with either a single color, texture or flip-book animation. See the [Box node documentation](#manuals:gui-box) for details.
Text node
: 
Displays text. See the [Text node documentation](#manuals:gui-text) for details.
Pie node
: 
A circular or ellipsoid node that can be partially filled or inverted. A See the [Pie node documentation](#manuals:gui-pie) for details.
Template node
: 
Templates are used to create instances based on other GUI scene files. See the [Template node documentation](#manuals:gui-template) for details.
ParticleFX node
: 
Plays a particle effect. See the [ParticleFX node documentation](#manuals:gui-particlefx) for details.
Add nodes by right-clicking on the *Nodes* folder and selecting Add ▸ and then Box, Text, Pie, Template or ParticleFx.
You can also press A and select the type you want to add to the GUI.
## Node properties
Each node has an extensive set of properties that control its appearance:
Id
: The identity of the node. This name has to be unique within the GUI scene.
Position, Rotation and Scale
: Governs the location, orientation and stretching of the node. You can use the *Move*, *Rotate* and *Scale* tools to change these values. The values can be animated from script ([learn more](#manuals:property-animation)).
Size (box, text and pie nodes)
: The size of the node is automatic by default but by setting the *Size Mode* to `Manual` you can alter the value. The size defines the bounds of the node and is used when doing input picking. This value can be animated from script ([learn more](#manuals:property-animation)).
Size Mode (box and pie nodes)
: If set to `Automatic` the editor will set a size for the node. If set to `Manual` you can set the size yourself.
Enabled
: If unchecked, the node is not rendered, not animated and can not be picked using `gui.pick_node()`. Use `gui.set_enabled()` and `gui.is_enabled()` to programmatically change and check this property.
Visible
: If unchecked, the node is not rendered, but can still be animated and picked using `gui.pick_node()`. Use `gui.set_visible()` and `gui.get_visible()` to programmatically change and check this property.
Text (text nodes)
: The text to display on the node.
Line Break (text nodes)
: Set for text to wrap according to the width of the node.
Font (text nodes)
: The font to use when rendering the text.
Texture (box and pie nodes)
: The texture to draw on the node. This is a reference to an image or animation in an atlas or tile source.
Material (box, pie nodes, text and particlefx nodes)
: The material to use when drawing the node. This can either be a material added to the Materials section of the outline or left blank to use the default material assigned to the GUI component.
Slice 9 (box nodes)
: Set to preserve the pixel size of the node's texture around the edges when the node is resized. See the [Box node documentation](#manuals:gui-box) for details.
Inner Radius (pie nodes)
: The inner radius of the node, expressed along the X axis. See the [Pie node documentation](#manuals:gui-pie) for details.
Outer Bounds (pie nodes)
: Controls the behavior of the outer bounds. See the [Pie node documentation](#manuals:gui-pie) for details.
Perimeter Vertices (pie nodes)
: The number of segments that will be used to build the shape. See the [Pie node documentation](#manuals:gui-pie) for details.
Pie Fill Angle (pie nodes)
: How much of the pie should be filled. See the [Pie node documentation](#manuals:gui-pie) for details.
Template (template nodes)
: The GUI scene file to use as template for the node. See the [Template node documentation](#manuals:gui-template) for details.
ParticleFX (particlefx nodes)
: The particle effect to use on this node. See the [ParticleFX node documentation](#manuals:gui-particlefx) for details.
Color
: The color of the node. If the node is textured, the color tints the texture. The color can be animated from script ([learn more](#manuals:property-animation)).
Alpha
: The translucency of the node. The alpha value can be animated from script ([learn more](#manuals:property-animation)).
Inherit Alpha
: Setting this checkbox makes a node inherit the alpha value of the parent node. The node's alpha value is then multiplied with the parent's alpha value.
Leading (text nodes)
: A scaling number for the line spacing. A value of `0` gives no line spacing. `1` (the default) is normal line spacing.
Tracking (text nodes)
: A scaling number for the letter spacing. Defaults to 0.
Layer
: Assigning a layer to the node overrides the normal draw order and instead follows the layer order. See below for details.
Blend mode
: Controls how the graphics of the node is blended with background graphics:
- `Alpha` alpha blends the pixel values of the node with the background. This corresponds to "Normal" blend mode in graphics software.
- `Add` adds the pixel values of the node with the background. This corresponds to "Linear dodge" in some graphics software.
- `Multiply` multiplies the pixel values of the node with the background.
- `Screen` inversely multiplies the pixel values of the node with the background. This corresponds to "Screen" blend mode in graphics software.
Pivot
: Sets the pivot point for the node. This can be seen as the "center point" of the node. Any rotation, scaling or size change will happen around this point.
Possible values are `Center`, `North`, `South`, `East`, `West`, `North West`, `North East`, `South West` or `South East`.
If you change the pivot of a node, the node will be moved so that the new pivot will be at the node's position. Text nodes are aligned so that `Center` sets the text center-aligned, `West` sets the text left-aligned and `East` sets the text right-aligned.
X Anchor, Y Anchor
: Anchoring controls how the node's vertical and horizontal position is altered when the scene boundaries, or the parent node's boundaries are stretched to fit the physical screen size.
The following anchoring modes are available:
- `None` (for both *X Anchor* and *Y Anchor*) keeps the node's position from the center of the parent node or scene, relative to it's *adjusted* size.
- `Left` or `Right` (*X Anchor*) scales the horizontal position of the node so it keeps the position from the left and right edges of the parent node or scene at the same percentage.
- `Top` or `Bottom` (*Y Anchor*) scales the vertical position of the node so it keeps the position from the top and bottom edges of the parent node or scene at the same percentage.
Adjust Mode
: Sets the adjust mode for the node. The adjust mode setting controls what happens to a node when the scene boundaries, or the parent node's boundaries, are adjusted to fit the physical screen size.
A node created in a scene where the logical resolution is a typical landscape resolution:
Fitting the scene to a portrait screen causes the scene to be stretched. Each node's bounding box is similarly stretched. However, by setting the adjust mode, the aspect ratio of the node's content can be kept intact. The following modes are available:
- `Fit` scales the node content so that it is equal to the stretched bounding box width or height, whichever is smallest. In other words, the content will fit inside the stretched node bounding box.
- `Zoom` scales the node content so that it is equal to the stretched bounding box width or height, whichever is largest. In other words, the content will fully cover the stretched node bounding box.
- `Stretch` stretches the node content so it fills the stretched node bounding box.
If the GUI scene property *Adjust Reference* is set to `Disabled`, this setting will be ignored.
Clipping Mode (box and pie nodes)
: Sets the clipping mode on the node:
- `None` renders the node as usual.
- `Stencil` makes the node boundaries define a stencil mask that is used to clip the node's child nodes.
See the [GUI clipping manual](#manuals:gui-clipping) for details.
Clipping Visible (box and pie nodes)
: Set to render the node's content in the stencil area. See the [GUI clipping manual](#manuals:gui-clipping) for details.
Clipping Inverted (box and pie nodes)
: Invert the stencil mask. See the [GUI clipping manual](#manuals:gui-clipping) for details.
## Pivot, Anchors and Adjust Mode
The combination of Pivot, Anchors and Adjust Mode properties allows for a very flexible design of GUIs but it can be somewhat hard to understand how it all works without looking at a concrete example. Let's take this GUI mockup created for a 640x1136 screen as an example:
The UI is created with X and Y Anchors set to None and the Adjust Mode for each node is left at the default value of Fit. The Pivot point for the top panel is North, the pivot for the bottom panel is South and the pivot point for the bars in the top panel are set to West. The rest of the nodes have pivot points set to Center. If we resize the window to make it wider this is what happens:
Now, what if we want the top and bottom bars to always be as wide as the screen? We can change the Adjust Mode for the grey background panels at the top and bottom to Stretch:
This is better. The grey background panels will now always stretch to the width of the window, but the bars in the top panel as well as the two boxes at the bottom aren't positioned properly. If we want to keep the bars at the top positioned to the left we need to change the X Anchor from None to Left:

That is exactly as we want it for the top panel. The bars in the top panel already had their Pivot points set to West which means that they will position themselves nicely with the left/west edge of the bars (Pivot) anchored to the left edge of the parent panel (X Anchor).
Now, if we set the X Anchor to Left for the box on the left and the X Anchor to Right for the box on the right we get the following result:

This is not quite the expected result. The two boxes should stay as close to the left and right edges as the two bars did in the top panel. The reason for this is that the Pivot point is wrong:

Both boxes have a Pivot point set to Center. What this means is that when the screen becomes wider the center point (the pivot point) of the boxes will stay at the same relative distance from the edges. In the case of the left box it was 17% from the left edge with the original 640x1136 window:

When the screen is resized the center point of the left box remains at the same distance of 17% from the left edge:

If we change the Pivot point from Center to West for the box on the left and to East for the box on the right and reposition the boxes we get the result we're after even when the screen is resized:

## Draw order
All nodes are rendered in the order they are listed under the "Nodes" folder. The node at the top of the list is drawn first and will thus appear behind every other node. The last node in the list is drawn last, meaning it will appear in front of all other nodes. Altering the Z-value on a node does not control its draw order; however, if you set the Z-value outside of your render script's render range the node will no longer be rendered to screen. You can override the index ordering of nodes with layers (see below).
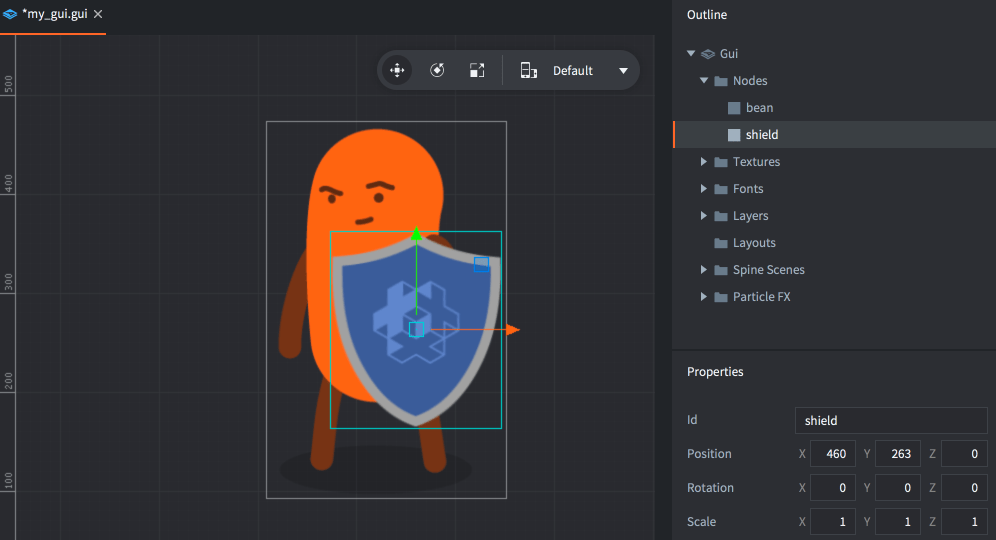
Select a node and press Alt + Up/Down to move a node up or down and change its index order.
The draw order can be changed in script:
```lua
local bean_node = gui.get_node("bean")
local shield_node = gui.get_node("shield")
if gui.get_index(shield_node) < gui.get_index(bean_node) then
gui.move_above(shield_node, bean_node)
end
```
## Parent-child hierarchies
A node is made the child of another node by dragging it onto the node that you wish to be the child's parent. A node with a parent inherits the transform (position, rotation and scale) applied to the parent and relative to the parent pivot.
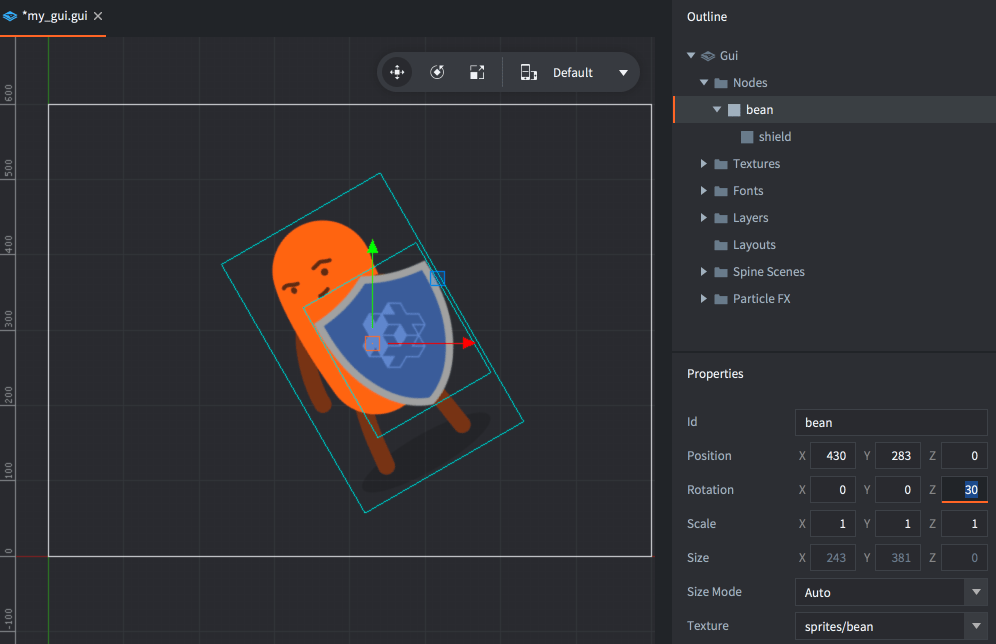
Parents are drawn before their children. Use layers to change the draw order of parent and child nodes and to optimize the rendering of nodes (see below).
## Layers and draw calls
Layers give fine grained control over how nodes are drawn and can be used to reduce the number of draw calls the engine must create to draw a GUI scene. When the engine is about to draw the nodes of a GUI scene, it groups the nodes into draw call batches based on the following conditions:
- The nodes must use the same type.
- The nodes must use the same atlas or tile source.
- The nodes must be rendered with the same blend mode.
- They must use same font.
If a node differs from the previous one on any of these points, it will break the batch and create another draw call. Clipping nodes always break the batch and each stencil scope also breaks the batch.
The ability to arrange nodes in hierarchies makes it easy to group nodes into manageable units. But hierarchies can effectively break batch rendering if you mix different node types:
When the rendering pipeline walks through the list of nodes, it is forced to set up a separate batch for each separate node because the types are different. All in all these three buttons will require six draw calls.
By assigning layers to the nodes, they can be ordered differently, allowing the render pipeline to group the nodes together in fewer draw calls. Start by adding the layers you need to the scene. Right click the "Layers" folder icon in the *Outline* and select Add ▸ Layer. Mark the new layer and assign it a *Name* property in the *Properties* view.

Then set the *Layer* property on each node to the corresponding layer. The layer drawing order takes precedence over the regular indexed node order, so setting the button graphics box-nodes to "graphics" and the button text nodes to "text" will result in the following draw order:
* First all nodes in the "graphics" layer, from the top:
1. "button-1"
2. "button-2"
3. "button-3"
* Then all nodes in the "text" layer, from the top:
4. "button-text-1"
5. "button-text-2"
6. "button-text-3"
The nodes can now be batched into two draw calls, instead of six. A major performance win!
Note that a child node with unset layer will implicitly inherit the layer setting of its parent node. Not setting a layer on a node implicitly adds it to the "null" layer, which is drawn before any other layer.
# GUI box nodes {#manuals:gui-box}
A box node is a rectangle filled with a color or a texture or animation.
## Adding box nodes
Add new box nodes by either right clicking in the *Outline* and selecting Add ▸ Box, or press A and select Box.
You can use images and animations from atlases or tile sources that has been added to the GUI. You add textures by right clicking the *Textures* folder icon in the *Outline* and selecting Add ▸ Textures.... Then set the *Texture* property on the box node:

Note that the color of the box node will tint the graphics. The tint color is multiplied onto the image data, meaning that if you set the color to white (the default) no tint is applied.
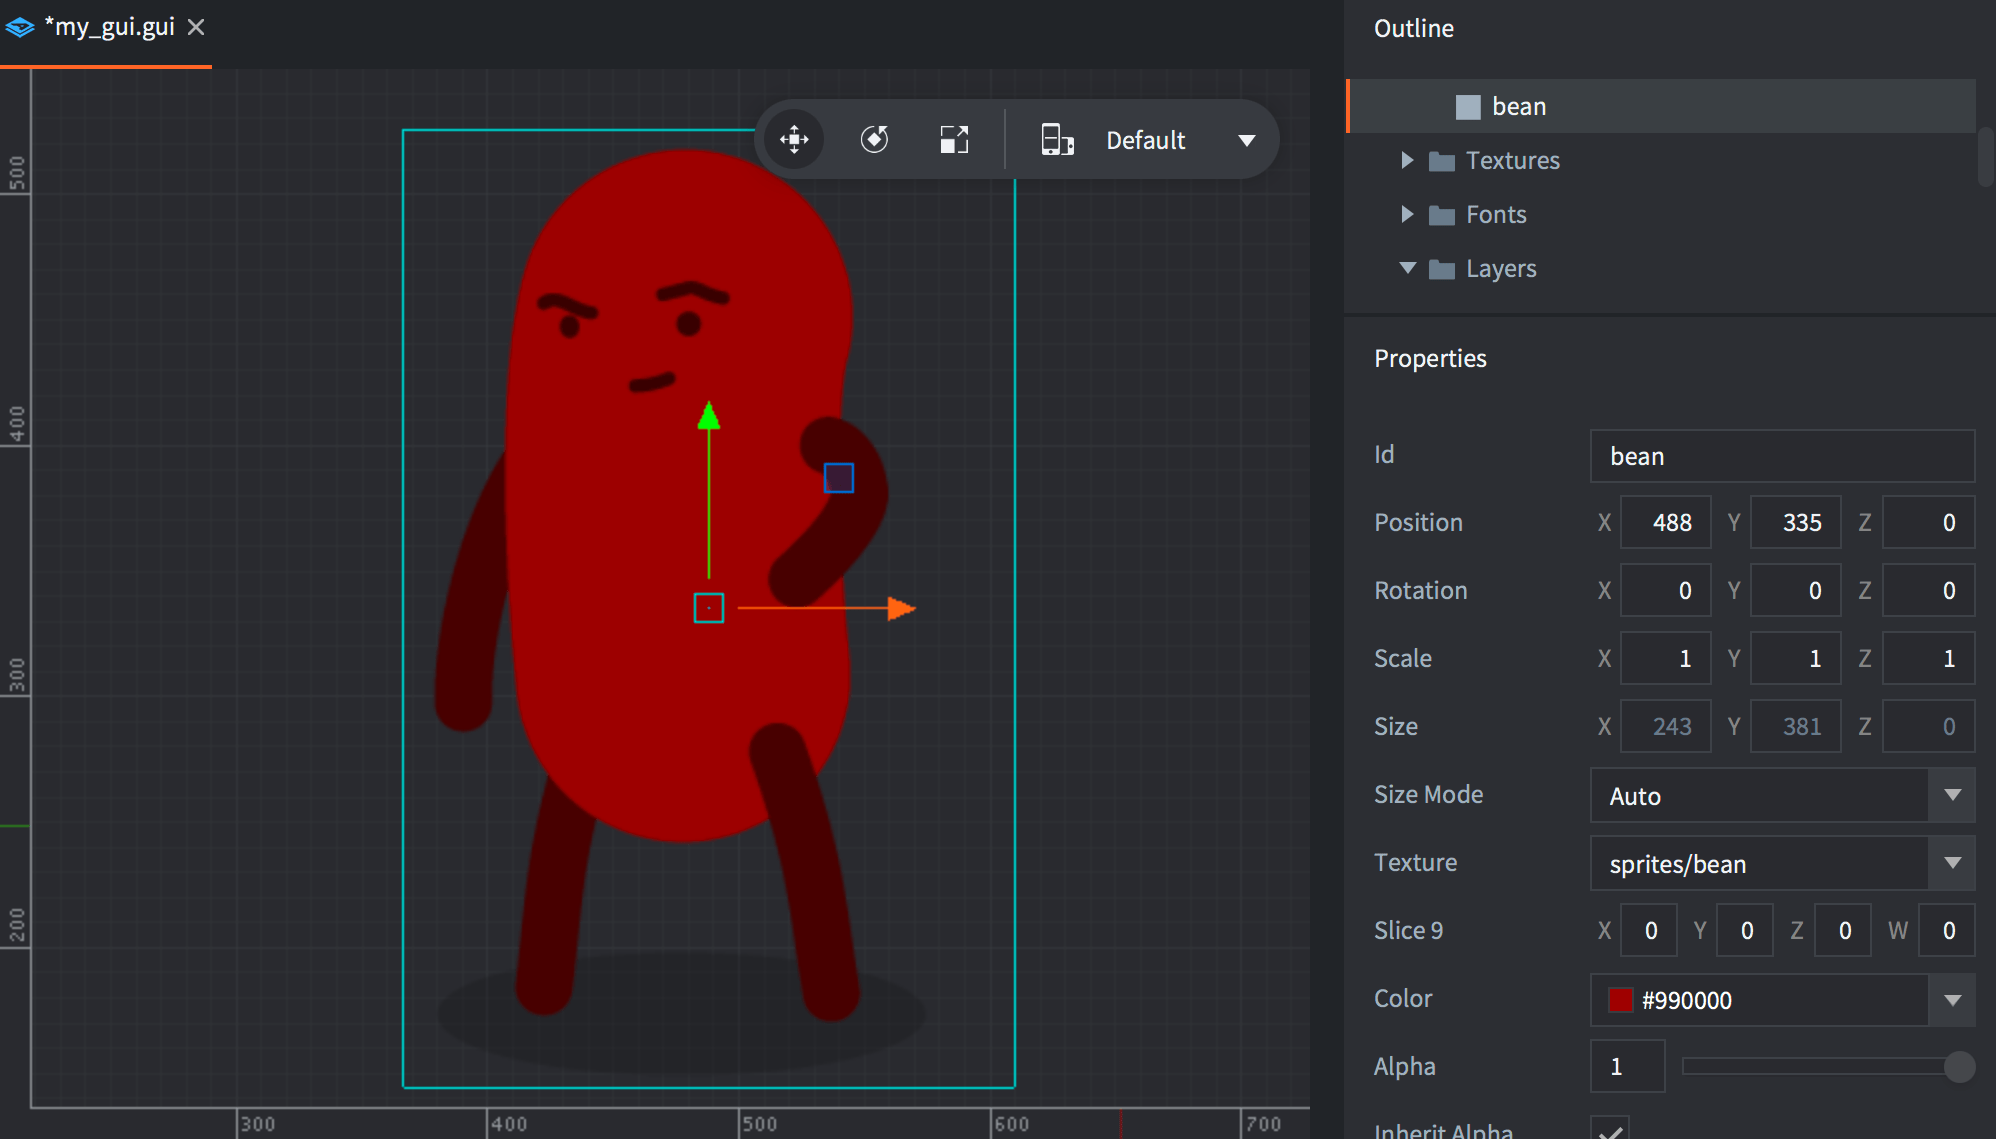
Box nodes are always rendered, even if they do not have a texture assigned to them, or have their alpha set to `0`, or are sized `0, 0, 0`. Box nodes should always have a texture assigned to them so the renderer can batch them properly and reduce the number of draw-calls.
## Playing animations
Box nodes can play animations from atlases or tile sources. Refer to the [flipbook animation manual](#manuals:flipbook-animation) to learn more.
## Slice-9 texturing
GUI box nodes and Sprite components sometimes feature elements that are context sensitive in regard to their size: panels and dialogs that need to be resized to fit the containing content or a health bar that need to be resized to show the remaining health of an enemy. These may cause visual problems when you apply texturing to the resized node or sprite.
Normally, the engine scales the texture to fit the rectangular boundaries, but by defining slice-9 edge areas it is possible to limit what parts of the texture that should scale:

The *Slice9* box node consists of 4 numbers that specify the number of pixels for the left, top, right and bottom margin that should not be regularly scaled:

The margins are set clockwise, starting on the left edge:

- Corner segments are never scaled.
- Edge segments are scaled along a single axis. The left and right edge segments are scaled vertically. The top and bottom edge segments are scaled horizontally.
- The central texture area is scaled horizontally and vertically as needed.
The *Slice9* texture scaling described above is only applied when you change box node's or sprite's size:


If you change scale parameter of the box node or sprite (or on the game object) - the node or sprite and texture is scaled without applying *Slice9* parameters.
When using slice-9 texturing on Sprites the [Sprite Trim Mode of the image](#manuals:atlas) must be set to Off.
### Mipmaps and slice-9
Due to the way mipmapping works in the renderer, scaling of texture segments can sometimes exhibit artifacts. This happens when you _scale down_ segments below the original texture size. The renderer then selects a lower resolution mipmap for the segment, resulting in visual artifacts.

To avoid this problem, make sure that the texture's segments that will be scaled are small enough never to be scaled down, only up.
# GUI text nodes {#manuals:gui-text}
Defold supports a specific type of GUI node that allows text to be rendered in a GUI scene. Any font resource added to a project can be used for text node rendering.
## Adding text nodes
The fonts that you wish to use in GUI text nodes must be added to the GUI component. Either right-click the *Fonts* folder, use the GUI top menu or press the corresponding keyboard shortcut.

Text nodes have a set of special properties:
*Font*
: Any text node you create must have the *Font* property set.
*Text*
: This property contains the text displayed.
*Line Break*
: Text alignment follows the pivot setting and setting this property allows the text to flow over several lines. The width of the node determines where the text will wrap.
## Alignment
By setting the node pivot you can change the alignment mode for the text.
*Center*
: If the pivot is set to `Center`, `North` or `South`, the text is center-aligned.
*Left*
: If the pivot is set to any of the `West` modes, the text is left-aligned.
*Right*
: If the pivot is set to any of the `East` modes, the text is right-aligned.

## Modifying text nodes in runtime
Text nodes respond to any generic node manipulation functions for setting size, pivot, color and so forth. A few text node only functions exist:
* To change the font of a text node, use the [`gui.set_font()`](https://defold.com/ref/gui/#gui.set_font) function.
* To change the line break behavior of a text node, use the [`gui.set_line_break()`](https://defold.com/ref/gui/#gui.set_line_break) function.
* To change the content of a text node, use the [`gui.set_text()`](https://defold.com/ref/gui/#gui.set_text) function.
```lua
function on_message(self, message_id, message, sender)
if message_id == hash("set_score") then
local s = gui.get_node("score")
gui.set_text(s, message.score)
end
end
```
# GUI pie nodes {#manuals:gui-pie}
Pie nodes are used to create circular or ellipsoid objects ranging from plain circles to pies and square doughnut shapes.
## Creating a pie node
Right click the *Nodes* section in the *Outline* and select Add ▸ Pie. The new pie node is selected and you can modify its properties.

The following properties are unique to pie nodes:
Inner Radius
: The inner radius of the node, expressed along the X axis.
Outer Bounds
: The shape of the outer bounds of the node.
- `Ellipse` will extend the node to the outer radius.
- `Rectangle` will extend the node to the node's bounding box.
Perimeter Vertices
: The number of segments that will be used to build the shape, expressed as the number of vertices required to fully circumscribe the 360 degree perimeter of the node.
Pie Fill Angle
: How much of the pie should be filled. Expressed as a counter-clockwise angle starting from the right.

If you set a texture on the node, the texture image is applied flat, with the corners of the texture correlating to the corners of the node bounding box.
## Modify pie nodes at runtime
Pie nodes respond to any generic node manipulation functions for setting size, pivot, color and so forth. A few pie node only functions and properties exist:
```lua
local pienode = gui.get_node("my_pie_node")
-- get the outer bounds
local fill_angle = gui.get_fill_angle(pienode)
-- increase perimeter vertices
local vertices = gui.get_perimeter_vertices(pienode)
gui.set_perimeter_vertices(pienode, vertices + 1)
-- change outer bounds
gui.set_outer_bounds(pienode, gui.PIEBOUNDS_RECTANGLE)
-- animate the inner radius
gui.animate(pienode, "inner_radius", 100, gui.EASING_INOUTSINE, 2, 0, nil, gui.PLAYBACK_LOOP_PINGPONG)
```
# GUI ParticleFX nodes {#manuals:gui-particlefx}
A particle effect node is used to play particle effect systems in the GUI screen space.
## Adding Particle FX nodes
Add new particle nodes by either right clicking in the *Outline* and selecting Add ▸ ParticleFX, or press A and select ParticleFX.
You can use particle effects that you have added to the GUI as source for the effect. Add particle effects by right clicking the *Particle FX* folder icon in the *Outline* and selecting Add ▸ Particle FX.... Then set the *Particlefx* property on the node:

## Controlling the effect
You can start and stop the effect by controlling the node from a script:
```lua
-- start the particle effect
local particles_node = gui.get_node("particlefx")
gui.play_particlefx(particles_node)
```
```lua
-- stop the particle effect
local particles_node = gui.get_node("particlefx")
gui.stop_particlefx(particles_node)
```
See the [Particle FX manual](#manuals:particlefx) for details on how particle effects work.
# GUI template nodes {#manuals:gui-template}
GUI template nodes provide a powerful mechanism to create reusable GUI components based on shared templates or "prefabs". This manual explains the feature and how to use it.
A GUI template is a GUI scene that is instantiated, node for node, in another GUI scene. Any property values in the original template nodes can then be overridden.
## Creating a template
A GUI template is a plain GUI scene so it is created just like any other GUI scene. Right click a location in the *Assets* pane and select New... ▸ Gui.

Create the template and save it. Note that the nodes of the instance will be placed relative to origin so it is a good idea to create the template at position 0, 0, 0.
## Creating instances from a template
You can create any number of instances based on the instance. Create or open the GUI scene where you want to place the template, then right click the *Nodes* section in the *Outline* and select Add ▸ Template.
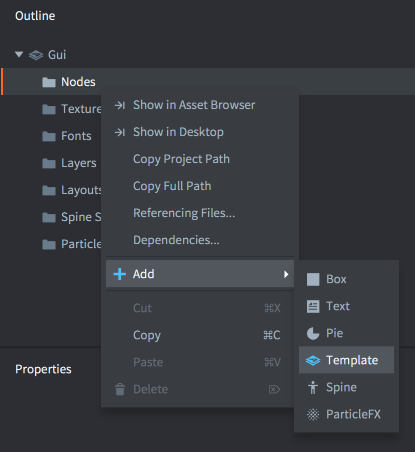
Set the *Template* property to the template GUI scene file.
You can add any number of template instances, and for each instance you can override the properties of each node and change instance node's position, coloring, size, texture and so forth.

Any property that you change is marked blue in the editor. Press the reset button by the property to set its value to the template value:

Any node that has overridden properties is also colored blue in the *Outline*:

The template instance is listed as a collapsible entry in the *Outline* view. However, it is important to note that this item in the outline *is not a node*. The template instance does not exist in runtime either, but all nodes that are part of the instance does.
Nodes that are part of a template instance are automatically named with a prefix and a slash (`"/"`) attached to their *Id*. The prefix is the *Id* set in the template instance.
## Modifying templates in runtime
Scripts that manipulate or query nodes added through the templating mechanism only need to consider the naming of instance nodes and include the template instance *Id* as a node name prefix:
```lua
if gui.pick_node(gui.get_node("button_1/button"), x, y) then
-- Do something...
end
```
There is no node corresponding to the template instance itself. If you need a root node for an instance, add it to the template.
If a script is associated with a template GUI scene, the script is not part of the instance node tree. You may attach one single script to each GUI scene so your script logic needs to sit on the GUI scene where you have instantiated your templates.
# GUI scripts {#manuals:gui-script}
To control the logic of your GUI and animate nodes you use Lua scripts. GUI scripts work the same as regular game object scripts, but are saved as a different file type and have access to a different set of functions: the `gui` module functions.
## Adding a script to a GUI
To add a script to a GUI, first create a GUI script file by right clicking a location in the *Assets* browser and selecting New ▸ Gui Script from the popup context menu.
The editor automatically opens the new script file. It is based on a template and comes equipped with empty lifecycle functions, just like game object scripts:
```lua
function init(self)
-- Add initialization code here
-- Remove this function if not needed
end
function final(self)
-- Add finalization code here
-- Remove this function if not needed
end
function update(self, dt)
-- Add update code here
-- Remove this function if not needed
end
function on_message(self, message_id, message, sender)
-- Add message-handling code here
-- Remove this function if not needed
end
function on_input(self, action_id, action)
-- Add input-handling code here
-- Remove this function if not needed
end
function on_reload(self)
-- Add input-handling code here
-- Remove this function if not needed
end
```
To attach the script to a GUI component, open the GUI component prototype file (also known as "prefabs" or "blueprints" in other engines) and select the root in the *Outline* to bring up GUI *Properties*. Set the *Script* property to the script file
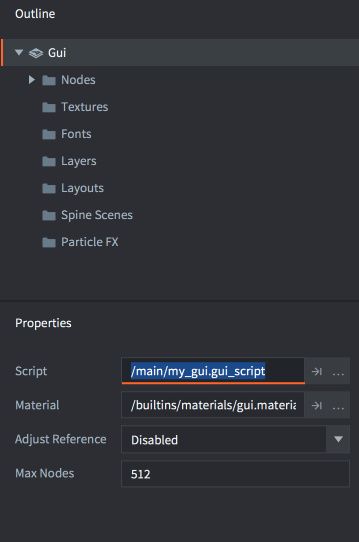
If the GUI component has been added to a game object somewhere in your game, the script will now run.
## The "gui" namespace
GUI scripts have access to the `gui` name space and [all the gui functions](https://defold.com/ref/gui). The `go` namespace is not available so you will need to separate game object logic into script components and communicate between the GUI and game object scripts. Any attempt to use the `go` functions will cause an error:
```lua
function init(self)
local id = go.get_id()
end
```
```txt
ERROR:SCRIPT: /main/my_gui.gui_script:2: You can only access go.* functions and values from a script instance (.script file)
stack traceback:
[C]: in function 'get_id'
/main/my_gui.gui_script:2: in function
```
## Message passing
Any GUI component with a script attached is able to communicate with other objects in your game runtime environment through message passing, it will behave like any other script component.
You address the GUI component like you would any other script component:
```lua
local stats = { score = 4711, stars = 3, health = 6 }
msg.post("hud#gui", "set_stats", stats)
```

## Addressing nodes
GUI nodes can be manipulated by a GUI script attached to the component. Each node must have a unique *Id* that is set in the editor:
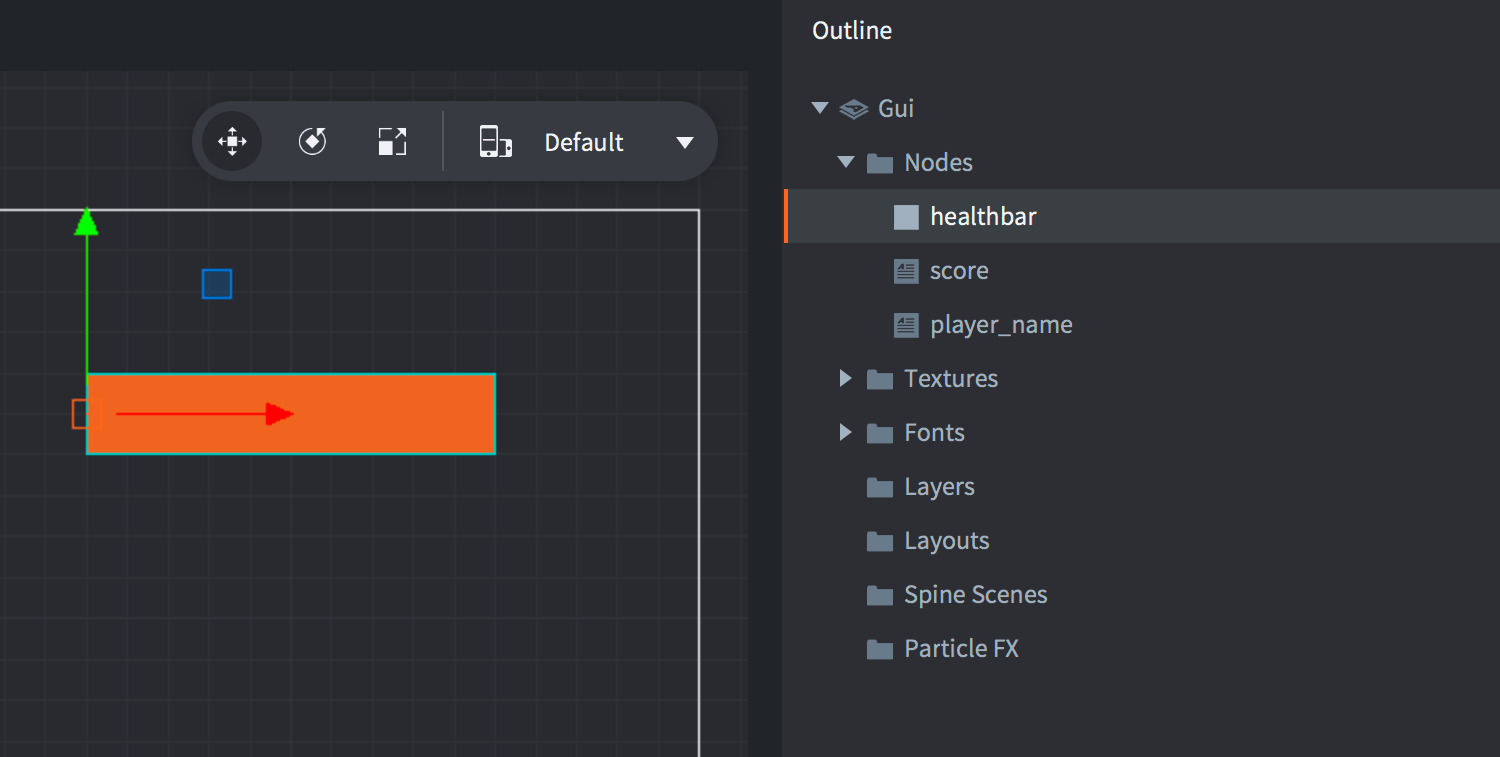
The *Id* allows a script to get hold of a reference to the node and manipulate it with the [gui namespace functions](https://defold.com/ref/gui):
```lua
-- extend the health bar by 10 units
local healthbar_node = gui.get_node("healthbar")
local size = gui.get_size(healthbar_node)
size.x = size.x + 10
gui.set_size(healthbar_node, size)
```
## Dynamically created nodes
To create a new node with script in runtime you have two options. The first option is to create nodes from scratch by calling the `gui.new_[type]_node()` functions. Those return a reference to the new node that you can use to manipulate the node:
```lua
-- Create a new box node
local new_position = vmath.vector3(400, 300, 0)
local new_size = vmath.vector3(450, 400, 0)
local new_boxnode = gui.new_box_node(new_position, new_size)
gui.set_color(new_boxnode, vmath.vector4(0.2, 0.26, 0.32, 1))
-- Create a new text node
local new_textnode = gui.new_text_node(new_position, "Hello!")
gui.set_font(new_textnode, "sourcesans")
gui.set_color(new_textnode, vmath.vector4(0.69, 0.6, 0.8, 1.0))
```
The alternative way to create new nodes is to clone an existing node with the `gui.clone()` function or a tree of nodes with the `gui.clone_tree()` function:
```lua
-- clone the healthbar
local healthbar_node = gui.get_node("healthbar")
local healthbar_node_2 = gui.clone(healthbar_node)
-- clone button node-tree
local button = gui.get_node("my_button")
local new_button_nodes = gui.clone_tree(button)
-- get the new tree root
local new_root = new_button_nodes["my_button"]
-- move the root (and children) 300 to the right
local root_position = gui.get_position(new_root)
root_position.x = root_position.x + 300
gui.set_position(new_root, root_position)
```
## Dynamic node Ids
Dynamically created nodes do not have an id assigned to them. This is by design. The references that are returned from `gui.new_[type]_node()`, `gui.clone()` and `gui.clone_tree()` are the only thing necessary to be able to access the nodes and you should keep track of that reference.
```lua
-- Add a text node
local new_textnode = gui.new_text_node(vmath.vector3(100, 100, 0), "Hello!")
-- "new_textnode" contains the reference to the node.
-- The node has no id, and that is fine. There's no reason why we want
-- to do gui.get_node() when we already have the reference.
```
# Clipping {#manuals:gui-clipping}
GUI nodes can be used as *clipping* nodes---masks that control how other nodes are rendered. This manual explains how this feature works.
## Creating a clipping node
Box, Text and Pie nodes can be used for clipping. To create a clipping node, add a node in your GUI, then set its properties accordingly:
Clipping Mode
: The mode used for clipping.
- `None` renders the node without any clipping taking place.
- `Stencil` makes the node writing to the current stencil mask.
Clipping Visible
: Check to render the content of the node.
Clipping Inverted
: Check to write the inversion of the node's shape to the mask.
Then add the node(s) you want to be clipped as children to the clipping node.

## Stencil mask
Clipping works by having nodes writing to a *stencil buffer*. This buffer contains clipping masks: information that that tells the graphics card whether a pixel should be rendered or not.
- A node with no clipper parent but with clipping mode set to `Stencil` will write its shape (or its inverse shape) to an new clipping mask stored in the stencil buffer.
- If a clipping node has a clipper parent it will instead clip the parent's clipping mask. A clipping child node can never _extend_ the current clipping mask, only clip it further.
- Non clipper nodes that are children to clippers will be rendered with the clipping mask created by the parent hierarchy.

Here, three nodes are set up in a hierarchy:
- The hexagon and square shapes are both stencil clippers.
- The hexagon creates a new clipping mask, the square clips it further.
- The circle node is a regular pie node so it will be rendered with the clipping mask created by its parent clippers.
Four combinations of normal and inverted clippers are possible for this hierarchy. The green area marks the part of the circle that is rendered. The rest is masked:
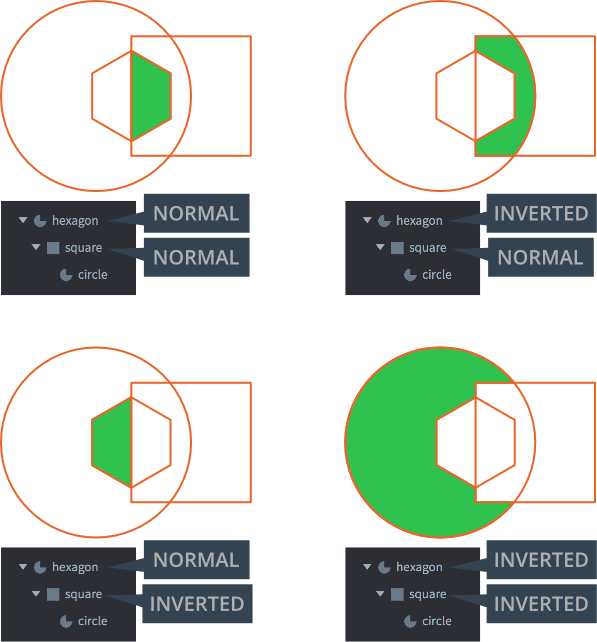
## Stencil limitations
- The total number of stencil clippers can not exceed 256.
- The maximum nesting depth of child _stencil_ nodes is 8 levels deep. (Only nodes with stencil clipping count.)
- The maximum number of stencil node siblings is 127. For each level down a stencil hierarchy, the max limit is halved.
- Inverted nodes have a higher cost. There is a limit to 8 inverted clipping nodes and each will halve the max amount of non-inverted clipping nodes.
- Stencils render a stencil mask from the _geometry_ of the node (not the texture). It is possible to invert the mask by setting the *Inverted clipper* property.
## Layers
Layers can be used to control rendering order (and batching) of nodes. When using layers and clipping nodes the usual layering order is overridden. Layer order always take precedence over the clipping order---if layer assignments are combined with clipping nodes, clipping could happen out-of-order if a parent node with clipping enabled belongs to a higher layer than its children. The children with no layer assigned will still respect the hierarchy and subsequently be drawn and clipped after the parent.
A clipping node and its hierarchy will be drawn first if it has a layer assigned and in the regular order if no layer is assigned.

In this example, both the clipper nodes "`Donut BG`" and "`BG`" are using the same layer 1. The render order between them will be according to the same order in the hierarchy where "`Donut BG`" is rendered before "`BG`". However, the child node "`Donut Shadow`" is assigned to the layer 2 which has a higher layer order and thus will be rendered after the both clipping nodes. In this case, the render order will be:
- `Donut BG`
- `BG`
- `BG Frame`
- `Donut Shadow`
Here you can see that the "`Donut Shadow`" object will be clipped by both clipping nodes due to the layering, even though it is only a child to one of them.
# Layouts {#manuals:gui-layouts}
Defold supports GUIs that automatically adapt to screen orientation changes on mobile devices. By using this feature you can design GUIs that adapt to the orientation and aspect ratio of a range of screen sizes. It is also possible to create layouts that match particular device models.
## Creating display profiles
By default, the *game.project* settings specify that a built-in display profiles settings file ("builtins/render/default.display_profiles") is used. The default profiles are "Landscape" (1280 pixels wide and 720 pixels high) and "Portrait" (720 pixels wide and 1280 pixels high). No device models are set on the profiles so they will match on any device.
To create a new profiles settings file, either copy the one from the "builtins" folder or right click a suitable location in the *Assets* view and select New... ▸ Display Profiles. Give the new file a suitable name and click Ok.
The editor now opens the new file for editing. Add new profiles by clicking the + in the *Profiles* list. For each profile, add a set of *qualifiers* for the profile:
Width
: The pixel width of the qualifier.
Height
: The pixel height of the qualifier.
Device Models
: A comma separated list of device models. The device model matches the start of the device model name, e.g. `iPhone10` will match "iPhone10,\*" models. Model names with commas should be enclosed in quotes, i.e. `"iPhone10,3", "iPhone10,6"` matches iPhone X models (see [iPhone wiki](https://www.theiphonewiki.com/wiki/Models)). Note that the only platforms reporting a device model when calling `sys.get_sys_info()` is Android and iOS. Other platforms return an empty string and will therefore never pick a display profile that has a device model qualifier.
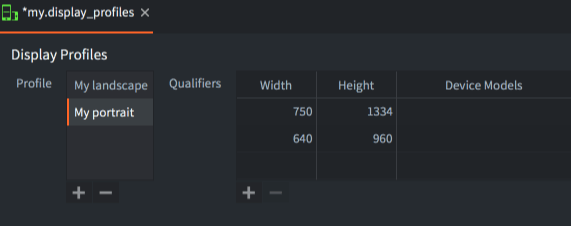
You also need to specify that the engine should use your new profiles. Open *game.project* and select the display profiles file in the *Display Profiles* setting under *display*:

If you want the engine to automatically switch between portrait and landscape layouts on device rotation, check the *Dynamic Orientation* box. The engine will dynamically select a matching layout and also change the selection if the device changes orientation.
### Auto Layout Selection (Display Profiles)
Display Profiles resource has an “Auto Layout Selection” option (ON by default). When ON, the engine automatically selects the best matching GUI layout both when the scene is created and when the window/display size changes. When OFF, the engine will not change layouts automatically—use `gui.set_layout()` from your GUI script to switch layouts manually. This setting is stored in the Display Profiles file and affects all GUI scene.
## GUI layouts
The current set of display profiled can be used to create layout variants of your GUI node setup. To add a new layout to a GUI scene, right-click the *Layouts* icon in the *Outline* view and select Add ▸ Layout ▸ ...:
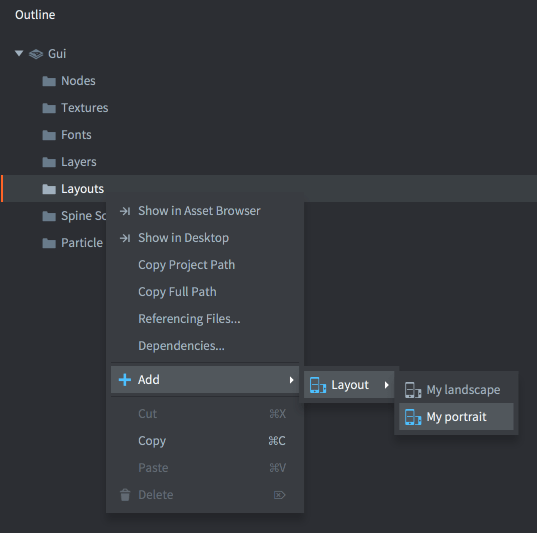
When editing a GUI scene, all nodes are edited on a particular layout. The currently selected layout is indicated in the GUI scene layout dropdown in the toolbar. If no layout is chosen, the nodes are edited in the *Default* layout.


Each change to a node property that you do with a layout selected _overrides_ the property in respect to the *Default* layout. Properties that are overridden are marked in blue. Nodes with overridden properties are also marked in blue. You can click on the reset button next to any overridden property to reset it to the original value.
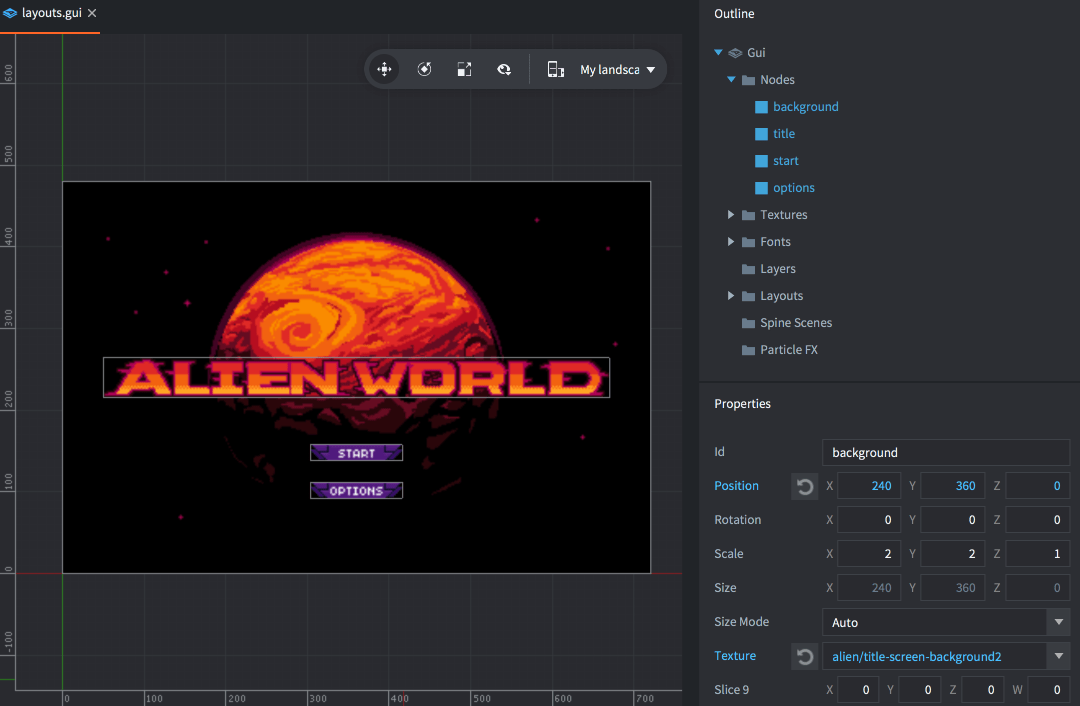
A layout cannot delete or create new nodes, only override properties. If you need to remove a node from a layout you can either move the node off-screen or delete it with script logic. You should also pay attention to the currently selected layout. If you add a layout to your project, the new layout will be set up according to the currently selected layout. Also, copying and pasting nodes considers the currently selected layout, when copying *and* when pasting.
## Dynamic profile selection
When Auto Layout Selection is enabled, the engine automatically selects the best matching layout. The dynamic layout matching scores each display profile qualifier according to the following rules:
1. If there is no device model set, or the device model matches, a score (S) is calculated for the qualifier.
2. The score (S) is calculated with the area of the display (A), the area from the qualifier (A_Q), the aspect ratio of the display (R) and the aspect ratio of the qualifier (R_Q):
Capsule shapes are only supported when using 3D physics (configured in the Physics section of the *game.project* file).
### Complex shapes
A complex shape can either be created from a tilemap component or from a convex hull shape.
## Tilemap collision shape
Defold includes a feature allowing you to easily generate physics shapes for the tile source used by a tile map. The [Tilesource manual](#manuals:tilesource) explains how to add collision groups to a tile source and assign tiles to collision groups ([example](https://defold.com/examples/tilemap/collisions/)).
To add collision to a tile map:
1. Add the tilemap to a game object by right-clicking the game object and selecting Add Component File. Select the tile map file.
2. Add a collision object component to the game object by right-clicking the game object and selecting Add Component ▸ Collision Object.
3. Instead of adding shapes to the component, set the *Collision Shape* property to the *tilemap* file.
4. Set up the collision object component *Properties* as usual.
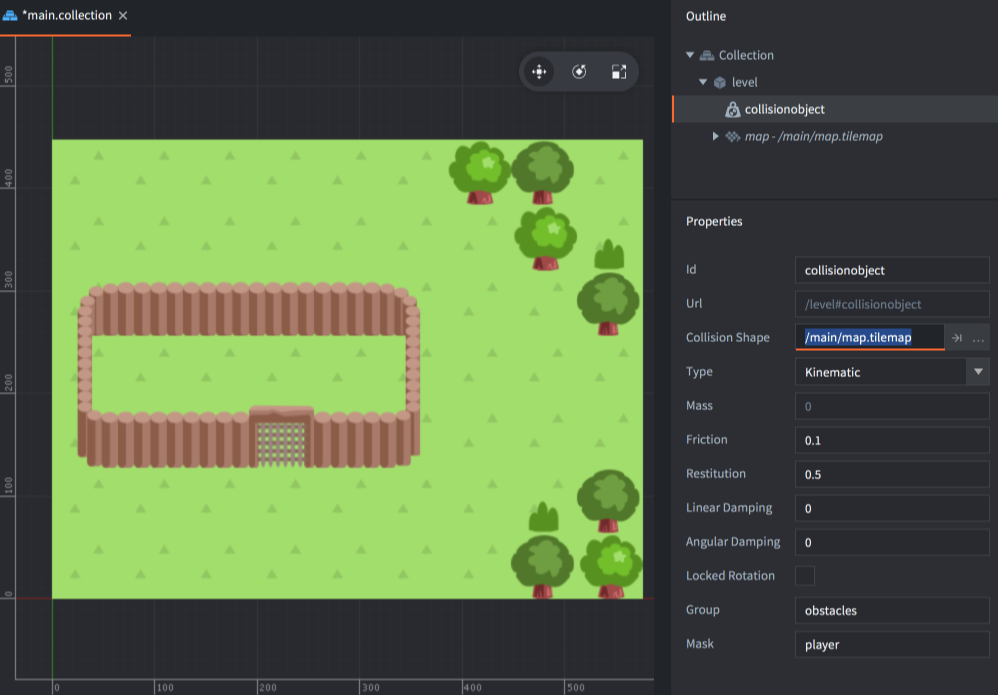
Note that the *Group* property is **not** used here since the collision groups are defined in the tile map's tile source.
## Convex hull shape
Defold includes a feature allowing you to create a convex hull shape from three or more points.
1. Create convex hull shape file (file extension `.convexshape`) using an external editor.
2. Edit the file manually using a text editor or external tool (see below)
3. Instead of adding shapes to the collision object component, set the *Collision Shape* property to the *convex shape* file.
### File Format
The convex hull file format uses the same data format as all other Defold files, ie the protobuf text format. A convex hull shape defines the points of the hull. In 2D physics, the points should be provided in a counter clockwise order. An abstract point cloud is used in 3D physics mode. 2D example:
```
shape_type: TYPE_HULL
data: 200.000
data: 100.000
data: 0.0
data: 400.000
data: 100.000
data: 0.0
data: 400.000
data: 300.000
data: 0.0
data: 200.000
data: 300.000
data: 0.0
```
The above example defines the four corners of a rectangle:
```
200x300 400x300
4---------3
| |
| |
| |
| |
1---------2
200x100 400x100
```
## External tools
There are a number of different external tools that can be used to create collision shapes:
* The [Physics Editor](https://www.codeandweb.com/physicseditor/tutorials/how-to-create-physics-shapes-for-defold) from CodeAndWeb can be used to create game objects with sprites and matching collision shapes.
* [Defold Polygon Editor](https://rossgrams.itch.io/defold-polygon-editor) can be used to create convex hull shapes.
* [Physics Body Editor](https://selimanac.github.io/physics-body-editor/) can be used to create convex hull shapes.
# Scaling collision shapes
The collision object and its shapes inherit the scale of the game object. To disable this behaviour uncheck the [Allow Dynamic Transforms](#manuals:project-settings) checkbox in the Physics section of *game.project*. Note that only uniform scaling is supported and that the smallest scale value will be used if the scale isn't uniform.
# Resizing collision shapes
The shapes of a collision object can be resized at runtime using `physics.set_shape()`. Example:
```lua
-- set capsule shape data
local capsule_data = {
type = physics.SHAPE_TYPE_CAPSULE,
diameter = 10,
height = 20,
}
physics.set_shape("#collisionobject", "my_capsule_shape", capsule_data)
-- set sphere shape data
local sphere_data = {
type = physics.SHAPE_TYPE_SPHERE,
diameter = 10,
}
physics.set_shape("#collisionobject", "my_sphere_shape", sphere_data)
-- set box shape data
local box_data = {
type = physics.SHAPE_TYPE_BOX,
dimensions = vmath.vector3(10, 10, 5),
}
physics.set_shape("#collisionobject", "my_box_shape", box_data)
```
A shape of the correct type with the specified id must already exist on the collision object.
# Rotating collision shapes
## Rotating collision shapes in 3D physics
Collision shapes in 3D physics can be rotated around all axis.
## Rotating collision shapes in 2D physics
Collision shapes in 2D physics can only be rotated around the z-axis. Rotation around the x or y axis will yield incorrect results and should be avoided, even when rotating 180 degrees to essentially flip the shape along the x or y axis. To flip a physics shape it is recommended to use [`physics.set_hlip(url, flip)`](https://defold.com/ref/stable/physics/?#physics.set_hflip:url-flip) and [`physics.set_vlip(url, flip)`](https://defold.com/ref/stable/physics/?#physics.set_vflip:url-flip).
# Debugging
You can [enable Physics debugging](#manuals:debugging) to see the collision shapes at runtime.
# Group and mask {#manuals:physics-groups}
The physics engine allows you to group your physics objects and filter how they should collide. This is handled by named _collision groups_. For each collision object you create two properties control how the object collides with other objects, *Group* and *Mask*.
For a collision between two objects to register both objects must mutually specify each other's groups in their *Mask* field.
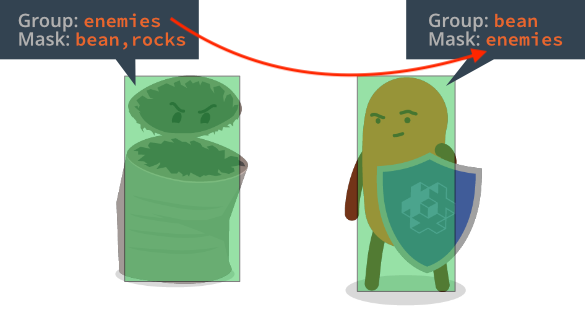
The *Mask* field can contain multiple group names, allowing for complex interaction scenarios.
## Detecting collisions
When two collision objects with matching groups and masks collide the physics engine will generate [collision messages](#manuals:physics-messages) that can be used in games to react to collisions.
# Collision messages {#manuals:physics-messages}
When two objects collide, the engine will send an event to the event callback or broadcast messages to both objects.
## Event filtering
The types of events generated may be controlled using the flags for each object:
* "Generate Collision Events"
* "Generate Contact Events"
* "Generate Trigger Events"
These are all `true` by default.
When two collision objects interact, we check if we should send a message to the user, given these checkboxes.
E.g. given the "Generate Contact Events" checkboxes:
When using `physics.set_listener()`:
| Component A | Component B | Send Message |
|-------------|-------------|--------------|
| ✅︎ | ✅︎ | Yes |
| ❌ | ✅︎ | Yes |
| ✅︎ | ❌ | Yes |
| ❌ | ❌ | No |
When using the default message handler:
| Component A | Component B | Send Message(s) |
|-------------|-------------|-------------------|
| ✅︎ | ✅︎ | Yes (A,B) + (B,A) |
| ❌ | ✅︎ | Yes (B,A) |
| ✅︎ | ❌ | Yes (A,B) |
| ❌ | ❌ | No |
## Collision response
The `"collision_response"` message is sent when one of the colliding objects is of type "dynamic", "kinematic" or "static". It has the following fields set:
`other_id`
: the id of the instance the collision object collided with (`hash`)
`other_position`
: the world position of the instance the collision object collided with (`vector3`)
`other_group`
: the collision group of the other collision object (`hash`)
`own_group`
: the collision group of the collision object (`hash`)
The collision_response message is only adequate to resolve collisions where you don't need any details on the actual intersection of the objects, for example if you want to detect if a bullet hits an enemy. There is only one of these messages sent for any colliding pair of objects each frame.
```Lua
function on_message(self, message_id, message, sender)
-- check for the message
if message_id == hash("collision_response") then
-- take action
print("I collided with", message.other_id)
end
end
```
## Contact point response
The `"contact_point_response"` message is sent when one of the colliding objects is of type "dynamic" or "kinematic" and the other is of type "dynamic", "kinematic" or "static". It has the following fields set:
`position`
: world position of the contact point (`vector3`).
`normal`
: normal in world space of the contact point, which points from the other object towards the current object (`vector3`).
`relative_velocity`
: the relative velocity of the collision object as observed from the other object (`vector3`).
`distance`
: the penetration distance between the objects -- non negative (`number`).
`applied_impulse`
: the impulse the contact resulted in (`number`).
`life_time`
: (*not currently used!*) life time of the contact (`number`).
`mass`
: the mass of the current collision object in kg (`number`).
`other_mass`
: the mass of the other collision object in kg (`number`).
`other_id`
: the id of the instance the collision object is in contact with (`hash`).
`other_position`
: the world position of the other collision object (`vector3`).
`other_group`
: the collision group of the other collision object (`hash`).
`own_group`
: the collision group of the collision object (`hash`).
For a game or application where you need to separate objects perfectly, the `"contact_point_response"` message gives you all information you need. However, note that for any given collision pair, several `"contact_point_response"` messages can be received each frame, depending on the nature of the collision. See [Resolving collisions for more information](#manuals:physics-resolving-collisions).
```Lua
function on_message(self, message_id, message, sender)
-- check for the message
if message_id == hash("contact_point_response") then
-- take action
if message.other_mass > 10 then
print("I collided with something weighing more than 10 kilos!")
end
end
end
```
## Trigger response
The `"trigger_response"` message is sent when one of the colliding objects is of type "trigger". The message will be sent once when the collision is first detected and then once more when the objects are no longer colliding. It has the following fields:
`other_id`
: the id of the instance the collision object collided with (`hash`).
`enter`
: `true` if the interaction was an entry into the trigger, `false` if it was an exit. (`boolean`).
`other_group`
: the collision group of the other collision object (`hash`).
`own_group`
: the collision group of the collision object (`hash`).
```Lua
function on_message(self, message_id, message, sender)
-- check for the message
if message_id == hash("trigger_response") then
if message.enter then
-- take action for entry
print("I am now inside", message.other_id)
else
-- take action for exit
print("I am now outside", message.other_id)
end
end
end
```
# Defold Physics Event Handling {#manuals:physics-events}
Previously, physics interactions in Defold were handled by broadcasting messages to all components of colliding objects. However, starting with version 1.6.4, Defold offers a more centralized approach through the `physics.set_listener()` function. This function allows you to set a custom listener to handle all physics interaction events in one place, thereby streamlining your code and improving efficiency.
## Setting the Physics World Listener
In Defold, each collection proxy creates its own separate physics world. Therefore, when you are working with multiple collection proxies, it's essential to manage the distinct physics worlds associated with each. To ensure that physics events are handled correctly in each world, you must set a physics world listener specifically for each collection proxy's world.
This setup means that the listener for physics events must be set from within the context of the collection that the proxy represents. By doing so, you associate the listener directly with the relevant physics world, enabling it to process physics events accurately.
Here is an example of how to set a physics world listener within a collection proxy:
```lua
function init(self)
-- Assuming this script is attached to a game object within the collection loaded by the proxy
-- Set the physics world listener for the physics world of this collection proxy
physics.set_listener(physics_world_listener)
end
```
By implementing this method, you ensure that each physics world generated by a collection proxy has its dedicated listener. This is crucial for handling physics events effectively in projects that utilize multiple collection proxies.
If a listener is set, [physics messages](#manuals:physics-messages) will no longer be sent for the physics world where this listener is set.
## Event Data Structure
Each physics event provides a `data` table containing specific information relevant to the event.
1. **Contact Point Event (`contact_point_event`):**
This event reports a contact point between two collision objects. It is useful for detailed collision handling, such as calculating impact forces or custom collision responses.
- `applied_impulse`: The impulse resulting from the contact.
- `distance`: The penetration distance between the objects.
- `a` and `b`: Objects representing the colliding entities, each containing:
- `position`: World position of contact point (vector3).
- `instance_position`: World position game object instance (vector3).
- `id`: Instance ID (hash).
- `group`: Collision group (hash).
- `relative_velocity`: Velocity relative to the other object (vector3).
- `mass`: Mass in kilograms (number).
- `normal`: Contact normal, pointing from the other object (vector3).
2. **Collision Event (`collision_event`):**
This event indicates that a collision has occurred between two objects. It is a more generalized event compared to the contact point event, ideal for detecting collisions without needing detailed information about the contact points.
- `a` and `b`: Objects representing the colliding entities, each containing:
- `position`: World position (vector3).
- `id`: Instance ID (hash).
- `group`: Collision group (hash).
3. **Trigger Event (`trigger_event`):**
This event is sent when an object interacts with a trigger object. It's useful for creating areas in your game that cause something to happen when an object enters or exits.
- `enter`: Indicates if the interaction was an entry (true) or an exit (false).
- `a` and `b`: Objects involved in the trigger event, each containing:
- `id`: Instance ID (hash).
- `group`: Collision group (hash).
4. **Ray Cast Response (`ray_cast_response`):**
This event is sent in response to a raycast, providing information about the object hit by the ray.
- `group`: Collision group of the hit object (hash).
- `request_id`: Identifier of the raycast request (number).
- `position`: Hit position (vector3).
- `fraction`: The fraction of the ray's length at which the hit occurred (number).
- `normal`: Normal at the hit position (vector3).
- `id`: Instance ID of the hit object (hash).
5. **Ray Cast Missed (`ray_cast_missed`):**
This event is sent when a raycast does not hit any object.
- `request_id`: Identifier of the raycast request that missed (number).
## Example Usage
```lua
local function physics_world_listener(self, event, data)
if event == hash("contact_point_event") then
-- Handle detailed contact point data
pprint(data)
elseif event == hash("collision_event") then
-- Handle general collision data
pprint(data)
elseif event == hash("trigger_event") then
-- Handle trigger interaction data
pprint(data)
elseif event == hash("ray_cast_response") then
-- Handle raycast hit data
pprint(data)
elseif event == hash("ray_cast_missed") then
-- Handle raycast miss data
pprint(data)
end
end
function init(self)
physics.set_listener(physics_world_listener)
end
```
## Limitations
The listener calls synchronously at the moment it occurs. It happens in the middle of a timestep, which means that the physics world is locked. This makes it impossible to use functions that may affect physics world simulations, e.g., `physics.create_joint()`.
Here is a small example of how to avoid these limitations:
```lua
local function physics_world_listener(self, event, data)
if event == hash("contact_point_event") then
local position_a = data.a.normal * SIZE
local position_b = data.b.normal * SIZE
local url_a = msg.url(nil, data.a.id, "collisionobject")
local url_b = msg.url(nil, data.b.id, "collisionobject")
-- fill the message in the same way arguments should be passed to `physics.create_joint()`
local message = {physics.JOINT_TYPE_FIXED, url_a, "joind_id", position_a, url_b, position_b, {max_length = SIZE}}
-- send message to the object itself
msg.post(".", "create_joint", message)
end
end
function on_message(self, message_id, message)
if message_id == hash("create_joint") then
-- unpack message with function arguments
physics.create_joint(unpack(message))
end
end
function init(self)
physics.set_listener(physics_world_listener)
end
```
# Resolving kinematic collisions {#manuals:physics-resolving-collisions}
Using kinematic collision objects require you to resolve collisions yourself and move the objects as a reaction. A naive implementation of separating two colliding objects looks like this:
```lua
function on_message(self, message_id, message, sender)
-- Handle collision
if message_id == hash("contact_point_response") then
local newpos = go.get_position() + message.normal * message.distance
go.set_position(newpos)
end
end
```
This code will separate your kinematic object from other physics object it penetrates, but the separation often overshoots and you will see jitter in many cases. To understand the problem better, consider the following case where a player character has collided with two objects, *A* and *B*:
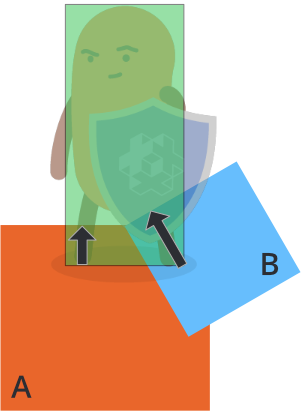
The physics engine will send multiple `"contact_point_response"` message, one for object *A* and one for object *B* the frame the collision occurs. If you move the character in response to each penetration, as in the naive code above, the resulting separation would be:
- Move the character out of object *A* according to its penetration distance (the black arrow)
- Move the character out of object *B* according to its penetration distance (the black arrow)
The order of these is arbitrary but the result is the same either way: a total separation that is the *sum of the individual penetration vectors*:
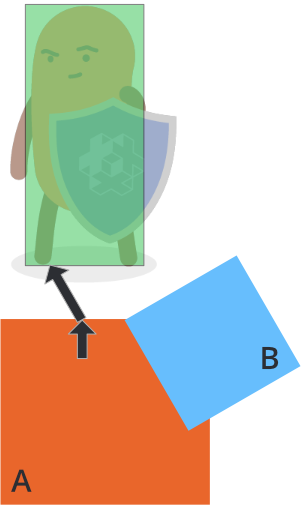
To properly separate the character from objects *A* and *B*, you need to handle each contact point's penetration distance and check if any previous separations have already, wholly or partially, solved the separation.
Suppose that the first contact point message comes from object *A* and that you move the character out by *A*'s penetration vector:
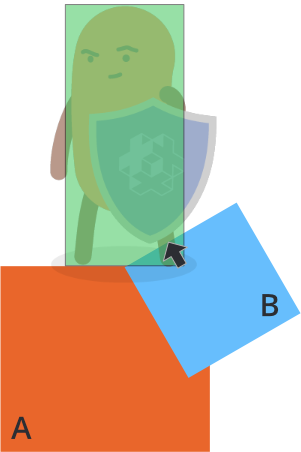
Then the character has already been partially separated from *B*. The final compensation necessary to perform full separation from object *B* is indicated by the black arrow above. The length of the compensation vector can be calculated by projecting the penetration vector of *A* onto the penetration vector of *B*:

```
l = vmath.project(A, B) * vmath.length(B)
```
The compensation vector can be found by reducing the length of *B* by *l*. To calculate this for an arbitrary number of penetrations, you can accumulate the necessary correction in a vector by, for each contact point, and starting with a zero length correction vector:
1. Project the current correction against the contact's penetration vector.
2. Calculate what compensation is left from the penetration vector (as per the formula above).
3. Move the object by the compensation vector.
4. Add the compensation to the accumulated correction.
A complete implementation looks like this:
```lua
function init(self)
-- correction vector
self.correction = vmath.vector3()
end
function update(self, dt)
-- reset correction
self.correction = vmath.vector3()
end
function on_message(self, message_id, message, sender)
-- Handle collision
if message_id == hash("contact_point_response") then
-- Get the info needed to move out of collision. We might
-- get several contact points back and have to calculate
-- how to move out of all of them by accumulating a
-- correction vector for this frame:
if message.distance > 0 then
-- First, project the accumulated correction onto
-- the penetration vector
local proj = vmath.project(self.correction, message.normal * message.distance)
if proj < 1 then
-- Only care for projections that does not overshoot.
local comp = (message.distance - message.distance * proj) * message.normal
-- Apply compensation
go.set_position(go.get_position() + comp)
-- Accumulate correction done
self.correction = self.correction + comp
end
end
end
end
```
## Ray casts {#manuals:physics-ray-casts}
Ray casts are used to read the physics world along a linear ray. To cast a ray into the physics world, you provide a start and end position as well as [a set of collision groups](#manuals:physics-groups) to test against.
If the ray hits a physics object you will get information about the object it hit. Rays intersect with dynamic, kinematic and static objects. They do not interact with triggers.
```lua
function update(self, dt)
-- request ray cast
local my_start = vmath.vector3(0, 0, 0)
local my_end = vmath.vector3(100, 1000, 1000)
local my_groups = { hash("my_group1"), hash("my_group2") }
local result = physics.raycast(my_start, my_end, my_groups)
if result then
-- act on the hit (see 'ray_cast_response' message for all values)
print(result.id)
end
end
```
Ray casts will ignore collision objects that contain the starting point of the ray. This is a limitation in Box2D.
# Joints {#manuals:physics-joints}
Defold supports joints for 2D physics. A joint connects two collision objects using some kind of constraint. The supported joint types are:
* **Fixed (physics.JOINT_TYPE_FIXED)** - A rope joint that restricts the maximum distance between two points. In Box2D referred to as a Rope joint.
* **Hinge (physics.JOINT_TYPE_HINGE)** - A hinge joint specifies an anchor point on two collision objects and moves them so that the two collision objects are always in the same place, and the relative rotation of the collision objects is not restricted. The hinge joint can enable a motor with a defined maximum engine torque and speed. In Box2D referred to as a [Revolute joint](https://box2d.org/documentation/group__revolute__joint.html#details).
* **Weld (physics.JOINT_TYPE_WELD)** - A weld joint attempts to constrain all relative movement between two collision objects. The weld joint can be made soft like a spring with a frequency and damping ratio. In Box2D referred to as a [Weld joint](https://box2d.org/documentation/group__weld__joint.html#details).
* **Spring (physics.JOINT_TYPE_SPRING)** - A spring joint keeps two collision objects at a constant distance from each other. The spring joint can be made soft like a spring with a frequency and damping ratio. In Box2D referred to as a [Distance joint](https://box2d.org/documentation/group__distance__joint.html#details).
* **Slider (physics.JOINT_TYPE_SLIDER)** - A slider joint allows for relative translation of two collision objects along a specified axis and prevents relative rotation. In Box2D referred to as a [Prismatic joint](https://box2d.org/documentation/group__prismatic__joint.html#details).
* **Wheel (physics.JOINT_TYPE_WHEEL)** - A wheel joint restricts a point on `bodyB` to a line on `bodyA`. The wheel joint also provides a suspension spring. In Box2D referred to as a [Wheel joint](https://box2d.org/documentation/group__wheel__joint.html#details).
## Creating joints
Joints can currently only be created programmatically using [`physics.create_joint()`](https://defold.com/ref/physics/#physics.create_joint:joint_type-collisionobject_a-joint_id-position_a-collisionobject_b-position_b-[properties]):
Editor support for creating joints is planned but no release date has been decided.
```lua
-- connect two collision objects with a fixed joint constraint (rope)
physics.create_joint(physics.JOINT_TYPE_FIXED, "obj_a#collisionobject", "my_test_joint", vmath.vector3(10, 0, 0), "obj_b#collisionobject", vmath.vector3(0, 20, 0), { max_length = 20 })
```
The above will create a fixed joint with id `my_test_joint` connected between the two collision object `obj_a#collisionobject` and `obj_b#collisionobject`. The joint is connected 10 pixels to the left of the center of collision object `obj_a#collisionobject` and 20 pixels above the center of collision object `obj_b#collisionobject`. The maximum length of the joint is 20 pixels.
## Destroying joints
A joint can be destroyed using [`physics.destroy_joint()`](https://defold.com/ref/physics/#physics.destroy_joint:collisionobject-joint_id):
```lua
-- destroy a joint previously connected to the first collision object
physics.destroy_joint("obj_a#collisionobject", "my_test_joint")
```
## Reading from and updating joints
The properties of a joint can be read using [`physics.get_joint_properties()`](https://defold.com/ref/physics/#physics.get_joint_properties:collisionobject-joint_id) and set using [`physics.set_joint_properties()`](https://defold.com/ref/physics/#physics.set_joint_properties:collisionobject-joint_id-properties):
```lua
function update(self, dt)
if self.accelerating then
local hinge_props = physics.get_joint_properties("obj_a#collisionobject", "my_hinge")
-- increase motor speed by 100 revolutions per second
hinge_props.motor_speed = hinge_props.motor_speed + 100 * 2 * math.pi * dt
physics.set_joint_properties("obj_a#collisionobject", "my_hinge", hinge_props)
end
end
```
## Get joint reaction force and torque
The reaction force and torque applied to a joint can be read using [`physics.get_joint_reaction_force()`](https://defold.com/ref/physics/#physics.get_joint_reaction_force:collisionobject-joint_id) and [`physics.get_joint_reaction_torque()`](https://defold.com/ref/physics/#physics.get_joint_reaction_torque:collisionobject-joint_id).
# Sound Streaming {#manuals:sound-streaming}
While the default behaviour is to load sound data in full, it may also be beneficial to load the data in chunks, prior to their use. This is often called "streaming".
One benefit of sound streaming is that less runtime memory is required, another is if you are streaming content from e.g. a http url, you can update the content at any time, and also avoid the initial download.
### Example
There is an example project showcasing this setup: [https://github.com/defold/example-sound-streaming](https://github.com/defold/example-sound-streaming)
## How to enable streaming sounds
### Easy way
The simplest way to use sound streaming, is by enabling the [`sound.stream_enabled` setting](#manuals:project-settings) in *game.project*. When this option is enabled the engine will start streaming the sounds.
Note: If you have lots of sound files loaded at the same time, you may need to increase the `sound.stream_cache_size` value (see below).
### Runtime resources
You can also create a new sound data resource, and set it to a sound component.
You do this by:
* Load the initial part of the sound file data
* Note: This is the raw sound file, including the ogg/wav header
* Create a new sound data resource by calling [`resource.create_sound_data()`](https://defold.com/ref/resource/#resource.create_sound_data).
* Set the new sound data resource to the sound component using [`go.set()`](https://defold.com/ref/go#go.set)
Here is an excerpt from the example project, using a `http.request()` to get the initial sound file.
The web server you're loading content from has to support [HTTP range requests](https://developer.mozilla.org/en-US/docs/Web/HTTP/Guides/Range_requests).
```lua
local function play_sound(self, hash)
go.set(self.component, "sound", hash) -- override the resource data on the component
sound.play(self.component) -- start playing the sound
end
local function parse_range(s)
local _, _, rstart, rend, size = string.find(s, "(%d+)-(%d+)/(%d+)") -- "bytes 0-16383/103277"
return rstart, rend, size
end
-- Callback for the http response.
local function http_result(self, _id, response, extra)
if response.status == 200 or response.status == 206 then
-- Successful request
local relative_path = self.filename
local range = response.headers['content-range'] -- content-range = "bytes 0-16383/103277"
local rstart, rend, filesize = parse_range(range)
-- Create the Defold resource
-- "partial" will enable the streaming mode
print("Creating resource", relative_path)
local hash = resource.create_sound_data(relative_path, { data = response.response, filesize = filesize, partial = true })
-- send "play_sound" to the component
play_sound(self, hash)
end
end
local function load_web_sound(base_url, relative_path)
local url = base_url .. "/" .. relative_path
local headers = {}
headers['Range'] = string.format("bytes=%d-%d", 0, 16384-1)
http.request(url, "GET", http_result, headers, nil, { ignore_cache = true })
end
```
## Resource providers
You can use other means to load the initial chunk of the sound file. The important thing to remember is that the rest of the chunks are loaded from the resource system and its resource providers. In this example, we add a new (http) file provider by adding a live update mount, by calling using [liveupdate.add_mount()](https://defold.com/ref/liveupdate/#liveupdate.add_mount).
You can find a working example in [https://github.com/defold/example-sound-streaming](https://github.com/defold/example-sound-streaming).
```lua
-- See http_result() from above example
local function load_web_sound(base_url, relative_path)
local url = base_url .. "/" .. relative_path
local headers = {}
-- Request the initial part of the file
headers['Range'] = string.format("bytes=%d-%d", 0, 16384-1)
http.request(url, "GET", http_result, headers, nil, { ignore_cache = true })
end
function init(self)
self.base_url = "http://my.server.com"
self.filename = "/path/to/sound.ogg"
liveupdate.add_mount("webmount", self.base_url, 100, function ()
-- once the mount is ready, we can start our request for downloading the first chunk
load_web_sound(self.base_url, self.filename)
end)
end
function final(self)
liveupdate.remove_mount("webmount")
end
```
## Sound chunk cache
The amount of memory consumed by the sounds at runtime is controlled by the [`sound.stream_cache_size` setting](#manuals:project-settings) in *game.project*. Given this limit, the loaded sound data will never exceed this limit.
The initial chunk of each sound file cannot be evicted and they will occupy the cache for as long as the resources are loaded. The size of the initial chunk is controlled by the [`sound.stream_preload_size` setting](#manuals:project-settings) in *game.project*.
You can also control the size of each sound chunk by changing the [`sound.stream_chunk_size` setting](#manuals:project-settings) in *game.project*. This may help you get the sound cache size down even further if you have many sound files loaded at the same time. Sound files smaller than the sound chunk size, aren't streamed and if a new chunk doesn't fit into the cache, the oldest chunk is evicted
The total size of the sound chunk cache should be larger than the number of loaded sound files times the stream chunk size. Otherwise, you risk evicting new chunks each frame and sounds won't play properly
# Input {#manuals:input}
All user input is captured by the engine and dispatched as actions to script- and GUI script components in game objects that have acquired input focus and that implement the `on_input()` function. This manual explains how you set up bindings to capture input and how you create code that responds to it.
The input system uses a set of simple and powerful concepts, allowing you to manage input as you see fit for your game.

Devices
: Input devices that are either part of, or plugged into, your computer or mobile device provide raw system level input to the Defold runtime. The following device types are supported:
1. Keyboard (single key as well as text input)
2. Mouse (position, button clicks and mouse wheel actions)
3. Single and multi-touch (on iOS and Android devices and HTML5 on mobile)
4. Gamepads (as supported through the operating system and mapped in the [gamepads](#gamepads-settings-file) file)
Input bindings
: Before input is sent to a script the raw input from the device is translated into meaningful *actions* via the input bindings table.
Actions
: Actions are identified by the (hashed) names that you list in the input bindings file. Each action also contain relevant data about the input: if a button is pressed or released, the coordinates of the mouse and touch etc.
Input listeners
: Any script component or GUI script can receive input actions by *acquiring input focus*. Several listeners can be active at the same time.
Input stack
: The list of input listeners with the first acquirer of focus at the bottom of the stack and the last acquirer at the top.
Consuming input
: A script may choose to consume the input it received, preventing listeners further down the stack to receive it.
## Setting up input bindings
The input bindings is a project wide table that allows you to specify how device input should translate into named *actions* before they are dispatched to your script components and GUI scripts. You can create a new input binding file, right click a location in the *Assets* view and select New... ▸ Input Binding. To make the engine use the new file, change the *Game Binding* entry in *game.project*.

A default input binding file is automatically created with all new project templates so there is usually no need to create a new binding file. The default file is called "game.input_binding" and can be found in the "input" folder in the project root. Double click the file to open it in the editor:
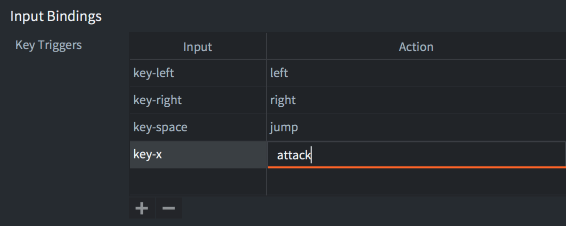
To create a new binding, click the + button at the bottom of the relevant trigger type section. Each entry has two fields:
*Input*
: The raw input to listen for, selected from a scroll list of available inputs.
*Action*
: The action name given to input actions when they are created and dispatched to your scripts. The same action name can be assigned to multiple inputs. For instance, you can bind the Space key and the gamepad "A" button to the action `jump`. Note that there is a known bug where touch inputs unfortunately cannot have the same action names as other inputs.
## Trigger types
There are five device specific types of triggers that you can create:
Key Triggers
: Single key keyboard input. Each key is mapped separately into a corresponding action. Learn more in the [key and text input manual](#manuals:input-key-and-text).
Text Triggers
: Text triggers are used to read arbitrary text input. Learn more in the [key and text input manual](#manuals:input-key-and-text)
Mouse Triggers
: Input from mouse buttons and scroll wheels. Learn more in the [mouse and touch input manual](#manuals:input-mouse-and-touch).
Touch Triggers
: Single-touch and Multi-touch type triggers are available on iOS and Android devices in native applications and in HTML5 bundles. Learn more in the [mouse and touch manual](#manuals:input-mouse-and-touch).
Gamepad Triggers
: Gamepad triggers allow you to bind standard gamepad input to game functions. Learn more in the [gamepads manual](#manuals:input-gamepads).
### Accelerometer input
In addition to the five different trigger types listed above Defold also supports accelerometer input in native Android and iOS applications. Check the Use Accelerometer box in the Input section of your *game.project* file.
```lua
function on_input(self, action_id, action)
if action.acc_x and action.acc_y and action.acc_z then
-- react to accelerometer data
end
end
```
## Input focus
To listen to input actions in a script component or GUI script, the message `acquire_input_focus` should be sent to the game object holding the component:
```lua
-- tell the current game object (".") to acquire input focus
msg.post(".", "acquire_input_focus")
```
This message instructs the engine to add input capable components (script components, GUI components and collection proxies) in the game objects to the *input stack*. The game object components are put on top of the input stack; the component that is added last will be top of the stack. Note that if the game object contains more than one input capable component, all components will be added to the stack:
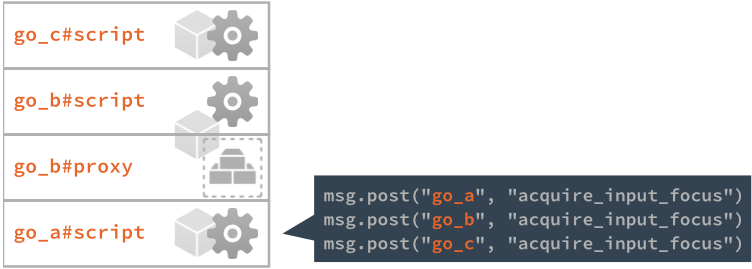
If a game object that has already acquired input focus does so again, its component(s) will be moved to the top of the stack.
## Input dispatch and on_input()
Input actions are dispatched according to the input stack, from the top to the bottom.

Any component that is on the stack containing an `on_input()` function will have that function called, once for each input action during the frame, with the following arguments:
`self`
: The current script instance.
`action_id`
: The hashed name of the action, as set up in the input bindings.
`action`
: A table containing the useful data about the action, like the value of the input, its location (absolute and delta positions), whether button input was `pressed` etc. See [on_input()](https://defold.com/ref/go#on_input) for details on the available action fields.
```lua
function on_input(self, action_id, action)
if action_id == hash("left") and action.pressed then
-- move left
local pos = go.get_position()
pos.x = pos.x - 100
go.set_position(pos)
elseif action_id == hash("right") and action.pressed then
-- move right
local pos = go.get_position()
pos.x = pos.x + 100
go.set_position(pos)
end
end
```
### Input focus and collection proxy components
Each game world that is dynamically loaded through a collection proxy has its own input stack. For action dispatch to reach the loaded world's input stack, the proxy component must be on the main world's input stack. All components on a loaded world's stack are handled before dispatch continues down the main stack:

It is a common error to forget to send `acquire_input_focus` to the game object holding the collection proxy component. Skipping this step prevents input from reaching any of the components on the loaded world's input stack.
### Releasing input
To stop listening to input actions, send a `release_input_focus` message to the game object. This message will remove any of the game object's components from the input stack:
```lua
-- tell the current game object (".") to release input focus.
msg.post(".", "release_input_focus")
```
## Consuming input
A component's `on_input()` can actively control whether actions should be passed on further down the stack or not:
- If `on_input()` returns `false`, or a return is omitted (this implies a `nil` return which is a false value in Lua) input actions will be passed on to the next component on the input stack.
- If `on_input()` returns `true` input is consumed. No component further down the input stack will receive the input. Note that this applies to *all* input stacks. A component on a proxy-loaded world's stack can consume input preventing components on the main stack to receive input:
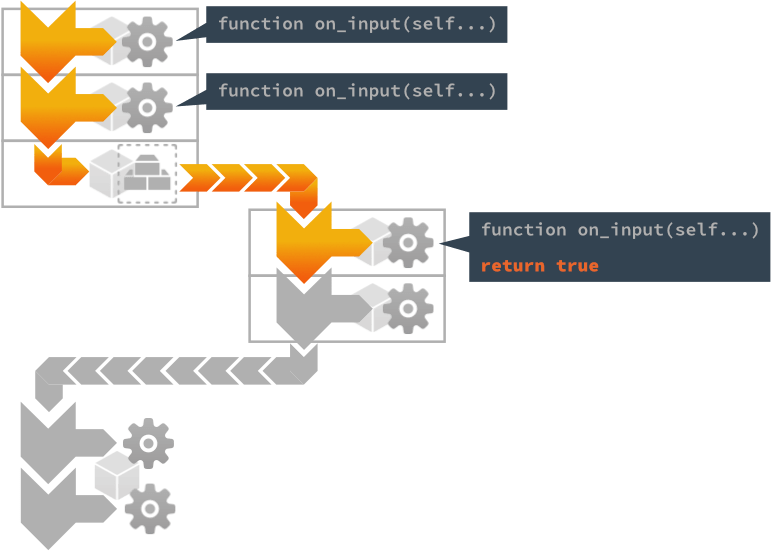
There are many good use cases where input consumption provides a simple and powerful way to shift input between different parts of a game. For example, if you need a pop-up menu that temporarily is the only part of the game that listens to input:

The pause menu is initially hidden (disabled) and when the player touches the "PAUSE" HUD item, it is enabled:
```lua
function on_input(self, action_id, action)
if action_id == hash("mouse_press") and action.pressed then
-- Did the player press PAUSE?
local pausenode = gui.get_node("pause")
if gui.pick_node(pausenode, action.x, action.y) then
-- Tell the pause menu to take over.
msg.post("pause_menu", "show")
end
end
end
```
The pause menu GUI acquires input focus and consumes input, preventing any input other than what's relevant for the pop-up menu:
```lua
function on_message(self, message_id, message, sender)
if message_id == hash("show") then
-- Show the pause menu.
local node = gui.get_node("pause_menu")
gui.set_enabled(node, true)
-- Acquire input.
msg.post(".", "acquire_input_focus")
end
end
function on_input(self, action_id, action)
if action_id == hash("mouse_press") and action.pressed then
-- do things...
local resumenode = gui.get_node("resume")
if gui.pick_node(resumenode, action.x, action.y) then
-- Hide the pause menu
local node = gui.get_node("pause_menu")
gui.set_enabled(node, false)
-- Release input.
msg.post(".", "release_input_focus")
end
end
-- Consume all input. Anything below us on the input stack
-- will never see input until we release input focus.
return true
end
```
It is recommended that you familiarize yourself with the general way in which input works in Defold, how to receive input and in which order input is received in your script files. Learn more about the input system in the [Input Overview manual](#manuals:input).
# Key Triggers
Key triggers allow you to bind single key keyboard input to game actions. Each key is mapped separately into a corresponding action. Key triggers are used to tie specific buttons to specific functions, like character movement with the arrow or WASD keys. If you need to read arbitrary keyboard input, use text triggers (see below).
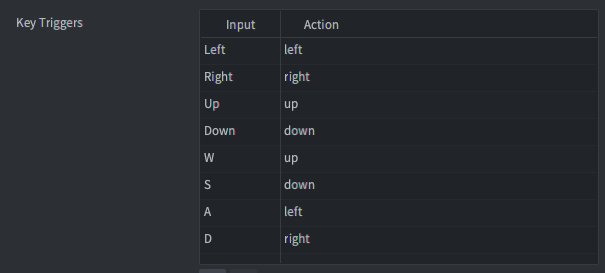
```lua
function on_input(self, action_id, action)
if action_id == hash("left") then
if action.pressed then
-- start moving left
elseif action.released then
-- stop moving left
end
end
end
```
# Text Triggers
Text triggers are used to read arbitrary text input. There are two types of text triggers; text and marked text.

## Text
The `text` captures normal text input. It sets the `text` field of the action table to a string containing the typed character. The action is only fired at the press of the button, no `release` or `repeated` action is sent.
```lua
function on_input(self, action_id, action)
if action_id == hash("text") then
-- Concatenate the typed character to the "user" node...
local node = gui.get_node("user")
local name = gui.get_text(node)
name = name .. action.text
gui.set_text(node, name)
end
end
```
## Marked text
The `marked-text` is used primarily for Asian keyboards where multiple keypresses can map to single inputs. For example, with the iOS "Japanese-Kana" keyboard, the user can type combinations and the top of the keyboard will display available symbols or sequences of symbols that can be entered.
- Each keypress generates a separate action and sets the action field `text` to the currently entered sequence of symbols (the "marked text").
- When the user selects a symbol or symbol combination, a separate `text` type trigger action is sent (provided that one is set up in the input binding list). The separate action sets the action field `text` to the final sequence of symbols.
It is recommended that you familiarize yourself with the general way in which input works in Defold, how to receive input and in which order input is received in your script files. Learn more about the input system in the [Input Overview manual](#manuals:input).
# Mouse Triggers
Mouse triggers allow you to bind input from mouse buttons and scroll wheels to game actions.
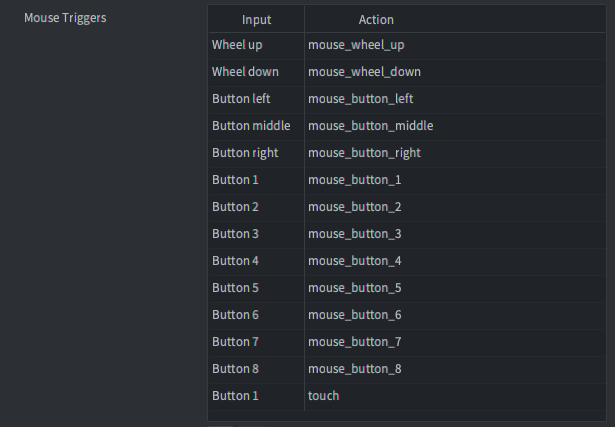
Mouse button inputs `MOUSE_BUTTON_LEFT`, `MOUSE_BUTTON_RIGHT` and `MOUSE_BUTTON_MIDDLE` are equivalent to `MOUSE_BUTTON_1`, `MOUSE_BUTTON_2` and `MOUSE_BUTTON_3`.
The examples below use the actions shown in the image above. As with all input you are free to name your input actions any way you want to.
## Mouse buttons
Mouse buttons generate pressed, released and repeated events. Example showing how to detect input for the left mouse button (either pressed or released):
```lua
function on_input(self, action_id, action)
if action_id == hash("mouse_button_left") then
if action.pressed then
-- left mouse button pressed
elseif action.released then
-- left mouse button released
end
end
end
```
`MOUSE_BUTTON_LEFT` (or `MOUSE_BUTTON_1`) input actions are sent for single touch inputs as well.
## Mouse wheel
Mouse wheel inputs detect scroll actions. The field `action.value` is `1` if the wheel is scrolled and `0` otherwise. (Scroll actions are dealt with as they were button presses. Defold does not currently support fine grained scroll input on touch pads.)
```lua
function on_input(self, action_id, action)
if action_id == hash("mouse_wheel_up") then
if action.value == 1 then
-- mouse wheel is scrolled up
end
end
end
```
## Mouse movement
Mouse movement is handled separately. Mouse movement events are not received unless at least one mouse trigger is set up in your input bindings.
Mouse movement are not bound in the input bindings but `action_id` is set to `nil` and the `action` table is populated with the location and delta movement of the mouse position.
```lua
function on_input(self, action_id, action)
if action.x and action.y then
-- let game object follow mouse/touch movement
local pos = vmath.vector3(action.x, action.y, 0)
go.set_position(pos)
end
end
```
# Touch Triggers
Single-touch and Multi-touch type triggers are available on iOS and Android devices in native applications and in HTML5 bundles.

## Single-touch
Single-touch type triggers are not set up from the Touch Triggers section of the input bindings. Instead **single-touch triggers are automatically set up when you have mouse button input set up for `MOUSE_BUTTON_LEFT` or `MOUSE_BUTTON_1`**.
## Multi-touch
Multi-touch type triggers populate a table in the action table called `touch`. The elements in the table are integer-indexed with numbers `1`--`N`where `N` is the number of touch points. Each element of the table contains fields with input data:
```lua
function on_input(self, action_id, action)
if action_id == hash("touch_multi") then
-- Spawn at each touch point
for i, touchdata in ipairs(action.touch) do
local pos = vmath.vector3(touchdata.x, touchdata.y, 0)
factory.create("#factory", pos)
end
end
end
```
Multi-touch must not be assigned the same action as the mouse button input for `MOUSE_BUTTON_LEFT` or `MOUSE_BUTTON_1`. Assigning the same action will effectively override single-touch and prevent you from receiving any single-touch events.
The [Defold-Input asset](https://defold.com/assets/defoldinput/) can be used to easily set up virtual on-screen controls such as buttons and analog sticks with support for multi touch.
## Detecting click or tap on objects
Detecting when the user has clicked or tapped on a visual component is a very common operation that is needed in many games. It could be user interaction with a button or other UI element or the interaction with a game object such as a player controlled unit in a strategy game, some treasure on a level in a dungeon crawler or a quest giver in an RPG. The approach to use varies depending on the type of visual component.
### Detecting interaction with GUI nodes
For UI elements there is the `gui.pick_node(node, x, y)` function that will return true or false depending on if the specified coordinate is within the bounds of a gui node or not. Refer to the [API docs](https://defold.com/ref/gui/#gui.pick_node:node-x-y), the [pointer over example](https://defold.com/examples/gui/pointer_over/) or the [button example](https://defold.com/examples/gui/button/) to learn more.
### Detecting interaction with game objects
For game objects it is more complicated to detect interaction since things such as camera translation and render script projection will impact the required calculations. There are two general approaches to detecting interaction with game objects:
1. Track the position and size of game objects the user can interact with and check if the mouse or touch coordinate is within the bounds of any of the objects.
2. Attach collision objects to game objects the user can interact with and one collision object that follows the mouse or finger and check for collisions between them.
A ready to use solution for using collision objects to detect user input with drag and click support can be found in the [Defold-Input asset](https://defold.com/assets/defoldinput/).
In both cases there is a need to convert from the screen space coordinates of the mouse or touch event and the world space coordinates of the game objects. This can be done in a couple of different ways:
* Manually keep track of which view and projection that is used by the render script and use this to convert to and from world space. See the [camera manual for an example of this](#manuals:camera).
* Use a [third-party camera solution](#manuals:camera) and make use of the provided screen-to-world conversion functions.
It is recommended that you familiarize yourself with the general way in which input works in Defold, how to receive input and in which order input is received in your script files. Learn more about the input system in the [Input Overview manual](#manuals:input).
# Gamepads
Gamepad triggers allow you to bind standard gamepad input to game functions. Gamepad input offers bindings for:
- Left and right sticks (direction and clicks)
- Left and right digital pads. Right pad usually translates to the "A", "B", "X" and "Y" buttons on the Xbox controller and "square", "circle", "triangle" and "cross" buttons on the Playstation controller.
- Left and right triggers
- Left and right shoulder buttons
- Start, Back and Guide buttons
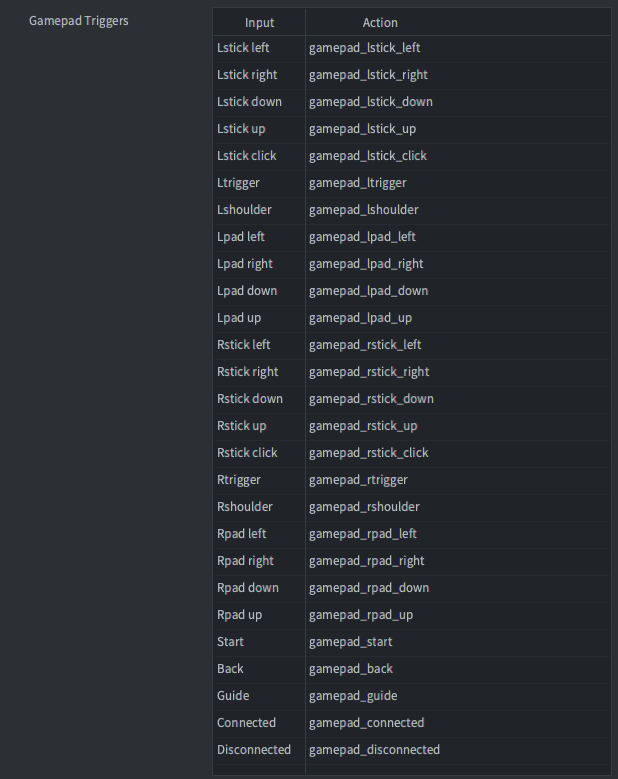
The examples below use the actions shown in the image above. As with all input you are free to name your input actions any way you want to.
## Digital buttons
Digital buttons generate pressed, released and repeated events. Example showing how to detect input for a digital button (either pressed or released):
```lua
function on_input(self, action_id, action)
if action_id == hash("gamepad_lpad_left") then
if action.pressed then
-- start moving left
elseif action.released then
-- stop moving left
end
end
end
```
## Analog sticks
Analog sticks generate continuous input events when the stick is moved outside the dead zone defined in the gamepad settings file (see below). Example showing how to detect input for an analog stick:
```lua
function on_input(self, action_id, action)
if action_id == hash("gamepad_lstick_down") then
-- left stick was moved down
print(action.value) -- a value between 0.0 an -1.0
end
end
```
Analog sticks also generate pressed and released events when moved in the cardinal directions above a certain threshold value. This makes it easy to also use an analog stick as digital directional input:
```lua
function on_input(self, action_id, action)
if action_id == hash("gamepad_lstick_down") and action.pressed then
-- left stick was moved to its extreme down position
end
end
```
## Multiple gamepads
Defold supports multiple gamepads through the host operating system, actions set the `gamepad` field of the action table to the gamepad number the input originated from:
```lua
function on_input(self, action_id, action)
if action_id == hash("gamepad_start") then
if action.gamepad == 0 then
-- gamepad 0 wants to join the game
end
end
end
```
## Connect and Disconnect
Gamepad input bindings also provide two separate bindings named `Connected` and `Disconnected` to detect when a gamepad is connected (even those connected from the start) or disconnected.
```lua
function on_input(self, action_id, action)
if action_id == hash("gamepad_connected") then
if action.gamepad == 0 then
-- gamepad 0 was connected
end
elseif action_id == hash("gamepad_disconnected") then
if action.gamepad == 0 then
-- gamepad 0 was disconnected
end
end
end
```
## Raw gamepads
(From Defold 1.2.183)
Gamepad input bindings also provide a separate binding named `Raw` to give the unfiltered (without applied deadzone) button, axis and hat input of any connected gamepad.
```lua
function on_input(self, action_id, action)
if action_id == hash("raw") then
pprint(action.gamepad_buttons)
pprint(action.gamepad_axis)
pprint(action.gamepad_hats)
end
end
```
## Gamepads settings file
Gamepad input setup uses a separate mapping file for each hardware gamepad type. Gamepad mappings for specific hardware gamepads are set in a *gamepads* file. Defold ships with a built-in gamepads file with settings for common gamepads:
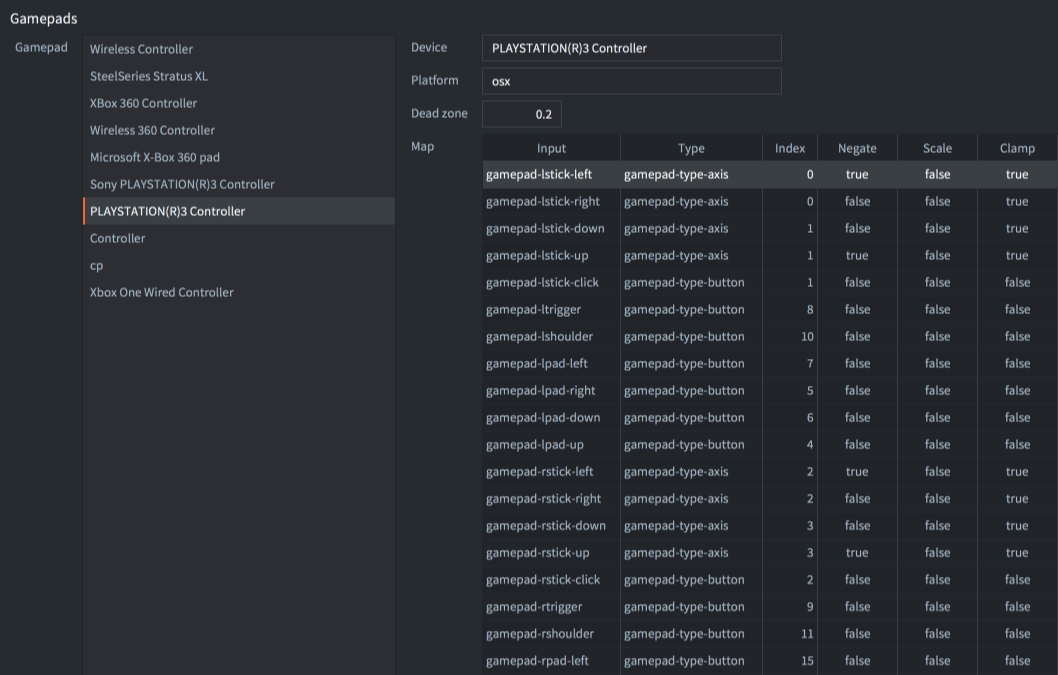
If you need to create a new gamepad settings file, we have a simple tool to help:
[Click to download gdc.zip](https://forum.defold.com/t/big-thread-of-gamepad-testing/56032).
It includes binaries for Windows, Linux and macOS. Run it from the command line:
```sh
./gdc
```
The tool will ask you to press different buttons on your connected controller. It will then output a new gamepads file with correct mappings for your controller. Save the new file, or merge it with your existing gamepads file, then update the setting in *game.project*:
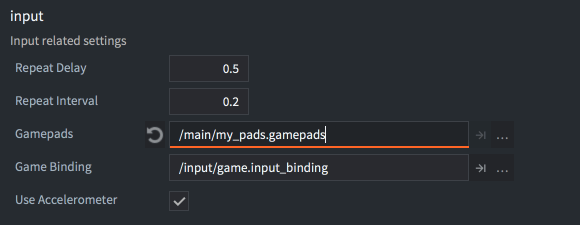
### Unidentified gamepads
(From Defold 1.2.186)
When a gamepad is connected and no mapping exists for the gamepad the gamepad will only generate "connected", "disconnected" and "raw" actions. In this case you need to manually map the raw gamepad data to actions in your game.
(From Defold 1.4.8)
It is possible to check if an input action for a gamepad is from an unknown gamepad or not by reading the `gamepad_unknown` value from the action:
```lua
function on_input(self, action_id, action)
if action_id == hash("connected") then
if action.gamepad_unknown then
print("The connected gamepad is unidentified and will only generate raw input")
else
print("The connected gamepad is known and will generate input actions for buttons and sticks")
end
end
end
```
## Gamepads in HTML5
Gamepads are supported in HTML5 builds and generate the same input events as on other platforms. Support for gamepads is based on the [Gamepad API](https://www.w3.org/TR/gamepad/) which is supported in most browsers ([refer to this support chart](https://caniuse.com/?search=gamepad)). If the browser doesn't support the Gamepad API Defold will silently ignore any Gamepad triggers in your project. You can check if the browser supports the Gamepad API by checking if the `getGamepads` function exists on the `navigator` object:
```lua
local function supports_gamepads()
return not html5 or (html5.run('typeof navigator.getGamepads === "function"') == "true")
end
if supports_gamepads() then
print("Platform supports gamepads")
end
```
If your game is running from inside an `iframe` you must also make sure that the `iframe` has the `gamepad` permission added:
```html
```
### Standard gamepad
(From Defold 1.4.1)
If a connected gamepad is identified by the browser as a standard gamepad it will use the mapping for "Standard Gamepad" in the [gamepads settings file](#manuals:input-gamepads) (a Standard Gamepad mapping is included in the `default.gamepads` file in `/builtins`). A standard gamepad is defined as having 16 buttons and 2 analog sticks with a button layout similar to a PlayStation or Xbox controller (see the [W3C definition and button layout](https://w3c.github.io/gamepad/#dfn-standard-gamepad) for more information). If the connected gamepad is not identified as a standard gamepad Defold will look for a mapping matching the hardware gamepad type in the gamepad settings file.
## Gamepads on Windows
On Windows, only XBox 360 controllers are currently supported. To hook up your 360 controller to your Windows machine, [make sure it is setup correctly](http://www.wikihow.com/Use-Your-Xbox-360-Controller-for-Windows).
## Gamepads on Android
(From Defold 1.2.183)
Gamepads are supported in Android builds and generate the same input events as on other platforms. Support for gamepads is based on the [Android input system for key and motion events](https://developer.android.com/training/game-controllers/controller-input). The Android input events will be translated to Defold gamepad events using the same *gamepad* file as described above.
When adding additional gamepad bindings on Android you can use the following lookup tables to translate from the Android input events to *gamepad* file values:
| Key event to button index | Index | Version |
|-----------------------------|-------|---------|
| `AKEYCODE_BUTTON_A` | 0 | 1.2.183 |
| `AKEYCODE_BUTTON_B` | 1 | 1.2.183 |
| `AKEYCODE_BUTTON_C` | 2 | 1.2.183 |
| `AKEYCODE_BUTTON_X` | 3 | 1.2.183 |
| `AKEYCODE_BUTTON_L1` | 4 | 1.2.183 |
| `AKEYCODE_BUTTON_R1` | 5 | 1.2.183 |
| `AKEYCODE_BUTTON_Y` | 6 | 1.2.183 |
| `AKEYCODE_BUTTON_Z` | 7 | 1.2.183 |
| `AKEYCODE_BUTTON_L2` | 8 | 1.2.183 |
| `AKEYCODE_BUTTON_R2` | 9 | 1.2.183 |
| `AKEYCODE_DPAD_CENTER` | 10 | 1.2.183 |
| `AKEYCODE_DPAD_DOWN` | 11 | 1.2.183 |
| `AKEYCODE_DPAD_LEFT` | 12 | 1.2.183 |
| `AKEYCODE_DPAD_RIGHT` | 13 | 1.2.183 |
| `AKEYCODE_DPAD_UP` | 14 | 1.2.183 |
| `AKEYCODE_BUTTON_START` | 15 | 1.2.183 |
| `AKEYCODE_BUTTON_SELECT` | 16 | 1.2.183 |
| `AKEYCODE_BUTTON_THUMBL` | 17 | 1.2.183 |
| `AKEYCODE_BUTTON_THUMBR` | 18 | 1.2.183 |
| `AKEYCODE_BUTTON_MODE` | 19 | 1.2.183 |
| `AKEYCODE_BUTTON_1` | 20 | 1.2.186 |
| `AKEYCODE_BUTTON_2` | 21 | 1.2.186 |
| `AKEYCODE_BUTTON_3` | 22 | 1.2.186 |
| `AKEYCODE_BUTTON_4` | 23 | 1.2.186 |
| `AKEYCODE_BUTTON_5` | 24 | 1.2.186 |
| `AKEYCODE_BUTTON_6` | 25 | 1.2.186 |
| `AKEYCODE_BUTTON_7` | 26 | 1.2.186 |
| `AKEYCODE_BUTTON_8` | 27 | 1.2.186 |
| `AKEYCODE_BUTTON_9` | 28 | 1.2.186 |
| `AKEYCODE_BUTTON_10` | 29 | 1.2.186 |
| `AKEYCODE_BUTTON_11` | 30 | 1.2.186 |
| `AKEYCODE_BUTTON_12` | 31 | 1.2.186 |
| `AKEYCODE_BUTTON_13` | 32 | 1.2.186 |
| `AKEYCODE_BUTTON_14` | 33 | 1.2.186 |
| `AKEYCODE_BUTTON_15` | 34 | 1.2.186 |
| `AKEYCODE_BUTTON_16` | 35 | 1.2.186 |
([Android `KeyEvent` definitions](https://developer.android.com/ndk/reference/group/input#group___input_1gafccd240f973cf154952fb917c9209719))
| Motion event to axis index | Index |
|-----------------------------|-------|
| `AMOTION_EVENT_AXIS_X` | 0 |
| `AMOTION_EVENT_AXIS_Y` | 1 |
| `AMOTION_EVENT_AXIS_Z` | 2 |
| `AMOTION_EVENT_AXIS_RZ` | 3 |
| `AMOTION_EVENT_AXIS_LTRIGGER` | 4 |
| `AMOTION_EVENT_AXIS_RTRIGGER` | 5 |
| `AMOTION_EVENT_AXIS_HAT_X` | 6 |
| `AMOTION_EVENT_AXIS_HAT_Y` | 7 |
([Android `MotionEvent` definitions](https://developer.android.com/ndk/reference/group/input#group___input_1ga157d5577a5b2f5986037d0d09c7dc77d))
Use this lookup table in combination with a gamepad test app from the Google Play Store to figure out which key event each button on your gamepad is mapped to.
# Scripts {#manuals:script}
Script components allows you to create game logic using the [Lua programming language](#manuals:lua).
## Script types
There are three types of Lua script in Defold, each has different Defold libraries available.
Game Object scripts
: Extension _.script_. These scripts are added to game objects exactly like any other [component](#manuals:components) and Defold will execute the Lua code as part of the engine lifecycle functions. Game Object scripts are usually used to control game objects and the logic that binds the game together with level loading, game rules and so forth. Game Object scripts have access to the [GO](https://defold.com/ref/go) functions and all Defold library functions except the [GUI](https://defold.com/ref/gui) and [Render](https://defold.com/ref/render) functions.
GUI scripts
: Extension _.gui_script_. Run by GUI components and usually containing the logic required to display GUI elements like heads up displays, menus etc. Defold will execute the Lua code as part of the engine lifecycle functions. GUI scripts have access to the [GUI](https://defold.com/ref/gui) functions and all Defold library functions except the [GO](https://defold.com/ref/go) and [Render](https://defold.com/ref/render) functions.
Render scripts
: Extension _.render_script_. Run by the rendering pipeline and containing the logic required to render all app/game graphics each frame. The render script has a special place in the lifecycle of your game. Details can be found in the [Application lifecycle documentation](#manuals:application-lifecycle). Render scripts have access to the [Render](https://defold.com/ref/render) functions and all Defold library functions except the [GO](https://defold.com/ref/go) and [GUI](https://defold.com/ref/gui) functions.
## Script execution, callbacks and self
Defold executes Lua scripts as part of the engine lifecycle and exposes the lifecycle through a set of predefined callback functions. When you add a script component to a game object the script becomes part of the game object's and its component(s) lifecycle. The script is evaluated in the Lua context when it is loaded, then the engine executes the following functions and passes a reference to the current script component instance as parameter. You can use this `self` reference to store state in the component instance.
`self` is a userdata object that acts like a Lua table but you can't iterate over it with `pairs()` or `ipairs()` and you can't print it using `pprint()`.
#### `init(self)`
Called when the component is initialized.
```lua
function init(self)
-- These variables are available through the lifetime of the component instance
self.my_var = "something"
self.age = 0
end
```
#### `final(self)`
Called when the component is deleted. This is useful for cleaning up purposes, for instance if you have spawned game objects that should be deleted when the component is deleted.
```lua
function final(self)
if self.my_var == "something" then
-- do some cleanup
end
end
```
#### `update(self, dt)`
Called once each frame. `dt` contains the delta time since the last frame.
```lua
function update(self, dt)
self.age = self.age + dt -- increase age with the timestep
end
```
#### `fixed_update(self, dt)`
Frame-rate independent update. `dt` contains the delta time since the last update. This function is called when `engine.fixed_update_frequency` is enabled (!= 0). Useful when you wish to manipulate physics objects at regular intervals to achieve a stable physics simulation when `physics.use_fixed_timestep` is enabled in *game.project*.
```lua
function fixed_update(self, dt)
msg.post("#co", "apply_force", {force = vmath.vector3(1, 0, 0), position = go.get_world_position()})
end
```
#### on_message(self, message_id, message, sender)
When messages are sent to the script component through [`msg.post()`](https://defold.com/ref/msg#msg.post) the engine calls this function of the receiver component. Learn [more about message passing](#manuals:message-passing).
```lua
function on_message(self, message_id, message, sender)
if message_id == hash("increase_score") then
self.total_score = self.total_score + message.score
end
end
```
#### `on_input(self, action_id, action)`
If this component has acquired input focus (see [`acquire_input_focus`](https://defold.com/ref/go/#acquire_input_focus)) the engine calls this function when input is registered. Learn [more about input handling](#manuals:input).
```lua
function on_input(self, action_id, action)
if action_id == hash("touch") and action.pressed then
print("Touch", action.x, action.y)
end
end
```
#### `on_reload(self)`
This function is called when the script is reloaded through the hot reload editor function (Edit ▸ Reload Resource). It is very useful for debugging, testing and tweaking purposes. Learn [more about hot-reload](#manuals:hot-reload).
```lua
function on_reload(self)
print(self.age) -- print the age of this game object
end
```
## Reactive logic
A game object with a script component implements some logic. Often, that logic is dependent on some external factor. An enemy AI might react to the player being within a certain radius from the AI; a door might unlock and open as a result of player interaction, etc, etc.
The `update()` function allows you to implement complex behaviors defined as a state machine running each frame---sometimes that is the adequate approach. But there is a cost associated with each call to `update()`. Unless you really need the function you should delete it and instead try to build your logic _reactively_. It is cheaper to passively wait for some message to trigger a response than it is to actively probe the game world for data to respond to. Furthermore, solving a design problem reactively also often leads to cleaner and more stable design and implementation.
Let's look at a concrete example. Suppose that you want a script component to send a message 2 seconds after it has been initiated. It should then wait for a certain response message and after receiving the response, it should send another message 5 seconds later. The non reactive code for that would look something like this:
```lua
function init(self)
-- Counter to keep track of time.
self.counter = 0
-- We need this to keep track of our state.
self.state = "first"
end
function update(self, dt)
self.counter = self.counter + dt
if self.counter >= 2.0 and self.state == "first" then
-- send message after 2 seconds
msg.post("some_object", "some_message")
self.state = "waiting"
end
if self.counter >= 5.0 and self.state == "second" then
-- send message 5 seconds after we received "response"
msg.post("another_object", "another_message")
-- Nil the state so we don’t reach this state block again.
self.state = nil
end
end
function on_message(self, message_id, message, sender)
if message_id == hash("response") then
-- “first” state done. enter next
self.state = "second"
-- zero the counter
self.counter = 0
end
end
```
Even in this quite simple case we get fairly tangled up logic. It's possible to make this look better with the help of coroutines in a module (see below), but let's instead try to make this reactive and use a built-in timing mechanism.
```lua
local function send_first()
msg.post("some_object", "some_message")
end
function init(self)
-- Wait 2s then call send_first()
timer.delay(2, false, send_first)
end
local function send_second()
msg.post("another_object", "another_message")
end
function on_message(self, message_id, message, sender)
if message_id == hash("response") then
-- Wait 5s then call send_second()
timer.delay(5, false, send_second)
end
end
```
This is cleaner and easier to follow. We get rid of internal state variables that are often hard to follow through the logic---and which might lead to subtle bugs. We also dispose of the `update()` function completely. That relieves the engine from calling our script 60 times a second, even if it's just idling.
## Preprocessing
It is possible to use a Lua preprocessor and special markup to conditionally include code based on the build variant. Example:
```lua
-- Use one of the following keywords: RELEASE, DEBUG or HEADLESS
--#IF DEBUG
local lives_num = 999
--#ELSE
local lives_num = 3
--#ENDIF
```
The preprocessor is available as a build extension. Learn more about how to install and use it on the [extension page on GitHub](https://github.com/defold/extension-lua-preprocessor).
## Editor support
The Defold editor supports Lua script editing with syntax coloring and auto-completion. To fill out Defold function names, press *Ctrl+Space* to bring up a list of the functions matching what you are typing.
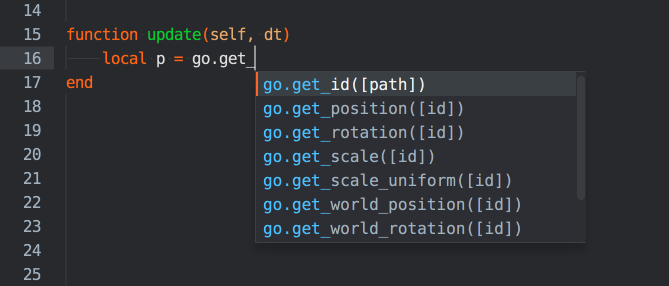
# Properties {#manuals:properties}
Defold exposes properties for game objects, components and GUI nodes that can be read, set and animated. The following types of properties exist:
* System defined game object transforms (position, rotation and scale) and component specific properties (for example a sprite's pixel size or a collision object's mass)
* User defined script component properties defined in Lua scripts (see [Script properties documentation](#manuals:script-properties) for details)
* GUI node properties
* Shader constants defined in shaders and material files (see [Material documentation](#manuals:material) for details)
Numeric properties display a drag handle when you hover over their input field. You can increase/decrease their value, by dragging the handle right/left or up/down respectively.
Depending on where a property is found, you access it via a generic function, or a property-specific function. Many of the properties can be automatically animated. Animating properties through the built-in system is highly recommended over manipulating the properties yourself (inside an `update()` function), both for performance reasons as well as convenience.
Composite properties of type `vector3`, `vector4` or `quaternion` also expose their sub-components (`x`, `y`, `z` and `w`). You can address the components individually by suffixing the name with a dot (`.`) and the name of the component. For example, to set the x-component of a game object's position:
```lua
-- Set the x position of "game_object" to 10.
go.set("game_object", "position.x", 10)
```
The functions `go.get()`, `go.set()` and `go.animate()` take a reference as their first parameter and a property identifier as their second. The reference identifies the game object or component and can be a string, a hash or a URL. URLs are explained in detail in the [addressing manual](#manuals:addressing). The property identifier is a string or hash that names the property:
```lua
-- Set the x-scale of the sprite component
local url = msg.url("#sprite")
local prop = hash("scale.x")
go.set(url, prop, 2.0)
```
For GUI nodes, the node identifier is provided as the first parameter to the property specific function:
```lua
-- Get the color of the button
local node = gui.get_node("button")
local color = gui.get_color(node)
```
## Game object and component properties
All game objects, and some component types have properties that can be read and manipulated in runtime. Read these values with [`go.get()`](https://defold.com/ref/go#go.get) and write them with [`go.set()`](https://defold.com/ref/go#go.set). Depending on the property value type, you can animate the values with [`go.animate()`](https://defold.com/ref/go#go.animate). A small set of the properties are read only.
`get`
: Can be read with [`go.get()`](https://defold.com/ref/go#go.get).
`get+set`
: Can be read with [`go.get()`](https://defold.com/ref/go#go.get) and written with [`go.set()`](https://defold.com/ref/go#go.set). Numerical values can be animated with [`go.animate()`](https://defold.com/ref/go#go.animate).
*GAME OBJECT PROPERTIES*
| property | description | type | |
| ---------- | -------------------------------------- | --------------- | ---------------- |
| *position* | The local position of the game object. | `vector3` | `get+set` |
| *rotation* | Local rotation of game object, expressed as a quaternion. | `quaternion` | `get+set` |
| *euler* | Local rotation of game object, Euler angles. | `vector3` | `get+set` |
| *scale* | Local non uniform scale of the game object, expressed as a vector where each component contains a multiplier along each axis. To double the size in x and y, provide vmath.vector3(2.0, 2.0, 0) | `vector3` | `get+set` |
| *scale.xy* | Local non uniform scale of the game object, expressed as a vector where each component contains a multiplier along X and Y axis.| `vector3` | `get+set` |
Specific functions for working with the game object transform also exist; they are `go.get_position()`, `go.set_position()`, `go.get_rotation()`, `go.set_rotation()`, `go.get_scale()`, `go.set_scale()` and `go.set_scale_xy()`.
*SPRITE COMPONENT PROPERTIES*
| property | description | type | |
| ---------- | -------------------------------------- | --------------- | ---------------- |
| *size* | The non scaled size of the sprite---its size as taken from the source atlas. | `vector3` | `get` |
| *image* | The texture path hash of the sprite. | `hash` | `get`|
| *scale* | Non uniform scale of the sprite . | `vector3` | `get+set`|
| *scale.xy* | Non uniform scale of the sprite along X and Y axis. | `vector3` | `get+set`|
| *material* | The material used by the sprite. | `hash` | `get+set`|
| *cursor* | Position (between 0--1) of playback cursor. | `number` | `get+set`|
| *playback_rate* | The framerate of the flipbook animation. | `number` | `get+set`|
*COLLISION OBJECT COMPONENT PROPERTIES*
| property | description | type | |
| ---------- | -------------------------------------- | --------------- | ---------------- |
| *mass* | The mass of the collision object. | `number` | `get` |
| *linear_velocity* | The current linear velocity of the collision object. | `vector3` | `get` |
| *angular_velocity* | The current angular velocity of the collision object. | `vector3` | `get` |
| *linear_damping* | Linear damping of the collision object. | `vector3` | `get+set` |
| *angular_damping* | Angular damping of the collision object. | `vector3` | `get+set` |
*MODEL (3D) COMPONENT PROPERTIES*
| property | description | type | |
| ---------- | -------------------------------------- | --------------- | ---------------- |
| *animation* | The current animation. | `hash` | `get` |
| *texture0* | The texture path hash of the model. | `hash` | `get`|
| *cursor* | Position (between 0--1) of playback cursor. | `number` | `get+set` |
| *playback_rate* | The playback rate of the animation. A multiplier to the animation playback rate. | `number` | `get+set` |
| *material* | The material used by the model. | `hash` | `get+set`|
*LABEL COMPONENT PROPERTIES*
| property | description | type | |
| ---------- | -------------------------------------- | --------------- | ---------------- |
| *scale* | The scale of the label. | `vector3` | `get+set` |
| *scale.xy* | The scale of the label along X and Y axis. | `vector3` | `get+set`|
| *color* | The color of the label. | `vector4` | `get+set` |
| *outline* | The outline color of the label. | `vector4` | `get+set` |
| *shadow* | The shadow color of the label. | `vector4` | `get+set` |
| *size* | The size of the label. The size will constrain the text if line break is enabled. | `vector3` | `get+set` |
| *material* | The material used by the label. | `hash` | `get+set`|
| *font* | The font used by the label. | `hash` | `get+set`|
## GUI node properties
GUI nodes also contain properties, but they are read and written through special getter and setter functions. For each property there exists one get- and one set- function. There is also a set of constants defined to use as reference to the properties when animating them. If you need to refer to separate property components you have to use the string name of the property, or a hash of the string name.
* `position` (or `gui.PROP_POSITION`)
* `rotation` (or `gui.PROP_ROTATION`)
* `scale` (or `gui.PROP_SCALE`)
* `color` (or `gui.PROP_COLOR`)
* `outline` (or `gui.PROP_OUTLINE`)
* `shadow` (or `gui.PROP_SHADOW`)
* `size` (or `gui.PROP_SIZE`)
* `fill_angle` (or `gui.PROP_FILL_ANGLE`)
* `inner_radius` (or `gui.PROP_INNER_RADIUS`)
* `slice9` (or `gui.PROP_SLICE9`)
Note that all color values are encoded in a vector4 where the components correspond to the RGBA values:
`x`
: The red color component
`y`
: The green color component
`z`
: The blue color component
`w`
: The alpha component
*GUI NODE PROPERTIES*
| property | description | type | |
| ---------- | -------------------------------------- | --------------- | ---------------- |
| *color* | The face color of the node. | `vector4` | `gui.get_color()` `gui.set_color()` |
| *outline* | The outline color of the node. | `vector4` | `gui.get_outline()` `gui.set_outline()` |
| *position* | The position of the node. | `vector3` | `gui.get_position()` `gui.set_position()` |
| *rotation* | The rotation of the node expressed as Euler angles--degrees rotated around each axis. | `vector3` | `gui.get_rotation()` `gui.set_rotation()` |
| *scale* | The scale of the node expressed as a multiplier along each axis. | `vector3` |`gui.get_scale()` `gui.set_scale()` |
| *shadow* | The shadow color of the node. | `vector4` | `gui.get_shadow()` `gui.set_shadow()` |
| *size* | The unscaled size of the node. | `vector3` | `gui.get_size()` `gui.set_size()` |
| *fill_angle* | The fill angle of a pie node expressed as degrees counter-clockwise. | `number` | `gui.get_fill_angle()` `gui.set_fill_angle()` |
| *inner_radius* | The inner radius of a pie node. | `number` | `gui.get_inner_radius()` `gui.set_inner_radius()` |
| *slice9* | The edge distances of a slice9 node. | `vector4` | `gui.get_slice9()` `gui.set_slice9()` |
# Script properties {#manuals:script-properties}
Script properties provide a simple and powerful way of defining and exposing custom properties for a specific game object instance. Script properties can be edited on specific instances directly in the editor and their settings can be used in code to alter the behavior of a game object. There are many cases where script properties are very useful:
* When you want to override values for specific instances in the editor, and thereby increase script re-usability.
* When you want to spawn a game object with initial values.
* When you want to animate the values of a property.
* When you want to access state data in one script from another. (Note that if you access properties frequently between objects, it may be better to move the data to a shared storage.)
Common use cases are to set the health or speed of a specific enemy AI, the tint color of a pickup object, the atlas of a sprite, or what message a button object should send when pressed---and/or where to send it.
## Defining a script property
Script properties are added to a script component by defining them with the `go.property()` special function. The function has to be used at the top level---outside any lifecycle functions like `init()` and `update()`. The default value provided for the property governs the type of the property: `number`, `boolean`, `hash`, `msg.url`, `vmath.vector3`, `vmath.vector4`, `vmath.quaternion` and `resource` (see below).
Note that the reversal of the hash value works only in the Debug build to facilitate debugging. In the Release build, the reversed string value does not exist, so using `tostring()` on a `hash` value to extract the string from it is meaningless.
```lua
-- can.script
-- Define script properties for health and an attack target
go.property("health", 100)
go.property("target", msg.url())
function init(self)
-- store initial position of target.
-- self.target is a url referencing another object.
self.target_pos = go.get_position(self.target)
...
end
function on_message(self, message_id, message, sender)
if message_id == hash("take_damage") then
-- decrease the health property
self.health = self.health - message.damage
if self.health <= 0 then
go.delete()
end
end
end
```
Any script component instance created from this script can then set the property values.

Select the script component in the *Outline* view in the editor and the properties appear in the *Properties* view allowing you to edit them:

Any property that is overridden with a new instance specific value is marked blue. Click the reset button by the property name to revert the value to the default (as set in the script).
Script properties are parsed when building the project. Value expressions are not evaluated. This means that something like `go.property("hp", 3+6)` will not work while `go.property("hp", 9)` will.
## Accessing script properties
Any defined script property is available as a stored member in `self`, the script instance reference:
```lua
-- my_script.script
go.property("my_property", 1)
function update(self, dt)
-- Read and write the property
if self.my_property == 1 then
self.my_property = 3
end
end
```
User-defined script properties can also be accessed through the get, set and animate functions, the same way as any other property:
```lua
-- another.script
-- increase "my_property" in "myobject#script" by 1
local val = go.get("myobject#my_script", "my_property")
go.set("myobject#my_script", "my_property", val + 1)
-- animate "my_property" in "myobject#my_script"
go.animate("myobject#my_script", "my_property", go.PLAYBACK_LOOP_PINGPONG, 100, go.EASING_LINEAR, 2.0)
```
## Factory created objects
If you use a factory to create the game object, it is possible to set script properties at creation time:
```lua
local props = { health = 50, target = msg.url("player") }
local id = factory.create("#can_factory", nil, nil, props)
-- Accessing factory-created script properties
local url = msg.url(nil, id, "can")
local can_health = go.get(url, "health")
```
When spawning a hierarchy of game objects through `collectionfactory.create()` you need to pair object id's with property tables. These are put together in a table and passed to the `create()` function:
```lua
local props = {}
props[hash("/can1")] = { health = 150 }
props[hash("/can2")] = { health = 250, target = msg.url("player") }
props[hash("/can3")] = { health = 200 }
local ids = collectionfactory.create("#cangang_factory", nil, nil, props)
```
The property values provided via `factory.create()` and `collectionfactory.create()` will override any value set in the prototype file as well as the default values in the script.
If several script components attached to a game object define the same property, each component will get initialized with the value provided to `factory.create()` or `collectionfactory.create()`.
## Resource properties
Resource properties are defined just like the script properties for the basic data types:
```lua
go.property("my_atlas", resource.atlas("/atlas.atlas"))
go.property("my_font", resource.font("/font.font"))
go.property("my_material", resource.material("/material.material"))
go.property("my_texture", resource.texture("/texture.png"))
go.property("my_tile_source", resource.tile_source("/tilesource.tilesource"))
```
When a resource property is defined it shows up in the *Properties* view as any other script property, but as a file/resource browser field:
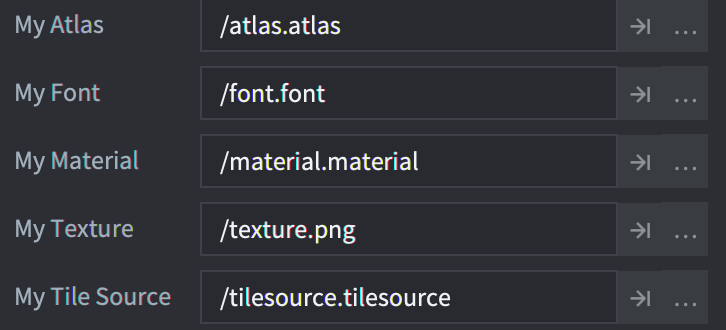
You access and use the resource properties using `go.get()` or via the `self` script instance reference and using `go.set()`:
```lua
function init(self)
go.set("#sprite", "image", self.my_atlas)
go.set("#label", "font", self.my_font)
go.set("#sprite", "material", self.my_material)
go.set("#model", "texture0", self.my_texture)
go.set("#tilemap", "tile_source", self.my_tile_source)
end
```
# Lua in Defold {#manuals:lua}
The Defold engine has the Lua language embedded for scripting. Lua is a lightweight dynamic language that is powerful, fast, and easy to embed. It is widely used as a videogame scripting language. Lua programs are written in a simple procedural syntax. The language is dynamically typed and is run by a bytecode interpreter. It features automatic memory management with incremental garbage collection.
This manual will give a quick introduction to the basics of Lua programming in general and what you need to consider when working with Lua in Defold. If you have some experience with Python, Perl, Ruby, Javascript, or a similar dynamic language you will get going pretty quickly. If you are new to programming you might want to start with a Lua book aimed at beginners. There are plenty to choose from.
## Lua versions
Defold uses [LuaJIT](https://luajit.org/), a highly optimized version of Lua suitable for use in games and other performance-critical software. It is fully upwards compatible with Lua 5.1 and supports all standard Lua library functions and the full set of Lua/C API functions.
LuaJIT also adds several [language extensions](https://luajit.org/extensions.html) and some Lua 5.2 and 5.3 features.
We aim to keep Defold the same across all platforms, but we currently have a few minor discrepancies in the Lua language version between platforms:
* iOS does not allow JIT compilation.
* Nintendo Switch does not allow JIT compilation.
* HTML5 uses Lua 5.1.4 instead of LuaJIT.
To guarantee that your game works across all supported platforms we strongly recommend that you ONLY use language features from Lua 5.1.
### Standard libraries and extensions
Defold includes all of the [Lua 5.1 standard libraries](http://www.lua.org/manual/5.1/manual.html#5) as well as a socket and a bit operation library:
- base (`assert()`, `error()`, `print()`, `ipairs()`, `require()` etc)
- coroutine
- package
- string
- table
- math
- io
- os
- debug
- socket (from [LuaSocket](https://github.com/diegonehab/luasocket))
- bitop (from [BitOp](http://bitop.luajit.org/api.html))
All libraries are documented in the [reference API documentation](https://defold.com/ref/go).
## Lua books and resources
### Online resources
* [Programming in Lua (first edition)](http://www.lua.org/pil/contents.html) Later editions are available in print.
* [Lua 5.1 reference manual](http://www.lua.org/manual/5.1/)
* [Learn Lua in 15 Minutes](http://tylerneylon.com/a/learn-lua/)
* [Awesome Lua - tutorial section](https://github.com/LewisJEllis/awesome-lua#tutorials)
### Books
* [Programming in Lua](https://www.amazon.com/gp/product/8590379868/ref=dbs_a_def_rwt_hsch_vapi_taft_p1_i0) - Programming in Lua is the official book about the language, providing a solid base to any programmer who wants to use Lua. Authored by Roberto Ierusalimschy, the chief architect of the language.
* [Lua programming gems](https://www.amazon.com/Programming-Gems-Luiz-Henrique-Figueiredo/dp/8590379841) - This collection of articles records some of the existing wisdom and practice on how to program well in Lua.
* [Lua 5.1 reference manual](https://www.amazon.com/gp/product/8590379833/ref=dbs_a_def_rwt_hsch_vapi_taft_p1_i4) - Also available online (see above)
* [Beginning Lua Programming](https://www.amazon.com/Beginning-Lua-Programming-Kurt-Jung/dp/0470069171)
### Videos
* [Learn Lua in one video](https://www.youtube.com/watch?v=iMacxZQMPXs)
## Syntax
Programs have simple, easy-to-read syntax. Statements are written one on each line and there is no need to mark the end of a statement. You can optionally use semicolons `;` to separate statements. Blocks of code are keyword delimited, ending with the `end` keyword. Comments can be either written in a block or until the end of the line:
```lua
--[[
Here is a block of comments that can run
over several lines in the source file.
--]]
a = 10
b = 20 ; c = 30 -- two statements on one line
if my_variable == 3 then
call_some_function(true) -- Here is a line comment
else
call_another_function(false)
end
```
## Variables and data types
Lua is dynamically typed, meaning variables do not have types, but values do.
Unlike in statically typed languages, you can assign any value to any variable as you like.
There are eight basic types in Lua:
`nil`
: This type only has the value `nil`. It usually represents the absence of a useful value, for example, unassigned variables.
```lua
print(my_var) -- will print 'nil' since 'my_var' is not yet assigned a value
```
boolean
: Has either the value `true` or `false`. Conditions that are `false` or `nil` are made false. Any other value makes it true.
```lua
flag = true
if flag then
print("flag is true")
else
print("flag is false")
end
if my_var then
print("my_var is not nil nor false!")
end
if not my_var then
print("my_var is either nil or false!")
end
```
number
: Numbers are internally represented as either 64 bit _integers_ or 64 bit _floating point_ numbers. Lua automatically converts between these representations as needed so you generally don't have to worry about it.
```lua
print(10) --> prints '10'
print(10.0) --> '10'
print(10.000000000001) --> '10.000000000001'
a = 5 -- integer
b = 7/3 -- float
print(a - b) --> '2.6666666666667'
```
string
: Strings are immutable sequences of bytes that can contain any 8-bit value, including embedded zeros (`\0`). Lua makes no assumptions about the contents of a string so you can store any data you like in them. String literals are written in single or double quotes. Lua converts between numbers and strings at runtime. Strings can be concatenated with the `..` operator.
Strings can contain the following C-style escape sequences:
| Sequence | Character |
| -------- | --------- |
| `\a` | bell |
| `\b` | back space |
| `\f` | form feed |
| `\n` | newline |
| `\r` | carriage return |
| `\t` | horizontal tab |
| `\v` | vertical tab |
| `\\` | backslash |
| `\"` | double quote |
| `\'` | single quote |
| `\[` | left square bracket |
| `\]` | right square bracket |
| `\ddd` | character denoted by its numeric value where `ddd` is a sequence of up to three _decimal_ digits |
```lua
my_string = "hello"
another_string = 'world'
print(my_string .. another_string) --> "helloworld"
print("10.2" + 1) --> 11.2
print(my_string + 1) -- error, can't convert "hello"
print(my_string .. 1) --> "hello1"
print("one\nstring") --> one
--> string
print("\097bc") --> "abc"
multi_line_string = [[
Here is a chunk of text that runs over several lines. This is all
put into the string and is sometimes very handy.
]]
```
function
: Functions are first-class values in Lua, meaning that you can pass them as parameters to functions and return them as values. Variables assigned to a function contain a reference to the function. You can assign variables to anonymous functions, but Lua provides syntactic sugar (`function name(param1, param2) ... end`) for convenience.
```lua
-- Assign 'my_plus' to function
my_plus = function(p, q)
return p + q
end
print(my_plus(4, 5)) --> 9
-- Convenient syntax to assign function to variable 'my_mult'
function my_mult(p, q)
return p * q
end
print(my_mult(4, 5)) --> 20
-- Takes a function as parameter 'func'
function operate(func, p, q)
return func(p, q) -- Calls the provided function with parameters 'p' and 'q'
end
print(operate(my_plus, 4, 5)) --> 9
print(operate(my_mult, 4, 5)) --> 20
-- Create an adder function and return it
function create_adder(n)
return function(a)
return a + n
end
end
adder = create_adder(2)
print(adder(3)) --> 5
print(adder(10)) --> 12
```
table
: Tables are the only data-structuring type in Lua. They are associative array _objects_ that are used to represent lists, arrays, sequences, symbol tables, sets, records, graphs, trees, etc. Tables are always anonymous and variables you assign a table to do not contain the table itself, but a reference to it. When initializing a table as a sequence, the first index is `1`, not `0`.
```lua
-- Initialize a table as a sequence
weekdays = {"Sunday", "Monday", "Tuesday", "Wednesday",
"Thursday", "Friday", "Saturday"}
print(weekdays[1]) --> "Sunday"
print(weekdays[5]) --> "Thursday"
-- Initialize a table as a record with sequence values
moons = { Earth = { "Moon" },
Uranus = { "Puck", "Miranda", "Ariel", "Umbriel", "Titania", "Oberon" } }
print(moons.Uranus[3]) --> "Ariel"
-- Build a table from an empty constructor {}
a = 1
t = {}
t[1] = "first"
t[a + 1] = "second"
t.x = 1 -- same as t["x"] = 1
-- Iterate over the table key, value pairs
for key, value in pairs(t) do
print(key, value)
end
--> 1 first
--> 2 second
--> x 1
u = t -- u now refers to the same table as t
u[1] = "changed"
for key, value in pairs(t) do -- still iterating over t!
print(key, value)
end
--> 1 changed
--> 2 second
--> x 1
```
userdata
: Userdata is provided to allow arbitrary C data to be stored in Lua variables. Defold uses Lua userdata objects to store Hash values (hash), URL objects (url), Math objects (vector3, vector4, matrix4, quaternion), Game objects, GUI nodes (node), Render predicates (predicate), Render targets (render_target) and Render constant buffers (constant_buffer)
thread
: Threads represent independent threads of execution and are used to implement coroutines. See below for details.
## Operators
Arithmetic operators
: Mathematic operators `+`, `-`, `*`, `/`, the unary `-` (negation) and exponential `^`.
```lua
a = -1
print(a * 2 + 3 / 4^5) --> -1.9970703125
```
Lua provides automatic conversions between numbers and strings at run time. Any numeric operation applied to a string tries to convert the string to a number:
```lua
print("10" + 1) --> 11
```
Relational/comparison operators
: `<` (less than), `>` (greater than), `<=` (less or equal), `>=` (greater or equal), `==` (equal), `~=` (not equal). There operators always return `true` or `false`. Values of different types are considered different. If the types are the same, they are compared according to their value. Lua compares tables, userdata, and functions by reference. Two such values are considered equal only if they refer to the same object.
```lua
a = 5
b = 6
if a <= b then
print("a is less than or equal to b")
end
print("A" < "a") --> true
print("aa" < "ab") --> true
print(10 == "10") --> false
print(tostring(10) == "10") --> true
```
Logical operators
: `and`, `or`, and `not`. `and` returns its first argument if it is `false`, otherwise it returns its second argument. `or` returns its first argument if it is not `false`, otherwise it returns its second argument.
```lua
print(true or false) --> true
print(true and false) --> false
print(not false) --> true
if a == 5 and b == 6 then
print("a is 5 and b is 6")
end
```
Concatenation
: Strings can be concatenated with the `..` operator. Numbers are converted to strings when concatenated.
```lua
print("donkey" .. "kong") --> "donkeykong"
print(1 .. 2) --> "12"
```
Length
: The unary length operator `#`. The length of a string is its number of bytes. The length of a table is its sequence length, the number of indices that are numbered from `1` and upwards where the value is not `nil`. Note: If the sequence has `nil` value "holes" in it, the length can be any index preceding a `nil` value.
```lua
s = "donkey"
print(#s) --> 6
t = { "a", "b", "c", "d" }
print(#t) --> 4
u = { a = 1, b = 2, c = 3 }
print(#u) --> 0
v = { "a", "b", nil }
print(#v) --> 2
```
## Flow control
Lua provides the usual set of flow control constructs.
if---then---else
: Test a condition, execute the `then` part if the condition is true, otherwise execute the (optional) `else` part. Instead of nesting `if` statements you can use `elseif`. This replaces a switch-statement that Lua does not have.
```lua
a = 5
b = 4
if a < b then
print("a is smaller than b")
end
if a == '1' then
print("a is 1")
elseif a == '2' then
print("a is 2")
elseif a == '3' then
print("a is 3")
else
print("I have no idea what a is...")
end
```
while
: Test a condition and execute the block as long as it's true.
```lua
weekdays = {"Sunday", "Monday", "Tuesday", "Wednesday",
"Thursday", "Friday", "Saturday"}
-- Print each weekday
i = 1
while weekdays[i] do
print(weekdays[i])
i = i + 1
end
```
repeat---until
: Repeats the block until a condition is true. The condition is tested after the body so it will execute at least once.
```lua
weekdays = {"Sunday", "Monday", "Tuesday", "Wednesday",
"Thursday", "Friday", "Saturday"}
-- Print each weekday
i = 0
repeat
i = i + 1
print(weekdays[i])
until weekdays[i] == "Saturday"
```
for
: Lua has two types of `for` loop: numeric and generic. The numeric `for` takes 2 or 3 numeric values whereas the generic `for` iterates over all values returned by an _iterator_ function.
```lua
-- Print the numbers 1 to 10
for i = 1, 10 do
print(i)
end
-- Print the numbers 1 to 10 and increment with 2 each time
for i = 1, 10, 2 do
print(i)
end
-- Print the numbers 10 to 1
for i=10, 1, -1 do
print(i)
end
t = { "a", "b", "c", "d" }
-- Iterate over the sequence and print the values
for i, v in ipairs(t) do
print(v)
end
```
break and return
: Use the `break` statement to break out of an inner block of a `for`, `while` or `repeat` loop. Use `return` to return a value from a function or to finish the execution of a function and return to the caller. `break` or `return` can appear only as the last statement of a block.
```lua
a = 1
while true do
a = a + 1
if a >= 100 then
break
end
end
function my_add(a, b)
return a + b
end
print(my_add(10, 12)) --> 22
```
## Locals, globals and lexical scoping
All variables that you declare are by default global, meaning that they are available through all parts of the Lua runtime context. You can explicitly declare variables `local`, meaning that the variable will only exist within the current scope.
Each Lua source file defines a separate scope. Local declarations on the topmost level in a file mean the variable is local to the Lua script file. Each function creates another nested scope and each control structure block creates additional scopes. You can explicitly create a scope with the `do` and `end` keywords. Lua is lexically scoped, meaning that a scope has full access to _local_ variables from the enclosing scope. Note that the local variables must be declared before their use.
```lua
function my_func(a, b)
-- 'a' and 'b' are local to this function and available through its scope
do
local x = 1
end
print(x) --> nil. 'x' is not available outside the do-end scope
print(foo) --> nil. 'foo' is declared after 'my_func'
print(foo_global) --> "value 2"
end
local foo = "value 1"
foo_global = "value 2"
print(foo) --> "value 1". 'foo' is available in the topmost scope after declaration.
```
Note that if you declare functions `local` in a script file (which is generally a good idea) you need to watch out how you order the code. You can use forward declarations if you have functions that mutually call each other.
```lua
local func2 -- Forward declare 'func2'
local function func1(a)
print("func1")
func2(a)
end
function func2(a) -- or func2 = function(a)
print("func2")
if a < 10 then
func1(a + 1)
end
end
function init(self)
func1(1)
end
```
If you write a function enclosed in another function, it too has full access to local variables from the enclosing function. This is a very powerful construct.
```lua
function create_counter(x)
-- 'x' is a local variable in 'create_counter'
return function()
x = x + 1
return x
end
end
count1 = create_counter(10)
count2 = create_counter(20)
print(count1()) --> 11
print(count2()) --> 21
print(count1()) --> 12
```
## Variable shadowing
Local variables declared in a block will shadow variables from a surrounding block with the same name.
```lua
my_global = "global"
print(my_global) -->"global"
local v = "local"
print(v) --> "local"
local function test(v)
print(v)
end
function init(self)
v = "apple"
print(v) --> "apple"
test("banana") --> "banana"
end
```
## Coroutines
Functions execute from beginning to end and there is no way to stop them midway through. Coroutines allow you to do that, which can be very convenient in some cases. Suppose we want to create a very specific frame-by-frame animation where we move a game object from y position `0` to some very specific y positions from frame 1 to frame 5. We could solve that with a counter in the `update()` function (see below) and a list of the positions. However, with a coroutine, we get a very clean implementation that is easy to extend and work with. All state is contained within the coroutine itself.
When a coroutine yields it returns control back to the caller but remembers its execution point so it can continue from there later on.
```lua
-- This is our coroutine
local function sequence(self)
coroutine.yield(120)
coroutine.yield(320)
coroutine.yield(510)
coroutine.yield(240)
return 440 -- return the final value
end
function init(self)
self.co = coroutine.create(sequence) -- Create the coroutine. 'self.co' is a thread object
go.set_position(vmath.vector3(100, 0, 0)) -- Set initial position
end
function update(self, dt)
local status, y_pos = coroutine.resume(self.co, self) -- Continue execution of coroutine.
if status then
-- If the coroutine is still not terminated/dead, use its yielded return value as a new position
go.set_position(vmath.vector3(100, y_pos, 0))
end
end
```
## Lua contexts in Defold
All variables that you declare are by default global, meaning that they are available through all parts of the Lua runtime context. Defold has a setting *shared_state* setting in *game.project* that controls this context. If the option is set, all scripts, GUI scripts, and the render script are evaluated in the same Lua context and global variables are visible everywhere. If the option is not set, the engine executes scripts, GUI scripts, and the render script in separate contexts.
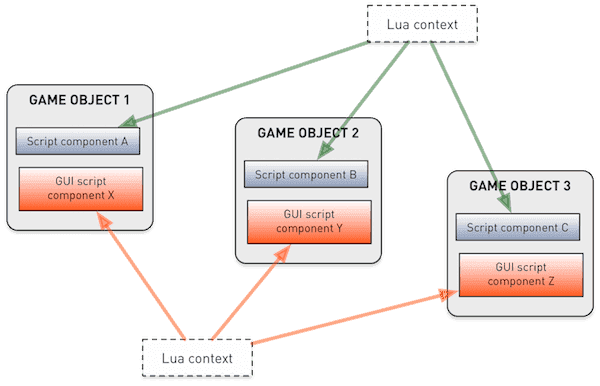
Defold allows you to use the same script file in several separate game object components. Any locally declared variables are shared between components that run the same script file.
```lua
-- 'my_global_value' will be available from all scripts, gui_scripts, render script and modules (Lua files)
my_global_value = "global scope"
-- this value will be shared through all component instances that use this particular script file
local script_value = "script scope"
function init(self, dt)
-- This value will be available on this script component instance
self.foo = "self scope"
-- this value will be available inside init() and after it's declaration
local local_foo = "local scope"
print(local_foo)
end
function update(self, dt)
print(self.foo)
print(my_global_value)
print(script_value)
print(local_foo) -- will print nil, since local_foo is only visible in init()
end
```
## Performance considerations
In a high-performance game that is intended to run at a smooth 60 FPS small performance mistakes can have a large impact on the experience. There are some simple general things to consider and some things that might not seem problematic.
Beginning with the simple things. It is generally a good idea to write straightforward code that does not contain unnecessary loops. Sometimes you do need to iterate over lists of things, but be careful if the list of things is sufficiently large. This example runs in slightly over 1 millisecond on a pretty decent laptop, which can make all the difference if each frame is only 16 milliseconds long (at 60 FPS) and with the engine, render script, physics simulation, and so forth eating up a chunk of that.
```lua
local t = socket.gettime()
local table = {}
for i=1,2000 do
table[i] = vmath.vector3(i, i, i)
end
print((socket.gettime() - t) * 1000)
-- DEBUG:SCRIPT: 0.40388
```
Use the value returned from `socket.gettime()` (seconds since system epoch) to benchmark suspect code.
## Memory and garbage collection
Lua's garbage collection runs automatically in the background by default and reclaims memory that the Lua runtime has allocated. Collecting lots of garbage can be a time-consuming task so it is good to keep down the number of objects that need to be garbage collected:
* Local variables are in themselves free and will not generate garbage. (i.e. `local v = 42`)
* Each _new unique_ string creates a new object. Writing `local s = "some_string"` will create a new object and assign `s` to it. The local `s` itself will not generate garbage, but the string object will. Using the same string multiple times adds no additional memory cost.
* Each time a table constructor is executed (`{ ... }`) a new table is created.
* Executing a _function statement_ creates a closure object. (i.e. executing the statement `function () ... end`, not calling a defined function)
* Vararg functions (`function(v, ...) end`) create a table for the ellipsis each time the function is _called_ (in Lua before version 5.2, or if not using LuaJIT).
* `dofile()` and `dostring()`
* Userdata objects
There are many cases where you can avoid creating new objects and instead reuse the ones you already have. For example. The following is common at the end of each `update()`:
```lua
-- Reset velocity
self.velocity = vmath.vector3()
```
It's easy to forget that each call to `vmath.vector3()` creates a new object. Let's find out how much memory one `vector3` uses:
```lua
print(collectgarbage("count") * 1024) -- 88634
local v = vmath.vector3()
print(collectgarbage("count") * 1024) -- 88704. 70 bytes in total has been allocated
```
70 bytes has been added between the calls to `collectgarbage()`, but this includes allocations for more than the `vector3` object. Each printing of the result from `collectgarbage()` builds a string which in itself adds 22 bytes of garbage:
```lua
print(collectgarbage("count") * 1024) -- 88611
print(collectgarbage("count") * 1024) -- 88633. 22 bytes allocated
```
So a `vector3` weighs in at 70-22=48 bytes. That is not much, but if you create _one_ each frame in a 60 FPS game it's suddenly 2.8 kB of garbage per second. With 360 script components that each create one `vector3` every frame we're looking at 1 MB of garbage generated per second. The numbers can add up very quickly. When the Lua runtime collects garbage it may eat up many precious milliseconds---especially on mobile platforms.
One way to avoid allocations is to create a `vector3` and then keep working with the same object. For instance, to reset a `vector3` we can use the following construct:
```lua
-- Instead of doing self.velocity = vmath.vector3() which creates a new object
-- we zero an existing velocity vector object's components
self.velocity.x = 0
self.velocity.y = 0
self.velocity.z = 0
```
The default garbage-collecting scheme may not be optimal for some time-critical applications. If you see a stutter in your game or app, you might want to tune how Lua collects garbage through the [`collectgarbage()`](https://defold.com/ref/base/#collectgarbage) Lua function. You can, for instance, run the collector for a short time every frame with a low `step` value. To get an idea how much memory your game or app is eating, you can print the current amount of garbage bytes with:
```lua
print(collectgarbage("count") * 1024)
```
## Best practices
A common implementation design consideration is how to structure code for shared behaviors. Several approaches are possible.
Behaviors in a module
: Encapsulating a behavior in a module allows you to easily share code between different game objects’ script components (and GUI scripts). When writing module functions it is generally best to write strictly functional code. There are cases where stored state or side effects are a necessity (or lead to cleaner design). If you have to store the internal state in the module, be aware that components share Lua contexts. See the [Modules documentation](#manuals:modules) for details.
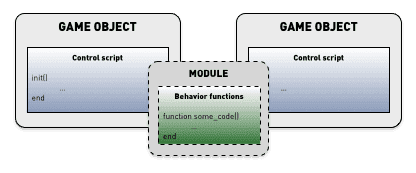
Also, even if it is possible to have module code directly modify the internals of a game object (by passing `self` to a module function) we strongly discourage you from doing so since you will create very tight coupling.
A helper game object with encapsulated behavior
: Just like you can contain script code in a Lua module, you can contain it in a game object with a script component. The difference is that if you contain it in a game object you can communicate with it strictly through message passing.

Grouping game object with helper behavior object inside a collection
: In this design, you can create a behavior game object that automatically acts upon another target game object, either by a predefined name (the user has to rename the target game object to match) or through a `go.property()` URL that points to the target game object.
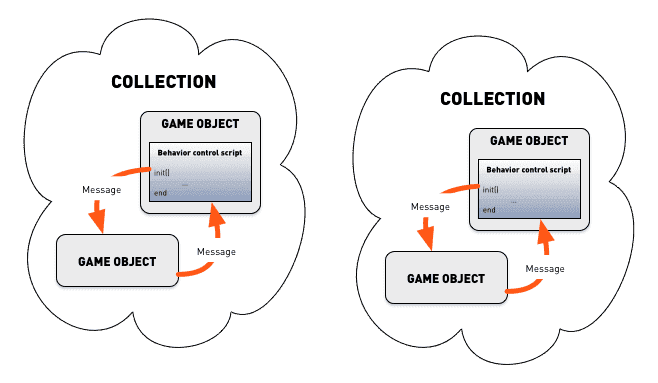
The benefit of this setup is that you can drop a behavior game object into a collection containing the target object. Zero additional code is needed.
In situations where you need to manage large quantities of game objects, this design is not preferable since the behavior object is duplicated for each instance and each object will cost memory.
# Application Security {#manuals:application-security}
Application security is a broad topic which covers everything from secure development practices to securing your game content after it has been released. This manual will cover a number of areas and put them in the context of application security when using the Defold engine, tools and services:
* Intellectual property protection
* Anti-cheat solutions
* Secure network communication
* Use of third-party software
* Use of cloud build servers
* Downloadable content
## Securing your intellectual property from theft
A concern most developers have is how to protect their creations from theft. Copyright, patents and trademarks can from a legal standpoint be used to protect the different aspects of the intellectual property of video games. Copyright gives its owner the exclusive right to distribute the creative work, Patents protects any inventions and Trademarks protects names, symbols and logos.
It may also be desirable to take technical precautions to protect the creative work of a game. It is however important to keep in mind that once the game is in the hands of the player it is possible to find ways to extract the assets. This can be achieved by reverse engineering the game application and files, but also by using tools to extract texture and models as they are sent to the GPU or when other assets are loaded into memory.
For this reason it is our general stance that if users are determined to extract the assets of a game, they will be able to do so.
Developers can add their own protection to make it harder, __but not impossible__, to extract the assets. This typically includes various means of encryption and obfuscation to protect and hide game assets.
### Source code obfuscation
Applying source code obfuscation is an automated process where the source code is deliberately made difficult for humans to understand, without impacting the program’s output. The purpose is usually to protect against theft, but also to make cheating harder.
It is possible to apply source code obfuscation in Defold either as a prebuild step or as an integrated part of the Defold build process. With prebuild obfuscation the source code is obfuscated using an obfuscation tool before the Defold build process is started.
Build-time obfuscation on the other hand is integrated into the build process using a Lua builder plugin. A Lua builder plugin takes the raw source code as input and returns an obfuscated version of the source code as output. One example of build-time obfuscation is shown in the [Prometheus extension](https://github.com/defold/extension-prometheus), based on the Prometheus Lua obfuscator available on GitHub. Below you will find an example of using Prometheus to aggressively obfuscate a snippet of code (note that this kind of heavy obfuscation will have an impact on the runtime performance of the Lua code):
Example:
```
function init(self)
print("hello")
test.greet("Bob")
end
```
Obfuscated output:
```
local v={"+qdW","ZK0tEKf=";"XP/IX3+="}for o,J in ipairs({% raw %}{{1;3};{1,1},{2,3}}{% endraw %})do while J[1]
For security reasons browsers (and by extension any JavaScript running in a browser) is prevented from accessing system files. File operations in HTML5 builds in Defold still work, but only on a "virtual file system" using the IndexedDB API in the browser. What this means is that there is no way to access bundle resources using `io.*` or `os.*` functions. You can however access bundle resources using `http.request()`.
#### Custom and Bundle resources - comparison
| Characteristic | Custom Resources | Bundle Resources |
|-----------------------------|-------------------------------------------|------------------------------------------------|
| Loading speed | Faster - files loaded from binary archive | Slower - files loaded from filesystem |
| Load partial files | No - only entire files | Yes - read arbitrary bytes from file |
| Modify files after bundling | No - files stored inside a binary archive | Yes - files stored on the local file system |
| HTML5 support | Yes | Yes - but access through http and not file I/O |
### System file access
Access to system files may be restricted by the operating system for security reasons. You can use the [`extension-directories`](https://defold.com/assets/extensiondirectories/) native extension to get the absolute path to some common system directories (ie documents, resource, temp). Once you have the absolute path of these files you can use the `io.*` and `os.*` functions to access the files (see above).
For security reasons browsers (and by extension any JavaScript running in a browser) is prevented from accessing system files. File operations in HTML5 builds in Defold still work, but only on a "virtual file system" using the IndexedDB API in the browser. What this means is that there is no way to access system files in HTML5 builds.
## Extensions
The [Asset Portal](https://defold.com/assets/) contains several assets to simplify file and folder access. Some examples:
* [Lua File System (LFS)](https://defold.com/assets/luafilesystemlfs/) - Functions to work with directories, file permissions etc
* [DefSave](https://defold.com/assets/defsave/) - A module to help you save / load config and player data between session.
# Networking {#manuals:networking}
It is not uncommon for games to have some kind of connection to a backend service, perhaps to post scores, handle match making or store saved games in the cloud. Many games also have peer to peer connections where game clients communicate directly with each other, without involvement of a central server. Network connections and the exchange of data can be made using several different protocols and standards. Learn more about the different ways to use network connections in Defold:
* [HTTP Requests](#manuals:http-requests)
* [Socket connections](#manuals:socket-connections)
* [WebSocket connections](#manuals:websocket-connections)
* [Online services](#manuals:online-services)
## Technical details
### IPv4 and IPv6
Defold supports IPv4 and IPv6 connections for sockets and HTTP requests.
### Secure connections
Defold supports secure SSL connections for sockets and HTTP requests.
Defold can optionally also verify the SSL certificate of any secure connection. SSL verification will be enabled when a PEM file containing public CA-root certificate keys or a self-signed certificate public key is provided in the [SSL Certificates setting](#manuals:project-settings)) field of the Network section in *game.project*. A list of CA-root certificates is included in `builtins/ca-certificates`, but it is recommended to create a new PEM file and copy-paste the needed CA-root certificates depending on the server(s) the game connects to.
## HTTP requests {#manuals:http-requests}
Defold can make normal HTTP requests using the `http.request()` function.
### HTTP GET
This is the most basic request to get some data from the server. Example:
```Lua
local function handle_response(self, id, response)
print(response.status, response.response)
end
http.request("https://www.defold.com", "GET", handle_response)
```
This will make an HTTP GET request to https://www.defold.com. The function is asynchronous and will not block while making the request. Once the request has been made and a server has sent a response it will invoke/call the provided callback function. The callback function will receive the full server response, including status code and response headers.
HTTP requests are automatically cached in the client to improve network performance. The cached files are stored in an OS specific application support path in a folder named `defold/http-cache`. You usually don't have to care about the HTTP cache but if you need to clear the cache during development you can manually delete the folder containing the cached files. On macOS this folder is located in `%HOME%/Library/Application Support/Defold/http-cache/` and on Windows in `%APP_DATA%/defold/http-cache`.
### HTTP POST
When sending data, like a score or some authentication data, to a server it is typically done using a POST requests:
```Lua
local function handle_response(self, id, response)
print(response.status, response.response)
end
local headers = {
["Content-Type"] = "application/x-www-form-urlencoded"
}
local body = "foo=bar"
http.request("https://httpbin.org/post", "POST", handle_response, headers, body)
```
### Other HTTP methods
Defold HTTP requests also support the HEAD, DELETE and PUT methods.
### API Reference
Refer to the [API reference](https://defold.com/ref/http/) to learn more.
### Extensions
An alternative HTTP request implementation can be found in the [TinyHTTP extension](https://defold.com/assets/tinyhttp/).
## Socket connections {#manuals:socket-connections}
Defold includes the [LuaSocket library](https://lunarmodules.github.io/luasocket/) for creating TCP and UDP socket connections. Example of how to create a socket connection, sending some data and reading a response:
```Lua
local client = socket.tcp()
client:connect("127.0.0.1", 8123)
client:settimeout(0)
client:send("foobar")
local response = client:receive("*l")
```
This will create a TCP socket, connect it to IP 127.0.0.1 (localhost) and port 8123. It will set timeout to 0 to make the socket non-blocking and it will send the string "foobar" over the socket. It will also read a line of data (bytes ending with a newline character) from the socket. Note that the above example doesn't contain any kind of error handling.
### API Reference and examples
Refer to the [API reference](https://defold.com/ref/socket/) to learn more about the functionality available via LuaSocket. The [official LuaSocket documentation](https://lunarmodules.github.io/luasocket/) also contains many examples of how to work with the library. There is also some examples and helper modules in the [DefNet library](https://github.com/britzl/defnet/).
# Game services {#manuals:online-services}
Using HTTP requests and socket connections allows you to connect to and interact with thousands of different services on the internet, but in most cases there's more to it than simply making an HTTP request. You usually need to use some kind of authentication, the request data may need to be formatted in a certain way and the response may need to be parsed before it can be used. This can of course be done manually by you but there are also extensions and libraries to take care of this sort of thing for you. Below you'll find a list of some extensions that can be used to more easily interact with specific backend services:
## General purpose
* [Colyseus](https://defold.com/assets/colyseus/) - Multiplayer game client
* [Nakama](https://defold.com/assets/nakama/) - Add authentication, matchmaking, analytics, cloud save, multiplayer, chat and more to your game
* [Photon Realtime](https://defold.com/assets/photon-realtime/) - Photon Realtime offers scalable solutions for essential features such as authentication, matchmaking, and fast, reliable communication.
* [PlayFab](https://defold.com/assets/playfabsdk/) - Add authentication, matchmaking, analytics, cloud save and more to your game
* [AWS SDK](https://github.com/britzl/aws-sdk-lua) - Use Amazon Web Services from within your game
## Authentication, leaderboards, achievements
* [Google Play Game Services](https://defold.com/assets/googleplaygameservices/) - Use Google Play Game Services to authenticate and use cloud save in your game
* [Steamworks](https://defold.com/assets/steamworks/) - Add Steam support to your game
* [Apple GameKit Game Center](https://defold.com/assets/gamekit/)
## Analytics
* [Firebase Analytics](https://defold.com/assets/googleanalyticsforfirebase/) - Add Firebase Analytics to your game
* [Game Analytics](https://gameanalytics.com/docs/item/defold-sdk) - Add GameAnalytics to your game
* [Google Analytics](https://defold.com/assets/gameanalytics/) - Add Google Analytics to your game
Check the [Asset Portal](https://www.defold.com/assets/) for even more extensions!
# Render {#manuals:render}
Every object that is shown on screen by the engine: sprites, models, tiles, particles or GUI nodes, are drawn by a renderer. At the heart of the renderer is a render script that controls the render pipeline. By default, every 2D object is drawn with the correct bitmap with the specified blending and at the correct Z depth---so you might not have to ever think about rendering beyond ordering and simple blending. For most 2D games, the default pipeline functions well, but your game might have special requirements. If that is the case, Defold allows you to write a tailor-made rendering pipeline.
### Render pipeline - What, when and where?
The render pipeline controls what to render, when to render it and also where to render it. What to render is controlled by [render predicates](#render-predicates). When to render a predicate is controlled in the [render script](#the-render-script) and where to render a predicate is controlled by the [view projection](#default-view-projection). The render pipeline can also cull the graphics, drawn by a render predicate, which lies outside of a defined bounding box or frustum. This process is called frustum culling.
## The default render
The render file contains a reference to the current render script as well as custom materials that should be made available in the render script (use with [`render.enable_material()`](https://defold.com/ref/render/#render.enable_material))
At the heart of the rendering pipeline is the _render script_. This is a Lua script with the functions `init()`, `update()` and `on_message()` and it is primarily used to interact with the underlying graphics API. The render script has a special place in the lifecycle of your game. Details can be found in the [Application lifecycle documentation](#manuals:application-lifecycle).
In the "Builtins" folder of your projects you can find the default render resource ("default.render") and the default render script ("default.render_script").
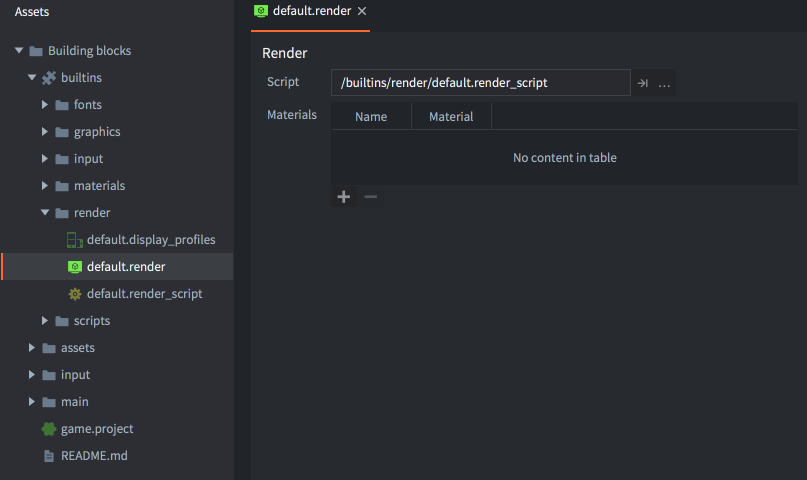
To set up a custom renderer:
1. Copy the files "default.render" and "default.render_script" to a location in your project hierarchy. You can, of course, create a render script from scratch but it is a good idea to start with a copy of the default script, especially if you are new to Defold and/or graphics programming.
2. Edit your copy of the "default.render" file and change the *Script* property to refer to your copy of the render script.
3. Change the *Render* property (under *bootstrap*) in the *game.project* settings file to refer to your copy of the "default.render" file.
## Render predicates
To be able to control the draw order of objects, you create render _predicates_. A predicate declares what should be drawn based on a selection of material _tags_.
Each object that is drawn onto the screen has a material attached to it that controls how the object should be drawn to the screen. In the material, you specify one or more _tags_ that should be associated with the material.
In your render script, you can then create a *render predicate* and specify which tags should belong to that predicate. When you tell the engine to draw the predicate, each object with a material containing all of the tags specified for the predicate will be drawn.
```
Sprite 1 Sprite 2 Sprite 3 Sprite 4
Material A Material A Material B Material C
outlined outlined greyscale outlined
tree tree tree house
```
```lua
-- a predicate matching all sprites with tag "tree"
local trees = render.predicate({"tree"})
-- will draw Sprite 1, 2 and 3
render.draw(trees)
-- a predicate matching all sprites with tag "outlined"
local outlined = render.predicate({"outlined"})
-- will draw Sprite 1, 2 and 4
render.draw(outlined)
-- a predicate matching all sprites with tags "outlined" AND "tree"
local outlined_trees = render.predicate({"outlined", "tree"})
-- will draw Sprite 1 and 2
render.draw(outlined_trees)
```
A detailed description on how materials work can be found in the [Material documentation](#manuals:material).
## Default view projection
The default render script is configured to use an orthographic projection suitable for 2D games. It provides three different orthographic projections: `Stretch` (default), `Fixed Fit` and `Fixed`. As an alternative to the orthographic projections in the default render script you also have the option to use the projection matrix provided by a camera component.
### Stretch projection
The stretch projection will always draw an area of your game that is equal to the dimensions set in *game.project*, even when the window is resized. If the aspect ratio changes it will result in game content being stretched either vertically or horizontally:
*Stretch projection with original window size*
*Stretch projection with the window stretched horizontally*
The stretch projection is the default projection but if you have changed from it and need to switch back you do it by sending a message to the render script:
```lua
msg.post("@render:", "use_stretch_projection", { near = -1, far = 1 })
```
### Fixed fit projection
Just like the stretch projection the fixed fit projection will always show an area of the game that is equal to the dimensions set in *game.project*, but if the window is resized and the aspect ratio changes the game content will retain the original aspect ratio and additional game content will be shown vertically or horizontally:
*Fixed fit projection with original window size*
*Fixed fit projection with the window stretched horizontally*
*Fixed fit projection with the window reduced to 50% of original size*
You enable the fixed fit projection by sending a message to the render script:
```lua
msg.post("@render:", "use_fixed_fit_projection", { near = -1, far = 1 })
```
### Fixed projection
The fixed projection will retain the original aspect ratio and render your game content with a fixed zoom level. This means that it if the zoom level is set to something other than 100% it will show more or less than the area of the game defined by the dimensions in *game.project*:
*Fixed projection with zoom set to 2*
*Fixed projection with zoom set to 0.5*
*Fixed projection with zoom set to 2 and window reduced to 50% of original size*
You enable the fixed projection by sending a message to the render script:
```lua
msg.post("@render:", "use_fixed_projection", { near = -1, far = 1, zoom = 2 })
```
### Camera projection
When using the default render script and there are enabled [Camera components](#manuals:camera) available in the project, they will take precedence over any other view / projections set in the render script. To read more about how to work with camera components in render scripts, please consult the [Camera documentation](#manuals:camera).
Orthographic cameras support an `Orthographic Mode` that controls how the camera adapts to the window:
- `Fixed` uses the camera’s `Orthographic Zoom` value.
- `Auto Fit` (contain) keeps the full design area visible.
- `Auto Cover` (cover) fills the window and may crop.
You can switch modes in the Editor or at runtime via the Camera API:
```lua
-- Use auto-fit behavior with an orthographic camera
camera.set_orthographic_mode("main:/go#camera", camera.ORTHO_MODE_AUTO_FIT)
-- Query current mode
local mode = camera.get_orthographic_mode("main:/go#camera")
```
## Frustum culling
The render API in Defold lets developers perform something called frustum culling. When frustum culling is enabled any graphics that lies outside of a defined bounding box or frustum will be ignored. In a large game world where only a portion is visible at a time, frustum culling can dramatically reduce the amount of data that needs to be sent to the GPU for rendering, thus increasing performance and saving battery (on mobile devices). It is common to use the view and projection of the camera to create the bounding box. The default render script uses the view and projection (from the camera) to calculate a frustum.
Frustum culling is implemented in the engine per component type. Current status (Defold 1.9.0):
| Component | Supported |
|-------------|-----------|
| Sprite | YES |
| Model | YES |
| Mesh | YES (1) |
| Label | YES |
| Spine | YES |
| Particle fx | NO |
| Tilemap | YES |
| Rive | NO |
1 = Mesh bounding box needs to be set by the developer. [Learn more](#manuals:mesh).
## Coordinate systems
When components are rendered you usually talk of in which coordinate system the components are rendered. In most games you have some components drawn in world space and some in screen space.
GUI components and their nodes are usually drawn in the screen space coordinate, with the bottom left corner of the screen having coordinate (0,0) and the top right corner is (screen width, screen height). The screen space coordinate system is never offset or in some other way translated by a camera. This will keep the GUI nodes always drawn on screen regardless of how the world is rendered.
Sprites, tilemaps and other components used by game objects that exist in your game world are usually drawn in the world space coordinate system. If you make no modifications to your render script and use no camera component to change the view projection this coordinate system is the same as the screen space coordinate system, but as soon as you add a camera and either move it around or change the view projection the two coordinate systems will deviate. When the camera is moving the lower left corner of the screen will be offset from (0, 0) so that other parts of the world is rendered. If the projection changes the coordinates will be both translated (ie offset from 0, 0) and modified by a scale factor.
## The render script
Below is the code for a custom render script that is a slightly modified version of the built-in one.
init()
: The function `init()` is used to set up the predicates, the view and clear color. These variables will be used during the actual rendering.
```lua
function init(self)
-- Define the render predicates. Each predicate is drawn by itself and
-- that allows us to change the state of OpenGL between the draws.
self.predicates = create_predicates("tile", "gui", "text", "particle", "model")
-- Create and fill data tables will be used in update()
local state = create_state()
self.state = state
local camera_world = create_camera(state, "camera_world", true)
init_camera(camera_world, get_stretch_projection)
local camera_gui = create_camera(state, "camera_gui")
init_camera(camera_gui, get_gui_projection)
update_state(state)
end
```
update()
: The `update()` function is called once each frame. Its function is to perform the actual drawing by calling the underlying OpenGL ES APIs (OpenGL Embedded Systems API). To properly understand what's going on in the `update()` function, you need to understand how OpenGL works. There are many great resources on OpenGL ES available. The official site is a good starting place. You find it at https://www.khronos.org/opengles/
This example contains the setup necessary to draw 3D models. The `init()` function defined a `self.predicates.model` predicate. Elsewhere a material with the tag "model" has been created. There are also some model components that use the material:
```lua
function update(self)
local state = self.state
if not state.valid then
if not update_state(state) then
return
end
end
local predicates = self.predicates
-- clear screen buffers
--
render.set_depth_mask(true)
render.set_stencil_mask(0xff)
render.clear(state.clear_buffers)
local camera_world = state.cameras.camera_world
render.set_viewport(0, 0, state.window_width, state.window_height)
render.set_view(camera_world.view)
render.set_projection(camera_world.proj)
-- render models
--
render.set_blend_func(render.BLEND_SRC_ALPHA, render.BLEND_ONE_MINUS_SRC_ALPHA)
render.enable_state(render.STATE_CULL_FACE)
render.enable_state(render.STATE_DEPTH_TEST)
render.set_depth_mask(true)
render.draw(predicates.model_pred)
render.set_depth_mask(false)
render.disable_state(render.STATE_DEPTH_TEST)
render.disable_state(render.STATE_CULL_FACE)
-- render world (sprites, tilemaps, particles etc)
--
render.set_blend_func(render.BLEND_SRC_ALPHA, render.BLEND_ONE_MINUS_SRC_ALPHA)
render.enable_state(render.STATE_DEPTH_TEST)
render.enable_state(render.STATE_STENCIL_TEST)
render.enable_state(render.STATE_BLEND)
render.draw(predicates.tile)
render.draw(predicates.particle)
render.disable_state(render.STATE_STENCIL_TEST)
render.disable_state(render.STATE_DEPTH_TEST)
-- debug
render.draw_debug3d()
-- render GUI
--
local camera_gui = state.cameras.camera_gui
render.set_view(camera_gui.view)
render.set_projection(camera_gui.proj)
render.enable_state(render.STATE_STENCIL_TEST)
render.draw(predicates.gui, camera_gui.frustum)
render.draw(predicates.text, camera_gui.frustum)
render.disable_state(render.STATE_STENCIL_TEST)
end
```
So far this is a simple and straightforward render script. It draws in the same manner every single frame. However, it is sometimes desirable to be able to introduce state into the render script and perform different operations depending on the state. It may also be desirable to communicate with the render script from other parts of the game code.
on_message()
: A render script can define an `on_message()` function and receive messages from other parts of your game or app. A common case where an external component sends information to the render script is the _camera_. A camera component that has acquired camera focus will automatically send its view and projection to the render script each frame. This message is named `"set_view_projection"`:
```lua
local MSG_CLEAR_COLOR = hash("clear_color")
local MSG_WINDOW_RESIZED = hash("window_resized")
local MSG_SET_VIEW_PROJ = hash("set_view_projection")
function on_message(self, message_id, message)
if message_id == MSG_CLEAR_COLOR then
-- Someone sent us a new clear color to be used.
update_clear_color(state, message.color)
elseif message_id == MSG_SET_VIEW_PROJ then
-- The camera component that has camera focus will sent set_view_projection
-- messages to the @render socket. We can use the camera information to
-- set view (and possibly projection) of the rendering.
camera.view = message.view
self.camera_projection = message.projection or vmath.matrix4()
update_camera(camera, state)
end
end
```
However, any script of GUI script can send messages to the render script though the special `@render` socket:
```lua
-- Change the clear color.
msg.post("@render:", "clear_color", { color = vmath.vector4(0.3, 0.4, 0.5, 0) })
```
## Render Resources
To pass in certain engine resources into the render script, you can add these into the `Render Resources` table in the .render file assigned to the project:
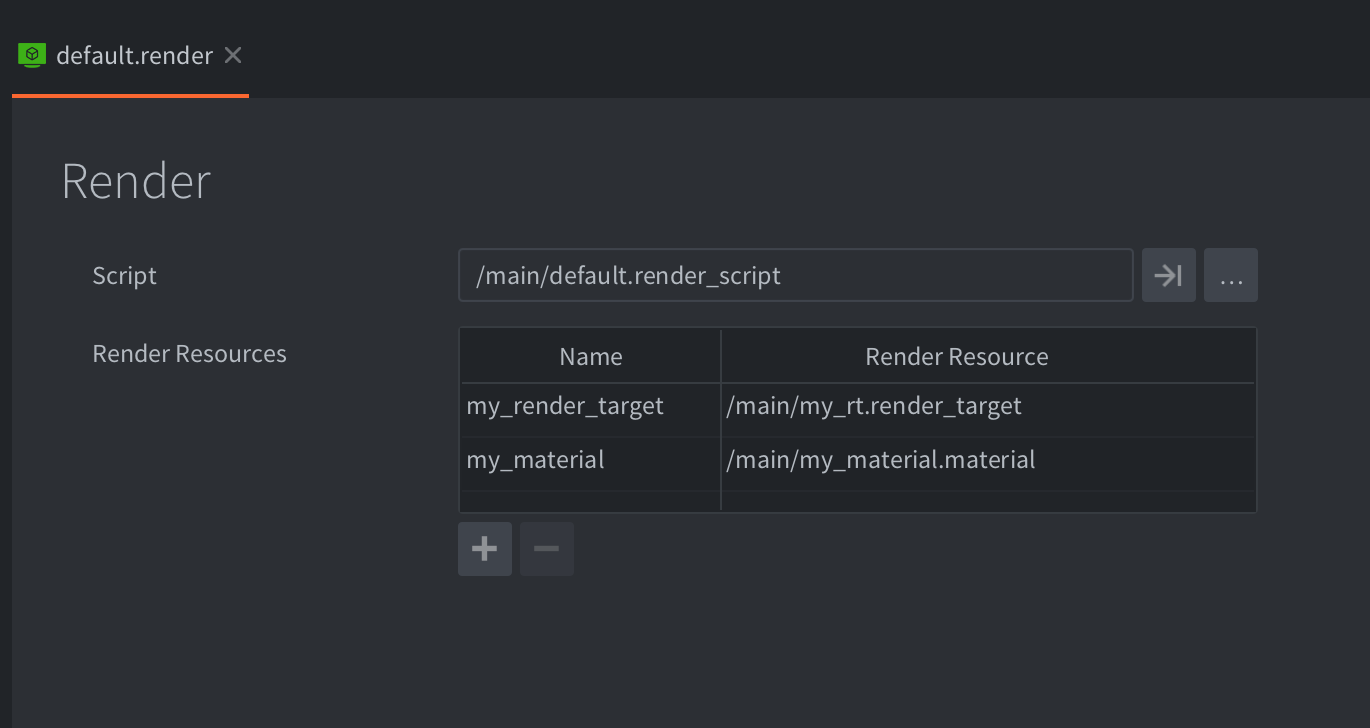
Using these resources in a render script:
```lua
-- "my_material" will now be used for all draw calls associated with the predicate
render.enable_material("my_material")
-- anything drawn by the predicate will end up in "my_render_target"
render.set_render_target("my_render_target")
render.draw(self.my_full_screen_predicate)
render.set_render_target(render.RENDER_TARGET_DEFAULT)
render.disable_material()
-- bind the render target result texture to whatever is getting rendered via the predicate
render.enable_texture(0, "my_render_target", render.BUFFER_COLOR0_BIT)
render.draw(self.my_tile_predicate)
```
Defold currently only supports `Materials` and `Render Targets` as referenced render resources, but over time more resource types will be supported by this system.
## Texture handles
Textures in Defold are represented internally as a handle, which essentially equates to a number that should uniquely identify a texture object anywhere in the engine. This means that you can bridge the gameobject world with the rendering world by passing these handles between the render system and a gameobject script. For example, a script can create a dynamic texture in a script attached to a gameobject and send this to the renderer to be used as a global texture in a draw command.
In a `.script` file:
```lua
local my_texture_resource = resource.create_texture("/my_texture.texture", tparams)
-- note: my_texture_resource is a hash to the resource path, which can't be used as a handle!
local my_texture_handle = resource.get_texture_info(my_texture_resource)
-- my_texture_handle contains information about the texture, such as width, height and so on
-- it does also contain the handle, which is what we are after
msg.post("@render:", "set_texture", { handle = my_texture_handle.handle })
```
In a .render_script file:
```lua
function on_message(self, message_id, message)
if message_id == hash("set_texture") then
self.my_texture = message.handle
end
end
function update(self)
-- bind the custom texture to the draw state
render.enable_texture(0, self.my_texture)
-- do drawing..
end
```
There is currently no way of changing which texture a resource should point to, you can only use raw handles like this in the render script.
## Supported graphics APIs
The Defold render script API translates render operations into the following graphics APIs:
| System | Graphics API | Note |
|----------|----------------------------|--------------------------|
| macOS | OpenGL 3.3 or Metal | Vulkan via MoltenVK |
| Windows | OpenGL 3.3 or Vulkan 1.1 | |
| Linux | OpenGL 3.3 or Vulkan 1.1 | |
| Android | OpenGLES 3.0 or Vulkan 1.1 | Fallback to OpenGLES 2.0 |
| iOS | OpenGLES 3.0 or Metal | Vulkan via MoltenVK |
| HTML5 | WebGL 2.0 or WebGPU | Fallback to WebGL 1.0 |
## System messages
`"set_view_projection"`
: This message is sent from camera components that has acquired camera focus.
`"window_resized"`
: The engine will send this message on changes of the window size. You can listen to this message to alter rendering when the target window size changes. On desktop this means that the actual game window has been resized and on mobile devices this message is sent whenever an orientation change happens.
```lua
local MSG_WINDOW_RESIZED = hash("window_resized")
function on_message(self, message_id, message)
if message_id == MSG_WINDOW_RESIZED then
-- The window was resized. message.width and message.height contain the new dimensions.
...
end
end
```
`"draw_line"`
: Draw debug line. Use to visualize ray_casts, vectors and more. Lines are drawn with the `render.draw_debug3d()` call.
```lua
-- draw a white line
local p1 = vmath.vector3(0, 0, 0)
local p2 = vmath.vector3(1000, 1000, 0)
local col = vmath.vector4(1, 1, 1, 1)
msg.post("@render:", "draw_line", { start_point = p1, end_point = p2, color = col } )
```
`"draw_text"`
: Draw debug text. Use to print debug information. The text is drawn with the built-in `always_on_top.font` font. The system font has a material with tag `debug_text` and is rendered with other text in the default render script.
```lua
-- draw a text message
local pos = vmath.vector3(500, 500, 0)
msg.post("@render:", "draw_text", { text = "Hello world!", position = pos })
```
The visual profiler accessible through the `"toggle_profile"` message sent to the `@system` socket is not part of the scriptable renderer. It is drawn separate from your render script.
## Draw calls and batching
A draw call is the term used to describe the process of setting up the GPU to draw an object to the screen using a texture and a material with optional additional settings. This process is usually resource intensive and it is recommended that the number of draw calls are as few as possible. You can measure the number of the draw calls and the time it takes to render them using the [built-in profiler](#manuals:profiling).
Defold will try to batch render operation to reduce the number of draw calls according to a set of rules defined below. The rules differ between GUI components and all other component types.
### Batch rules for non-GUI components
Rendering is done based on z-order, from low to high. The engine will start by sorting the list of things to draw and iterate from low to high z-values. Each object in the list will be grouped into the same draw call as the previous object if the following conditions are met:
* Belongs to the same collection proxy
* Is of the same component type (sprite, particle fx, tilemap etc)
* Uses the same texture (atlas or tile source)
* Has the same material
* Has the same shader constants (such as tint)
This means that if two sprite components in the same collection proxy has adjacent or the same z-value (and thus comes next to each other in the sorted list), use the same texture, material and constants they will be grouped into the same draw call.
### Batch rules for GUI components
Rendering of the nodes in a GUI component are done from top to bottom of the node list. Each node in the list will be grouped into the same draw call as the previous node if the following conditions are met:
* Is of the same type (box, text, pie etc)
* Uses the same texture (atlas or tile source)
* Has the same blend mode.
* Has the same font (only for text nodes)
* Has the same stencil settings
Rendering of nodes are done per component. This means that nodes from different GUI components will not be batched.
The ability to arrange nodes in hierarchies makes it easy to group nodes into manageable units. But hierarchies can effectively break batch rendering if you mix different node types. It is possible to more effectively batch GUI nodes while maintaining node hierarchies using GUI layers. You can read more about GUI layers and how they affect draw calls in the [GUI manual](#manuals:gui#layers-and-draw-calls).
# Materials {#manuals:material}
Materials are used to express how a graphical component (a sprite, tilemap, font, GUI node, model etc) should be rendered.
A material holds _tags_, information that is used in the rendering pipeline to select objects to be rendered. It also holds references to _shader programs_ that are compiled through the available graphics driver and uploaded to the graphics hardware and run when the component is rendered each frame.
* For more information on the render pipeline, see the [Render documentation](#manuals:render).
* For an in depth explanation of shader programs, see the [Shader documentation](#manuals:shader).
## Creating a material
To create a material, right click a target folder in the *Assets* browser and select New... ▸ Material. (You can also select File ▸ New... from the menu, and then select Material). Name the new material file and press Ok.
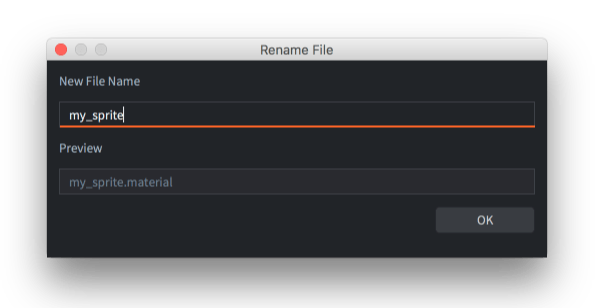
The new material will open in the *Material Editor*.

The material file contains the following information:
Name
: The identity of the material. This name is used to list the material in the *Render* resource to include it in the build. The name is also used in the render API function `render.enable_material()`. The name should be unique.
Vertex Program
: The vertex shader program file (*`.vp`*) to use when rendering with the material. The vertex shader program is run on the GPU for each of a component's primitive vertices. It computes the screen position of each vertex and also optionally output "varying" variables that are interpolated and input to the fragment program.
Fragment Program
: The fragment shader program file (*`.fp`*) to use when rendering with the material. The program runs on the GPU for each of a primitive's fragments (pixels) and its purpose is to decide the color of each fragment. This is usually done by texture lookups and calculations based on input variables (varying variables or constants).
Vertex Constants
: Uniforms that will be passed to the vertex shader program. See below for a list of available constants.
Fragment Constants
: Uniforms that will be passed to the fragment shader program. See below for a list of available constants.
Samplers
: You can optionally configure specific samplers in the materials file. Add a sampler, name it according to the name used in the shader program and set the wrap and filter settings to your liking.
Tags
: The tags associated with the material. Tags are represented in the engine as a _bitmask_ that is used by [`render.predicate()`](https://defold.com/ref/render#render.predicate) to collect components that should be drawn together. See the [Render documentation](#manuals:render) on how to do that. The maximum number of tags you can use in a project is 32.
## Attributes
Shader attributes (also referred to as vertex streams, or vertex attributes), is a mechanism for how the GPU retrieves vertices from memory in order to render geometry. The vertex shader specifies a set of streams by using the `attribute` keyword and in most cases Defold produces and binds the data automatically under the hood based on the names of the streams. However, in some cases you might want to forward more data per vertex to achieve a specific effect that the engine does not produce. A vertex attribute can be configured with the following fields:
Name
: The attribute name. Similar to shader constants, the attribute configuration will only be used if it matches an attribute specified in the vertex program.
Semantic type
: A semantic type indicates the semantic meaning of *what* the attribute is and/or *how* it should be shown in the editor. For example, specifying an attribute with a `SEMANTIC_TYPE_COLOR` will show a color picker in the editor, while the data will still be passed in as-is from the engine to the shader.
- `SEMANTIC_TYPE_NONE` The default semantic type. Does not have any other effect on the attribute other than passing the material data for the attribute directly to the vertex buffer (default)
- `SEMANTIC_TYPE_POSITION` Produces per-vertex position data for the attribute. Can be used together with coordinate space to tell the engine how the positions will be calculated
- `SEMANTIC_TYPE_TEXCOORD` Produces per-vertex texture coordinates for the attribute
- `SEMANTIC_TYPE_PAGE_INDEX` Produces per-vertex page indices for the attribute
- `SEMANTIC_TYPE_COLOR` Affects how the editor interprets the attribute. If an attribute is configured with a color semantic, a color picked widget will be shown in the inspector
- `SEMANTIC_TYPE_NORMAL` Produces per-vertex normal data for the attribute
- `SEMANTIC_TYPE_TANGENT` Produces per-vertex tangent data for the attribute
- `SEMANTIC_TYPE_WORLD_MATRIX` Produces per-vertex world matrix data for the attribute
- `SEMANTIC_TYPE_NORMAL_MATRIX` Produces per-vertex normal matrix data for the attribute
Data type
: The data type of the backing data for the attribute.
- `TYPE_BYTE` Signed 8-bit byte values
- `TYPE_UNSIGNED_BYTE` Unsigned 8-bit byte values
- `TYPE_SHORT` Signed 16-bit short values
- `TYPE_UNSIGNED_SHORT` Unsigned 16-bit short values
- `TYPE_INT` Signed integer values
- `TYPE_UNSIGNED_INT` Unsigned integer values
- `TYPE_FLOAT` Floating point values (default)
Normalize
: If true, the attribute values will be normalized by the GPU driver. This can be useful when you don't need full precision, but want to calculate something without knowing the specific limits. E.g a color vector typically only need byte values of 0..255 while still being treated as a 0..1 value in the shader.
Coordinate space
: Some semantic types support supplying data in different coordinate spaces. To implement a billboarding effect with sprites, you typically want a position attribute in local space as well as a fully transformed position in world space for most effective batching.
Vector type
: The vector type of the attribute.
- `VECTOR_TYPE_SCALAR` Single scalar value
- `VECTOR_TYPE_VEC2` 2D vector
- `VECTOR_TYPE_VEC3` 3D vector
- `VECTOR_TYPE_VEC4` 4D vector (default)
- `VECTOR_TYPE_MAT2` 2D matrix
- `VECTOR_TYPE_MAT3` 3D matrix
- `VECTOR_TYPE_MAT4` 4D matrix
Step function
: Specifies how the attribute data should be presented to the vertex function. This is only relevant for instancing.
- `Vertex` Once per vertex, e.g a position attribute will typically be given to the vertex function per vertex in the mesh (default)
- `Instance` Once per instance, e.g a world matrix attribute will typically be given to the vertex function once per instance
Value
: The value of the attribute. Attribute values can be overridden on a per-component basis, but otherwise this will act as the default value of the vertex attribute. Note: for *default* attributes (position, texture coordinates and page indices) the value will be ignored.
Custom attributes can also be used to trim memory footprint on both CPU and GPU by reconfiguring the streams to use a smaller data type, or a different element count.
### Default attribute semantics
The material system will assign a default semantic type automatically based on the name of the attribute in run-time for a specific set of names:
- `position` - semantic type: `SEMANTIC_TYPE_POSITION`
- `texcoord0` - semantic type: `SEMANTIC_TYPE_TEXCOORD`
- `texcoord1` - semantic type: `SEMANTIC_TYPE_TEXCOORD`
- `page_index` - semantic type: `SEMANTIC_TYPE_PAGE_INDEX`
- `color` - semantic type: `SEMANTIC_TYPE_COLOR`
- `normal` - semantic type: `SEMANTIC_TYPE_NORMAL`
- `tangent` - semantic type: `SEMANTIC_TYPE_TANGENT`
- `mtx_world` - semantic type: `SEMANTIC_TYPE_WORLD_MATRIX`
- `mtx_normal` - semantic type: `SEMANTIC_TYPE_NORMAL_MATRIX`
If you have entries for these attributes in the material, the default semantic type will be overridden with whatever you have configured in the material editor.
### Setting custom vertex attribute data
Similar to user defined shader constants, you can also update vertex attributes in runtime by calling go.get, go.set and go.animate:
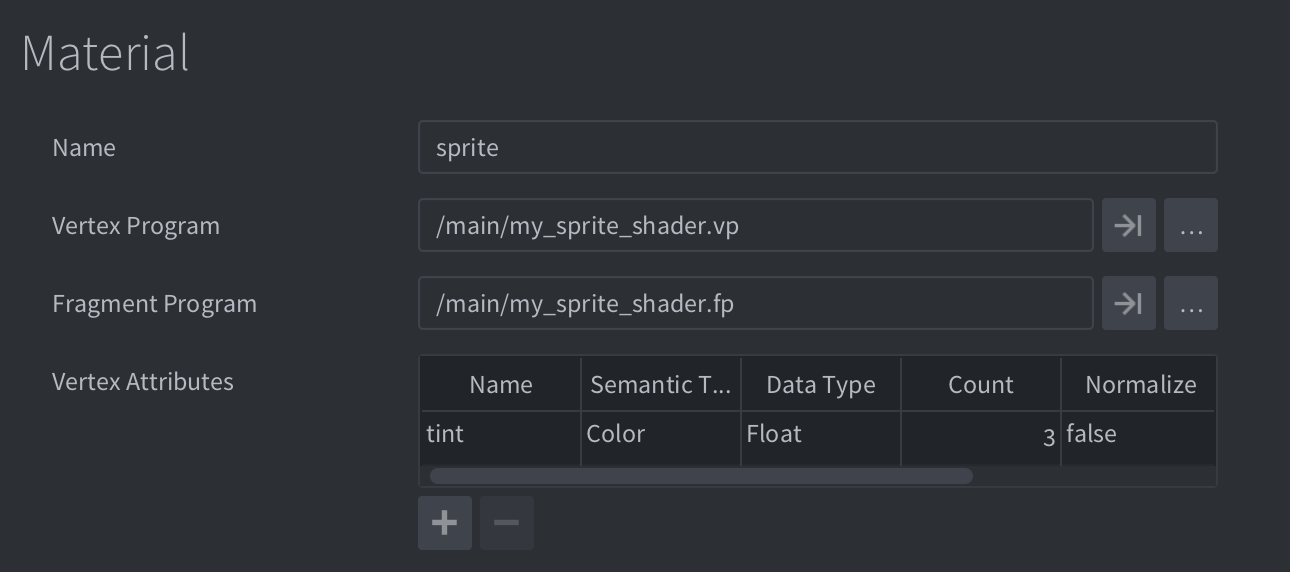
```lua
go.set("#sprite", "tint", vmath.vector4(1,0,0,1))
go.animate("#sprite", "tint", go.PLAYBACK_LOOP_PINGPONG, vmath.vector4(1,0,0,1), go.EASING_LINEAR, 2)
```
There are some caveats to updating the vertex attributes however, whether or not a component can use the value depends on the semantic type of the attribute. For example, a sprite component supports the `SEMANTIC_TYPE_POSITION` so if you update an attribute that has this semantic type, the component will ignore the overridden value since the semantic type dictates that the data should always be produced by the sprites position.
Setting custom vertex data in runtime is currently only supported for sprite components.
### Instancing
Instancing is a technique used to efficiently draw multiple copies of the same object in a scene. Instead of creating a separate copy of the object each time it's used, instancing allows the graphics engine to create a single object and then reuse it multiple times. For example, in a game with a large forest, instead of creating a separate tree model for each tree, instancing allows you to create one tree model and then place it hundreds or thousands of times with different positions and scales. The forest can now be rendered with a single draw call instead of individual draw calls for each tree.
Instancing is currently only available for Model components.
Instancing is enabled automatically when possible. Defold heavily relies on batching the draw state as much as possible - for instancing to work some requirements must be met:
- The same material must be used for all instances. Instancing will still work if a custom material has been set by `render.enable_material`)
- The material must be configured to use the 'local' vertex space
- The material must have at least one vertex attribute that is repeated per instance
- Constant values must be the same for all instances. Constant values can be put into custom vertex attributes or some other backing method instead (e.g a texture)
- Shader resources, such as textures or storage buffers, must be the same for all instances
Configuring a vertex attribute to be repeated per instance requires that the `Step function` is set to `Instance`. This is done automatically for certain semantic types based on name (see the `Default attribute semantics` table above), but it can also be set manually in the material editor by setting the `Step function` to `Instance`.
As a simple example, the following scene has four game objects with a model component each:
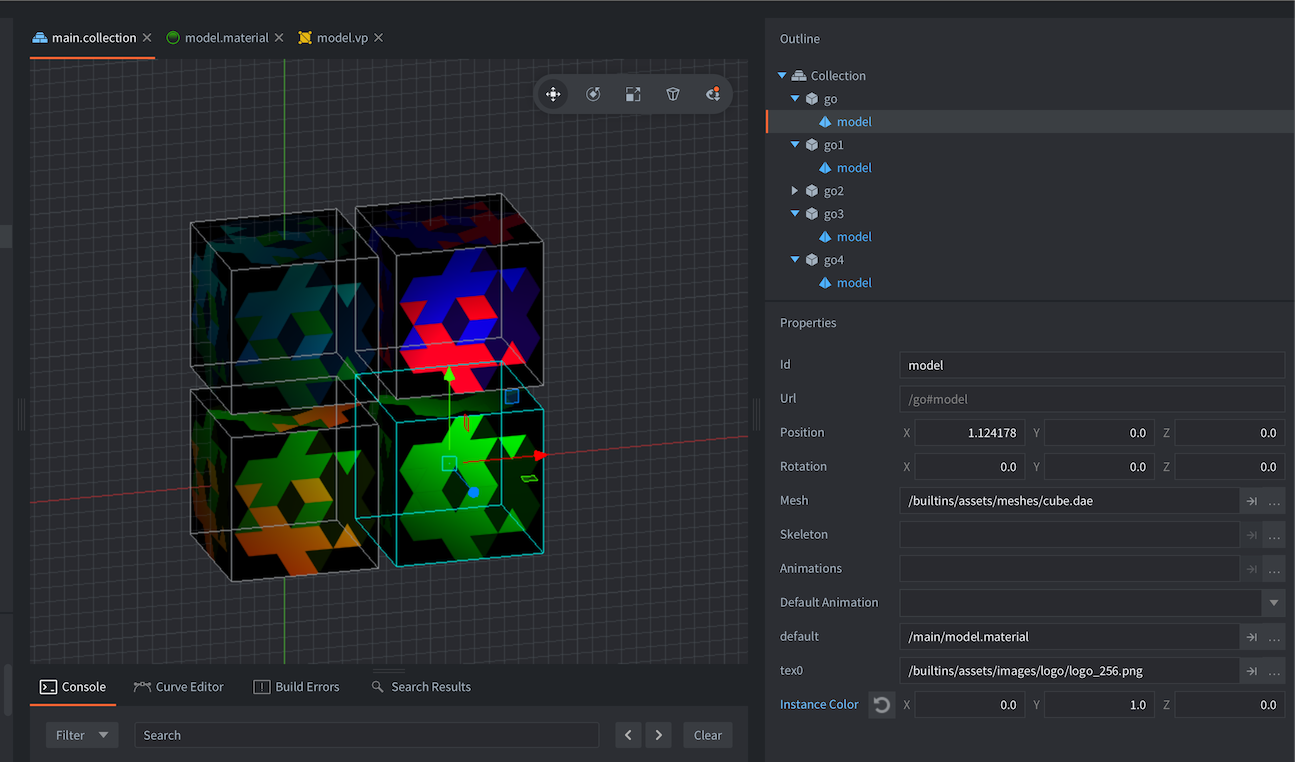
The material is configured as such, with a single custom vertex attribute that is repeated per instance:

The vertex shader has multiple per-instance attributes specified:
```glsl
// Per vertex attributes
attribute highp vec4 position;
attribute mediump vec2 texcoord0;
attribute mediump vec3 normal;
// Per instance attributes
attribute mediump mat4 mtx_world;
attribute mediump mat4 mtx_normal;
attribute mediump vec4 instance_color;
```
Note that the `mtx_world` and `mtx_normal` will be configured to use the step function `Instance` by default. This can be changed in the material editor by adding an entry for them and setting the `Step function` to `Vertex`, which will make the attribute be repeated per vertex instead of per instance.
To verify that the instancing works in this case, you can look at the web profiler. In this case, since the only thing that changes between the instances of the box is the per-instance attributes, it can be rendered with a single draw call:
#### Backwards compatibility
On OpenGL based graphics adapters, instancing requires at least OpenGL 3.1 for desktop and OpenGL ES 3.0 for mobile. This means that very old devices that are using OpenGL ES2 or older OpenGL versions might not support instancing. In this case, rendering will still work by default without any special care from the developer, but it may not be as performant as if actual instancing was used. Currently, there is no way of detecting if instancing is supported or not, but this functionality will be added in the future so that a cheaper material can be used, or things like foliage or clutter that typically would be good candidates for instancing, could be skipped completely.
## Vertex and fragment constants
Shader constants, or "uniforms" are values that are passed from the engine to vertex and fragment shader programs. To use a constant you define it in the material file as either a *Vertex Constant* property or a *Fragment Constant* property. Corresponding `uniform` variables need to be defined in the shader program. The following constants can be set in a material:
`CONSTANT_TYPE_WORLD`
: The world matrix. Use to transform vertices into world space. For some component types, the vertices are already in world space when they arrive to the vertex program (due to batching). In those cases multiplying with the world matrix in the shader will yield the wrong results.
`CONSTANT_TYPE_VIEW`
: The view matrix. Use to transform vertices to view (camera) space.
`CONSTANT_TYPE_PROJECTION`
: The projection matrix. Use to transform vertices to screen space.
`CONSTANT_TYPE_VIEWPROJ`
: A matrix with the view and projection matrices already multiplied.
`CONSTANT_TYPE_WORLDVIEW`
: A matrix with the world and view matrices already multiplied.
`CONSTANT_TYPE_WORLDVIEWPROJ`
: A matrix with the world, view and projection matrices already multiplied.
`CONSTANT_TYPE_NORMAL`
: A matrix to compute normal orientation. The world transform might include non-uniform scaling, which breaks the orthogonality of the combined world-view transform. The normal matrix is used to avoid issues with the direction when transforming normals. (The normal matrix is the transpose inverse of the world-view matrix).
`CONSTANT_TYPE_USER`
: A vector4 constant that you can use for any custom data you want to pass into your shader programs. You can set the initial value of the constant in the constant definition, but it is mutable through the functions [go.set()](https://defold.com/ref/stable/go/#go.set) / [go.animate()](https://defold.com/ref/stable/go/#go.animate). You can also retrieve the value with [go.get()](https://defold.com/ref/stable/go/#go.get). Changing a material constant of a single component instance [breaks render batching and will result in additional draw calls](#manuals:render).
Example:
```lua
go.set("#sprite", "tint", vmath.vector4(1,0,0,1))
go.animate("#sprite", "tint", go.PLAYBACK_LOOP_PINGPONG, vmath.vector4(1,0,0,1), go.EASING_LINEAR, 2)
```
`CONSTANT_TYPE_USER_MATRIX4`
: A matrix4 constant that you can use for any custom data you want to pass into your shader programs. You can set the initial value of the constant in the constant definition, but it is mutable through the functions [go.set()](https://defold.com/ref/stable/go/#go.set) / [go.animate()](https://defold.com/ref/stable/go/#go.animate). You can also retrieve the value with [go.get()](https://defold.com/ref/stable/go/#go.get). Changing a material constant of a single component instance [breaks render batching and will result in additional draw calls](#manuals:render).
Example:
```lua
go.set("#sprite", "m", vmath.matrix4())
```
In order for a material constant of type `CONSTANT_TYPE_USER` or `CONSTANT_TYPE_MATRIX4` to be available using `go.get()` and `go.set()` it has to be used in the shader program. If the constant is defined in the material but not used in the program it will be removed from the material and it will not be available at run-time.
## Samplers
Samplers are used to sample the color information from a texture (a tile source or atlas). The color information can then be used for calculations in the shader program.
Sprite, tilemap, GUI and particle effect components automatically gets a `sampler2D` set. The first declared `sampler2D` in the shader program is automatically bound to the image referenced in the graphics component. Therefore there is currently no need to specify any samplers in the materials file for those components. Furthermore, those component types currently only support a single texture. (If you need multiple textures in a shader, you can use [`render.enable_texture()`](https://defold.com/ref/render/#render.enable_texture) and set texture samplers manually from your render script.)
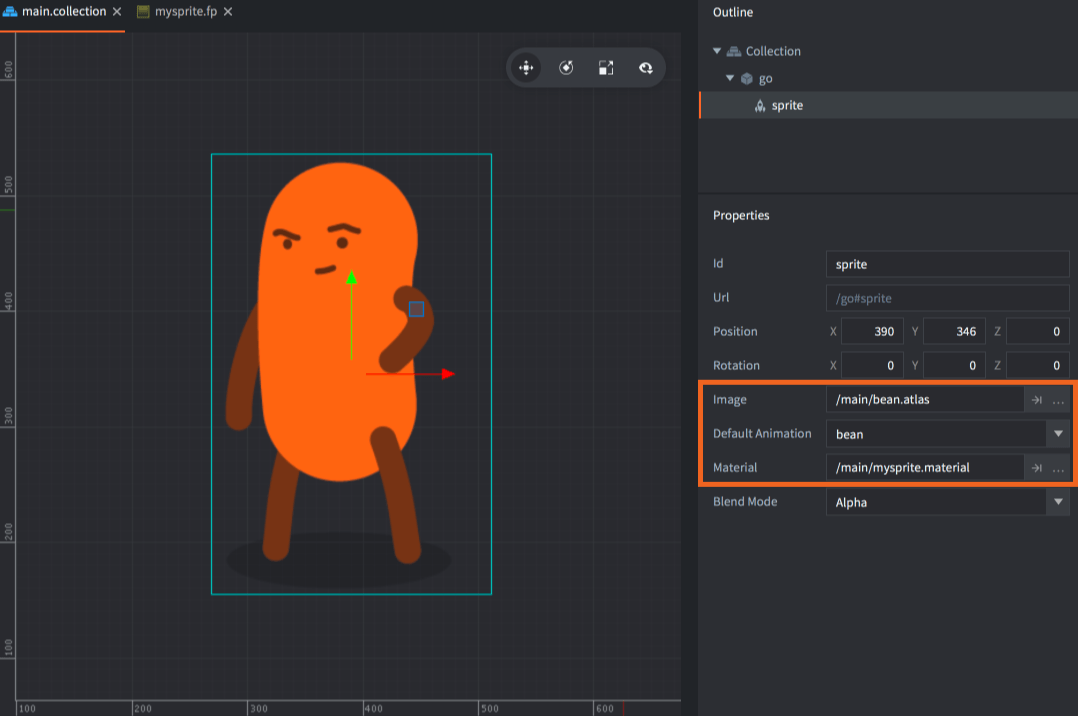
```glsl
-- mysprite.fp
varying mediump vec2 var_texcoord0;
uniform lowp sampler2D MY_SAMPLER;
void main()
{
gl_FragColor = texture2D(MY_SAMPLER, var_texcoord0.xy);
}
```
You can specify a component's sampler settings by adding the sampler by name in the materials file. If you don't set up your sampler in the materials file, the global *graphics* project settings are used.

For model components, you need to specify your samplers in the material file with the settings you want. The editor will then allow you to set textures for any model component that use the material:

```glsl
-- mymodel.fp
varying mediump vec2 var_texcoord0;
uniform lowp sampler2D TEXTURE_1;
uniform lowp sampler2D TEXTURE_2;
void main()
{
lowp vec4 color1 = texture2D(TEXTURE_1, var_texcoord0.xy);
lowp vec4 color2 = texture2D(TEXTURE_2, var_texcoord0.xy);
gl_FragColor = color1 * color2;
}
```

## Sampler settings
Name
: The name of the sampler. This name should match the `sampler2D` declared in the fragment shader.
Wrap U/W
: The wrap mode for the U and V axes:
- `WRAP_MODE_REPEAT` will repeat texture data outside the range [0,1].
- `WRAP_MODE_MIRRORED_REPEAT` will repeat texture data outside the range [0,1] but every second repetition is mirrored.
- `WRAP_MODE_CLAMP_TO_EDGE` will set texture data for values greater than 1.0 to 1.0, and any values less than 0.0 is set to 0.0---i.e. the edge pixels will be repeated to the edge.
Filter Min/Mag
: The filtering for magnification and minification. Nearest filtering requires less computation than linear interpolation, but can result in aliasing artifacts. Linear interpolation often provides smoother results:
- `Default` uses the default filter option specified in the `game.project` file under `Graphics` as `Default Texture Min Filter` and `Default Texture Mag Filter` .
- `FILTER_MODE_NEAREST` uses the texel with coordinates nearest the center of the pixel.
- `FILTER_MODE_LINEAR` sets a weighted linear average of the 2x2 array of texels that lie nearest to the center of the pixel.
- `FILTER_MODE_NEAREST_MIPMAP_NEAREST` chooses the nearest texel value within an individual mipmap.
- `FILTER_MODE_NEAREST_MIPMAP_LINEAR` selects the nearest texel in the two nearest best choices of mipmaps and then interpolates linearly between these two values.
- `FILTER_MODE_LINEAR_MIPMAP_NEAREST` interpolates linearly within an individual mipmap.
- `FILTER_MODE_LINEAR_MIPMAP_LINEAR` uses linear interpolation to compute the value in each of two maps and then interpolates linearly between these two values.
Max Anisotropy
: Anisotropic filtering is an advanced filtering technique that takes multiple samples, blending the results together. This setting controls the level of anisotropy for the texture samplers. If anisotropic filtering is not supported by the GPU the parameter will not do anything, and it will be set to 1 as default.
## Constants buffers
When the rendering pipeline draws, it pulls constant values from a default system constants buffer. You can create a custom constants buffer to override the default constants and instead set shader program uniforms programmatically in the render script:
```lua
self.constants = render.constant_buffer() -- <1>
self.constants.tint = vmath.vector4(1, 0, 0, 1) -- <2>
...
render.draw(self.my_pred, {constants = self.constants}) -- <3>
```
1. Create a new constants buffer
2. Set the `tint` constant to bright red
3. Draw the predicate using our custom constants
Note that the buffer's constant elements are referenced like an ordinary Lua table, but you can't iterate over the buffer with `pairs()` or `ipairs()`.
# Compute programs {#manuals:compute}
Compute shader support in Defold currently in *technical preview*.
This means that there are some features lacking, and that the API could potentially change in the future.
Compute shaders are a powerful tool for performing general-purpose computations on the GPU. They allow you to leverage the parallel processing power of the GPU for tasks such as physics simulations, image processing, and more. A compute shader operates on data stored in buffers or textures, performing operations in parallel across many GPU threads. This parallelism is what makes compute shaders so powerful for intensive computations.
* For more information on the render pipeline, see the [Render documentation](#manuals:render).
* For an in depth explanation of shader programs, see the [Shader documentation](#manuals:shader).
## What can I do with compute shaders?
Since compute shaders are meant to be used for generic computation, there is really no limit to what you can do with them. Here are some examples what compute shaders are typically used for:
Image Processing
- Image filtering: Apply blurs, edge detection, a sharpen filter and so on.
- Color grading: Adjust the color space of an image.
Physics
- Particle systems: Simulating large numbers of particles for effects like smoke, fire, and fluid dynamics.
- Soft Body Physics: Simulating deformable objects like cloth and jelly.
- Culling: Occlusion culling, frustum culling
Procedural Generation
- Terrain Generation: Creating detailed terrain using noise functions.
- Vegetation and Foliage: Creating procedurally generated plants and trees.
Rendering effects
- Global illumination: Simulating realistic lighting by approximating the way light bounces around a scene.
- Voxelization: Create a 3D voxel grid from mesh data.
## How does compute shaders work?
At a high level, compute shaders work by dividing a task into many smaller tasks that can be executed simultaneously. This is achieved through the concept of `work groups` and `invocations`:
Work Groups
: The compute shader operates on a grid of `work groups`. Each work group contains a fixed number of invocations (or threads). The size of the work groups and the number of invocations are defined in the shader code.
Invocations
: Each invocation (or thread) executes the compute shader program. Invocations within a work group can share data through shared memory, allowing for efficient communication and synchronization between them.
The GPU executes the compute shader by launching many invocations across multiple work groups in parallel, providing significant computational power for suitable tasks.
## Creating a compute program
To create a compute program, right click a target folder in the *Assets* browser and select New... ▸ Compute. (You can also select File ▸ New... from the menu, and then select Compute). Name the new compute file and press Ok.
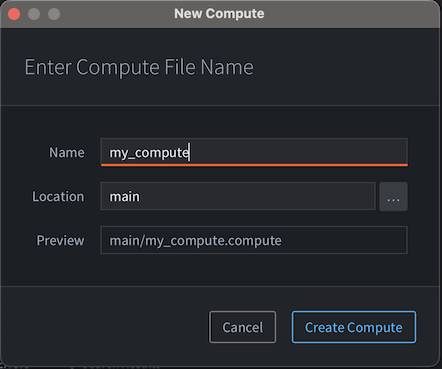
The new compute will open in the *Compute Editor*.
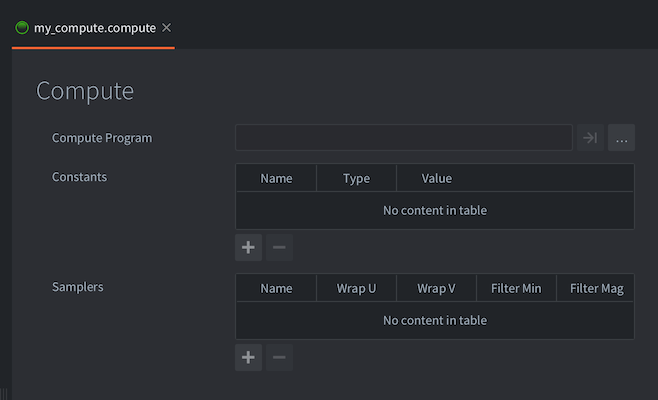
The compute file contains the following information:
Compute Program
: The compute shader program file (*`.cp`*) to use. The shader operates on "abstract work items", meaning that there is no fixed definition of the input and output data types. It is up to the programmer to define what the compute shader should produce.
Constants
: Uniforms that will be passed to the compute shader program. See below for a list of available constants.
Samplers
: You can optionally configure specific samplers in the materials file. Add a sampler, name it according to the name used in the shader program and set the wrap and filter settings to your liking.
## Using the compute program in Defold
In contrast to materials, compute programs are not assigned to any components, and are not part of the normal render flow. A compute program must be `dispatched` in a render script to do any work. Before dispatching however, you need to make sure the render script has a reference to the compute program. Currently, the only way for a render script to know about the compute program is to add it into the .render file that holds the reference to your render script:
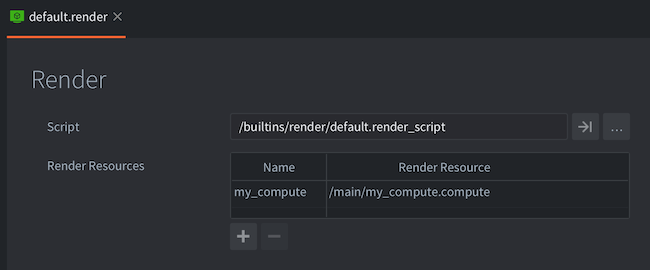
To use the compute program, it first needs to be bound to the render context. This is done in the same way as materials:
```lua
render.set_compute("my_compute")
-- Do compute work here, call render.set_compute() to unbind
render.set_compute()
```
While the compute constants will be automatically applied when the program is dispatched, there is no way to bind any inputs or output resources (textures, buffers and so on) to a compute program from the editor. Instead this must be done via render scripts:
```lua
render.enable_texture("blur_render_target", "tex_blur")
render.enable_texture(self.storage_texture, "tex_storage")
```
To run the program in the working space you have decided, you need to dispatch the program:
```lua
render.dispatch_compute(128, 128, 1)
-- dispatch_compute also accepts an options table as the last argument
-- you can use this argument table to pass in render constants to the dispatch call
local constants = render.constant_buffer()
constants.tint = vmath.vector4(1, 1, 1, 1)
render.dispatch_compute(32, 32, 32, {constants = constants})
```
### Writing data from compute programs
Currently, generating any type of output from a compute program can only be done via `storage textures`. A storage texture is similar to a "regular texture" except that they support more functionality and configurability. Storage textures, as the name implies, can be used as a generic buffer that you can read and write data to from a compute program. You can then bind the same buffer to a different shader program for reading.
To create a storage texture in Defold, you need to do this from a regular .script file. Render scripts does not have this functionality as dynamic textures need to be created via the resource API which is only available in regular .script files.
```lua
-- In a .script file:
function init(self)
-- Create a texture resource like usual, but add the "storage" flag
-- so it can be used as the backing storage for compute programs
local t_backing = resource.create_texture("/my_backing_texture.texturec", {
type = resource.TEXTURE_TYPE_IMAGE_2D,
width = 128,
height = 128,
format = resource.TEXTURE_FORMAT_RGBA32F,
flags = resource.TEXTURE_USAGE_FLAG_STORAGE + resource.TEXTURE_USAGE_FLAG_SAMPLE,
})
-- get the texture handle from the resource
local t_backing_handle = resource.get_texture_info(t_backing).handle
-- notify the renderer of the backing texture, so it can be bound with render.enable_texture
msg.post("@render:", "set_backing_texture", { handle = t_backing_handle })
end
```
## Putting it all together
### Shader program
```glsl
// compute.cp
#version 450
layout (local_size_x = 1, local_size_y = 1, local_size_z = 1) in;
// specify the input resources
uniform vec4 color;
uniform sampler2D texture_in;
// specify the output image
layout(rgba32f) uniform image2D texture_out;
void main()
{
// This isn't a particularly interesting shader, but it demonstrates
// how to read from a texture and constant buffer and write to a storage texture
ivec2 tex_coord = ivec2(gl_GlobalInvocationID.xy);
vec4 output_value = vec4(0.0, 0.0, 0.0, 1.0);
vec2 tex_coord_uv = vec2(float(tex_coord.x)/(gl_NumWorkGroups.x), float(tex_coord.y)/(gl_NumWorkGroups.y));
vec4 input_value = texture(texture_in, tex_coord_uv);
output_value.rgb = input_value.rgb * color.rgb;
// Write the output value to the storage texture
imageStore(texture_out, tex_coord, output_value);
}
```
### Script component
```lua
-- In a .script file
-- Here we specify the input texture that we later will bind to the
-- compute program. We can assign this texture to a model component,
-- or enable it to the render context in the render script.
go.property("texture_in", resource.texture())
function init(self)
-- Create a texture resource like usual, but add the "storage" flag
-- so it can be used as the backing storage for compute programs
local t_backing = resource.create_texture("/my_backing_texture.texturec", {
type = resource.TEXTURE_TYPE_IMAGE_2D,
width = 128,
height = 128,
format = resource.TEXTURE_FORMAT_RGBA32F,
flags = resource.TEXTURE_USAGE_FLAG_STORAGE + resource.TEXTURE_USAGE_FLAG_SAMPLE,
})
local textures = {
texture_in = resource.get_texture_info(self.texture_in).handle,
texture_out = resource.get_texture_info(t_backing).handle
}
-- notify the renderer of the input and output textures
msg.post("@render:", "set_backing_texture", textures)
end
```
### Render script
```lua
-- respond to the message "set_backing_texture"
-- to set the backing texture for the compute program
function on_message(self, message_id, message)
if message_id == hash("set_backing_texture") then
self.texture_in = message.texture_in
self.texture_out = message.texture_out
end
end
function update(self)
render.set_compute("compute")
-- We can bind textures to specific named constants
render.enable_texture(self.texture_in, "texture_in")
render.enable_texture(self.texture_out, "texture_out")
render.set_constant("color", vmath.vector4(0.5, 0.5, 0.5, 1.0))
-- Dispatch the compute program as many times as we have pixels.
-- This constitutes our "working group". The shader will be invoked
-- 128 x 128 x 1 times, or once per pixel.
render.dispatch_compute(128, 128, 1)
-- when we are done with the compute program, we need to unbind it
render.set_compute()
end
```
## Compatibility
Defold currently supports compute shaders in the following graphics adapters:
- Vulkan
- Metal (via MoltenVK)
- OpenGL 4.3+
- OpenGL ES 3.1+
There is currently no way to check if the running client supports compute shaders.
This means that there is no guarantee that the client supports running compute shaders if the graphics adapter is OpenGL, or OpenGL ES based.
Vulkan and Metal support compute shaders from version 1.0. To use Vulkan, you need to create a custom manifest and select Vulkan as the backend.
# Shaders {#manuals:shader}
Shader programs are at the core of graphics rendering. They are programs written in a C-like language called GLSL (GL Shading Language) that the graphics hardware run to perform operations on either the underlying 3D data (the vertices) or the pixels that end up on the screen (the "fragments"). Shaders are used for drawing sprites, lighting 3D models, creating full screen post effects and much, much more.
This manual describes how Defold's rendering pipeline interfaces with GPU shaders. In order to create shaders for your content, you also need to understand the concept of materials, as well as how the render pipeline works.
* See the [Render manual](#manuals:render) for details on the render pipeline.
* See the [Material manual](#manuals:material) for details on materials.
* See the [Compute manual](#manuals:compute) for details on compute programs.
Specifications of OpenGL ES 2.0 (OpenGL for Embedded Systems) and OpenGL ES Shading Language can be found at [Khronos OpenGL Registry](https://www.khronos.org/registry/gles/).
Observe that on desktop computers it is possible to write shaders using features not available on OpenGL ES 2.0. Your graphics card driver may happily compile and run shader code that will not work on mobile devices.
## Concepts
Vertex shader
: A vertex shader cannot create or delete vertices, only change the position of a vertex. Vertex shaders are commonly used to transform the positions of vertices from the 3D world space into 2D screen space.
The input of a vertex shader is vertex data (in the form of `attributes`) and constants (`uniforms`). Common constants are the matrices necessary to transform and project the position of a vertex to screen space.
The output of the vertex shader is the computed screen position of the vertex (`gl_Position`). It is also possible to pass data from the vertex shader to the fragment shader through `varying` variables.
Fragment shader
: After the vertex shader is done, it is the job of the fragment shader to decide the coloring of each fragment (or pixel) of the resulting primitives.
The input of a fragment shader is constants (`uniforms`) as well as any `varying` variables that has been set by the vertex shader.
The output of the fragment shader is the color value for the particular fragment (`gl_FragColor`).
Compute shader
: A compute shader is a general purpose shader that can be used to perform any type of work on a GPU. It is not part of the graphics pipeline at all, compute shaders run in a separate execution context and is not dependent on input from any other shader.
The input of a compute shader is constant buffers (`uniforms`), texture images (`image2D`), samplers (`sampler2D`) and storage buffers (`buffer`).
The output of the compute shader is not explicitly defined, there is no specific output that needs to be produced as opposed to the vertex and the fragment shaders. As compute shaders are generic, it is up to the programmer to define what type of result the compute shader should produce.
World matrix
: The vertex positions of a model's shape are stored relative to the model's origin. This is called "model space". The game world, however, is a "world space" where the position, orientation and scale of each vertex is expressed relative to the world origin. By keeping these separate the game engine is able to move, rotate and scale each model without destroying the original vertex values stored in the model component.
When a model is placed in the game world the model's local vertex coordinates must be translated to world coordinates. This translation is done by a *world transform matrix*, which tells what translation (movement), rotation and scale should be applied to a model's vertices to be correctly placed in the game world's coordinate system.
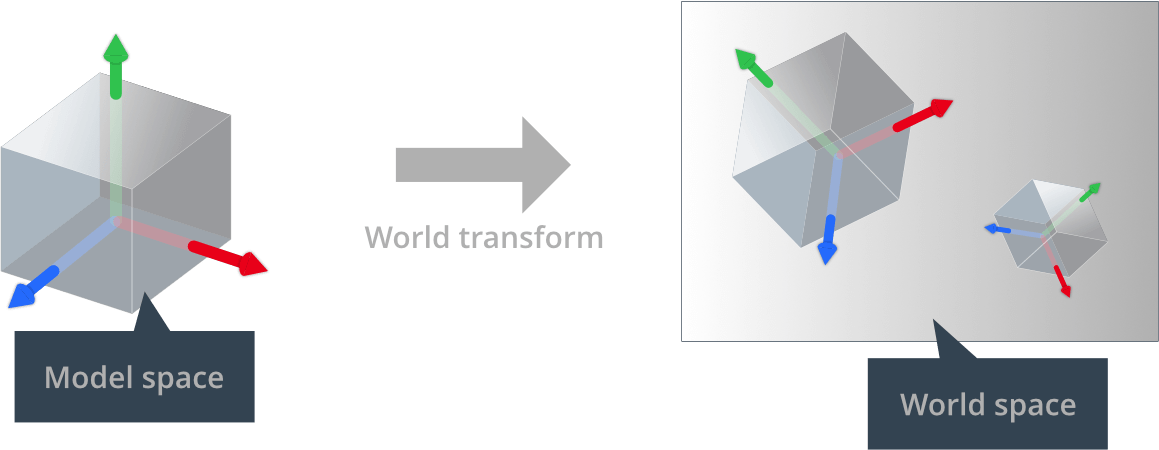
View and projection matrix
: In order to put the vertices of the game world onto the screen, each matrix' 3D coordinates is first translated into coordinates relative to the camera. This is done with a _view matrix_. Secondly, the vertices are projected onto the 2D screen space with a _projection matrix_:

Attributes
: A value associated with an individual vertex. Attributes are passed to the shader by the engine and if you want to access an attribute you just declare it in your shader program. Different component types have a different set of attributes:
- Sprite has `position` and `texcoord0`.
- Tilegrid has `position` and `texcoord0`.
- GUI node has `position`, `textcoord0` and `color`.
- ParticleFX has `position`, `texcoord0` and `color`.
- Model has `position`, `texcoord0` and `normal`.
- Font has `position`, `texcoord0`, `face_color`, `outline_color` and `shadow_color`.
Constants
: Shader constants remain constant for the duration of the render draw call. Constants are added to the material file *Constants* sections and then declared as `uniform` in the shader program. Sampler uniforms are added to the *Samplers* section of the material and then declared as `uniform` in the shader program. The matrices necessary to perform vertex transformations in a vertex shader are available as constants:
- `CONSTANT_TYPE_WORLD` is the *world matrix* that maps from an object’s local coordinate space into world space.
- `CONSTANT_TYPE_VIEW` is the *view matrix* that maps from world space to camera space.
- `CONSTANT_TYPE_PROJECTION` is the *projection matrix* that maps from camera to screen space.
- Premultiplied $world * view$, $view * projection$ and $world * view$ matrices are also available.
- `CONSTANT_TYPE_USER` is a `vec4` type constant that you can use as you wish.
The [Material manual](#manuals:material) explains how to specify constants.
Samplers
: Shaders can declare *sampler* type uniform variables. Samplers are used to read values from an image source:
- `sampler2D` samples from a 2D image texture.
- `sampler2DArray` samples from a 2D image array texture. This is mostly used for paged atlases.
- `samplerCube` samples from a 6 image cubemap texture.
- `image2D` loads (and potentially stores) texture data to an image object. This is mostly used for compute shaders for storage.
You can use a sampler only in the GLSL standard library's texture lookup functions. The [Material manual](#manuals:material) explains how to specify sampler settings.
UV coordinates
: A 2D coordinate is associated with a vertex and it maps to a point on a 2D texture. A portion, or the whole, of the texture can therefore be painted onto the shape described by a set of vertices.
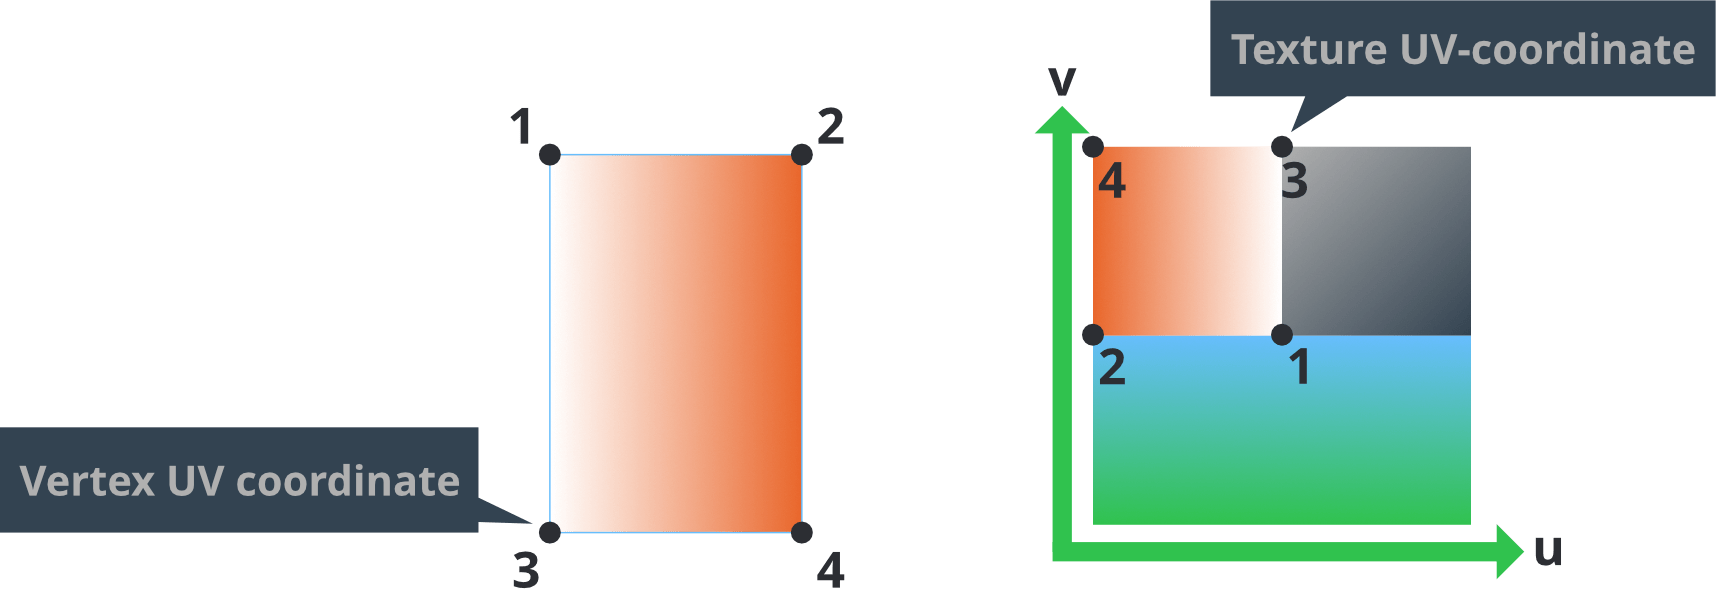
A UV-map is typically generated in the 3D modeling program and stored in the mesh. The texture coordinates for each vertex are provided to the vertex shader as an attribute. A varying variable is then used to find the UV coordinate for each fragment as interpolated from the vertex values.
Varying variables
: Varying types of variables are used to pass information between the vertex stage and the fragment stage.
1. A varying variable is set in the vertex shader for each vertex.
2. During rasterization this value is interpolated for each fragment on the primitive being rendered. The distance of the fragment to the shape's vertices dictates the interpolated value.
3. The variable is set for each call to the fragment shader and can be used for fragment calculations.

For instance, setting a varying to a `vec3` RGB color value on each corners of a triangle will interpolate the colors across the whole shape. Similarly, setting texture map lookup coordinates (or *UV-coordinates*) on each vertex in a rectangle allows the fragment shader to look up texture color values for the whole area of the shape.

## Writing modern GLSL shaders
Since the Defold engine supports multiple platforms and graphics APIs, it must be simple for developers to write shaders that works everywhere. The asset pipeline achieves this in mainly two ways (denoted as `shader pipelines` from now on):
1. The legacy pipeline, where shaders are written in ES2 compatible GLSL code.
2. The modern pipeline, where shaders are written in SPIR-v compatible GLSL code.
Starting with Defold 1.9.2, it is encouraged to write shaders that utilize the new pipeline, and to achieve this most shaders need to be migrated into shaders written in at least version 140 (OpenGL 3.1). To migrate a shader, make sure these requirements are met:
### Version declaration
Put at least #version 140 at the top of the shader:
```glsl
#version 140
```
This is how the shader pipeline is picked in the build process, which is why you can still use the old shaders. If no version preprocessor was found, Defold will fallback to the legacy pipeline.
### Attributes
In vertex shaders, replace the `attribute` keyword with `in`:
```glsl
// instead of:
// attribute vec4 position;
// do:
in vec4 position;
```
Note: Fragment shaders (and compute shaders) does not take any vertex inputs.
### Varyings
In vertex shaders, varyings should be prefixed with `out`. In fragment shaders, varyings becomes `in`:
```glsl
// In a vertex shader, instead of:
// varying vec4 var_color;
// do:
out vec4 var_color;
// In a fragment shader, instead of:
// varying vec4 var_color;
// do:
in vec4 var_color;
```
### Uniforms (called constants in Defold)
Opaque uniform types (samplers, images, atomics, SSBOs) does not need any migration, you can use them as you do today:
```glsl
uniform sampler2D my_texture;
uniform image2D my_image;
```
For non-opaque uniform types, you need to put them in a `uniform block`. A uniform block is simply a collection of uniform variables, and is declared with the `uniform` keyword:
```glsl
uniform vertex_inputs
{
mat4 mtx_world;
mat4 mtx_proj;
mat4 mtx_view;
mat4 mtx_normal;
...
};
void main()
{
// Individual members of the uniform block can be used as-is
gl_Position = mtx_proj * mtx_view * mtx_world * vec4(position, 1.0);
}
```
All members in the uniform block is exposed to materials and components as individual constants. No migration is needed for using render constant buffers, or `go.set` and `go.get`.
### Built-in Variables
In fragment shaders, `gl_FragColor` is deprecated starting with version 140. Use `out` instead:
```glsl
// instead of:
// gl_FragColor = vec4(1.0, 0.0, 0.0, 1.0);
// do:
out vec4 color_out;
void main()
{
color_out = vec4(1.0, 0.0, 0.0, 1.0);
}
```
### Texture functions
Specific texture sampling functions such as `texture2D` and `texture2DArray` doesn't exist anymore. Instead, just use the `texture` function:
```glsl
uniform sampler2D my_texture;
uniform sampler2DArray my_texture_array;
// instead of:
// vec4 sampler_2d = texture2D(my_texture, uv);
// vec4 sampler_2d_array = texture2DArray(my_texture_array, vec3(uv, slice));
// do:
vec4 sampler_2d = texture(my_texture, uv);
vec4 sampler_2d_array = texture(my_texture_array, vec3(uv, slice));
```
### Precision
Setting explicit precision for variables, inputs, outputs and so forth was previously required in order to be compliant with OpenGL ES contexts. This is not required anymore, precision is now set automatically for platforms that support it.
### Putting it together
As a final example where all of these rules are applied, here is the builtin sprite shaders converted into the new format:
```glsl
#version 140
uniform vx_uniforms
{
mat4 view_proj;
};
// positions are in world space
in vec4 position;
in vec2 texcoord0;
out vec2 var_texcoord0;
void main()
{
gl_Position = view_proj * vec4(position.xyz, 1.0);
var_texcoord0 = texcoord0;
}
```
```glsl
#version 140
in vec2 var_texcoord0;
out vec4 color_out;
uniform sampler2D texture_sampler;
uniform fs_uniforms
{
vec4 tint;
};
void main()
{
// Premultiply alpha since all runtime textures already are
vec4 tint_pm = vec4(tint.xyz * tint.w, tint.w);
color_out = texture(texture_sampler, var_texcoord0.xy) * tint_pm;
}
```
## Including snippets into shaders
Shaders in Defold support including source code from files within the project that have have the `.glsl` extension. To include a glsl file from a shader, use the `#include` pragma either with double quotations or brackets. Includes must have either project relative paths or a path that is relative from the file that is including it:
```glsl
// In file /main/my-shader.fp
// Absolute path
#include "/main/my-snippet.glsl"
// The file is in the same folder
#include "my-snippet.glsl"
// The file is in a sub-folder on the same level as 'my-shader'
#include "sub-folder/my-snippet.glsl"
// The file is in a sub-folder on the parent directory, i.e /some-other-folder/my-snippet.glsl
#include "../some-other-folder/my-snippet.glsl"
// The file is on the parent directory, i.e /root-level-snippet.glsl
#include "../root-level-snippet.glsl"
```
There are some caveats to how includes are picked up:
- Files must be project relative, meaning that you can only include files that are located within the project. Any absolute path must be specified with a leading `/`
- You can include code anywhere in the file, but you cannot include a file inline in a statement. E.g `const float #include "my-float-name.glsl" = 1.0` will not work
### Header guards
Snippets can themselves include other `.glsl` files, which means that the final produced shader can potentially include the same code several times, and depending on the contents of the files you can end up with compile issues due to having the same symbols stated more than once. To avoid this, you can use *header guards*, which is a common concept in several programming languages. Example:
```glsl
// In my-shader.vs
#include "math-functions.glsl"
#include "pi.glsl"
// In math-functions.glsl
#include "pi.glsl"
// In pi.glsl
const float PI = 3.14159265359;
```
In this example, the `PI` constant will be defined twice, which will cause compiler errors when running the project. You should instead protect the contents with header guards:
```glsl
// In pi.glsl
#ifndef PI_GLSL_H
#define PI_GLSL_H
const float PI = 3.14159265359;
#endif // PI_GLSL_H
```
The code from `pi.glsl` will be expanded twice in `my-shader.vs`, but since you have wrapped it in header guards the PI symbol will only be defined once and the shader will compile successfully.
However, this is not always strict necessary depending of use-case. If instead you want to reuse code locally in a function or elsewhere where you don't need the values to be globally available in the shader code, you should probably not use header guards. Example:
```glsl
// In red-color.glsl
vec3 my_red_color = vec3(1.0, 0.0, 0.0);
// In my-shader.fp
vec3 get_red_color()
{
#include "red-color.glsl"
return my_red_color;
}
vec3 get_red_color_inverted()
{
#include "red-color.glsl"
return 1.0 - my_red_color;
}
```
## Editor-specific shader code
When shaders are rendered in the Defold Editor viewport, a preprocessor definition `EDITOR` is available. This allows you to write shader code that behaves differently when running in the editor versus when running in the actual game engine.
This is particularly useful for:
- Adding debug visualizations that should only appear in the editor.
- Implementing editor-specific features like wireframe modes or material previews.
- Providing fallback rendering for materials that might not work properly in the editor viewport.
Use the `#ifdef EDITOR` preprocessor directive to conditionally compile code that should only run in the editor:
```glsl
#ifdef EDITOR
// This code will only execute when the shader is rendered in the Defold Editor
color_out = vec4(1.0, 0.0, 1.0, 1.0); // Magenta color for editor preview
#else
// This code will execute when running in the game
color_out = texture(texture_sampler, var_texcoord0) * tint_pm;
#endif
```
## The rendering process
Before ending up on the screen, the data that you create for your game goes through a series of steps:

All visual components (sprites, GUI nodes, particle effects or models) consists of vertices, points in 3D world that describe the shape of the component. The good thing by this is that it is possible to view the shape from any angle and distance. The job of the vertex shader program is to take a single vertex and translate it into a position in the viewport so the shape can end up on screen. For a shape with 4 vertices, the vertex shader program runs 4 times, each in parallel.
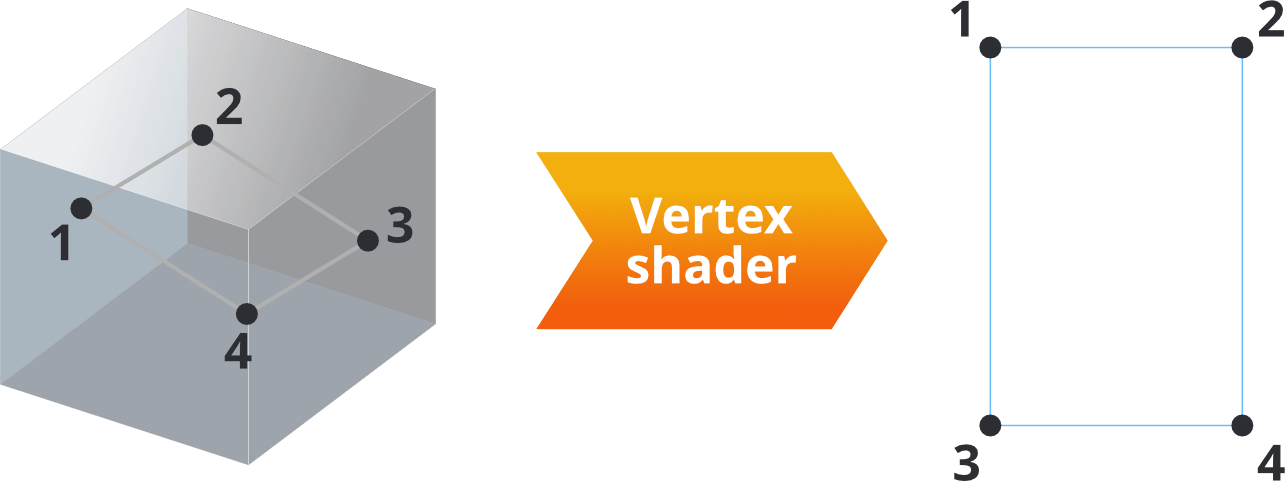
The input of the program is the vertex position (and other attribute data associated with the vertex) and the output is a new vertex position (`gl_Position`) as well as any `varying` variables that should be interpolated for each fragment.
The most simple vertex shader program just sets the position of the output to a zero vertex (which is not very useful):
```glsl
void main()
{
gl_Position = vec4(0.0,0.0,0.0,1.0);
}
```
A more complete example is the built-in sprite vertex shader:
```glsl
-- sprite.vp
uniform mediump mat4 view_proj; // [1]
attribute mediump vec4 position; // [2]
attribute mediump vec2 texcoord0;
varying mediump vec2 var_texcoord0; // [3]
void main()
{
gl_Position = view_proj * vec4(position.xyz, 1.0); // [4]
var_texcoord0 = texcoord0; // [5]
}
```
1. A uniform (constant) containing the view and projection matrices multiplied.
2. Attributes for the sprite vertex. `position` is already transformed into world space. `texcoord0` contains the UV coordinate for the vertex.
3. Declare a varying output variable. This variable will be interpolated for each fragment between the values set for each vertex and sent to the fragment shader.
4. `gl_Position` is set to the output position of the current vertex in projection space. This value has 4 components: `x`, `y`, `z` and `w`. The `w` component is used to calculate perspective-correct interpolation. This value is normally 1.0 for each vertex before any transformation matrix is applied.
5. Set the varying UV coordinate for this vertex position. After rasterization it will be interpolated for each fragment and sent to the fragment shader.
After vertex shading, the on screen shape of the component is decided: primitive shapes are generated and rasterized, meaning that the graphics hardware splits each shape into *fragments*, or pixels. It then runs the fragment shader program, once for each of the fragments. For an on screen image 16x24 pixels in size, the program runs 384 times, each in parallel.
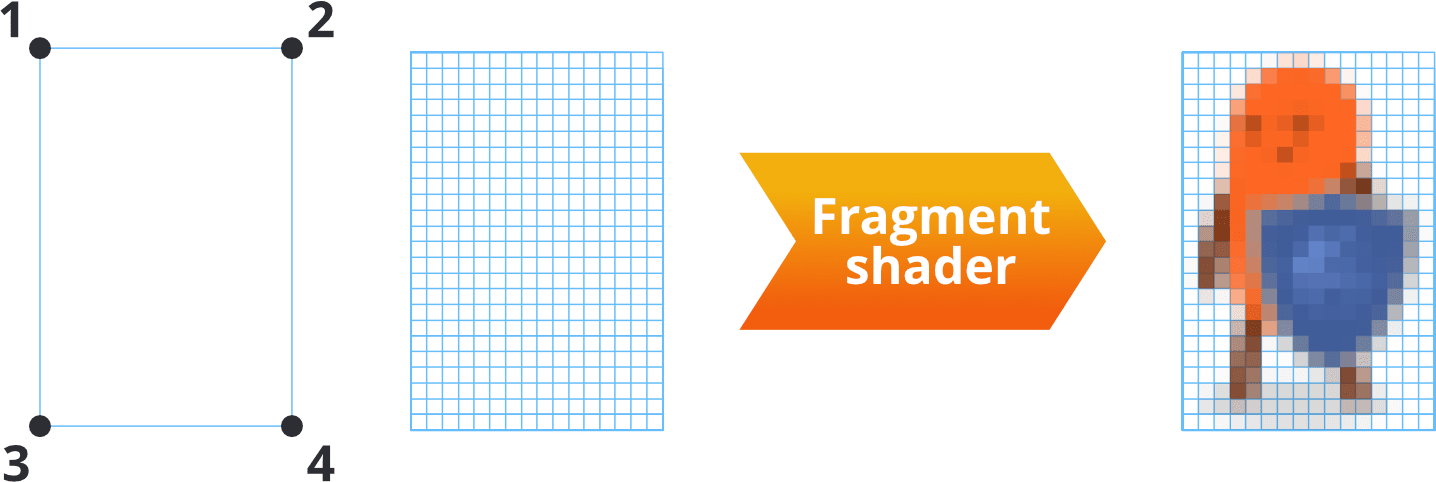
The input of the program is whatever the rendering pipeline and the vertex shader sends, usually the *uv-coordinates* of the fragment, tint colors etc. The output is the final color of the pixel (`gl_FragColor`).
The most simple fragment shader program just sets the color of each pixel to black (again, not a very useful program):
```glsl
void main()
{
gl_FragColor = vec4(0.0,0.0,0.0,1.0);
}
```
Again, a more complete example is the built-in sprite fragment shader:
```glsl
// sprite.fp
varying mediump vec2 var_texcoord0; // [1]
uniform lowp sampler2D DIFFUSE_TEXTURE; // [2]
uniform lowp vec4 tint; // [3]
void main()
{
lowp vec4 tint_pm = vec4(tint.xyz * tint.w, tint.w); // [4]
lowp vec4 diff = texture2D(DIFFUSE_TEXTURE, var_texcoord0.xy);// [5]
gl_FragColor = diff * tint_pm; // [6]
}
```
1. The varying texture coordinate variable is declared. The value of this variable will be interpolated for each fragment between the values set for each vertex in the shape.
2. A `sampler2D` uniform variable is declared. The sampler, together with the interpolated texture coordinates, is used to perform texture lookup so the sprite can be textured properly. Since this is a sprite, the engine will assign this sampler to the image set in the sprite's *Image* property.
3. A constant of type `CONSTANT_TYPE_USER` is defined in the material and declared as a `uniform`. Its value is used to allow color tinting of the sprite. The default is pure white.
4. The color value of the tint gets premultiplied with its alpha value since all runtime textures already contain premultiplied alpha.
5. Sample the texture at the interpolated coordinate and return the sampled value.
6. `gl_FragColor` is set to the output color for the fragment: the diffuse color from the texture multiplied with the tint value.
The resulting fragment value then goes through tests. A common test is the *depth test* in where the fragment's depth value is compared against the depth buffer value for the pixel that is being tested. Depending on the test, the fragment can be discarded or a new value is written to the depth buffer. A common use of this test is to allow graphics that is closer to the camera to block graphics further back.
If the test concluded that the fragment is to be written to the frame buffer, it will be *blended* with the pixel data already present in the buffer. Blending parameters that are set in the render script allow the source color (the value written by the fragment shader) and the destination color (the color from the image in the framebuffer) to be combined in various ways. A common use of blending is to enable rendering transparent objects.
## Further study
- [Shadertoy](https://www.shadertoy.com) contains a massive number of user contributed shaders. It is a great source of inspiration where you can learn about various shading techniques. Many of the shaders showcased on the site can be ported to Defold with very little work. The [Shadertoy tutorial](https://www.defold.com/tutorials/shadertoy/) goes through the steps of converting an existing shader to Defold.
- The [Grading tutorial](https://www.defold.com/tutorials/grading/) shows how to create a full screen color grading effect using color lookup table textures for the grading.
- [The Book of Shaders](https://thebookofshaders.com/00/) will teach you how to use and integrate shaders into your projects, improving their performance and graphical quality.
# Physically Based Rendering (PBR) {#manuals:physically-based-rendering}
Physically Based Rendering (PBR) is a shading approach that models how light interacts with surfaces using real-world physical principles. It produces consistent, realistic lighting across different environments and allows assets to look correct under a wide range of lighting conditions.
Defold’s PBR implementation follows the glTF 2.0 material specification and associated Khronos extensions. When you import glTF assets into Defold, material properties are automatically parsed and stored as structured material data that can be accessed in shaders at runtime.
PBR materials can include effects such as metallic reflections, surface roughness, transmission, clearcoat, subsurface scattering, iridescence, and more.
Defold currently exposes PBR material data to shaders, but does not provide a built-in PBR lighting model. You can use this data in your own lighting and reflection shaders to achieve physically based rendering. A default PBR lighting model will be added to Defold at a later stage.
Embedded textures from glTF files are currently not automatically assigned in Defold. Only material parameters are exposed to shaders. You can still manually assign textures to model components and sample them in your shader.
## Material properties overview
The material properties are parsed from the glTF 2.0 source files assigned to a model component. Not all properties are standard. Some are provided through optional glTF extensions that may or may not be included by the tool used to export the glTF file. The relevant extension is denoted in parentheses after the property name below.
Metallic roughness
: Describes how light interact with the material. The default PBR model.
Specular glossiness (KHR_materials_pbrSpecularGlossiness)
: An alternative to metallic roughness. Often used in older assets.
Clearcoat (KHR_materials_clearcoat)
: Adds a transparent coating layer with its own roughness and normal map.
Ior (KHR_materials_ior)
: Adds an index of refraction.
Specular (KHR_materials_specular)
: Adds a dedicated specular intensity and color channel.
Iridescence (KHR_materials_iridescence)
: Simulates thin-film interference for materials like soap bubbles or pearls.
Sheen (KHR_materials_sheen)
: Models fabric-like micro-surface reflections.
Transmission (KHR_materials_transmission)
: Models light transmission for transparent or glass-like materials.
Volume (KHR_materials_volume)
: Supports volumetric effects like thickness and attenuation.
Emissive strength (KHR_materials_emissive_strength)
: Controls emissive brightness independent of base color.
Normal map
: Normal map for surface detail.
Occlusion map
: Ambient occlusion map.
Emissive map
: Self-emissive texture for glowing surfaces.
Emissive factor
: RGB multiplier for emissive intensity
Alpha cutoff
: Threshold for masked transparency.
Alpha mode
: Opaque, Masked, or Blended transparency modes.
Double sided
: If true, both sides of the surface are rendered.
Unlit
: If true, the material bypasses lighting calculations.
Some of these properties provides hints on how the material should be rendered. The data for the properties (alpha cutoff, alpha mode, double sided and unlit) is available in the shaders, but does not affect how the material is rendered in Defold.
## Shader integration
The PBR material data is exposed to the shaders based on types and name convention. The PBR material system provides all parsed material parameters to shaders via a structured uniform block named `PbrMaterial`. Each supported glTF extension corresponds to a struct within this block, which can be conditionally compiled using #define flags.
```glsl
uniform PbrMaterial
{
// Material properties
};
```
The various features of the material is specified as fixed structs in the shader. Data has been packed as much as possible in vec4's since that is how constants are set internally in Defold. In those cases where data has been packed, it is denoted as comments in the shader snippets for each feature below:
```glsl
struct PbrMetallicRoughness
{
vec4 baseColorFactor;
// R: metallic (Default=1.0), G: roughness (Default=1.0)
vec4 metallicAndRoughnessFactor;
// R: use baseColorTexture, G: use metallicRoughnessTexture
vec4 metallicRoughnessTextures;
};
struct PbrSpecularGlossiness
{
vec4 diffuseFactor;
// RGB: specular (Default=1.0), A: glossiness (Default=1.0)
vec4 specularAndSpecularGlossinessFactor;
// R: use diffuseTexture, G: use specularGlossinessTexture
vec4 specularGlossinessTextures;
};
struct PbrClearCoat
{
// R: clearCoat (Default=0.0), G: clearCoatRoughness (Default=0.0)
vec4 clearCoatAndClearCoatRoughnessFactor;
// R: use clearCoatTexture, G: use clearCoatRoughnessTexture, B: use clearCoatNormalTexture
vec4 clearCoatTextures;
};
struct PbrTransmission
{
// R: transmission (Default=0.0)
vec4 transmissionFactor;
// R: use transmissionTexture
vec4 transmissionTextures;
};
struct PbrIor
{
// R: ior (Default=0.0)
vec4 ior;
};
struct PbrSpecular
{
// RGB: specularColor, A: specularFactor (Default=1.0);
vec4 specularColorAndSpecularFactor;
// R: use specularTexture, G: use specularColorTexture
vec4 specularTextures;
};
struct PbrVolume
{
// R: thicknessFactor (Default=0.0), RGB: attenuationColor
vec4 thicknessFactorAndAttenuationColor;
// R: attentuationDistance (Default=-1.0)
vec4 attenuationDistance;
// R: use thicknessTexture
vec4 volumeTextures;
};
struct PbrSheen
{
// RGB: sheenColor, A: sheenRoughnessFactor (Default=0.0)
vec4 sheenColorAndRoughnessFactor;
// R: use sheenColorTexture, G: use sheenRoughnessTexture
vec4 sheenTextures;
};
struct PbrEmissiveStrength
{
// R: emissiveStrength (Default=1.0)
vec4 emissiveStrength;
};
struct PbrIridescence
{
// R: iridescenceFactor (Default=0.0), G: iridescenceIor (Default=1.3), B: iridescenceThicknessMin (Default=100.0), A: iridescenceThicknessMax (Default=400.0)
vec4 iridescenceFactorAndIorAndThicknessMinMax;
// R: use iridescenceTexture, G: use iridescenceThicknessTexture
vec4 iridescenceTextures;
};
```
The common properties are set on the material uniform itself (and once again, note the data packing into vec4).
```glsl
// Common textures
uniform sampler2D PbrMaterial_normalTexture;
uniform sampler2D PbrMaterial_occlusionTexture;
uniform sampler2D PbrMaterial_emissiveTexture;
uniform PbrMaterial
{
// Common properties:
// R: alphaCutoff (Default=0.5), G: doubleSided (Default=false), B: unlit (Default=false)
vec4 pbrAlphaCutoffAndDoubleSidedAndIsUnlit;
// R: use normalTexture, G: use occlusionTexture, B: use emissiveTexture
vec4 pbrCommonTextures;
// Other properties...
};
```
### Example shader
Here is an example shader that contains all features and a proposed naming scheme for texture bindings (again, this must be handled manually). Note that you can turn off features simply by using defines around each member of the PbrMaterial itself, as shown in the example below:
```glsl
// Feature flags, comment or remove these to slim down the shader.
#define PBR_METALLIC_ROUGHNESS
#define PBR_SPECULAR_GLOSSINESS
#define PBR_CLEARCOAT
#define PBR_TRANSMISSION
#define PBR_IOR
#define PBR_SPECULAR
#define PBR_VOLUME
#define PBR_SHEEN
#define PBR_EMISSIVE_STRENGTH
#define PBR_IRIDESCENCE
// Common
uniform sampler2D PbrMaterial_normalTexture;
uniform sampler2D PbrMaterial_occlusionTexture;
uniform sampler2D PbrMaterial_emissiveTexture;
// PbrMetallicRoughness
uniform sampler2D PbrMetallicRoughness_baseColorTexture;
uniform sampler2D PbrMetallicRoughness_metallicRoughnessTexture;
struct PbrMetallicRoughness
{
vec4 baseColorFactor;
// R: metallic (Default=1.0), G: roughness (Default=1.0)
vec4 metallicAndRoughnessFactor;
// R: use baseColorTexture, G: use metallicRoughnessTexture
vec4 metallicRoughnessTextures;
};
// PbrSpecularGlossiness
uniform sampler2D PbrSpecularGlossiness_diffuseTexture;
uniform sampler2D PbrSpecularGlossiness_specularGlossinessTexture;
struct PbrSpecularGlossiness
{
vec4 diffuseFactor;
// RGB: specular (Default=1.0), A: glossiness (Default=1.0)
vec4 specularAndSpecularGlossinessFactor;
// R: use diffuseTexture, G: use specularGlossinessTexture
vec4 specularGlossinessTextures;
};
// PbrClearCoat
uniform sampler2D PbrClearCoat_clearcoatTexture;
uniform sampler2D PbrClearCoat_clearcoatRoughnessTexture;
uniform sampler2D PbrClearCoat_clearcoatNormalTexture;
struct PbrClearCoat
{
// R: clearCoat (Default=0.0), G: clearCoatRoughness (Default=0.0)
vec4 clearCoatAndClearCoatRoughnessFactor;
// R: use clearCoatTexture, G: use clearCoatRoughnessTexture, B: use clearCoatNormalTexture
vec4 clearCoatTextures;
};
// PbrTransmission
uniform sampler2D PbrTransmission_transmissionTexture;
struct PbrTransmission
{
// R: transmission (Default=0.0)
vec4 transmissionFactor;
// R: use transmissionTexture
vec4 transmissionTextures;
};
struct PbrIor
{
// R: ior (Default=0.0)
vec4 ior;
};
// PbrSpecular
uniform sampler2D PbrSpecular_specularTexture;
uniform sampler2D PbrSpecular_specularColorTexture;
struct PbrSpecular
{
// RGB: specularColor, A: specularFactor (Default=1.0);
vec4 specularColorAndSpecularFactor;
// R: use specularTexture, G: use specularColorTexture
vec4 specularTextures;
};
// PbrVolume
uniform sampler2D PbrVolume_thicknessTexture;
struct PbrVolume
{
// R: thicknessFactor (Default=0.0), RGB: attenuationColor
vec4 thicknessFactorAndAttenuationColor;
// R: attentuationDistance (Default=-1.0)
vec4 attenuationDistance;
// R: use thicknessTexture
vec4 volumeTextures;
};
// PbrSheen
uniform sampler2D PbrSheen_sheenColorTexture;
uniform sampler2D PbrSheen_sheenRoughnessTexture;
struct PbrSheen
{
// RGB: sheenColor, A: sheenRoughnessFactor (Default=0.0)
vec4 sheenColorAndRoughnessFactor;
// R: use sheenColorTexture, G: use sheenRoughnessTexture
vec4 sheenTextures;
};
struct PbrEmissiveStrength
{
// R: emissiveStrength (Default=1.0)
vec4 emissiveStrength;
};
// PbrIridescence
uniform sampler2D PbrEmissive_iridescenceTexture;
uniform sampler2D PbrEmissive_iridescenceThicknessTexture;
struct PbrIridescence
{
// R: iridescenceFactor (Default=0.0), G: iridescenceIor (Default=1.3), B: iridescenceThicknessMin (Default=100.0), A: iridescenceThicknessMax (Default=400.0)
vec4 iridescenceFactorAndIorAndThicknessMinMax;
// R: use iridescenceTexture, G: use iridescenceThicknessTexture
vec4 iridescenceTextures;
};
uniform PbrMaterial
{
// Common properties
// R: alphaCutoff (Default=0.5), G: doubleSided (Default=false), B: unlit (Default=false)
vec4 pbrAlphaCutoffAndDoubleSidedAndIsUnlit;
// R: use normalTexture, G: use occlusionTexture, B: use emissiveTexture
vec4 pbrCommonTextures;
// Features
#ifdef PBR_METALLIC_ROUGHNESS
PbrMetallicRoughness pbrMetallicRoughness;
#endif
#ifdef PBR_SPECULAR_GLOSSINESS
PbrSpecularGlossiness pbrSpecularGlossiness;
#endif
#ifdef PBR_CLEARCOAT
PbrClearCoat pbrClearCoat;
#endif
#ifdef PBR_TRANSMISSION
PbrTransmission pbrTransmission;
#endif
#ifdef PBR_IOR
PbrIor pbrIor;
#endif
#ifdef PBR_SPECULAR
PbrSpecular pbrSpecular;
#endif
#ifdef PBR_VOLUME
PbrVolume pbrVolume;
#endif
#ifdef PBR_SHEEN
PbrSheen pbrSheen;
#endif
#ifdef PBR_EMISSIVE_STRENGTH
PbrEmissiveStrength pbrEmissiveStrength;
#endif
#ifdef PBR_IRIDESCENCE
PbrIridescence pbrIridescence;
#endif
};
```
If specific data points in the material struct are not found, the data for those features will not be set. E.g if there is no `pbrClearCoat` in the material struct, no clear coat data will be set. If the uniform block is not found, no data at all will be set during rendering.
### Constants
Each material property corresponds to an internal render constant in Defold. You can override default values by defining constants on the material resource itself, following the naming pattern `pbrFeature.structMember`. These values will be applied automatically if the matching data is missing in the glTF material.

## Next steps
To use the material data for physically based lighting, implement a BRDF in your fragment shader using the parameters provided in the `PbrMaterial` block.
See also:
* [Shaders manual](#manuals:shader)
* [Render manual](#manuals:render)
* [glTF 2.0 specification](https://registry.khronos.org/glTF/specs/2.0/glTF-2.0.html)
# Bundling an application {#manuals:bundling}
While developing your application you should make a habit of testing the game on the target platforms as often as possible. You should do this to detect performance issues early on in the development process where these things are much easier to fix. It is also recommended to test on all target platforms to find discrepancies in things such as shaders. When developing on mobile you have the option to use the [mobile development app](#manuals:dev-app) to push content to the app, instead of having to do a full bundle and uninstall/install cycle.
You can create an application bundle for all platforms that Defold supports from within the Defold editor itself, with no external tools needed. You can also bundle from the command line using our command line tools. Application bundling requires a network connection if your project contains one or more [native extensions](#manuals:extensions).
## Bundling from within the editor
You create an application bundle from the Project menu and Bundle option:
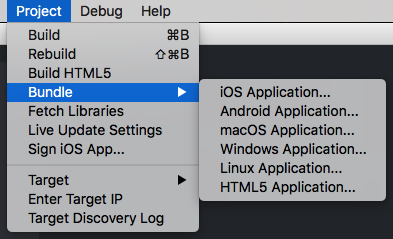
Selecting any of the menu options will bring up the Bundle dialog for that specific platform.
### Build reports
When bundling your game there is an option to create a build report. This is very useful to get a grip on the size of all the assets that are part of your game bundle. Simply check the *Generate build report* checkbox when bundling the game.
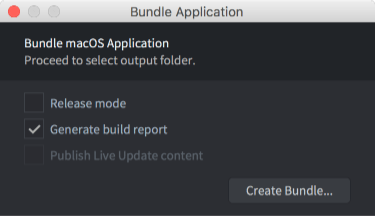
To learn more about build reports please refer to the [Profiling manual](#manuals:profiling).
### Android
Creating an Android application bundle (.apk file) is documented in the [Android manual](#manuals:android).
### iOS
Creating an iOS application bundle (.ipa file) is documented in the [iOS manual](#manuals:ios).
### macOS
Creating a macOS application bundle (.app file) is documented in the [macOS manual](#manuals:macos).
### Linux
Creating a Linux application bundle requires no specific setup and no optional platform specific configuration in the *game.project* [project settings file](#manuals:project-settings).
### Windows
Creating a Windows application bundle (.exe file) is documented in the [Windows manual](#manuals:windows).
### HTML5
Creating an HTML5 application bundle as well as optional setup is documented in the [HTML5 manual](#manuals:html5).
#### Facebook Instant Games
It is possible to create a special version of an HTML5 application bundle specifically for Facebook Instant Games. This process is documented in the [Facebook Instant Games manual](#manuals:instant-games).
## Bundling from the command line
The editor uses our command line tool [Bob](#manuals:bob) to bundle the application.
While doing day to day development of your application it is likely that you build and bundle from within the Defold editor. In other circumstances you may wish to automatically generate application bundles, for instance batch building for all targets when releasing a new version or when creating nightly builds of the latest version of the game, perhaps in a CI environment. Building and bundling of an application can be done outside the normal editor workflow using the [Bob command line tool](#manuals:bob).
## The bundle layout
The logical bundle layout is structured like this:
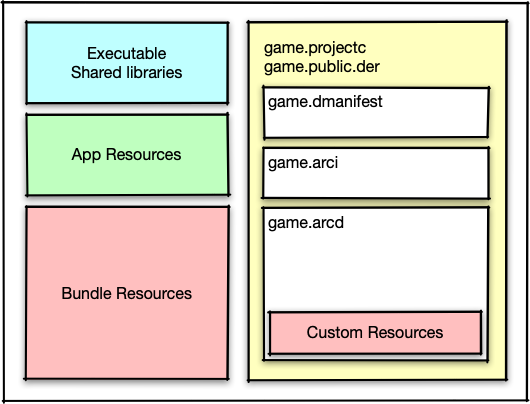
A bundle is output into a folder. Depending on platform, that folder may also be zip archived into an `.apk` or `.ipa`.
The contents of the folder depends on the platform.
Apart from the executable files, our bundling process also collects the required assets for the platform (e.g. the .xml resource files for Android).
Using the [bundle_resources](#manuals:project-settings) setting, you can configure assets that should be placed within the bundle as-is.
You can control this per platform.
The game assets are located in the `game.arcd` file, and they are individually compressed using LZ4 compression.
Using the [custom_resources](#manuals:project-settings) setting, you can configure assets that should be placed (with compression) within the `game.arcd`.
These assets can be accessed via the [`sys.load_resource()`](https://defold.com/ref/sys/#sys.load_resource) function.
## Release vs Debug
When creating an application bundle you have an option of creating a debug or release bundle. The differences between the two bundles are small but important to keep in mind:
* Release builds do not include the [profiler](#manuals:profiling)
* Release builds do not include the [screen recorder](https://defold.com/ref/stable/sys/#start_record)
* Release builds do not show the output of any calls to `print()` or the output from any native extensions
* Release builds have the `is_debug` value in `sys.get_engine_info()` set to`false`
* Release builds will not do reverse lookups of `hash` values when calling `tostring()`. What this means in practice is that a `tostring()` for a value of type `url` or `hash` will return its numeric representation and not the original string (`'hash: [/camera_001]'` vs `'hash: [11844936738040519888 (unknown)]'`)
* Release builds do not support targeting from the editor for [hot-reload](#manuals:hot-reload) and similar functionality
# Bob the builder {#manuals:bob}
Bob is a command line tool for building Defold projects outside of the normal editor workflow.
Bob is able to build data (corresponding to the build step of selecting the editor menu item Project ▸ Build), create data archives and create standalone, distributable application bundles (corresponding to the editor menu item Project ▸ Bundle ▸ ... options)
Bob is distributed as a Java _JAR_ archive containing everything needed to build. You find the latest *bob.jar* distribution on the [GitHub Releases page](https://github.com/defold/defold/releases). Select a release, then download *bob/bob.jar*. If you are using Defold 1.9.6, you will need OpenJDK 21 to run it. For older versions of Defold, you will need openJDK 17 or 11.
Compatible OpenJDK 21 mirrors (from Defold 1.9.6):
* [OpenJDK 21 by Microsoft](https://docs.microsoft.com/en-us/java/openjdk/download#openjdk-21)
* [OpenJDK 21 by Adoptium Working Group](https://github.com/adoptium/temurin21-binaries/releases) / [Adoptium.net](https://adoptium.net/)
If you are on Windows you want the `.msi` file installer for OpenJDK.
## Usage
Bob is run from a shell or from the command line by invoking `java` (or `java.exe` on Windows) and providing the bob java archive as argument:
```text
$ java -jar bob.jar --help
usage: bob [options] [commands]
-a,--archive Build archive
-ar,--architectures
iOS only - Make sure you specify [Localizations](#manuals:project-settings) in `game.project`, since `sys.get_info()` will never return language which isn’t in this list.
Translate the text on the store page as this will have a positive impact on sales! Some platforms require the text on the store page to be translated to the language of each country where the game is available.
## Store materials
### App icon
Make sure your game stands out from the competition. The icon is often your first point of contact with potential players. It should be easy to find on a page full of game icons.
### Store banners and images
Make sure to use impactful and exciting art for your game. It is probably worth spending some money to work with an artist to create art that attracts players.
## Save games
### Save games on desktop, mobile and web
Save games and other saved state can be stored using Defold API function `sys.save(filename, data)` and loaded using `sys.load(filename)`. You can use `sys.get_save_file(application_id, name)` to get a path to an operating system specific location where files can be saved, typically in the logged in users home folder.
### Save games on console
Using `sys.get_save_file()` and `sys.save()` works well on most platforms, but on consoles it is recommended to take a different approach. Console platforms typically associate a user with each connected controller, and as such save games, achievements and other features should be associated with their respective user.
The gamepad input events will contain a user id which can be used to associate the actions of a controller with a user on the console.
The console platforms and their native extensions will expose platform specific API functions to save and load data associated with a specific user. Use these APIs when saving and loading on console.
Console platform APIs for file operations are typically asynchronous. When developing a cross platform game targeted for console it is recommended to design your game such that all file operations are asynchronous, regardless of platform. Example:
```lua
local function save_game(data, user_id, cb)
if console then
local filename = "savegame"
consoleapi.save(user_id, filename, data, cb)
else
local filename = sys.get_save_file("mygame", "savegame" .. user_id)
local success = sys.save(filename, data)
cb(success)
end
end
```
## Build artifacts
Make sure to [generate debug symbols](#manuals:debugging-native-code) for each released version so that you can debug crashes. Store these together with the application bundle.
Make sure to store the `manifest.private.der` and `manifest.public.der` files which are generated in the project root during the first bundle. These are the public and private signing keys for the game archive and archive manifest. You need these files in order to recreate a previous build of your game.
## Application optimizations
Read the [Optimization manual](#manuals:optimizations) on how to optimize your application for performance, size, memory and battery usage.
## Performance
Always test on target hardware! Check game performance and optimize if needed. Use the [profiler](#manuals:profiling) to find bottlenecks in the code.
## Screen resolution and refresh rate
For platforms with a fixed orientation and screen resolution: Check that the game works on the target platform screen resolution and aspect ratio. For platforms with variable screen resolution and aspect ratio: Check that the game works on a variety of screen resolutions and aspect ratios. Take into consideration what kind of [view projection](#manuals:render) that is used in the render script and camera.
For mobile platforms either lock the screen orientation in *game.project* or make sure the game works in both landscape and portrait mode.
* **Display sizes** - Is everything looking good on a larger or smaller screen than the default width and height set in *game.project*?
* The projection used in the render script and the layouts used in the gui will play a role here.
* **Aspect ratios** - Is everything looking good on a screen with a different aspect ratio than the default aspect ratio from the width and height set in *game.project*?
* The projection used in the render script and the layouts used in the gui will play a role here.
* **Refresh rate** - Is the game running well on a screen with a higher refresh rate than 60 Hz?
* The vsync and swap interval in the Display section of *game.project*
## Mobile phones and notch and hole punch cameras
It has become increasingly popular to use a small lens cut-out on the display screen to fit in the front camera and sensors (also known as a notch or hole punch camera). When porting a game to mobile it is recommended to make sure that no critical information is positioned where a notch (center of upper screen edge) or hole-punch (top left screen area) is typically found. It is also possible to use the [Safe Area extension](/extension-safearea) to restrict the game view to the area outside any notch or hole-punch camera.
## Platform specific guidelines
### Android
Make sure to store your [keystore](#manuals:android) somewhere safe so that you can update your game.
### Consoles
Store the complete bundle for each version. You will need these files if you want to patch the game.
### Nintendo Switch
Integrate platform specific code - For Nintendo Switch there's a separate extension with some helper functionality for user selection etc.
Defold for Nintendo Switch uses Vulkan as the graphics backend - Make sure to test the game using the [Vulkan graphics backend](https://github.com/defold/extension-vulkan).
### PlayStation®4
Integrate platform specific code - For PlayStation®4 there's a separate extension with some helper functionality for user selection etc.
### HTML5
Playing web games on mobile phones is increasing in popularity - Try to make the game run well in a mobile browser as well! It is also important to keep in mind that web games are expected to load fast! - Make sure to optimize the game for size. Also consider the loading experience in general to not lose players unnecessarily.
In 2018 browsers introduced an autoplay policy for sounds which prevent games and other web content from playing sounds until a user interaction event (touch, button, gamepad etc) has taken place. It is important to take this into account when porting to HTML5 and only start playing sounds and music upon first user interaction. Attempts to play sounds before any user interaction will be logged as an error in the browser developer console but will not impact the game.
Also make sure to pause any playing sounds if the game is showing ads.
# The mobile development app {#manuals:dev-app}
The development app allows you to push content to it over wifi. This will greatly reduce iteration time as you don't have to bundle and install every time you wish to test your changes. You install the development app on your device(s), start the app and then select the device as a build target from the editor.
## Installing a development app
Any iOS or Android application that is bundled in Debug mode will be able to act as a development app. In fact, this is the recommended solution as the development app will have the correct project settings and uses the same [native extensions](#manuals:extensions) as the project you are working on.
Starting with Defold 1.4.0 it is possible to bundle a Debug variant of your project without any content. Use this option to create a version of your application with native extensions, suitable for iterative development as described in this manual.
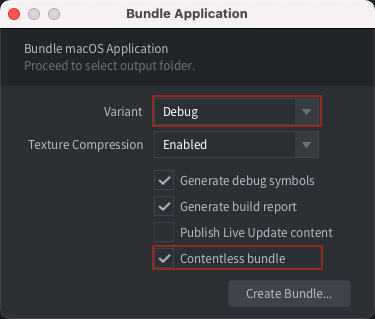
### Installing on iOS
Follow the [instructions in the iOS manual](#manuals:ios) to bundle for iOS. Make sure to select Debug as variant!
### Installing on Android
Follow the [instructions in the Android manual](#manuals:android) to bundle for Android.
## Launching your game
To launch your game on your device, the development app and editor must be able to connect, over the same wifi network or using USB (see below).
1. Make sure the editor is up and running.
2. Launch the development app on the device.
3. Select your device under Project ▸ Targets in the editor.
4. Select Project ▸ Build to run the game. It may take a while for the game to start since the game content is streamed to the device over the network.
5. While the game is running, you can use [hot reloading](#manuals:hot-reload) as usual.
### Connecting to an iOS device using USB on Windows
When connecting over USB on Windows to a development app running on an iOS device you first need to [install iTunes](https://www.apple.com/lae/itunes/download/). When iTunes is installed you also need to [enable Personal Hotspot](https://support.apple.com/en-us/HT204023) on your iOS device from the Settings menu. If you see an alert that says tap "Trust This Computer?" tap Trust. The device should now show up under Project ▸ Targets when the development app is running.
### Connecting to an iOS device using USB on Linux
On Linux you need to enable Personal Hotspot on your device from the Settings menu when connected using USB. If you see an alert that says tap "Trust This Computer?" tap Trust. The device should now show up under Project ▸ Targets when the development app is running.
### Connecting to an iOS device using USB on macOS
On newer iOS versions the device will automatically open a new ethernet interface between the device and computer when connected using USB on macOS. The device should show up under Project ▸ Targets when the development app is running.
On older iOS versions you need to enable Personal Hotspot on your device from the Settings menu when connected using USB on macOS. If you see an alert that says tap "Trust This Computer?" tap Trust. The device should now show up under Project ▸ Targets when the development app is running.
### Connecting to an Android device using USB on macOS
On macOS it is possible to connect over USB to a running development app on an Android device when the device is in USB Tethering Mode. On macOS you need to install a third-party driver such as [HoRNDIS](https://joshuawise.com/horndis#available_versions). When HoRNDIS is installed you also need to allow it to run via the Security & Privacy settings. Once USB Tethering is enabled the device will show up under Project ▸ Targets when the development app is running.
### Connecting to an Android device using USB on Windows or Linux
On Windows and Linux it is possible to connect over USB to a running development app on an Android device when the device is in USB Tethering Mode. Once USB Tethering is enabled the device will show up under Project ▸ Targets when the development app is running.
## Troubleshooting
Unable to download application
: Make sure the your device UDID is included in the mobile provisioning that was used for signing the app.
Your device does not appear in the Targets menu
: Make sure that your device is connected to the same wifi network as your computer. Make sure the development app is built in Debug mode.
The game does not start with a message about mismatching versions
: This happens when you have upgraded the editor to the latest version. You need to build and install a new version.
# Version control {#manuals:version-control}
Defold is built intended for small teams that work in intense collaboration to create games. Team members can work in parallel on the same content with very little friction. Defold has built-in support for version control using [Git](https://git-scm.com). Git is designed for distributed collaborative work and it is an extremely powerful tool that allows for a wide range of workflows.
## Changed files
When you save changes in your local working copy, Defold tracks all changes in the *Changed Files* editor pane, listing each file that has either been added, deleted or modified.
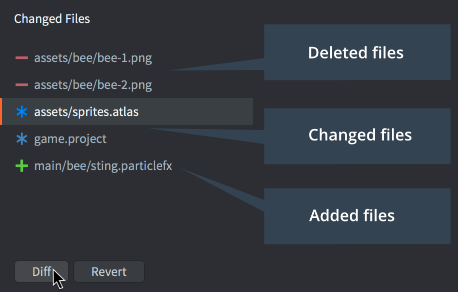
Select a file in the list and click Diff to view the changes that you have done to the file or Revert to undo all changes and restore the file to the state it had after the last synchronization.
## Git
Git is built primarily to handle source code and text files and stores those types of files with a very low footprint. Only the changes between each version are stored, which means that you can keep an extensive history of changes to all your project files to a relatively small cost. Binary files such as image or sound files, however, does not benefit from Git's storage scheme. Each new version you check in and synchronize takes about the same space. That is usually not a major issue with final project assets (JPEG or PNG images, OGG sound files etc) but it can quickly become an issue with working project files (PSD files, Protools projects etc). These types of files often grow very large since you usually work in much higher resolution than the target assets. It is generally considered best to avoid putting large working files under the control of Git and instead use a separate storage and backup solution for those.
There are many ways you can use Git in a team workflow. The one Defold uses is as follows. When you synchronize, the following happens:
1. Any local changes are stashed so they can be restored if something fails later in the sync process.
2. Server changes are pulled.
3. The stash is applied (the local changes are restored), this may result in merge conflicts that need to be resolved.
4. The user gets the option to commit any local file changes.
5. If there are local commits, the user may choose to push these to the server. Again, it is possible that this leads to conflicts that need to be resolved.
If you prefer a different workflow you can run Git from command line or through a third party application to perform pulls, pushes, commits and merges, working on several branches and so on.
# Working offline {#manuals:working-offline}
Defold does in most cases not require an internet connection to work. There is however a few situations when an internet connection is needed:
* Automatic updates
* Reporting issues
* Fetching dependencies
* Building native extensions
## Automatic updates
Defold will check periodically if new updates exist. Defold update checks are made to the [official download site](https://d.defold.com). If an update is detected it will automatically be downloaded.
If you only have an internet connection for limited periods of time and don't wish to wait for the automatic update to trigger you can manually download new versions of Defold from the [official download site](https://d.defold.com).
## Reporting issues
If a problem is detected in the editor you get a choice to report the issue to the Defold issue tracker. The issue tracker is [hosted on GitHub](https://www.github.com/defold/editor2-issues) which means you need an internet connection to report the issue.
If you encounter an issue while offline you can manually report it later using the [Report Issue option in the Help menu](#manuals:getting-help) of the editor.
## Fetching dependencies
Defold supports a system where developers can share code and assets through something called [Library Projects](#manuals:libraries). Libraries are zip files that can be hosted anywhere online. You typically find Defold library projects on GitHub and other online source code repositories.
A project can add a library as a [project dependency in the project settings](#manuals:project-settings). Dependencies are downloaded/updated when the project is opened or any time when the *Fetch Libraries* option is selected from the *Project* menu.
If you need to work offline and in multiple projects you can download dependencies in advance and then share them using a local server. Dependencies on GitHub are usually available from the Releases tab of the project repository:
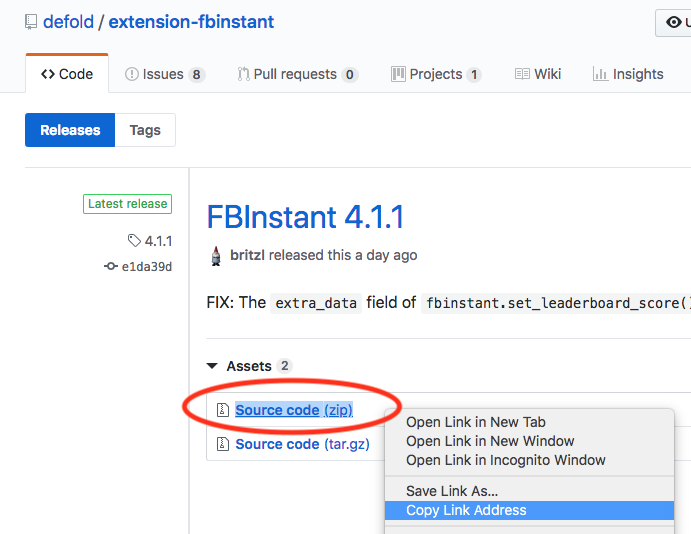
You can use Python to easily create a local server:
python -m SimpleHTTPServer
This will create a server in the current directory serving files on `localhost:8000`. If the current directory contains downloaded dependencies you can add these to your *game.project* file:
http://localhost:8000/extension-fbinstant-4.1.1.zip
## Building native extensions
Defold supports a system where developers can add native code to extend the functionality of the engine through a system called [Native Extensions](#manuals:extensions). Defold provides a zero setup entry point to native extensions with a cloud based build solution.
The first time you build a project and the project contains a native extension the native code will get compiled into a custom Defold game engine on the Defold build servers and sent back to your PC. The custom engine will be cached in your project and reused for subsequent builds as long as you do not add, remove or change any native extensions and as long as you do not update the editor.
If you need to work offline and your project contains native extensions you must make sure to build successfully at least once to ensure that your project contains a cached copy of the custom engine.
# Debugging native code {#manuals:debugging-native-code}
Defold is well tested and should very rarely crash under normal circumstances. It is however impossible to guarantee that it will never crash, especially if your game uses native extensions. If you run into problems with crashes or native code that doesn't behave as expected there are a number of different ways forward:
* Use a debugger to step through the code
* Use print debugging
* Analyze a crash log
* Symbolicate a callstack
## Use a debugger
The most common way is to run the code via a `debugger`. It let's you step through the code, set `breakpoints` and it will stop the execution if you get a crash.
There are several debuggers for each platform.
* Visual studio - Windows
* VSCode - Windows, macOS, Linux
* Android Studio - Windows, macOS, Linux
* Xcode - macOS
* WinDBG - Windows
* lldb / gdb - macOS, Linux, (Windows)
* ios-deploy - macOS
Each tool can debug certain platforms:
* Visual studio - Windows + platforms supporting gdbserver (E.g. Linux/Android)
* VSCode - Windows, macOS (lldb), Linux (lldb/gdb) + platforms supporting gdbserver
* Xcode - macOS, iOS ([learn more](#manuals:debugging-native-code-ios))
* Android Studio - Android ([learn more](#manuals:debugging-native-code-android))
* WinDBG - Windows
* lldb/gdb - macOS, Linux, (iOS)
* ios-deploy - iOS (via lldb)
## Use print debugging
The simplest way to debug your native code is to use [print debugging](http://en.wikipedia.org/wiki/Debugging#Techniques). Use the functions in the [`dmLog` namespace](https://defold.com/ref/stable/dmLog/) to watch variables or indicate the flow of execution. Using any of the log functions will print to the *Console* view in the editor and to the [game log](#manuals:debugging-game-and-system-logs).
## Analyze a crash log
The Defold engine saves a `_crash` file if it does a hard crash. The crash file will contain information about the system as well as the crash. The [game log output](#manuals:debugging-game-and-system-logs) will write where the crash file is located (it varies depending on operating system, device and application).
You can use the [crash module](https://www.defold.com/ref/crash/) to read this file in the subsequent session. It is recommended that you read the file, gather the information, print it to the console and send it to an [analytics services](https://defold.com/tags/stars/analytics/) that supports collection of crash logs.
On Windows a `_crash.dmp` file is also generated. This file is useful when debugging a crash.
### Getting the crash log from a device
If a crash happens on a mobile device you can chose to download the crash file to your own computer and parse it locally.
#### Android
If the app is [debuggable](#manuals:project-settings), you can get the crash log using the [Android Debug Bridge (ADB) tool](https://developer.android.com/studio/command-line/adb.html) and the `adb shell` command:
```
$ adb shell "run-as com.defold.example sh -c 'cat /data/data/com.defold.example/files/_crash'" > ./_crash
```
#### iOS
In iTunes, you can view/download an apps container.
In the `Xcode -> Devices` window, you can also select the crash logs
## Symbolicate a callstack
If you get a callstack from either a `_crash` file or a [log file](#manuals:debugging-game-and-system-logs), you can symbolicate it. This means translating each address in the callstack into a filename and line number, which in turn helps when finding out the root cause.
It is important that you match the correct engine with the callstack, otherwise it's very likely to send you debugging the incorrect things! Use the flag [`--with-symbols`](#manuals:bob) when bundling with [bob](#manuals:bob) or check the "Generate debug symbols" checkbox from the bundle dialog in the editor:
* iOS - the `dmengine.dSYM.zip` folder in `build/arm64-ios` contains the debug symbols for iOS builds.
* macOS - the `dmengine.dSYM.zip` folder in `build/x86_64-macos` contains the debug symbols for macOS builds.
* Android - the `projecttitle.apk.symbols/lib/` bundle output folder contains the debug symbols for the target architectures.
* Linux - the executable contain the debug symbols.
* Windows - the `dmengine.pdb` file in `build/x86_64-win32` contains the debug symbols for Windows builds.
* HTML5 - the `dmengine.js.symbols` file in `build/js-web` or `build/wasm-web` contains the debug symbols for HTML5 builds.
It is very important that your save the debug symbols somewhere for each public release you make of your game and that you know which release the debug symbols belong to. You will not be able to debug any native crashes if you do not have the debug symbols! Also, you should keep an unstripped version of the engine. This allows for the best symbolication of the callstack.
### Uploading symbols to Google Play
You can [upload the debug symbols to Google Play](https://developer.android.com/studio/build/shrink-code#android_gradle_plugin_version_40_or_earlier_and_other_build_systems) so that any crashes logged in Google Play will show symbolicated call stacks. Zip the contents of the `projecttitle.apk.symbols/lib/` bundle output folder. The folder includes one or more sub folders with architecture names such as `arm64-v8a` and `armeabi-v7a`.
### Symbolicate an Android callstack
1. Get the engine from your build folder
```sh
$ ls
Console/on-screen logging only shows information in Debug builds. In Release builds the console log is empty, but you can enable file logging in Release by setting the project setting "Write Log File" to "Always". See details below.
## Reading the game log from the editor
When you run your game locally from the editor or connected to the [mobile development app](#manuals:dev-app) all of the output will be shown in the console pane of the editor:
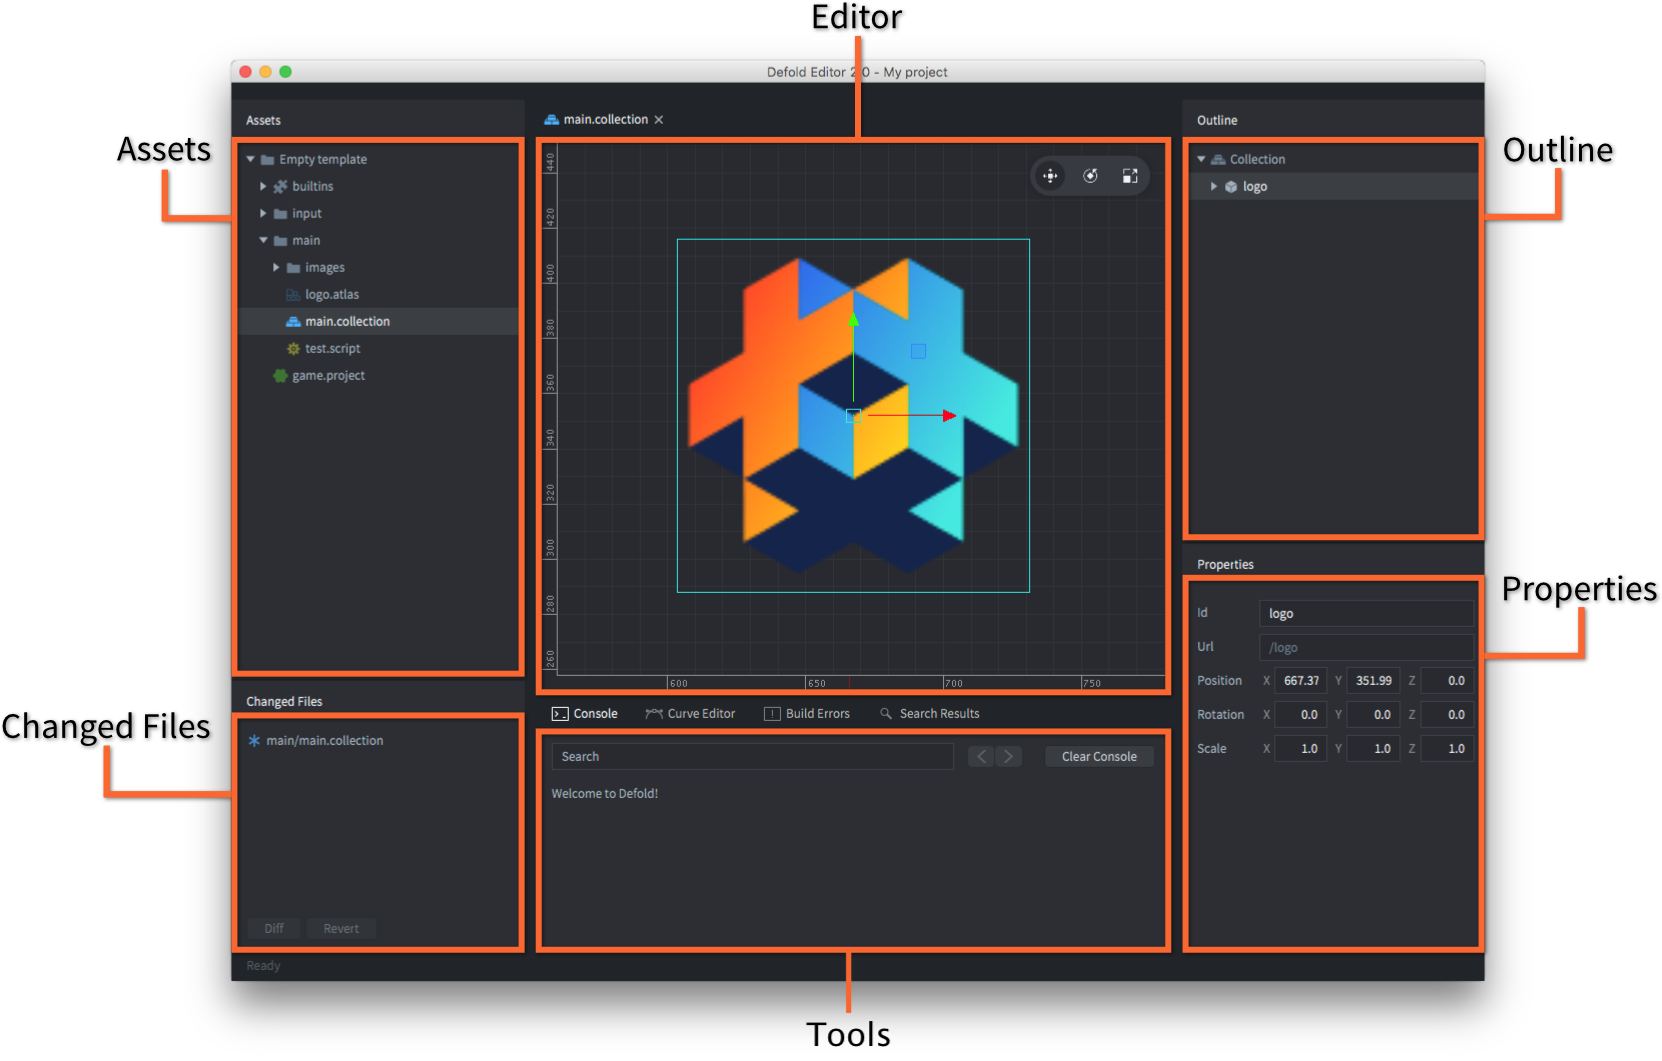
## Reading the game log from the terminal
When you run a Defold game from the terminal the log will show in the terminal window itself. On Windows and Linux you type the name of the executable in the terminal to start the game. On macOS you need to launch the engine from within the .app file:
```
$ > ./mygame.app/Contents/MacOS/mygame
```
## Reading game and system logs using platform specific tools
### HTML5
Logs can be read using the developer tools provided by most browsers.
* [Chrome](https://developers.google.com/web/tools/chrome-devtools/console) - Menu > More Tools > Developer Tools
* [Firefox](https://developer.mozilla.org/en-US/docs/Tools/Browser_Console) - Tools > Web Developer > Web Console
* [Edge](https://docs.microsoft.com/en-us/microsoft-edge/devtools-guide/console)
* [Safari](https://support.apple.com/guide/safari-developer/log-messages-with-the-console-dev4e7dedc90/mac) - Develop > Show JavaScript Console
### Android
You can use the Android Debug Bridge (ADB) tool to view the game and system log.
The `adb` command line tool is an easy to use and versatile program that is used to interact with Android devices. You can download and install `adb` as part of the Android SDK Platform-Tools, for Mac, Linux or Windows.
Download the Android SDK Platform-Tools from: https://developer.android.com/studio/releases/platform-tools. You find the *adb* tool in */platform-tools/*. Alternatively, platform specific packages can be installed through respective package managers.
On Ubuntu Linux:
```
$ sudo apt-get install android-tools-adb
```
On Fedora 18/19:
```
$ sudo yum install android-tools
```
On macOS (Homebrew)
```
$ brew cask install android-platform-tools
```
You can verify that `adb` works by connecting your Android device to your computer via USB and issue the following command:
```
$ adb devices
List of devices attached
31002535c90ef000 device
```
If your device does not show up, verify that you have enabled *USB debugging* on the Android device. Open the device *Settings* and look for *Developer options* (or *Development*).
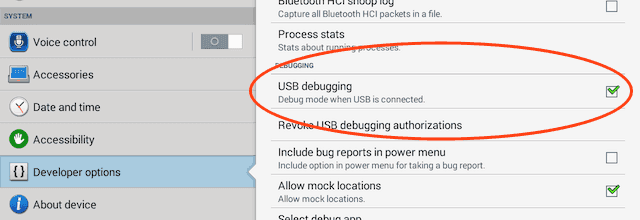
Once installed and setup, connect your device with USB, open a terminal and run:
```txt
$ cd
According to a 2017 study it was shown that "For every 6 MB increase to an APK's size, we see a decrease in the install conversion rate of 1%." ([source](https://medium.com/googleplaydev/shrinking-apks-growing-installs-5d3fcba23ce2))
### HTML5
Poki and many other web game platforms recommend that the initial download should be no larger than 5 MB.
Facebook has a recommendation that a Facebook Instant Game should start in less than 5 seconds and preferably less than 3 seconds. What this means for actual application size is not clearly defined but we are talking size in the range of up to 20 MB.
Playable ads are usually limited to between 2 and 5 MB depending on the ad network.
## Size optimization strategies
You can optimize the application size in two ways; by reducing the size of the engine and/or by reducing the size of the game assets.
To get a better understanding of what makes up the size of your application you can [generate a build report](#manuals:bundling) when bundling. It is quite common that sounds and graphics is what takes up the bulk of the size of any game.
Defold will create a dependency tree when building and bundling your application. The build system will start from the bootstrap collection specified in the *game.project* file and inspect every referenced collection, game object and component to build a list of the assets that are in use. It is only these assets that will get included in the final application bundle. Anything not directly referenced will get excluded. While it is good to know that unused assets will not be included you as a developer still needs to consider what goes into the final application and the size of the individual assets and the total size of the application bundle.
## Optimize engine size
A quick way to reduce the engine size is to remove functionality in the engine that you do not use. This is done [application manifest file](#manuals:app-manifest) where it is possible to remove engine components that you do not need. Examples:
* Physics - If your game does not make use of Box2D or Bullet3D physics then it is strongly advised to remove the physics engines
* LiveUpdate - If your game does not use LiveUpdate it can be removed
* Image loaded - If your game does not manually load and decode images using `image.load()`
* BasisU - If your game has few textures, compare the build size without BasisU (removed via app manifest) and without texture compression versus a build with BasisU and compressed textures. For games with limited textures, it might be more beneficial to reduce the binary size and skip texture compression. Additionally, not using the transcoder can lower the amount of memory required to run your game.
## Optimize asset size
The biggest wins in terms of asset size optimizations are usually gained by reducing the size of sounds and textures.
### Optimize sounds
Defold supports these formats:
* .wav
* .ogg
* .opus
Sounds files must be using 16-bit samples.
Our sound decoders will up/downscale sounds sample rates as needed for the current sound device.
Shorter sounds like sound effects are often compressed harder, whereas music files have less compression.
No compression is done by Defold, so the developer will have to handle that specifically for each audio format.
You can edit the sounds in an external sound editor software (or command line using e.g. [ffmpeg](https://ffmpeg.org)) to reduce the quality or convert between formats. Also consider converting sounds from stereo to mono to further reduce the size of the content.
### Optimize textures
You have several options when it comes to optimizing the textures used by your game, but the first thing to do is to check the size of the images that gets added to an atlas or used as a tilesource. You should never use a larger size on the images than is actually needed in your game. Importing large images and scaling them down to the appropriate size is a waste of texture memory and should be avoided. Start by adjusting the size of the images using external image editing software to the actual size needed in your game. For things such as background images it might also be ok to use a small image and scale it up to the desired size. Once you have the images down to the correct size and added to atlases or used in tilesources you also need to consider the size of the atlases themselves. The maximum atlas size that can be used varies between platforms and graphics hardware.
[This forum posts](https://forum.defold.com/t/texture-management-in-defold/8921/17?u=britzl) suggests several tips on how to resize multiple images using scripts or third party software.
* Max texture size on HTML5 reported to the [Web3D Survey project](https://web3dsurvey.com/webgl/parameters/MAX_TEXTURE_SIZE)
* Max texture size on iOS:
* iPad: 2048x2048
* iPhone 4: 2048x2048
* iPad 2, 3, Mini, Air, Pro: 4096x4096
* iPhone 4s, 5, 6+, 6s: 4096x4096
* Max texture size on Android varies greatly but in general all reasonably new devices support at least 4096x4096.
If an atlas is too large you need to either split it into several smaller atlases, use multi-page atlases or scale the entire atlas using a texture profile. The texture profile system in Defold allows you to not only scale entire atlases but also to apply compression algorithms to reduce the size of the atlas on disk. You can [read more about texture profiles in the manual](#manuals:texture-profiles). If you don’t know what to use, try to start with these settings as a starting point for further customizations:
* mipmaps: false
* premultiply_alpha: true
* format: TEXTURE_FORMAT_RGBA
* compression_level: NORMAL
* compression_type: COMPRESSION_TYPE_BASIS_UASTC
You can read more about how to optimize and manage textures in [this forum post](https://forum.defold.com/t/texture-management-in-defold/8921).
### Optimize fonts
The size of your fonts will be smaller if you specify what symbols you are going to use and set this in [Characters](#manuals:font) instead of using the All Chars checkbox.
### Exclude content for download on demand
Another way of reducing initial application size is to exclude parts of the game content from the application bundle and download it on demand. Defold provides a system called Live Update for excluding content for download on demand.
Excluded content can be anything from entire levels to unlockable characters, skins, weapons or vehicles. If your game has a lot of content, organize the loading process so that the bootstrap collection and the first level collection include the bare minimum resources required for that level. You achieve this by using collection proxies or factories with the "Exclude" checkbox enabled. Split resources according to the player's progress. This approach ensures efficient resource loading and keeps initial memory usage low. Learn more in the [Live Update manual](#manuals:live-update).
## Android specific size optimizations
Android builds must support both 32-bit and 64-bit CPU architectures. When you [bundle for Android](#manuals:android) you can specify which CPU architectures to include:
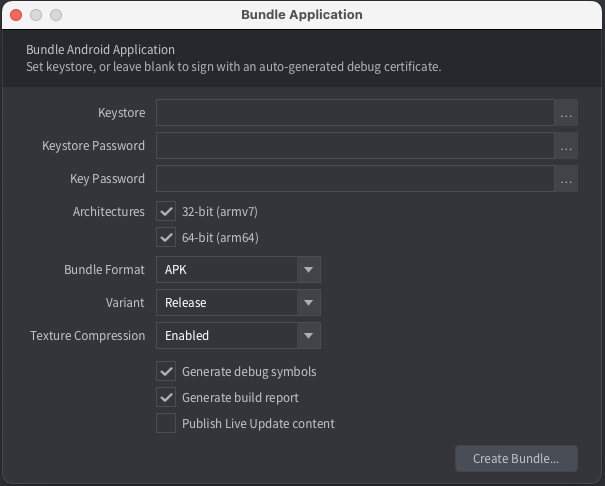
Google Play has support for [multiple APKs](https://developer.android.com/google/play/publishing/multiple-apks) per release of a game, which means that you can reduce the application size by generating two APKs, one per CPU architecture, and uploading both to Google Play.
You can also make use of a combination of [APK Expansion Files](https://developer.android.com/google/play/expansion-files) and [Live Update content](#manuals:live-update) thanks to the [APKX extension in the Asset Portal](https://defold.com/assets/apkx/).
# Optimizing runtime speed {#manuals:optimization-speed}
Before trying to optimize a game with the goal to make it run at a stable high frame rate you need to know where your bottlenecks are. What is actually taking up most of the time in a frame of your game? Is it the rendering? Is it your game logic? Is it the scene graph? To figure this out it is recommended to use the built-in profiling tools. Use the [on-screen or web profiler](#manuals:profiling) to sample the performance of your game and then make a decision if and what to optimize. Once you have a better understanding of what takes time you can start addressing the problems.
## Reduce script execution time
Reducing script execution time is needed if the profiler shows high values for the `Script` scope. As a general rule of thumb you should of course try to run as little code as possible every frame. Running a lot of code in `update()` and `on_input()` every frame is likely to have an impact on your game's performance, especially on low end devices. Some guidelines are:
### Use reactive code patterns
Don't poll for changes if you can get a callback. Don't manually animate something or perform a task that can be handed over to the engine (e.g. `go.animate)()` vs manually animating something).
### Reduce garbage collection
If you create loads of short lived objects such as Lua tables every frame this will eventually trigger the garbage collector of Lua. When this happens it can manifest itself as small hitches/spikes in frame time. Re-use tables where you can and really try to avoid creating Lua tables inside loops and similar constructs if possible.
### Prehash message and action ids
If you do a lot of message handling or have many input events to deal with it is recommended to prehash the strings. Consider this piece of code:
```lua
function on_message(self, message_id, message, sender)
if message_id == hash("message1") then
msg.post(sender, hash("message3"))
elseif message_id == hash("message2") then
msg.post(sender, hash("message4"))
end
end
```
In the above scenario the hashed string would be recreated every time a message is received. This can be improved by creating the hashed strings once and use the hashed versions when handling messages:
```lua
local MESSAGE1 = hash("message1")
local MESSAGE2 = hash("message2")
local MESSAGE3 = hash("message3")
local MESSAGE4 = hash("message4")
function on_message(self, message_id, message, sender)
if message_id == MESSAGE1 then
msg.post(sender, MESSAGE3)
elseif message_id == MESSAGE2 then
msg.post(sender, MESSAGE4)
end
end
```
### Prefer and cache URLs
Message passing or in other ways addressing a game object or component can be done both by providing an id as a string or hash or as a URL. If a string or hash is used it will internally be translated into a URL. It is therefore recommended to cache URLs that are used often, to get the best possible performance out of the system. Consider the following:
```lua
local pos = go.get_position("enemy")
local pos = go.get_position(hash("enemy"))
local pos = go.get_position(msg.url("enemy"))
-- do something with pos
```
In all three cases the position of a game object with id `enemy` would be retrieved. In the first and second case the id (string or hash) would be converted into a URL before being used. This tells us that it's better to cache URLs and use the cached version for the best possible performance:
```lua
function init(self)
self.enemy_url = msg.url("enemy")
end
function update(self, dt)
local pos = go.get_position(self.enemy_url)
-- do something with pos
end
```
## Reduce time it takes to render a frame
Reducing the time it takes to render a frame is needed if the profiler shows high values in the `Render` and `Render Script` scopes. There are several things to consider when trying to increase reduce the time it takes to render a frame:
* Reduce draw calls - Read more about reducing draw calls in [this forum post](https://forum.defold.com/t/draw-calls-and-defold/4674)
* Reduce overdraw
* Reduce shader complexity - Read up on GLSL optimizations in [this Khronos article](https://www.khronos.org/opengl/wiki/GLSL_Optimizations). You can also modify the default shaders used by Defold (found in `builtins/materials`) and reduce shader precision to gain some speed on low end devices. All shaders are using `highp` precision and a change to for instance `mediump` can in some cases improve performance slightly.
## Reduce scene graph complexity
Reducing the scene graph complexity is needed if the profiler shows high values in the `GameObject` scope and more specifically for the `UpdateTransform` sample. Some actions to take:
* Culling - Disable game objects (and their components) if they aren't currently visible. How this is determined depends very much on the type of game. For a 2D game it can be as easy as always disabling game objects that are outside of a rectangular area. You can use a physics trigger to detect this or by partitioning your objects into buckets. Once you know which objects to disable or enable you do this by sending a `disable` or `enable` message to each game object.
## Frustum culling
The render script can automatically ignore rendering of game object component that are outside of a defined bounding box (frustum). Learn more about Frustum Culling in the [Render Pipeline manual](#manuals:render).
# Platform specific optimizations
## Android Device Performance Framework
Android Dynamic Performance Framework is a set of APIs that allow games and to interact more directly with power and thermal systems of Android devices. It is possible to monitor the dynamic behavior on Android systems and optimize game performance at a sustainable level that doesn’t overheat devices. Use the [Android Dynamic Performance Framework extension](https://defold.com/extension-adpf/) to monitor and optimize performance in your Defold game for Android devices.
# Optimize battery usage {#manuals:optimization-battery}
Battery usage is mainly a concern if you are targeting mobile/handheld devices. High CPU or GPU usage will quickly drain battery and overheat the device.
Refer to the manuals on how to [optimize runtime performance](#manuals:optimization-speed) of a game to learn how to reduce CPU and GPU usage.
## Disable accelerometer
If you are creating a mobile game which doesn't make use of the device accelerometer it is recommended to [disable it in *game.project*](#manuals:project-settings) to reduce the number of generated input events.
# Platform specific optimizations
## Android Device Performance Framework
Android Dynamic Performance Framework is a set of APIs that allow games and to interact more directly with power and thermal systems of Android devices. It is possible to monitor the dynamic behavior on Android systems and optimize game performance at a sustainable level that doesn’t overheat devices. Use the [Android Dynamic Performance Framework extension](https://defold.com/extension-adpf/) to monitor and optimize performance in your Defold game for Android devices.
# Optimizing memory usage {#manuals:optimization-memory}
## Texture compression
The use of texture compression will not only reduce the size of resources within your game archive, but compressed textures may also reduce the amount of GPU memory required.
## Dynamic loading
Most game have at least some content that is used infrequently. From a memory usage stand point it does not make sense to have such content loaded in memory at all times, but rather load and unload it when it is needed. This will obviously be a trade-off between having something readily accessible at the cost of runtime memory and loading something at the cost of loading time.
Defold has several different ways of loading content dynamically:
* [Collection proxies](#manuals:collection-proxy)
* [Dynamic collection factories](#manuals:collection-factory)
* [Dynamic factories](#manuals:factory)
* [Live Update](#manuals:live-update)
## Optimize component counters
Defold will allocate memory for components and resources once when a collection is created, to reduce memory fragmentation. The amount of memory that is allocated depends on the configuration of various components counters in *game.project*. Use the [profiler](#manuals:profiling) to get accurate component and resource usage and configure your game to use max values that are closer to the real count of components and resources. This will reduce the amount of memory your game is using (refer to information about component [max count optimizations](#manuals:project-settings)).
## Optimize GUI node count
Optimize GUI node counts by setting the max number of nodes in the GUI file to only what is needed. The `Current Nodes` field of the [GUI component properties](#manuals:gui) will show the number of nodes used by the GUI component.
## Heap size (HTML5)
The heap size of a Defold HTML5 game can be configured from the [`heap_size` field](#manuals:project-settings) in *game.project*. Make sure to optimize memory usage of your game and set a minimal heap size.
For small games, 32 MB is an achievable heap size. For larger games, aim for 64–128 MB. If, for example, you're at 58 MB and further optimization isn't feasible, you can settle on 64 MB without overthinking it. There’s no strict target size — it depends on the game. Just aim for smaller sizes, ideally in steps of powers of two.
To check current heap usage you can launch your game and play the game in the most "resource heavy" level or section and monitor memory usage:
```lua
if html5 then
local mem = tonumber(html5.run("HEAP8.length") / 1024 / 1024)
print(mem)
end
```
You can also open the developer tools of your browser and write the following in the console:
```js
HEAP8.length / 1024 / 1024
```
If the memory usage remains at 32 MB, that's great! If not, follow the steps to [optimize the size of the engine itself and large assets such as sounds and textures](#manuals:optimization-size).
# Profiling {#manuals:profiling}
Defold includes a set of profiling tools that are integrated with the engine and the build pipeline. These are designed to help find problems with performance and memory usage. The built-in profilers are available on debug builds only. The frame profiler that is used in Defold is the [Remotery profiler by Celtoys](https://github.com/Celtoys/Remotery).
## The runtime visual profiler
Debug builds feature a runtime visual profiler that displays live information rendered overlaid on top of the running application:
```lua
function on_reload(self)
-- Toggle the visual profiler on hot reload.
profiler.enable_ui(true)
end
```
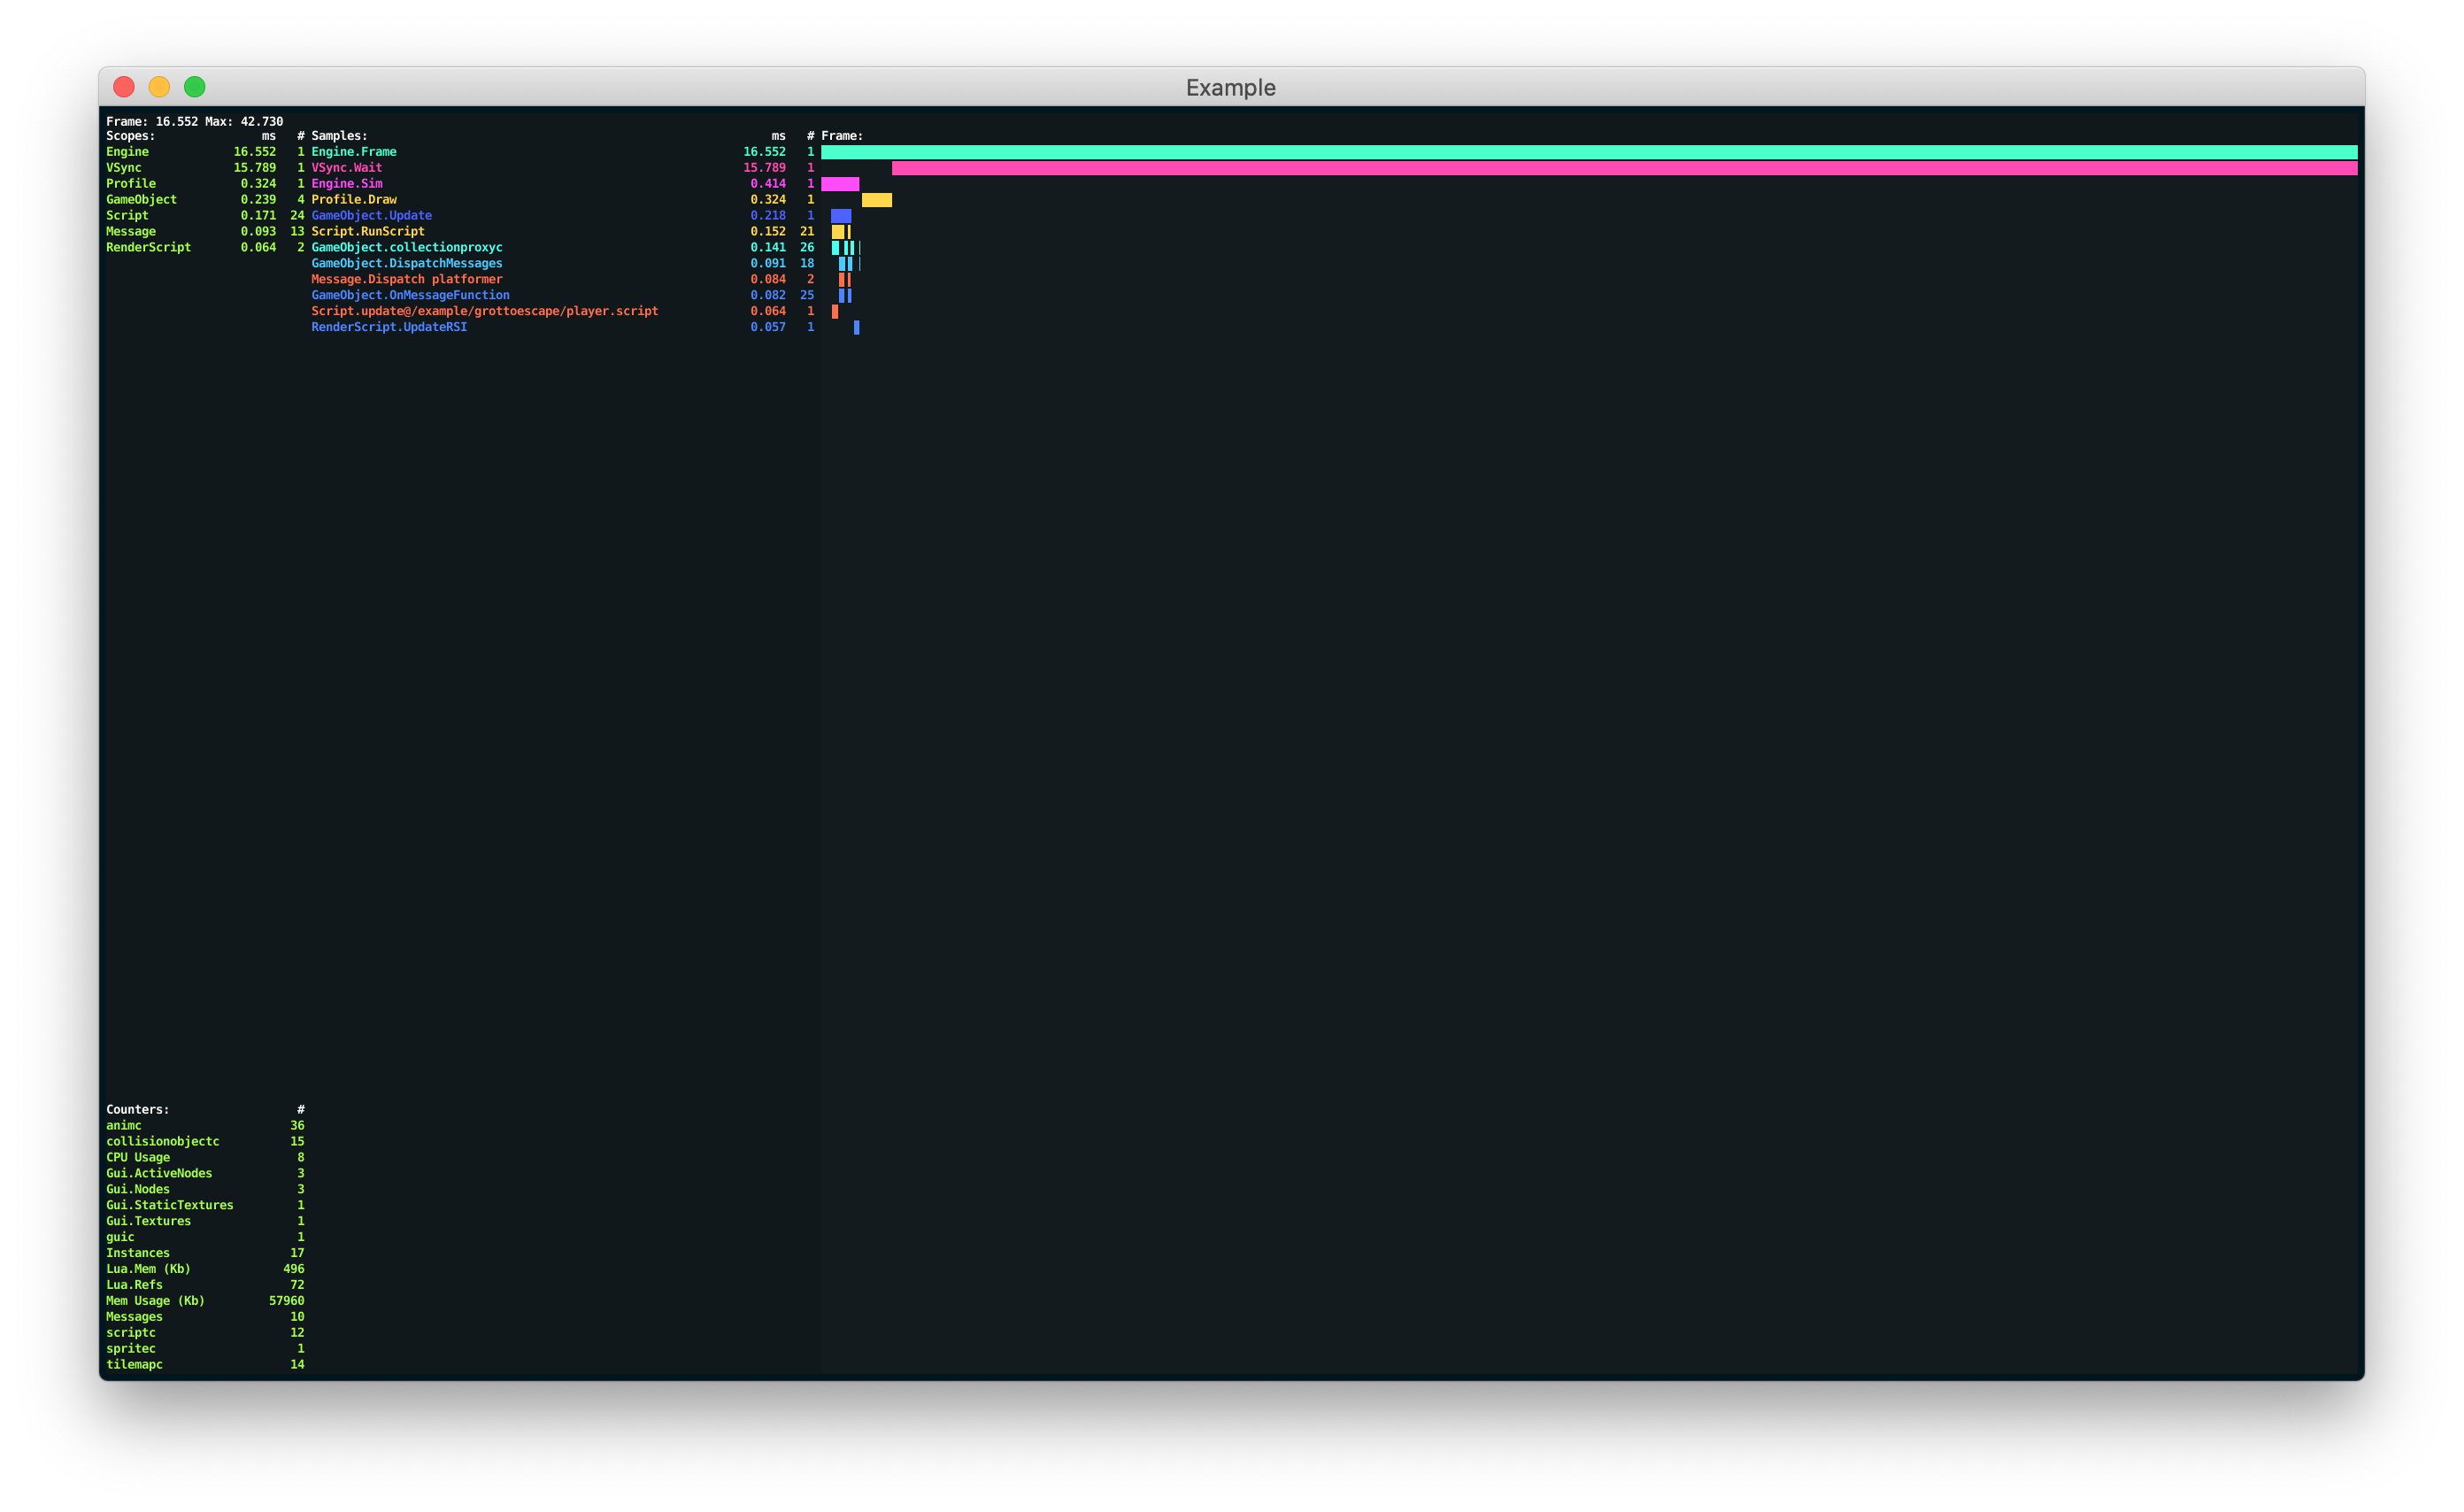
The visual profiler provides a number of different function that can be used to change the way the visual profiler presents its data:
```lua
profiler.set_ui_mode()
profiler.set_ui_view_mode()
profiler.view_recorded_frame()
```
Refer to a the [profiler API reference](https://defold.com/ref/stable/profiler/) for more information about the profiler functions.
## The web profiler
While running a debug build of the game, an interactive web-based profiler can be accessed through a browser.
### Frame profiler
The Frame profiler allows you to sample your game while it is running and analyze individual frames in detail. To access the profiler:
1. Start your game on your target device.
2. Select Debug ▸ Open Web Profiler menu.
The frame profiler is divided into several sections that all give different views into the running game. Press the Pause button in the top right corner to temporarily stop the profiler from updating the views.
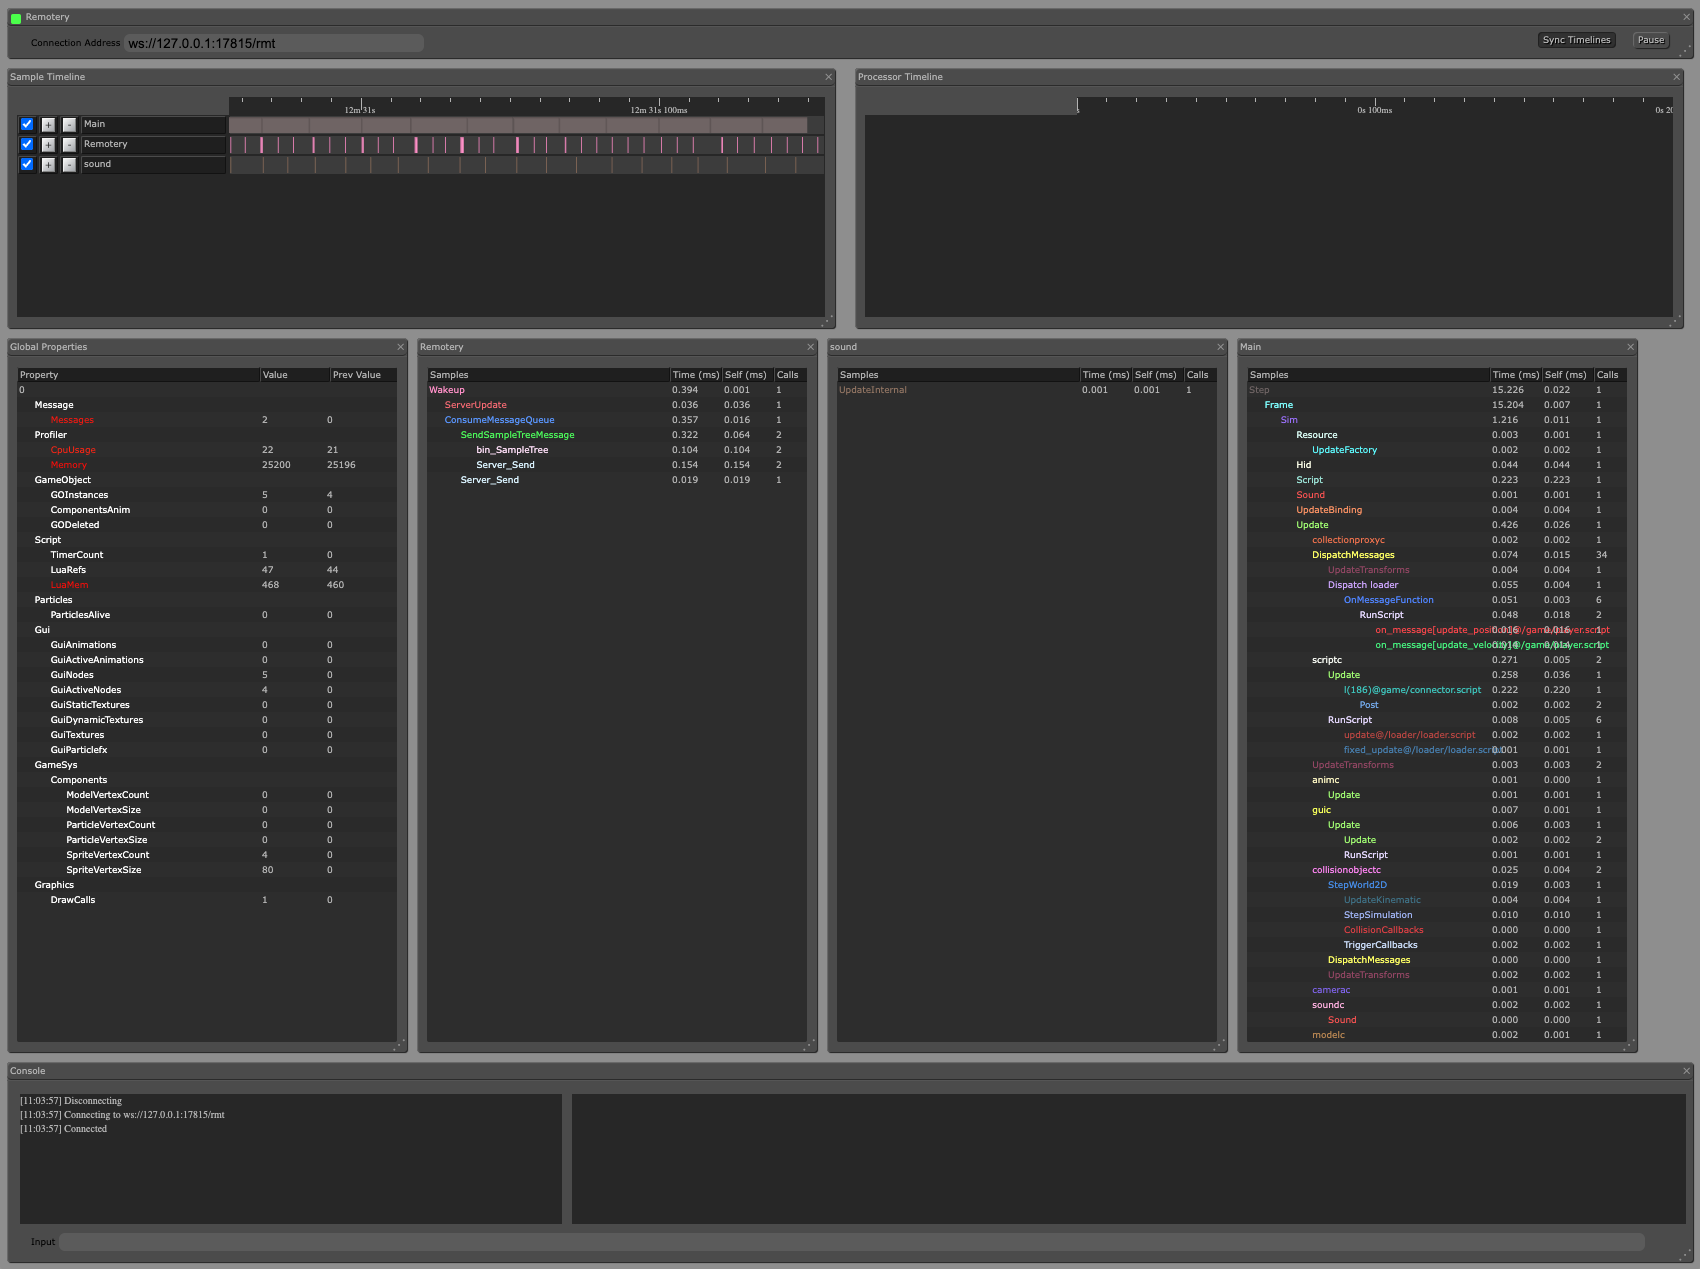
When you use multiple targets simultaneously, you can manually switch between them by changing the Connection Address field at the top of the page to match the Remotery profiler URL shown in the console when the target started:
```
INFO:ENGINE: Defold Engine 1.3.4 (80b1b73)
INFO:DLIB: Initialized Remotery (ws://127.0.0.1:17815/rmt)
INFO:ENGINE: Loading data from: build/default
```
Sample Timeline
: The Sample Timeline will show the frames of data captured in the engine, one horizontal timeline per Thread. Main is the main thread where all of the game logic and most of the engine code is run. Remotery is for the profiler itself and Sound is for the sound mixing and playback thread. You can zoom in and out (using the mouse wheel) and select individual frames to see the details of a frame in the Frame Data view.

Frame Data
: The Frame Data view is a table where all data for the currently selected frame is broken down into detail. You can view how many milliseconds are spent in each engine scope.
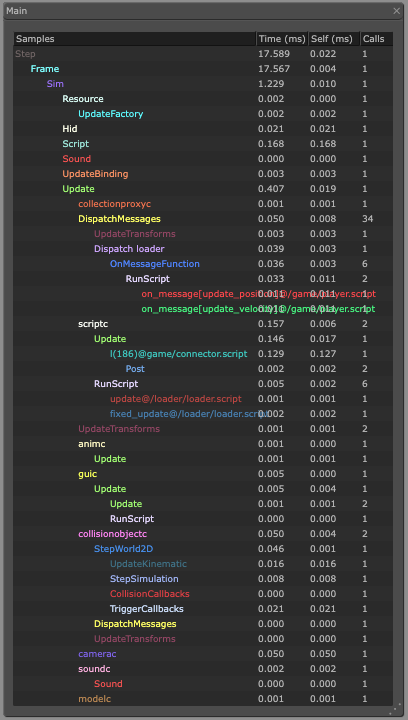
Global Properties
: The Global Properties view shows a table of counters. They make it is easy to, for instance, track the number of draw calls or the number of components of a certain type.
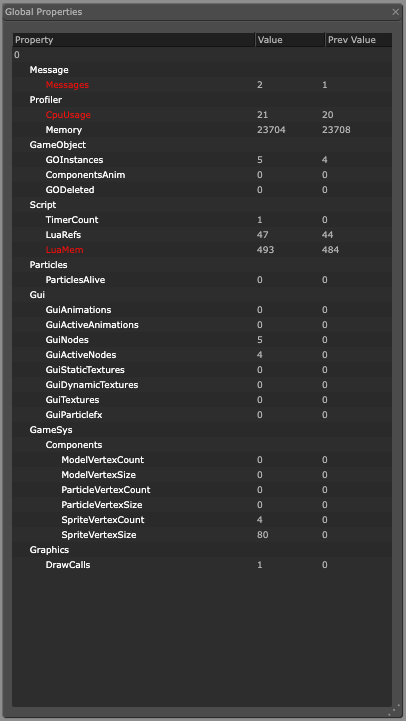
The LuaMem value is the amount of memory in kilobytes used by the Lua VM as reported by the Lua garbage collector. Memory is the amount of memory in kilobytes used by the engine.
### Resource profiler
The Resource profiler allows you to inspect your game while it is running and analyze resource use in detail. To access the profiler:
1. Start your game on your target device.
2. Open a browser and browse to http://localhost:8002
The resource profiler is divided into 2 sections, one showing a hierarchical view of the collections, game objects and components currently instantiated in your game, and the other showing all currently loaded resources.
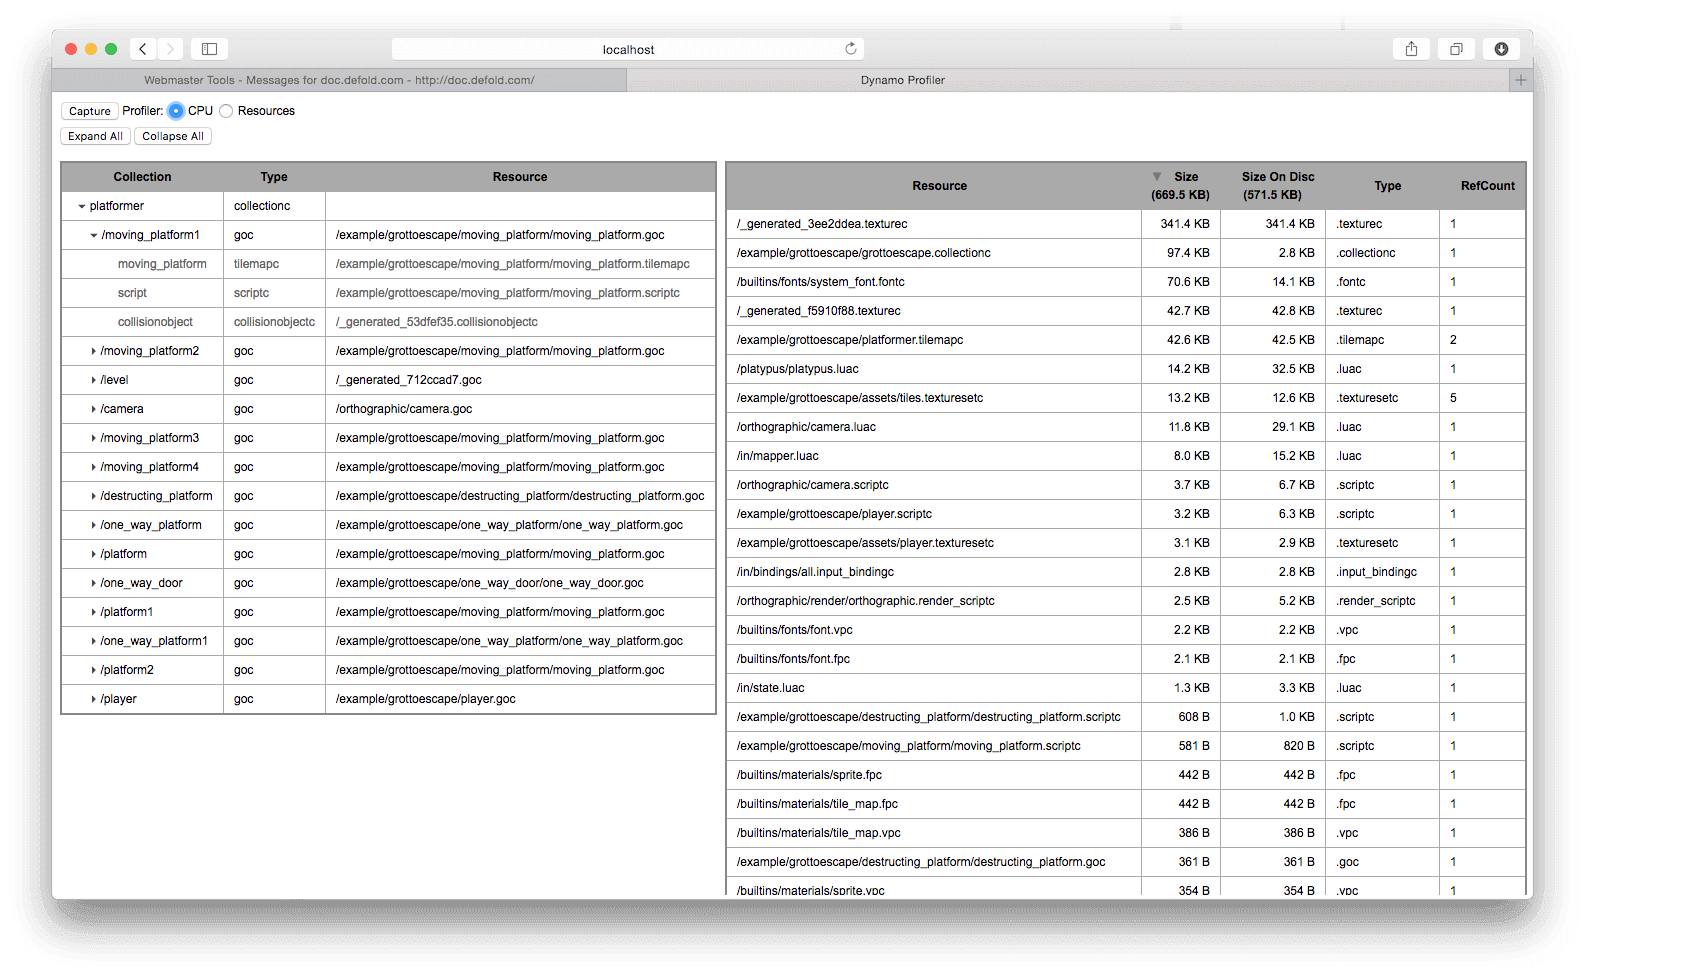
Collection view
: The collection view shows hierarchical list of all game objects and components currently instantiated in the game and from which collection they originate. This is a very useful tool when you need to dig into and understand what you have instanced in your game at any given time and from where the objects originate.
Resources view
: The resources view shows all resources currently loaded into memory, their size and the number of references to each resource. This is useful when optimizing memory usage in your application when you need to understand what is loaded into memory at any given time.
## Build reports
When bundling your game there is an option to create a build report. This is very useful to get a grip on the size of all the assets that are part of your game bundle. Simply check the *Generate build report* checkbox when bundling the game.

The builder will produce a file called "report.html" alongside the game bundle. Open the file in a web browser to inspect the report:
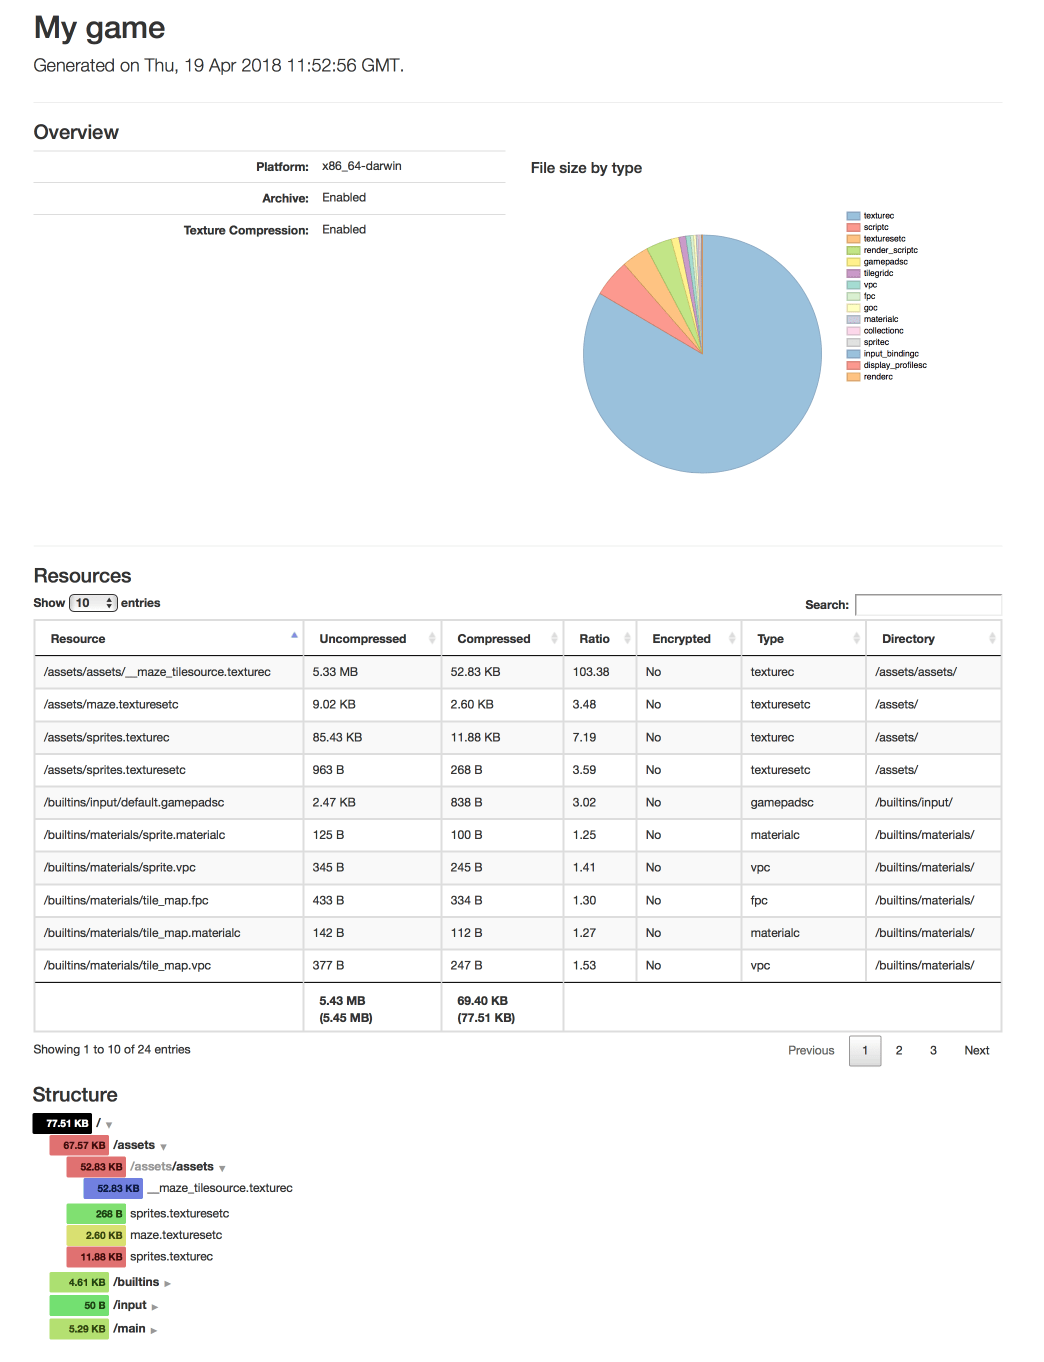
The *Overview* gives an over all visual breakdown of the project size based on resource type.
*Resources* shows a detailed list of resources that you can sort based on size, compression ratio, encryption, type and directory name. Use the "search" field to filter the resource entries displayed.
The *Structure* section shows sizes based on how resources are organized in the project file structure. Entries are color coded from green (light) to blue (heavy) according to the relative size of the file and directory content.
## External tools
In addition to the built-in tools, there is a wide range of free high quality tracing and profiling tools available. Here is a selection:
ProFi (Lua)
: We do not ship any built-in Lua profiler but there are external libraries that are easy enough to use. To find where your scripts spend time, either insert time measures in your code yourself, or use a Lua profiling library like [ProFi](https://github.com/jgrahamc/ProFi).
Note that pure Lua profilers add quite a lot of overhead with each hook they install. For this reason you should be a bit wary of the timing profiles you get from such a tool. Counting profiles are accurate enough though.
Instruments (macOS and iOS)
: This is a performance analyzer and visualizer that is part of Xcode. It allows you to trace and inspect the behavior of one or more apps or processes, examine device specific features (like Wi-Fi and Bluetooth) and much more.
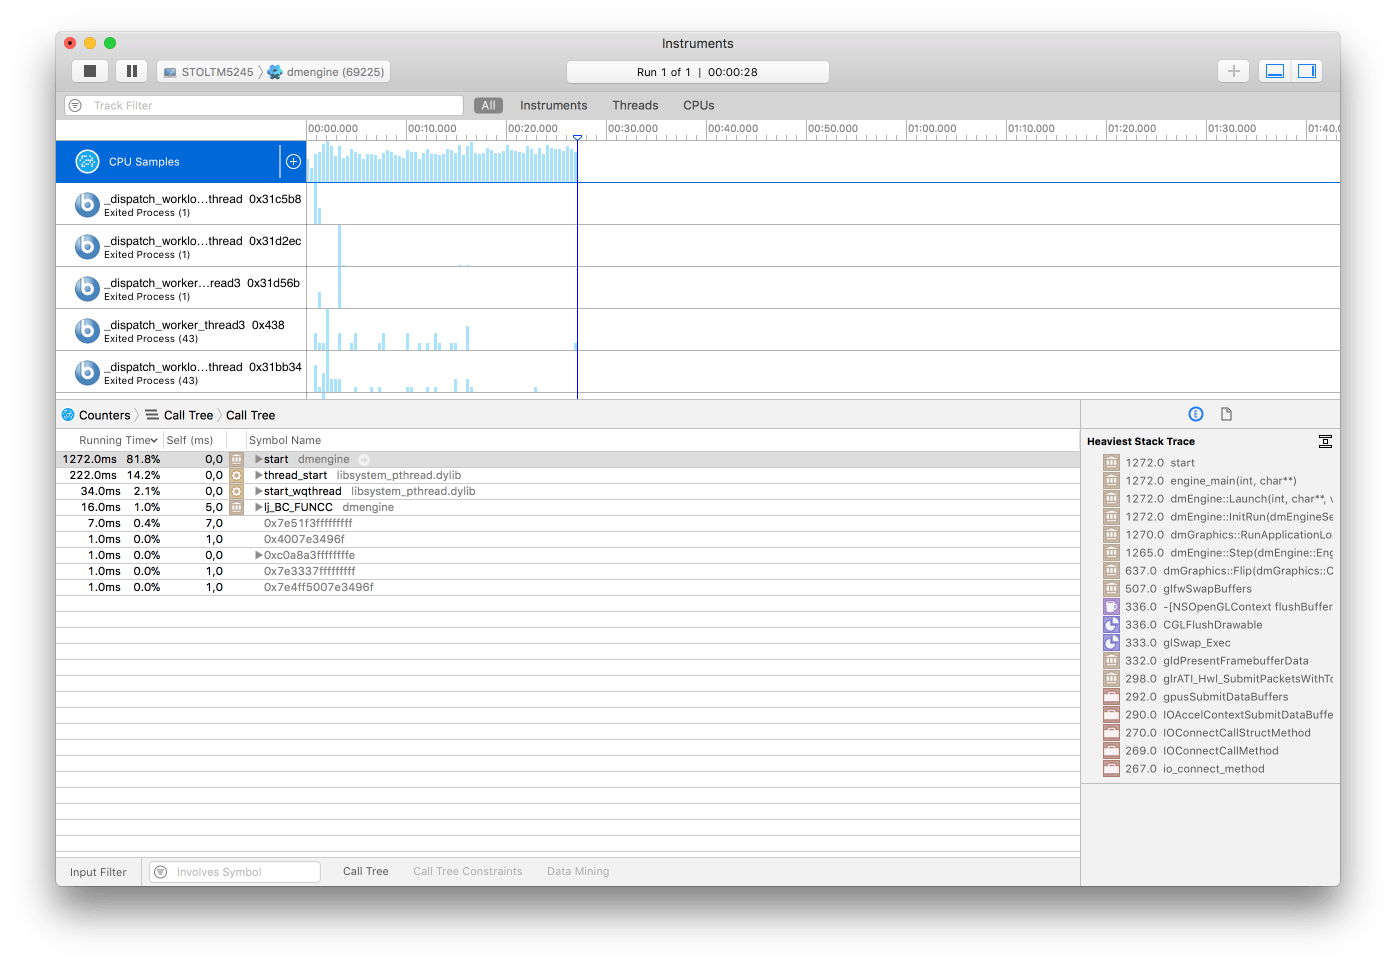
OpenGL profiler (macOS)
: Part of the package "Additional Tools for Xcode" that you can download from Apple (select Xcode ▸ Open Developer Tool ▸ More Developer Tools... in the Xcode menu).
This tool allows you to inspect a running Defold application and see how it uses OpenGL. It allows you to do traces of OpenGL function calls, set breakpoints on OpenGL functions, investigate application resources (textures, programs, shaders etc), look at buffer contents, and check other aspects of the OpenGL state.
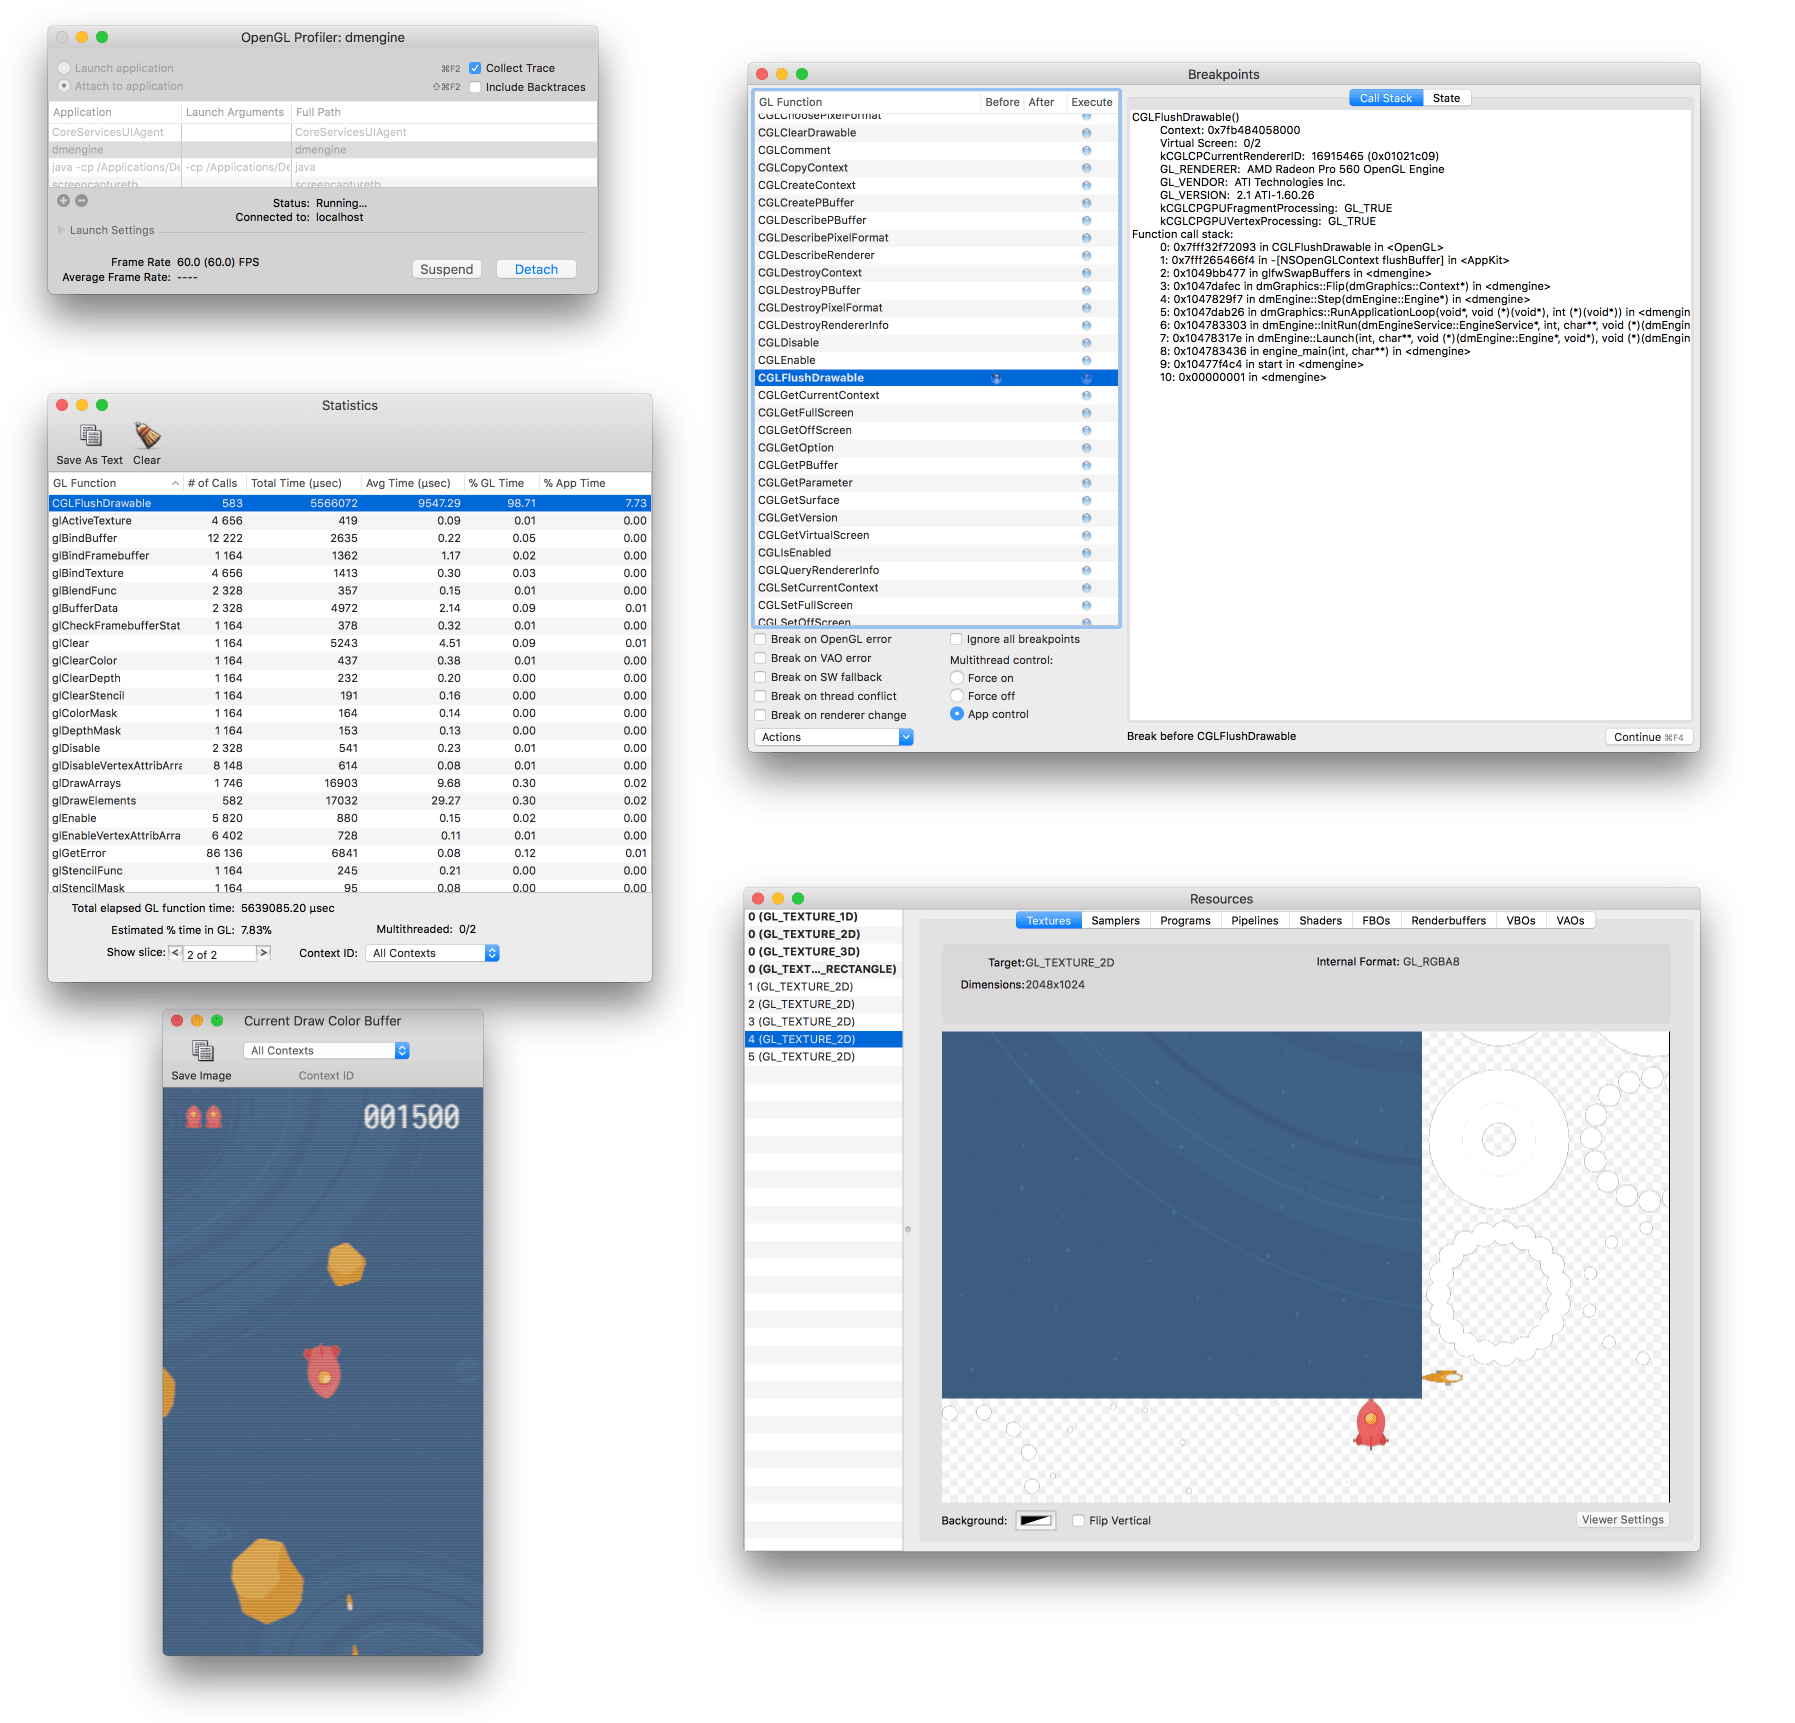
Android Profiler (Android)
: https://developer.android.com/studio/profile/android-profiler.html
A set of profiling tools that captures real-time data of your game's CPU, memory, and network activity. You can perform sample-based method tracing of code execution, capture heap dumps, view memory allocations, and inspect the details of network-transmitted files. Using the tool requires that you set `android:debuggable="true"` in "AndroidManifest.xml".
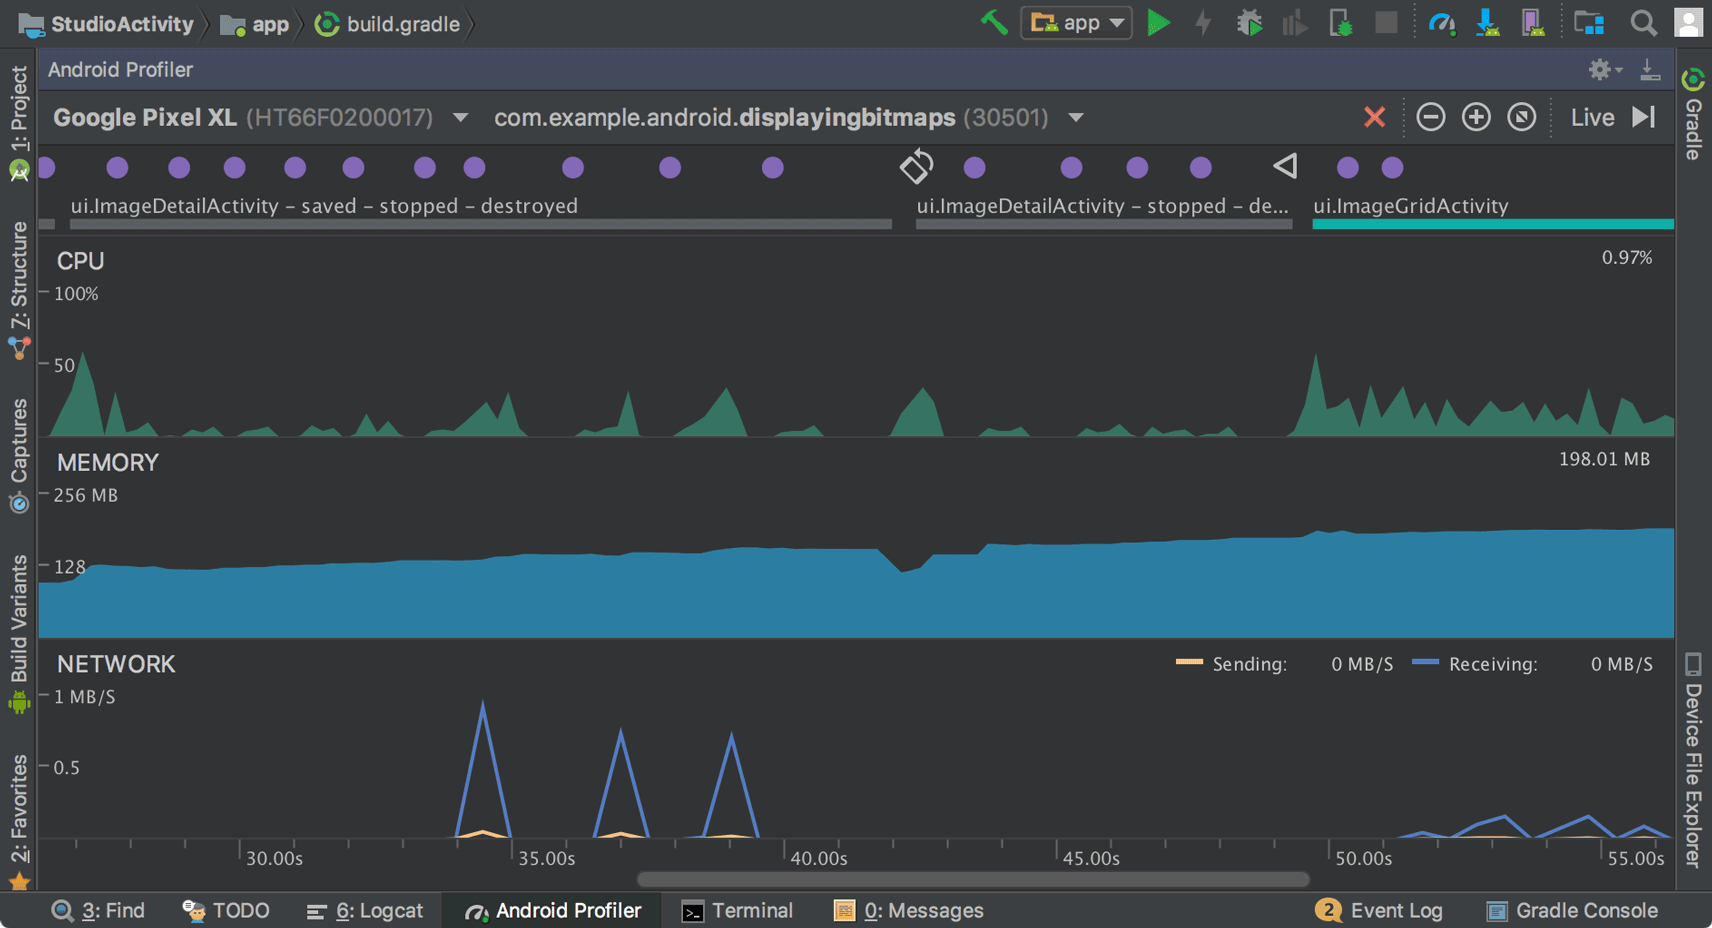
Note: Since Android Studio 4.1 it is also possible to [run the profiling tools without starting Android Studio](https://developer.android.com/studio/profile/android-profiler.html#standalone-profilers).
Graphics API Debugger (Android)
: https://github.com/google/gapid
This is a collection of tools that allows you to inspect, tweak and replay calls from an application to a graphics driver. To use the tool requires that you set `android:debuggable="true"` in "AndroidManifest.xml".
# Ads {#manuals:ads}
Ads has become a very common way of monetizing web and mobile games and it has turned into a billion dollar industry. As a developer you get paid based on the number of people watching the ads you show in your game. It is usually as simple as more viewers equals more money, but other factors also have an impact on how much you get paid:
* The ad quality - relevant ads are more likely to get interaction and attention from your players.
* The ad format - banner ads usually pay less while full screen ads viewed from start to to finish pays more.
* The ad network - the amount you get paid varies from ad networks to ad network.
CPM = Cost per mille. The amount an advertiser pays per one thousand views. The CPM varies between ad networks and ad formats.
## Formats
There are many different kinds of ad formats that can be used in games. Some of the more common ones are banner, interstitial and reward ads:
### Banner ads
Banner ads are text, image or video based and cover a relatively small part of the screen, usually at the top or bottom of the screen. Banner ads are very easy to implement and they fit very well with casual single screen games where it is easy to reserve an area of the screen for advertisements. Banner ads maximize exposure as users play your game without interruption.
### Interstitial ads
Interstitial ads are large full screen experiences with animations and sometimes also interactive rich media content. Interstitial ads are typically shown in between levels or game sessions as it is a natural break in the game experience. Interstitial ads typically generate less views than banner ads, but the cost (CPM) is much higher than for banner ads, resulting in significant overall ad revenue.
### Rewarded ads
Rewarded ads (also know as Incentivized ads) are optional and therefore less obtrusive than many other forms of ads. Rewarded ads are usually full screen experiences like interstitial ads. The user can choose a reward in exchange for viewing the ad - for instance loot, coins, lives, time or some other in-game currency or benefit. Rewarded ads usually has the highest cost (CPM), but the number of views is directly related to user opt-in rates. Rewarded ads will only generate great performance if the rewards are valuable enough and offered at the right time.
## Ad networks
The [Defold Asset Portal](https://defold.com/tags/stars/ads/) contains several assets which integrate with ad providers:
* [AdMob](https://defold.com/assets/admob-defold/) - Show ads using the Google AdMob network.
* [Enhance](https://defold.com/assets/enhance/) - Supports a number of different ad networks. Requires an additional post-build step.
* [Facebook Instant Games](https://defold.com/assets/facebookinstantgames/) - Show ads in your Facebook Instant Game.
* [IronSource](https://defold.com/assets/ironsource/) - Show ads using the IronSource Ad network.
* [Unity Ads](https://defold.com/assets/defvideoads/) - Show ads using the Unity Ads network.
# How to integrate ads in your game
When you have decided on an ad network to integrate in your game you need to follow the installation and usage instructions for that particular asset. What you typically do is to first add the extension as a [project dependency](#manuals:libraries). Once you have the asset added to your project you can proceed with the integration and call the functions specific to the asset to load and show ads.
# Combining ads and in-app purchases
It is quite common in mobile games to offer an [In-app purchase](#manuals:iap) to get rid of ads permanently.
## Learn more
There are many online resources to learn from when it comes to optimizing ad revenue:
* Google AdMob [Monetize mobile games with ads](https://admob.google.com/home/resources/monetize-mobile-game-with-ads/)
* Game Analytics [Popular ad formats and how to use them](https://gameanalytics.com/blog/popular-mobile-game-ad-formats.html)
* deltaDNA [Ad serving in games: 10 expert tips](https://deltadna.com/blog/ad-serving-in-games-10-tips/)
# Android development {#manuals:android}
Android devices allows you to freely run your own apps on them. It is very easy to build a version of your game and copy it onto an Android device. This manual explains the steps involved in bundling your game for Android. During development, running your game through the [development app](#manuals:dev-app) is often preferred since it allows you to hot reload content and code directly to your device.
## Android and Google Play signing process
Android requires that all APKs be digitally signed with a certificate before they are installed on a device or updated. If you use Android App Bundles, you need to sign only your app bundle before you upload it to the Play Console, and [Play App Signing](https://developer.android.com/studio/publish/app-signing#app-signing-google-play) takes care of the rest. However, you can also manually sign your app for upload to Google Play, other app stores and for distribution outside of any store.
When you create an Android application bundle from the Defold editor or the [command line tool](#manuals:bob) you can provide a keystore (containing your certificate and key) and keystore password which will be used when signing your application. If you don't, Defold generates a debug keystore and uses it when signing the application bundle.
You should **never** upload your application to Google Play if it was signed using a debug keystore. Always use a dedicated keystore which you have created yourself.
## Creating a keystore
The Android signing process in Defold changed in version 1.2.173 from using a stand-alone key and certificate to a keystore. [More information in this forum post](https://forum.defold.com/t/upcoming-change-to-the-android-build-pipeline/66084).
You can create a keystore [using Android Studio](https://developer.android.com/studio/publish/app-signing#generate-key) or from a terminal/command prompt:
```bash
keytool -genkey -v -noprompt -dname "CN=John Smith, OU=Area 51, O=US Air Force, L=Unknown, ST=Nevada, C=US" -keystore mykeystore.keystore -storepass 5Up3r_53cR3t -alias myAlias -keyalg RSA -validity 9125
```
This will create a keystore file named `mykeystore.keystore` containing a key and certificate. Access to key and certificate will be protected by the password `5Up3r_53cR3t`. The key and certificate will be valid for 25 years (9125 days). The generated key and certificate will be identified by the alias `myAlias`.
Make sure to store the keystore and associated password somewhere safe. If you sign and upload your applications to Google Play yourself and the keystore or keystore password is lost there is no way for you to update the application on Google Play. You can avoid this by using Google Play App Signing and let Google sign your applications for you.
## Creating an Android application bundle
The editor lets you easily create a stand alone application bundle for your game. Before bundling you can specify what icon(s) to use for the app, set version code etc in the *game.project* [project settings file](#manuals:project-settings).
To bundle select Project ▸ Bundle... ▸ Android Application... from the menu.
If you want the editor to automatically create random debug certificates, leave the *Keystore* and *Keystore password* fields empty:

If you want to sign your bundle with a particular keystore, specify the *Keystore* and *Keystore password*. The *Keystore* is expected to have the `.keystore` file extension while the password is expected to be stored in a text file with the `.txt` extension. It is also possible to specify a *Key password* if the key in the keystore uses a different password than the keystore itself:
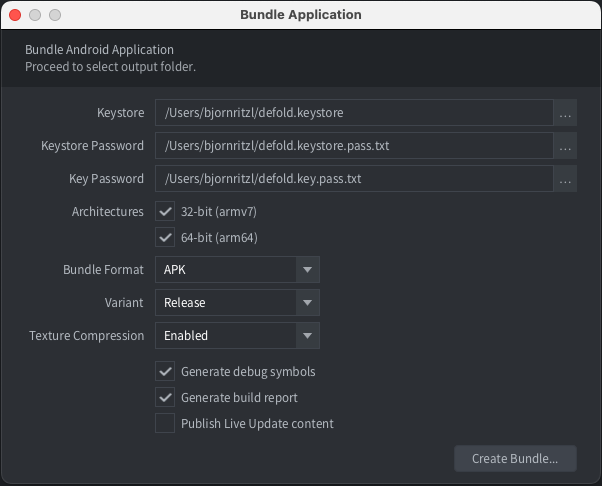
Defold supports the creation of both APK and AAB files. Select APK or AAB from the Bundle Format drop down.
Press Create Bundle when you have configured the application bundle settings. You will then be prompted to specify where on your computer the bundle will be created.
## Build variants
When you bundle a game, you need to choose what type of engine you wish to use. You have three basic options:
* Debug
* Release
* Headless
These different versions are also referred to as `Build variants`
When you choose Project ▸ Build you'll always get the debug version.
### Debug
This type of executable is typically used during development of a game as it has several useful debugging features included:
* Profiler - Used for gathering performance and usage counters. Learn how to use the profiler in the [Profiling manual](#manuals:profiling).
* Logging - The engine will log system information, warnings and errors when logging is enabled. The engine will also output logs from the Lua `print()` function and from native extensions logging using `dmLogInfo()`, `dmLogError()` and so on. Learn how to read these logs in the [Game and System Logs manual](#manuals:debugging-game-and-system-logs).
* Hot reload - Hot-reload is a powerful feature which lets a developer reload resource while the game is running. Learn how to use this in the [Hot-Reload manual](#manuals:hot-reload).
* Engine services - It is possible to connect to and interact with a debug version of a game through a number of different open TCP ports and services. The services include the hot-reload feature, remote log access and the profiler mentioned above, but also other services to remotely interact with the engine. Learn more about the engine services [in the developer documentation](https://github.com/defold/defold/blob/dev/engine/docs/DEBUG_PORTS_AND_SERVICES.md).
### Release
This variant has the debugging features disabled. This options should be chosen when the game is ready to be released to the app store or in other ways shared with players. It is not recommended to release a game with the debugging features enabled for a number of reasons:
* The debugging features take up a little bit of size in the binary, and [it is a best practice to try to keep the binary size of a released game as small as possible](#manuals:optimization).
* The debugging features takes a little bit of CPU time as well. This can impact the performance of the game if a user has a low-end hardware. On mobile phones the increased CPU usage will also contribute to heating and battery drain.
* The debugging features may expose information about the game that is not intended for the eyes of the players, either from a security, cheating or fraud perspective.
### Headless
This executable runs without any graphics and sound. It means that you can run the game unit/smoke tests on a CI server, or even have it as a game server in the cloud.
### Installing an Android application bundle
#### Installing an APK
An *`.apk`* file can be copied to your device with the `adb` tool, or to Google Play via the [Google Play developer console](https://play.google.com/apps/publish/).
The `adb` command line tool is an easy to use and versatile program that is used to interact with Android devices. You can download and install `adb` as part of the Android SDK Platform-Tools, for Mac, Linux or Windows.
Download the Android SDK Platform-Tools from: https://developer.android.com/studio/releases/platform-tools. You find the *adb* tool in */platform-tools/*. Alternatively, platform specific packages can be installed through respective package managers.
On Ubuntu Linux:
```
$ sudo apt-get install android-tools-adb
```
On Fedora 18/19:
```
$ sudo yum install android-tools
```
On macOS (Homebrew)
```
$ brew cask install android-platform-tools
```
You can verify that `adb` works by connecting your Android device to your computer via USB and issue the following command:
```
$ adb devices
List of devices attached
31002535c90ef000 device
```
If your device does not show up, verify that you have enabled *USB debugging* on the Android device. Open the device *Settings* and look for *Developer options* (or *Development*).

```
$ adb install Defold\ examples.apk
4826 KB/s (18774344 bytes in 3.798s)
pkg: /data/local/tmp/my_app.apk
Success
```
#### Installing an APK using editor
You can install and launch an *`.apk`* file using the editor's "Install on connected device" and "Launch installed app" check-boxes in the Bundle dialog:
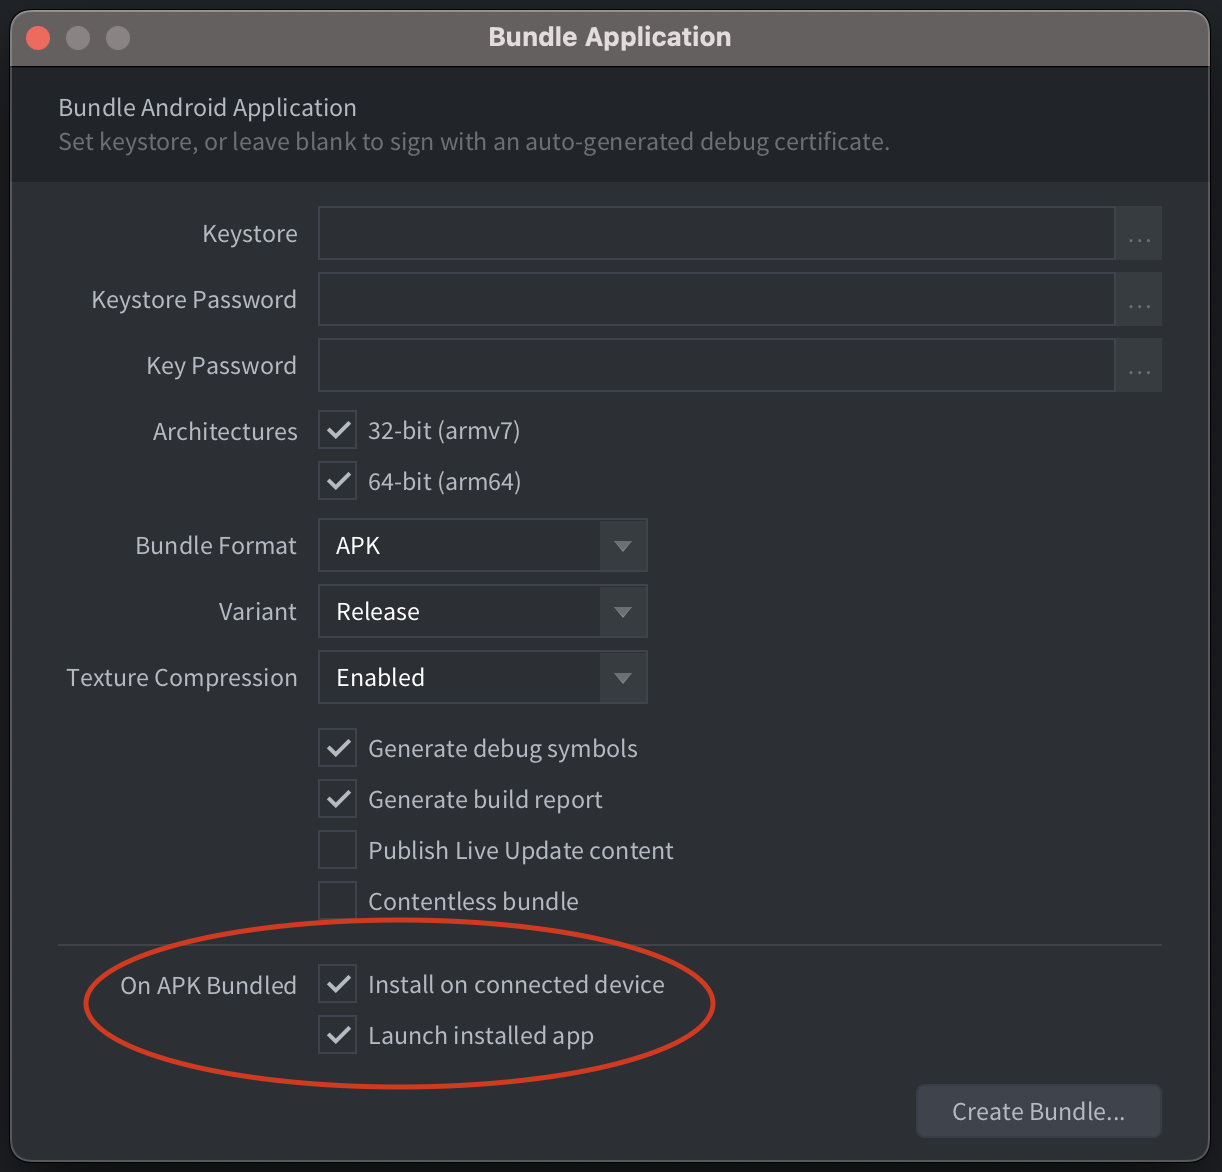
For this feature to work, you will need ADB installed and *USB debugging* enabled on the connected device. If the editor can't detect the install location of the ADB command line tool, you will need to specify it in [Preferences](#manuals:editor-preferences).
#### Installing an AAB
An *.aab* file can be uploaded to Google Play via the [Google Play developer console](https://play.google.com/apps/publish/). It is also possible to generate an *`.apk`* file from an *.aab* file to install it locally using the [Android bundletool](https://developer.android.com/studio/command-line/bundletool).
## Permissions
The Defold engine requires a number of different permissions for all engine features to work. The permissions are defined in the `AndroidManifest.xml`, specified in the *game.project* [project settings file](#manuals:project-settings). You can read more about Android permissions in [the official docs](https://developer.android.com/guide/topics/permissions/overview). The following permissions are requested in the default manifest:
### android.permission.INTERNET and android.permission.ACCESS_NETWORK_STATE (Protection level: normal)
Allows applications to open network sockets and access information about networks. These permission are needed for internet access. ([Android official docs](https://developer.android.com/reference/android/Manifest.permission#INTERNET)) and ([Android official docs](https://developer.android.com/reference/android/Manifest.permission#ACCESS_NETWORK_STATE)).
### android.permission.WAKE_LOCK (Protection level: normal)
Allows using PowerManager WakeLocks to keep processor from sleeping or screen from dimming. This permission is needed to temporarily prevent the device from sleeping while receiving a push notification. ([Android official docs](https://developer.android.com/reference/android/Manifest.permission#WAKE_LOCK))
## Using AndroidX
AndroidX is a major improvement to the original Android Support Library, which is no longer maintained. AndroidX packages fully replace the Support Library by providing feature parity and new libraries. Most of the Android extensions in the [Asset Portal](https://defold.com/assets) support AndroidX. If you do not wish to use AndroidX you can explicitly disable it in favour of the old Android Support Library by checking the `Use Android Support Lib` in the [application manifest](#manuals:app-manifest).
## FAQ
#### Q: Is it possible to hide the navigation and status bars on Android?
A: Yes, set the *immersive_mode* setting in the *Android* section of your *game.project* file. This lets your app take over the whole screen and capture all touch events on the screen.
#### Q: Why am I'm getting "Failure [INSTALL_PARSE_FAILED_INCONSISTENT_CERTIFICATES]" when installing a Defold game on device?
A: Android detects that you try to install the app with a new certificate. When bundling debug builds, each build will be signed with a temporary certificate. Uninstall the old app before installing the new version:
```
$ adb uninstall com.defold.examples
Success
$ adb install Defold\\ examples.apk
4826 KB/s (18774344 bytes in 3.798s)
pkg: /data/local/tmp/Defold examples.apk
Success
```
#### Q: Why am I getting errors about conflicting properties in AndroidManifest.xml when building with certain extensions?
A: This can happen when two or more extensions provide an Android Manifest stub containing the same property tag but with different values. This has for instance happened with Firebase and AdMob. The build error looks similar to this:
```
SEVERE: /tmp/job4531953598647135356/upload/AndroidManifest.xml:32:13-58
Error: Attribute property#android.adservices.AD_SERVICES_CONFIG@resource
value=(@xml/ga_ad_services_config) from AndroidManifest.xml:32:13-58 is also
present at AndroidManifest.xml:92:13-59 value=(@xml/gma_ad_services_config).
Suggestion: add 'tools:replace="android:resource"' to
Bundling a game for iOS is available only on Mac version of the Defold Editor.
iOS requires that _any_ app that you build and want to run on your phone or tablet _must_ be signed with an Apple-issued certificate and provisioning profile. This manual explains the steps involved in bundling your game for iOS. During development, running your game through the [development app](#manuals:dev-app) is often preferred since it allows you to hot reload content and code directly to your device.
## Apple's code signing process
The security associated with iOS apps consists of several components. You can get access to the required tools by singing up to the [Apple's iOS Developer Program](https://developer.apple.com/programs/). When you have enrolled, go to the [Apple's Developer Member Center](https://developer.apple.com/membercenter/index.action).
The section *Certificates, Identifiers & Profiles* contains all the tools that you need. From here you can create, delete and edit:
Certificates
: Apple-issued cryptographic certificates that identify you as a developer. You can create development or production certificates. Developer certificates allow you to test certain features such as the in-app purchase mechanism in a sandbox test environment. Production certificates are used to sign the final app for upload to the App Store. You need a certificate to sign apps before you can put them on your device for testing.
Identifiers
: Identifiers for various uses. It is possible to register wildcard identifiers (i.e. `some.prefix.*`) which can be used with several apps. App IDs can contain Application Service information, like if the app enables Passbook integration, the Game Center, etc. Such App IDs cannot be wildcard identifiers. For Application Services to function, your application's *bundle identifier* must match the App ID identifier.
Devices
: Each development device needs to be registered with their UDID (Unique Device IDentifier, see below).
Provisioning Profiles
: Provisioning profiles associate certificates with App IDs and a list of devices. They tell which app by what developer is allowed to be on what devices.
When signing your games and apps in Defold, you need a valid certificate and a valid provisioning profile.
Some of the things you can do on the Member Center homepage you can also perform from inside the Xcode development environment---if you have that installed.
Device identifier (UDID)
: The UDID for an iOS device can be found by connecting the device to a computer via wifi or cable. Open Xcode and select Window ▸ Devices and Simulators. The serial number and identifier are displayed when you select your device.
If you don't have Xcode installed you can find the identifier in iTunes. Click on the devices symbol and select your device.
1. On the *Summary* page, locate the *Serial Number*.
2. Click the *Serial Number* once so the field changes into *UDID*. If you click repeatedly, several pieces of information about the device will show up. Just continue to click until *UDID* shows.
3. Right-click the long UDID string and select Copy to copy the identifier to the clipboard so you can easily paste it into the UDID field when registering the device on Apple's Developer Member Center.
## Developing using a free Apple developer account
Since Xcode 7, anyone can install Xcode and do on-device development for free. You don't have to sign up for the iOS Developer Program. Instead, Xcode will automatically issue a certificate for you as a developer (valid for 1 year) and a provisioning profile for your app (valid for one week) on your specific device.
1. Connect your device.
2. Install Xcode.
3. Add a new account to Xcode and sign in with your Apple ID.
4. Create a new project. The simplest "Single View App" works fine.
5. Select your "Team" (auto created for you) and give the app a bundle identifier.
Make a note of the bundle identifier as you must use the same bundle identifier in your Defold project.
6. Make sure that Xcode has created a *Provisioning Profile* and *Signing Certificate* for the app.
7. Build the app on your device. The first time, Xcode will ask you to enable Developer mode and will prepare the device with debugger support. This may take a while.
8. When you have verified that the app works, find it on your disk. You can see the build location in the Build report in the "Report Navigator".
9. Locate the app, right-click it and select Show Package Contents.
10. Copy the file "embedded.mobileprovision" to some place on your drive where you will find it.
This provision file can be used together with your code signing identity to sign apps in Defold for one week.
When the provision expires, you need to build the app again in Xcode and get a new temporary provision file as described above.
## Creating an iOS application bundle
When you have the code signing identity and provisioning profile, you are ready to create a stand alone application bundle for your game from the editor. Simply select Project ▸ Bundle... ▸ iOS Application... from the menu.

Select your code signing identity and browse for your mobile provisioning file. Select which architectures (32 bit, 64 bit and the iOS simulator) to bundle for as well as the variant (Debug or Release). You can optionally uncheck the `Sign application` checkbox to skip the signing process and then manually sign at a later stage.
You **must** uncheck the `Sign application` checkbox when testing your game on the iOS simulator. You will be able to install the application but it will not boot.
Press *Create Bundle* and you will then be prompted to specify where on your computer the bundle will be created.
You specify what icon to use for the app, the launch screen storyboard and so forth in the *game.project* project settings file in the [iOS section](#manuals:project-settings).
## Build variants
When you bundle a game, you need to choose what type of engine you wish to use. You have three basic options:
* Debug
* Release
* Headless
These different versions are also referred to as `Build variants`
When you choose Project ▸ Build you'll always get the debug version.
### Debug
This type of executable is typically used during development of a game as it has several useful debugging features included:
* Profiler - Used for gathering performance and usage counters. Learn how to use the profiler in the [Profiling manual](#manuals:profiling).
* Logging - The engine will log system information, warnings and errors when logging is enabled. The engine will also output logs from the Lua `print()` function and from native extensions logging using `dmLogInfo()`, `dmLogError()` and so on. Learn how to read these logs in the [Game and System Logs manual](#manuals:debugging-game-and-system-logs).
* Hot reload - Hot-reload is a powerful feature which lets a developer reload resource while the game is running. Learn how to use this in the [Hot-Reload manual](#manuals:hot-reload).
* Engine services - It is possible to connect to and interact with a debug version of a game through a number of different open TCP ports and services. The services include the hot-reload feature, remote log access and the profiler mentioned above, but also other services to remotely interact with the engine. Learn more about the engine services [in the developer documentation](https://github.com/defold/defold/blob/dev/engine/docs/DEBUG_PORTS_AND_SERVICES.md).
### Release
This variant has the debugging features disabled. This options should be chosen when the game is ready to be released to the app store or in other ways shared with players. It is not recommended to release a game with the debugging features enabled for a number of reasons:
* The debugging features take up a little bit of size in the binary, and [it is a best practice to try to keep the binary size of a released game as small as possible](#manuals:optimization).
* The debugging features takes a little bit of CPU time as well. This can impact the performance of the game if a user has a low-end hardware. On mobile phones the increased CPU usage will also contribute to heating and battery drain.
* The debugging features may expose information about the game that is not intended for the eyes of the players, either from a security, cheating or fraud perspective.
### Headless
This executable runs without any graphics and sound. It means that you can run the game unit/smoke tests on a CI server, or even have it as a game server in the cloud.
## Installing and launching bundle on a connected iPhone
You can install and launch the built bundle using editor's "Install on connected device" and "Launch installed app" check-boxes in the Bundle dialog:

You need [ios-deploy](https://github.com/ios-control/ios-deploy) command lint tool installed for this feature to work. The simplest way to install it is using Homebrew:
```
$ brew install ios-deploy
```
If the editor can't detect the install location of the ios-deploy tool, you will need to specify it in [Preferences](#manuals:editor-preferences).
### Creating a storyboard
You create a storyboard file using Xcode. Start Xcode and create a new project. Select iOS and Single View App:
Click Next and proceed to configure your project. Enter a Product Name:
Click Create to finish the process. Your project is now created and we can proceed to create the storyboard:
Drag and drop an image to import it to the project. Next select `Assets.xcassets` and drop the image to `Assets.xcassets`:
Open `LaunchScreen.storyboard` and click on the plus button (+). Type "imageview" in the dialog to find the ImageView component.
Drag the Image View component onto the storyboard:
Select the image you previously added to `Assets.xcassets` from the Image dropdown:
Position the image and make any other adjustments you need, perhaps adding a Label or some other UI element. When you are done set the active scheme to "Build -> Any iOS Device (`arm64`, `armv7`)"(or "Generic iOS Device") and select Product -> Build. Wait for the build process to finish.
If you have only `arm64` option in "Any iOS Device (arm64)" change `iOS Deployment target` to 10.3 in "Project -> Basic -> Deployment" settings. It will make your storyboard compatible with `armv7` devices (for example iPhone5c)
If you use images in the storyboard they will not be included in your `LaunchScreen.storyboardc` automatically. Use `Bundle Resources` field in *game.project* to include resources.
For example, create folder `LaunchScreen` in Defold project and folder `ios` inside (`ios` folder needed to include these files only for ios bundles), then put your files in `LaunchScreen/ios/`. Add this path in `Bundle Resources`.

The last step is to copy the compiled `LaunchScreen.storyboardc` file to your Defold project. Open Finder at the following location and copy the `LaunchScreen.storyboardc` file to your Defold project:
/Library/Developer/Xcode/DerivedData/YOUR-PRODUCT-NAME-cbqnwzfisotwygbybxohrhambkjy/Build/Intermediates.noindex/YOUR-PRODUCT-NAME.build/Debug-iphonesimulator/YOUR-PRODUCT-NAME.build/Base.lproj/LaunchScreen.storyboardc
Forum user Sergey Lerg has put together [a video tutorial showing the process](https://www.youtube.com/watch?v=6jU8wGp3OwA&feature=emb_logo).
Once you have the storyboard file you can reference it from *game.project*.
### Creating an icon asset catalog
This is required from Defold 1.2.175.
Using an asset catalog is Apple's preferred way to manage your application's icons. In fact it is the only way to provide the icon used in the App Store listing. You create an asset catalog in the same way as a storyboard, using Xcode. Start Xcode and create a new project. Select iOS and Single View App:

Click Next and proceed to configure your project. Enter a Product Name:
Click Create to finish the process. Your project is now created and we can proceed to create the asset catalog:
Drag and drop images to the empty boxes representing the different supported icon sizes:
Do not add any icons for Notifications, Settings or Spotlight.
When you are done, set the active scheme to "Build -> Any iOS Device (arm64)"(or "Generic iOS Device") and select Product -> Build. Wait for the build process to finish.
Make sure that you build for "Any iOS Device (arm64)" or "Generic iOS Device" otherwise you will get `ERROR ITMS-90704` error when uploading your build.
The last step is to copy the compiled `Assets.car` file to your Defold project. Open Finder at the following location and copy the `Assets.car` file to your Defold project:
/Library/Developer/Xcode/DerivedData/YOUR-PRODUCT-NAME-cbqnwzfisotwygbybxohrhambkjy/Build/Products/Debug-iphoneos/Icons.app/Assets.car
Once you have the asset catalog file you can reference it and the icons from *game.project*:
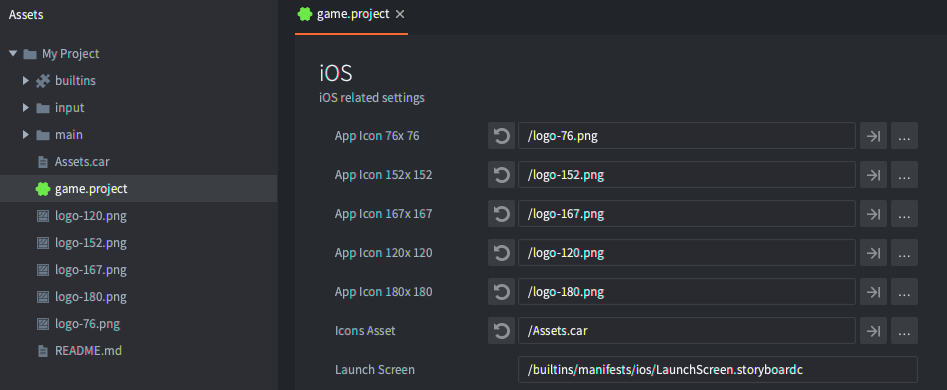
The App Store icon does not have to be referenced from *game.project*. It is automatically extracted from the `Assets.car` file when uploading to iTunes Connect.
## Installing an iOS application bundle
The editor writes an *.ipa* file which is an iOS application bundle. To install the file on your device, you can use one of the following tools:
* Xcode via the "Devices and Simulators" window
* [`ios-deploy`](https://github.com/ios-control/ios-deploy) command line tool
* [`Apple Configurator 2`](https://apps.apple.com/us/app/apple-configurator-2/) from the macOS App Store
* iTunes
You can also use the `xcrun simctl` command line tool to work with the iOS simulators available via Xcode:
```
# show a list of available devices
xcrun simctl list
# boot an iPhone X simulator
xcrun simctl boot "iPhone X"
# install your.app to a booted simulator
xcrun simctl install booted your.app
# launch the simulator
open /Applications/Xcode.app/Contents/Developer/Applications/Simulator.app
```
## Apple Privacy Manifest
The privacy manifest is a property list that records the types of data collected by your app or third-party SDK, and the required reasons APIs your app or third-party SDK uses. For each type of data your app or third-party SDK collects and category of required reasons API it uses, the app or third-party SDK needs to record the reasons in its bundled privacy manifest file.
Defold provides a default privacy manifest through the Privacy Manifest field in the *game.project* file. When creating an application bundle the privacy manifest will be merged with any privacy manifests in the project dependencies and included in the application bundle.
Read more about privacy manifests in the [official documentation from Apple](https://developer.apple.com/documentation/bundleresources/privacy_manifest_files?language=objc).
## Export Compliance information
When you submit your game to the App Store you will be asked to provide Export Compliance information with regard to the use of encryption in your game. [Apple explains why this is required](https://developer.apple.com/documentation/security/complying_with_encryption_export_regulations):
"When you submit your app to TestFlight or the App Store, you upload your app to a server in the United States. If you distribute your app outside the U.S. or Canada, your app is subject to U.S. export laws, regardless of where your legal entity is based. If your app uses, accesses, contains, implements, or incorporates encryption, this is considered an export of encryption software, which means your app is subject to U.S. export compliance requirements, as well as the import compliance requirements of the countries where you distribute your app."
The Defold game engine uses encryption for the following purposes:
* Making calls over secure channels (i.e. HTTPS and SSL)
* Copyright protection of Lua code (to prevent duplication)
These uses of encryption in the Defold engine are exempt from export compliance document requirements under United States and European Union law. Most Defold projects will remain exempt, but the addition of other cryptographic methods may change this status. It is your responsibility to ensure that your project meets the requirements of these laws and the App Store's rules. See Apple's [Export Compliance Overview](https://help.apple.com/app-store-connect/#/dev88f5c7bf9) for more information.
If you believe your project is exempt, set the [`ITSAppUsesNonExemptEncryption`](https://developer.apple.com/documentation/bundleresources/information-property-list/itsappusesnonexemptencryption) key to `False` in the project's `Info.plist` see [Application Manifests](#manuals:extensions-manifest-merge-tool) for more details.
## FAQ
#### Q: I am unable to install my Defold game using a free Apple Developer account.
A: Make sure that you are using the same bundle identifier in your Defold project as you used in the Xcode project when you generated the mobile provisioning profile.
#### Q: How can I check the entitlements of a bundled application?
A: From [Inspect the entitlements of a built app](https://developer.apple.com/library/archive/technotes/tn2415/_index.html#//apple_ref/doc/uid/DTS40016427-CH1-APPENTITLEMENTS):
```sh
codesign -d --ent :- /path/to/the.app
```
#### Q: How can I check the entitlements of a provisioning profile
A: From [Inspecting a profile's entitlements](https://developer.apple.com/library/archive/technotes/tn2415/_index.html#//apple_ref/doc/uid/DTS40016427-CH1-PROFILESENTITLEMENTS):
```sh
security cms -D -i /path/to/iOSTeamProfile.mobileprovision
```
# Nintendo Switch development {#manuals:nintendo-switch}
Due to Nintendo licensing restrictions access to Defold versions with support for the Nintendo Switch platform is not included in the standard version of Defold. In order to get access to versions of Defold with Nintendo Switch support you need to become an approved game developer for Nintendo Switch.
## Registering as a Nintendo Switch developer
You can register as a game developer for Nintendo Switch at the [Nintendo Developer Portal](https://developer.nintendo.com/register):
When you have been approved by Nintendo you will get access to the Tools and Middleware page of the Nintendo Developer Portal where you can sign up for Defold access. When you register for Defold access we will get an email from Nintendo verifying you as a registered Nintendo developer.
## Nintendo Switch access in Defold
Once we have confirmed your status as an approved Nintendo Switch developer we will provide you with access to the following:
* Source code access to the Nintendo Switch extension with console specific API integrations.
* Source code access to the Nintendo Switch enabled version of the Defold game engine. Note that the source code access is not required to build games for Nintendo Switch, but we provide access in case you wish to make source contributions to the engine core.
* [Command line tool](#manuals:bob) with support for bundling to the Nintendo Switch platform. Bundling from the Defold editor is not supported.
* Forum where you are able to get Nintendo Switch specific support.
## FAQ
#### Q: Do I need to install additional tools to build for consoles?
A: You will be able to create application bundles from the editor and command line tools. Information about how to test on PlayStation®4, PlayStation®5 and Nintendo Switch hardware will be provided to you when you are given access to the respective platforms.
#### Q: Is it still easy to use a single code base if I decide to also target consoles?
A: Yes, all of the standard Defold API functions are available also for the console platforms. In addition to the standard functionality you will also have access to a couple of PlayStation®4, PlayStation®5 and Nintendo Switch specific functions, but in general the code should be able to remain exactly the same across multiple platforms.
# Game development for PlayStation®4 and PlayStation®5 consoles {#manuals:sony-playstation}
Due to licensing restrictions, access to Defold versions with support for development on PS4 and PS5 is not included in the standard version of Defold. In order to get access to versions of Defold with PS4 and PS5 game development support you need to be registered as a licensed PS4 and PS5 game developer respectively.
## Registering as developer for PS4 and PS5 game development
You can register as a game developer for PS4™ and PS5™ game development from the [PlayStation™ Partners page](https://register.playstation.net/partnership)
When you have been approved by Sony you will get access to the Playstation 5 DevNet and/or Playstation 4 DevNet. Navigate to Development > Tools & Middleware > Tools & Middleware directory > Defold. Click the ‘Confirm Status’ button.
## PS4™ and PS5™ access in Defold
Once we have received confirmation of your status as a licensed developer for PS4™ and PS5™ we will provide you with access to the following:
* Source code access to the PS4™ and PS5™ extension with console specific API integrations.
* Source code access to the PS4™ and PS5™ enabled version of the Defold game engine will only be provided to PS5™ licensed game developers. Note that the source code access is not required to build games, but we provide access in case you wish to make source contributions to the engine core.
* [Command line tool](#manuals:bob) with support for bundling to the PS4™ and PS5™ platforms. Bundling from the Defold editor is not supported.
* Forum where you are able to get PS4™ and PS5™ specific support.
## FAQ
#### Q: Do I need to install additional tools to build for consoles?
A: You will be able to create application bundles from the editor and command line tools. Information about how to test on PlayStation®4, PlayStation®5 and Nintendo Switch hardware will be provided to you when you are given access to the respective platforms.
#### Q: Is it still easy to use a single code base if I decide to also target consoles?
A: Yes, all of the standard Defold API functions are available also for the console platforms. In addition to the standard functionality you will also have access to a couple of PlayStation®4, PlayStation®5 and Nintendo Switch specific functions, but in general the code should be able to remain exactly the same across multiple platforms.
# Xbox support {#manuals:microsoft-xbox}
Defold does not yet support Microsoft Xbox. The Defold Foundation is actively working towards becoming an Xbox Middleware provider. We encourage approved Xbox developers to reach out to their Xbox developer contact and request Defold support for Microsoft Xbox.
# HTML5 development {#manuals:html5}
Defold supports building games for the HTML5 platform through the regular bundling menu, as well as for other platforms. In addition, the resulting game is embedded on a regular HTML page that can be styled through a simple template system.
The *game.project* file contains the HTML5 specific settings:
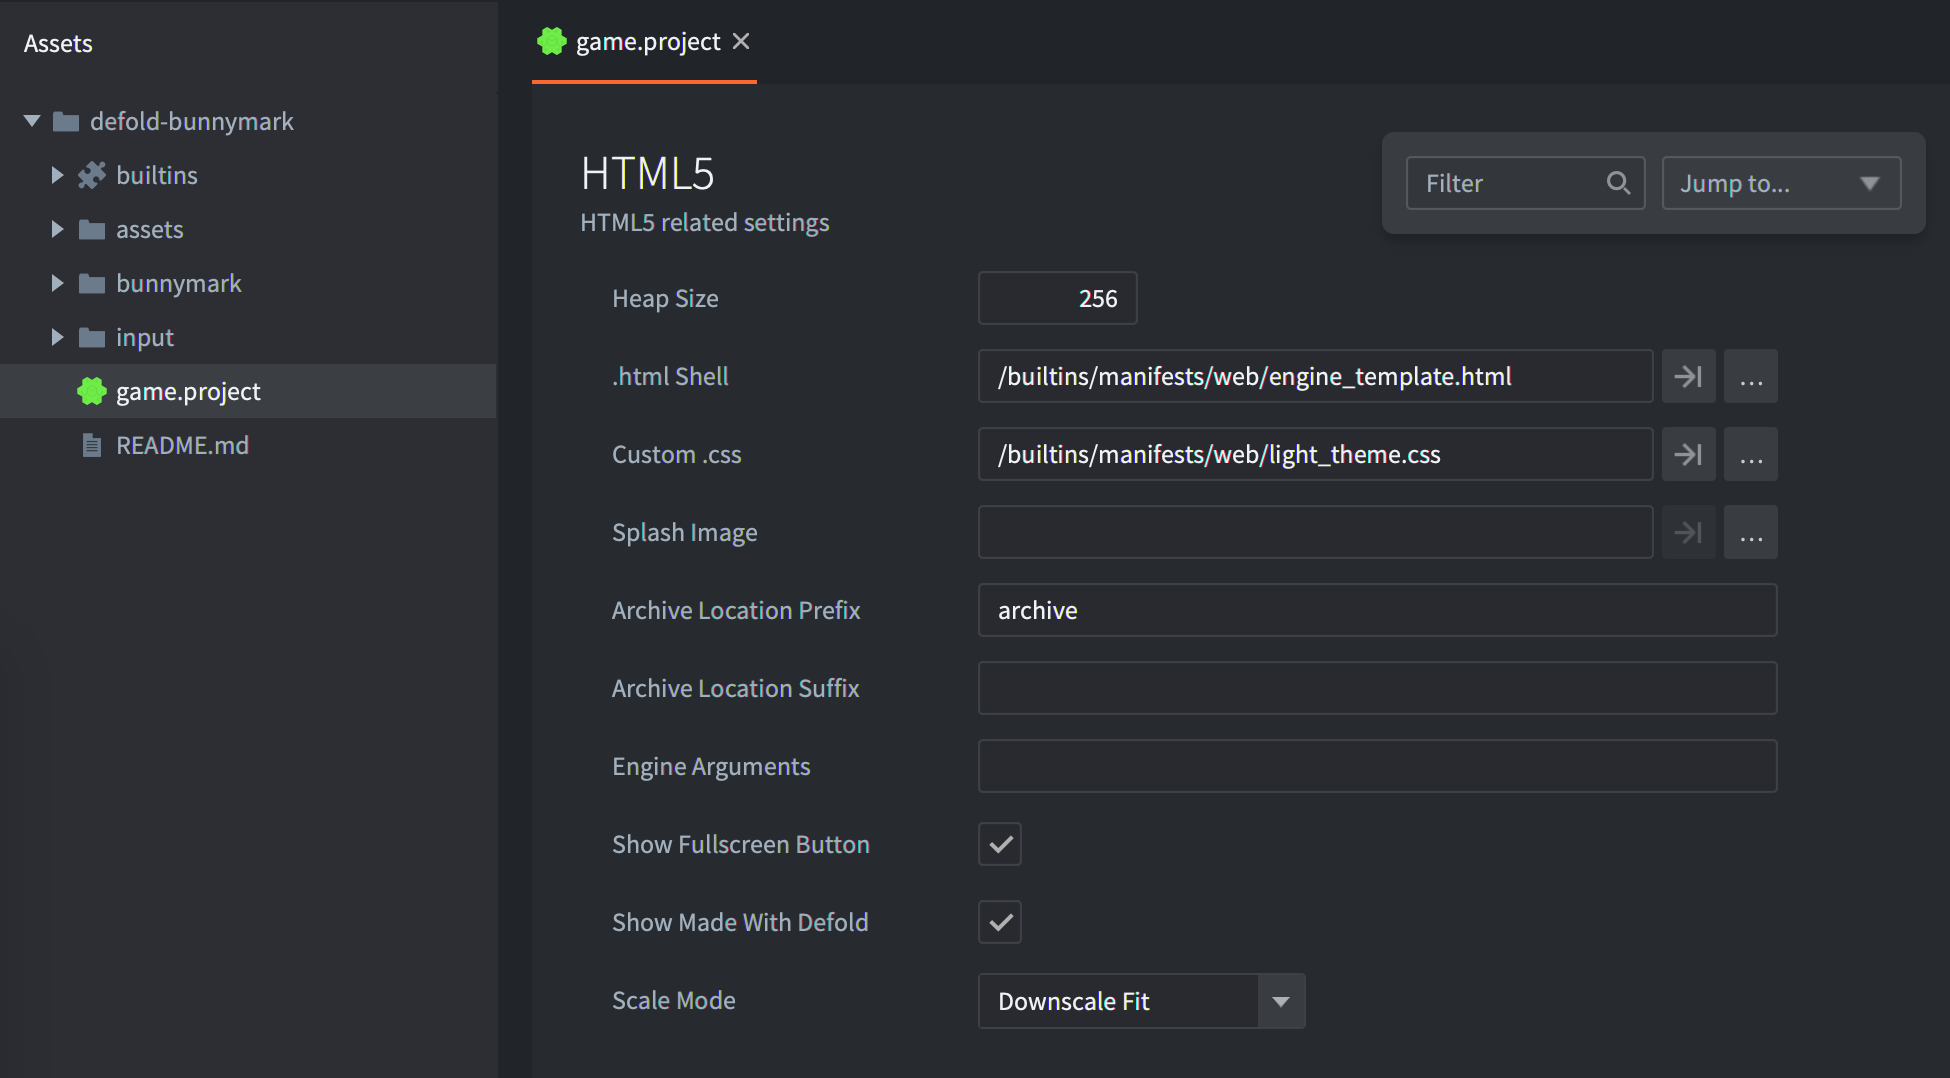
## Heap size
Defold support for HTML5 is powered by Emscripten (See http://en.wikipedia.org/wiki/Emscripten). In short, it creates a sandbox of memory for the heap in which the application operates. By default, the engine allocates a generous amount of memory (256MB). This should be more than sufficient for the typical game. As part of your optimization process, you may choose to use a smaller value. To do this, follow these steps:
1. Set *heap_size* to a preferred value. It should be expressed in megabytes.
2. Create your HTML5 bundle (see below)
## Testing HTML5 build
For testing, HTML5 build needs an HTTP server. Defold creates one for you if you choose Project ▸ Build HTML5.
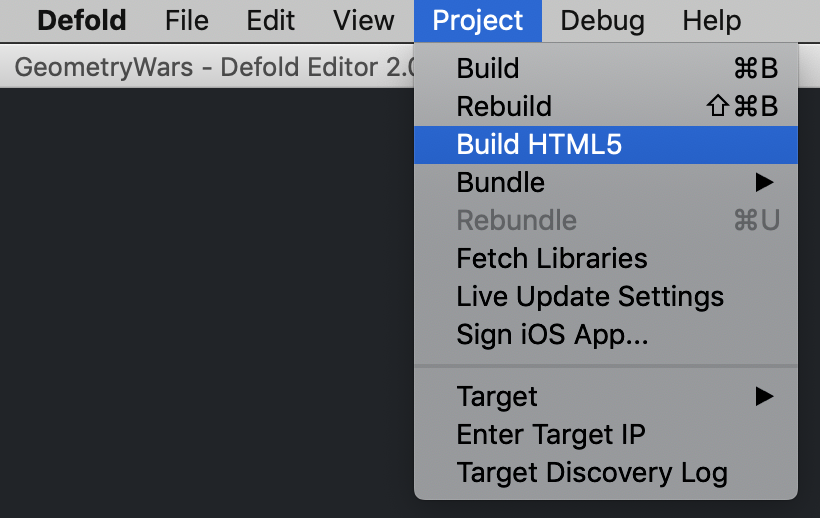
If you want to test your bundle, just upload it to your remote HTTP server or create a local server, for example, using python in the bundle folder.
Python 2:
```sh
python -m SimpleHTTPServer
```
Python 3:
```sh
python -m http.server
```
or
```sh
python3 -m http.server
```
You can't test the HTML5 bundle by opening `index.html` file in a browser. This requires HTTP server.
If you see a `"wasm streaming compile failed: TypeError: Failed to execute ‘compile’ on ‘WebAssembly’: Incorrect response MIME type. Expected ‘application/wasm’."` error in the console you must make sure that your server uses the `application/wasm` MIME type for `.wasm` files.
## Creating HTML5 bundle
Creating HTML5 content with Defold is simple and follows the same pattern as all other supported platforms: select Project ▸ Bundle... ▸ HTML5 Application... from the menu:
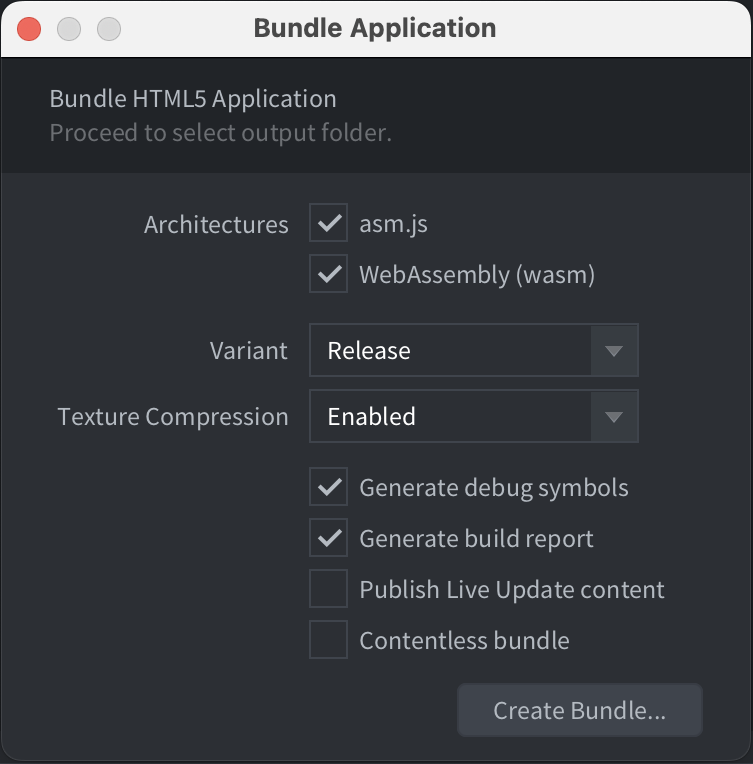
You can chose to include both an `asm.js` and a WebAssembly (wasm) version of the Defold engine in HTML5 bundle. In most cases it is enough to chose WebAssembly since [all modern browsers support WebAssembly](https://caniuse.com/wasm).
Even if you include both `asm.js` and `wasm` versions of the engine only one of them will be downloaded by the browser when launching the game. The WebAssembly version will be downloaded if the browser supports WebAssembly and the `asm.js` version will be used as a fallback in the rare case that WebAssembly is not supported.
When you click on the Create bundle button you will be prompted to select a folder in which to create your application. After the export process completes, you will find all of the files needed to run the application.
## Known issues and limitations
* Hot Reload - Hot Reload doesn't work in HTML5 builds. Defold applications must run their own miniature web server in order to receive updates from the editor, which isn't possible in a HTML5 build.
* Internet Explorer 11
* Audio - Defold handles audio playback using HTML5 _WebAudio_ (see http://www.w3.org/TR/webaudio), which is not currently supported by Internet Explorer 11. Applications will fall back to a null audio implementation when using this browser.
* WebGL - Microsoft has not completed work implementing the _WebGL_ API (see https://www.khronos.org/registry/webgl/specs/latest/). Therefore, it does not perform as well as other browsers.
* Full screen - Full screen mode is unreliable in the browser.
* Chrome
* Slow debug builds - In debug builds on HTML5 we verify all WebGL graphics calls to detect errors. This is unfortunately very slow when testing on Chrome. It is possible to disable this by setting the *Engine Arguments* field of *game.project* to `--verify-graphics-calls=false`.
* Gamepad support - [Refer to the Gamepad documentation](#manuals:input-gamepads) for special considerations and steps you may need to take on HTML5.
## Customizing HTML5 bundle
When generating an HTML5 version of your game, Defold provides a default web page. It references style and script resources that dictate how your game is presented.
Each time the application is exported, this content is created afresh. If you wish to customize any of these elements you must make modifications to your project settings. To do so, open the *game.project* in the Defold editor and scroll to the *html5* section:
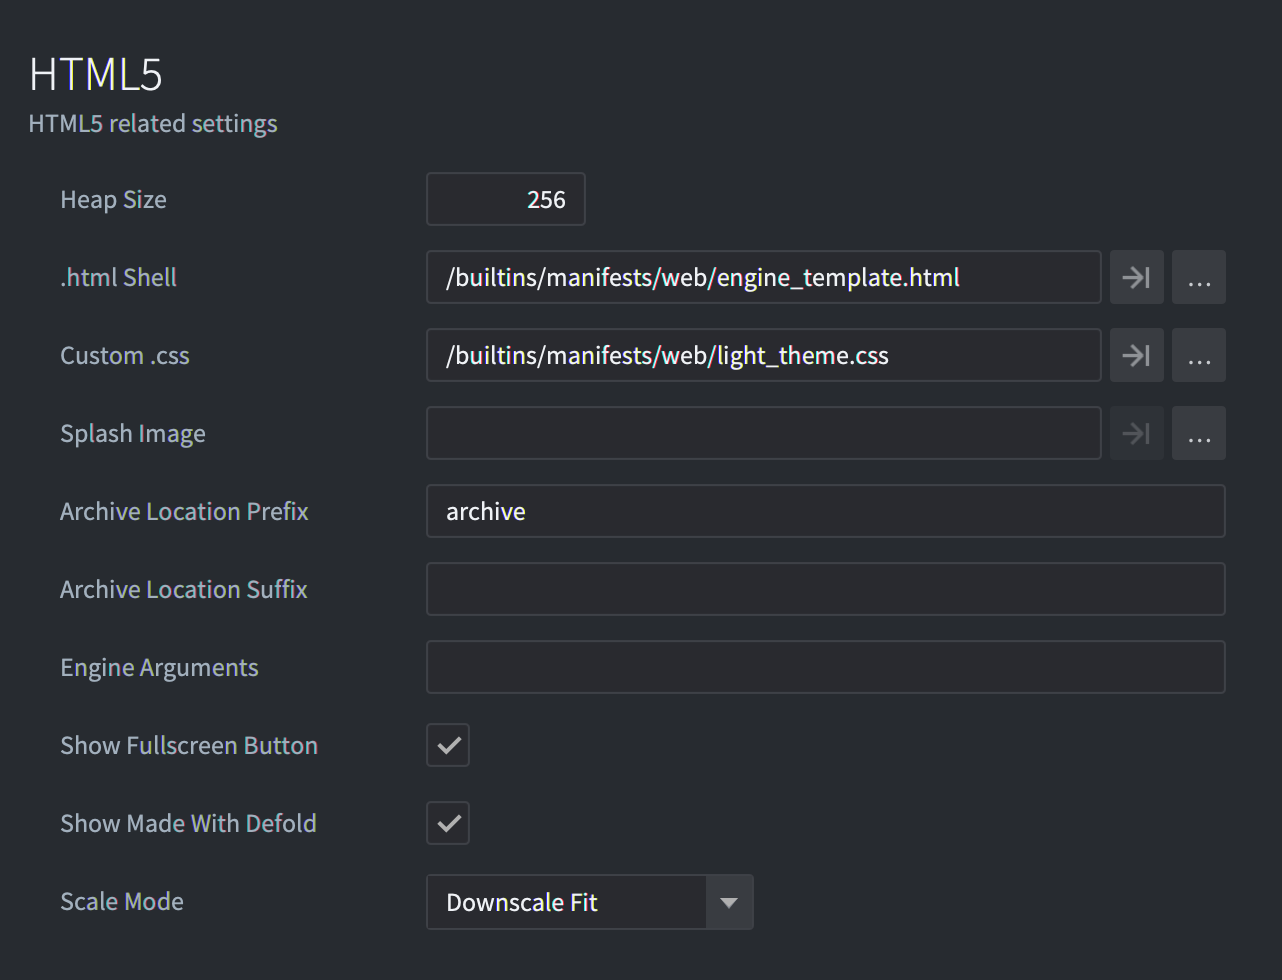
More information about every option is available in [project settings manual](#manuals:project-settings).
You can't modify files of the default html/css template in `builtins` folder. For applying your modifications copy/paste needed file from `builtins` and set this file in *game.project*.
The canvas shouldn't be styled with any border or padding. If you do, mouse input coordinates will be wrong.
In *game.project* it is possible to turn-off the `Fullscreen` button and the `Made with Defold` link.
Defold provides a dark and light theme for the index.html. The light theme is set by default but it is possible to change by changing `Custom CSS` file. There is also four predefined scale modes to chose from in the `Scale Mode` field.
The calculations for all scale modes include current screen DPI in case if you turn on `High Dpi` option in *game.project* (`Display` section)
### Downscale Fit and Fit
For the `Fit` mode canvas size will be changed to show full game canvas on the screen with original proportions. The only difference in `Downscale Fit` is changing size only if the inner size of the webpage is smaller than the original canvas of the game, but doesn't scale-up when a webpage is bigger than the original game canvas.
### Stretch
For the `Stretch` mode canvas size will be changed to fully fill the inner size of the webpage.
### No Scale
With `No Scale` mode the canvas size is exactly the same as you predefined in *game.project* file, `[display]` section.
## Tokens
We use [Mustache template language](https://mustache.github.io/mustache.5.html) for creation of the `index.html` file. When your are building or bundling, the HTML and CSS files are passed through a compiler that is capable of replacing certain tokens with values that depend upon your project settings. These tokens are always encased in either double or triple curly braces (`{% raw %}{{TOKEN}}{% endraw %}` or `{% raw %}{{{TOKEN}}}{% endraw %}`), depending on whether character sequences should be escaped or not. This feature can be useful if you either make frequent changes to your project settings or intend for material to be reused in other projects.
More information about Mustache template language is available in [manual](https://mustache.github.io/mustache.5.html).
Any *game.project* can be a token. For example, if you want to use `Width` value from `Display` section:
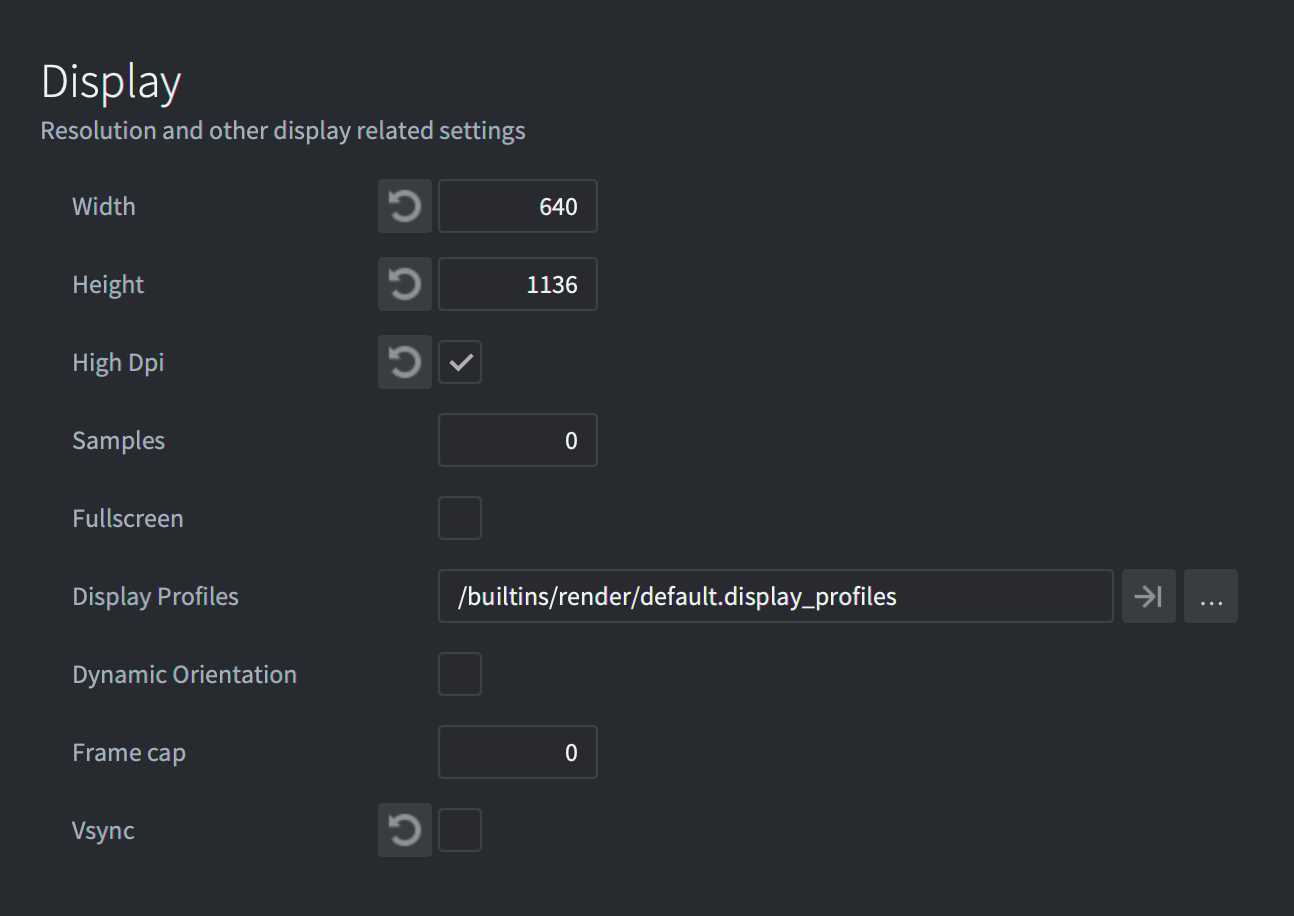
Open *game.project* as a text and check `[section_name]` and name of the field you want to use. Then you can use it as a token: `{% raw %}{{section_name.field}}{% endraw %}` or `{% raw %}{{{section_name.field}}}{% endraw %}`.
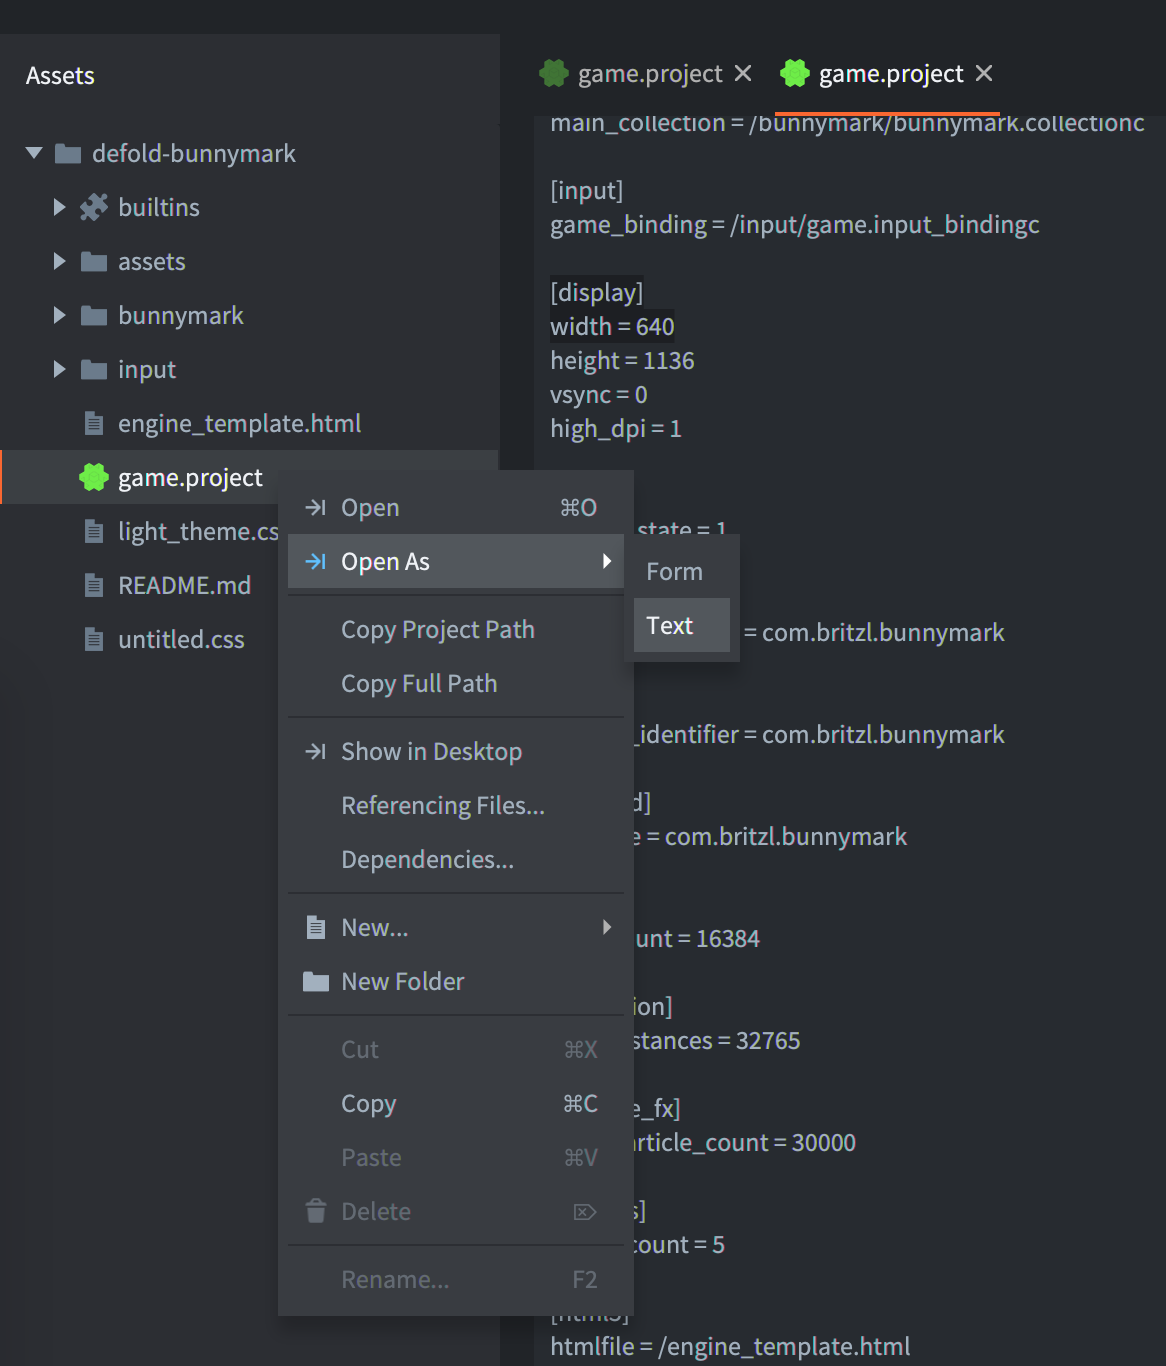
For example, in HTML template in JavaScript:
```javascript
function doSomething() {
var x = {% raw %}{{display.width}}{% endraw %};
// ...
}
```
Also, we have the following custom tokens:
DEFOLD_SPLASH_IMAGE
: Writes the filename of the splash image file or `false` if `html5.splash_image` in *game.project* is empty
```css
{% raw %}{{#DEFOLD_SPLASH_IMAGE}}{% endraw %}
background-image: url("{% raw %}{{DEFOLD_SPLASH_IMAGE}}{% endraw %}");
{% raw %}{{/DEFOLD_SPLASH_IMAGE}}{% endraw %}
```
exe-name
: The project name without unacceptable symbols
DEFOLD_CUSTOM_CSS_INLINE
: This is the place when we inline of the CSS file specified in your *game.project* settings.
```html
```
It is important that this inline block appear before the main application script is loaded. Since it includes HTML tags, this macro should appear in triple braces `{% raw %}{{{TOKEN}}}{% endraw %}` to prevent character sequences being escaped.
DEFOLD_SCALE_MODE_IS_DOWNSCALE_FIT
: This token is `true` if `html5.scale_mode` is `Downscale Fit`.
DEFOLD_SCALE_MODE_IS_FIT
: This token is `true` if `html5.scale_mode` is `Fit`.
DEFOLD_SCALE_MODE_IS_NO_SCALE
: This token is `true` if `html5.scale_mode` is `No Scale`.
DEFOLD_SCALE_MODE_IS_STRETCH
: This token is `true` if `html5.scale_mode` is `Stretch`.
DEFOLD_HEAP_SIZE
: Heap size specified in *game.project* `html5.heap_size` converted to bytes.
DEFOLD_ENGINE_ARGUMENTS
: Engine arguments specified in *game.project* `html5.engine_arguments` separated by `,` symbol.
build-timestamp
: Current build timestamp in seconds.
## Extra parameters
If you create your custom template, you can redefine set of parameters for the engine loader. To achieve that you need to add `
```
`CUSTOM_PARAMETERS` may contains following fields:
```
'archive_location_filter':
Filter function that will run for each archive path.
'unsupported_webgl_callback':
Function that is called if WebGL is not supported.
'engine_arguments':
List of arguments (strings) that will be passed to the engine.
'custom_heap_size':
Number of bytes specifying the memory heap size.
'disable_context_menu':
Disables the right-click context menu on the canvas element if true.
'retry_time':
Pause in seconds before retry file loading after error.
'retry_count':
How many attempts we do when trying to download a file.
'can_not_download_file_callback':
Function that is called if you can't download file after 'retry_count' attempts.
'resize_window_callback':
Function that is called when resize/orientationchanges/focus events happened
'start_success':
Function that is called just before main is called upon successful load.
'update_progress':
Function that is called as progress is updated. Parameter progress is updated 0-100.
```
## File operations in HTML5
HTML5 builds support file operations such as `sys.save()`, `sys.load()` and `io.open()` but the way these operations are handled internally is different from other platforms. When Javascript is run in a browser there is no real concept of a file system and local file access is blocked for security reasons. Instead Emscripten (and thus Defold) uses [IndexedDB](https://developer.mozilla.org/en-US/docs/Web/API/IndexedDB_API/Using_IndexedDB), an in-browser database used to persistently store data, to create a virtual filesystem in the browser. The important difference from file system access on other platforms is that there can be a slight delay between writing to a file and the change actually being stored in the database. The browser developer console usually allows you to inspect the contents of the IndexedDB.
## Passing arguments to an HTML5 game
It is sometimes necessary to provide additional arguments to a game before it or as it is started. This could for instance be a user id, session token or which level to load when the game starts. This can be achieved in a number of different ways, some of which are described here.
### Engine arguments
It is possible to specify additional engine arguments when the engine is configured and loaded. These extra engine arguments can at runtime be retrieved using `sys.get_config()`. To add the key-value pairs you modify the `engine_arguments` field of the `extra_params` object that is passed to the engine when loaded in `index.html`:
```