GUI box nodes
A box node is a rectangle filled with a color or a texture or animation.
Adding box nodes
Add new box nodes by either right clicking in the Outline and selecting Add ▸ Box, or press A and select Box.
You can use images and animations from atlases or tile sources that has been added to the GUI. You add textures by right clicking the Textures folder icon in the Outline and selecting Add ▸ Textures.... Then set the Texture property on the box node:

Note that the color of the box node will tint the graphics. The tint color is multiplied onto the image data, meaning that if you set the color to white (the default) no tint is applied.

Box nodes are always rendered, even if they do not have a texture assigned to them, or have their alpha set to 0, or are sized 0, 0, 0. Box nodes should always have a texture assigned to them so the renderer can batch them properly and reduce the number of draw-calls.
Playing animations
Box nodes can play animations from atlases or tile sources. Refer to the flipbook animation manual to learn more.
Slice-9 texturing
GUI box nodes and Sprite components sometimes feature elements that are context sensitive in regard to their size: panels and dialogs that need to be resized to fit the containing content or a health bar that need to be resized to show the remaining health of an enemy. These may cause visual problems when you apply texturing to the resized node or sprite.
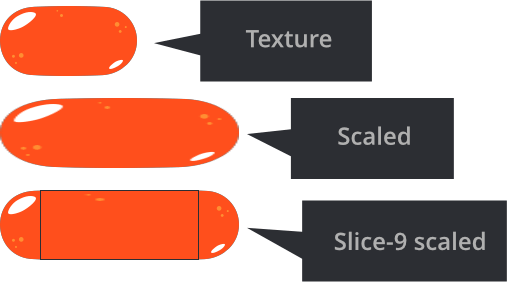
Normally, the engine scales the texture to fit the rectangular boundaries, but by defining slice-9 edge areas it is possible to limit what parts of the texture that should scale:

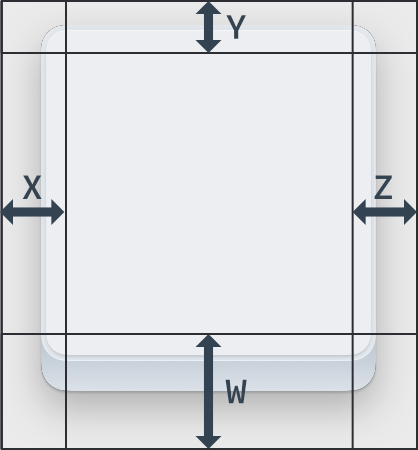
The Slice9 box node consists of 4 numbers that specify the number of pixels for the left, top, right and bottom margin that should not be regularly scaled:

The margins are set clockwise, starting on the left edge:

- Corner segments are never scaled.
- Edge segments are scaled along a single axis. The left and right edge segments are scaled vertically. The top and bottom edge segments are scaled horizontally.
- The central texture area is scaled horizontally and vertically as needed.
The Slice9 texture scaling described above is only applied when you change box node’s or sprite’s size:

![]()
If you change scale parameter of the box node or sprite (or on the game object) - the node or sprite and texture is scaled without applying Slice9 parameters.
When using slice-9 texturing on Sprites the Sprite Trim Mode of the image must be set to Off.
Mipmaps and slice-9
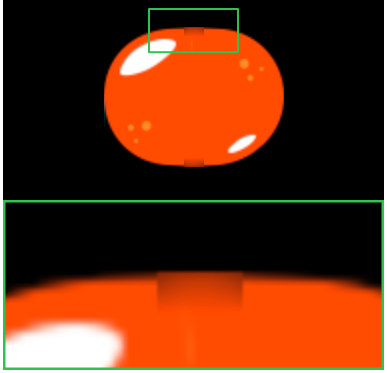
Due to the way mipmapping works in the renderer, scaling of texture segments can sometimes exhibit artifacts. This happens when you scale down segments below the original texture size. The renderer then selects a lower resolution mipmap for the segment, resulting in visual artifacts.

To avoid this problem, make sure that the texture’s segments that will be scaled are small enough never to be scaled down, only up.
- English
- 中文 (Chinese)
- Español (Spanish)
- Français (French)
- Νεοελληνική γλώσσα (Greek)
- Italiano (Italian)
- Język polski (Polish)
- Português (Portuguese)
- Русский (Russian)
- Українська (Ukranian)
Did you spot an error or do you have a suggestion? Please let us know on GitHub!
GITHUB