Importing 3D models
Defold currently support models, skeletons and animations in GL Transmission Format .glTF and Collada .dae format. You can use tools such as Maya, 3D Max, Sketchup and Blender to create and/or convert 3D models into glTF and Collada format. Blender is a powerful and popular 3D modeling, animation and rendering program. It runs on Windows, macOS and Linux and is freely available for download at http://www.blender.org

Importing to Defold
To import the model, simply drag and drop the .gltf file or .dae file and the corresponding texture image into the Assets Pane somewhere.

Using a model
Once you have the model imported into Defold you can use it in a Model component.
Exporting to glTF and Collada
The exported .gltf or .dae file contain all the vertices, edges and faces that make up the model, as well as UV coordinates (what part of the texture image maps to a certain part of the mesh) if you have defined them, the bones in the skeleton and animation data.
-
A detailed description on polygon meshes can be found on http://en.wikipedia.org/wiki/Polygon_mesh.
-
UV coordinates and UV mapping is described at http://en.wikipedia.org/wiki/UV_mapping.
Defold imposes some limitations on exported animation data:
-
Defold currently only supports baked animations. Animations need to have matrices for each animated bone each keyframe, and not position, rotation and scale as separate keys.
-
Animations are also linearly interpolated. If you do more advanced curve interpolation the animations needs to be prebaked from the exporter.
-
Animation clips in Collada are not supported. To use multiple animations per model, export them into separate .dae files and gather the files into an .animationset file in Defold.
Requirements
When you export a model you need to make sure that it fulfills the following requirements:
- The model must consist of a single mesh
- The model must use a single material
- The exported .gltf file must use embedded mesh data. Mesh data in a separate binary file is not supported.
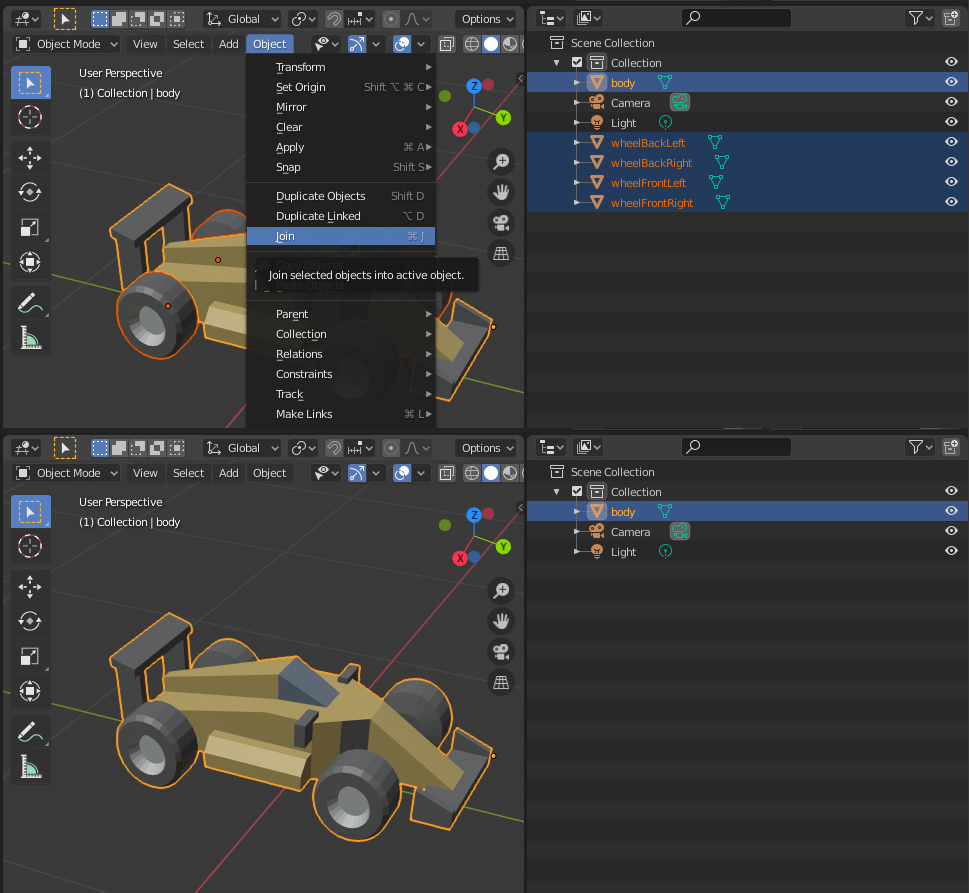
You can use Blender to join multiple meshes. Select all of the meshes and press CTRL/CMD + J to join them.
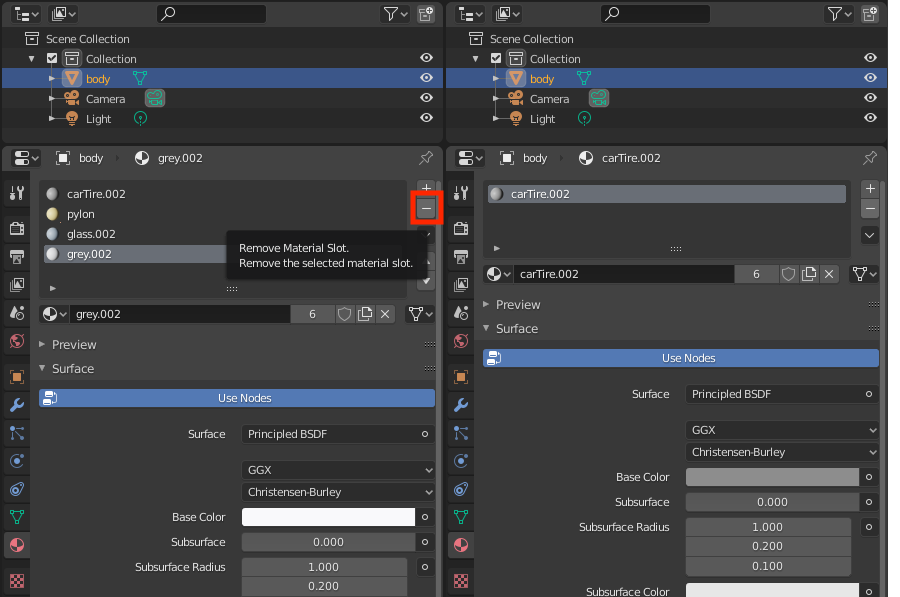
You can use Blender to remove extra materials from the model. Select the material to remove and press the - button.
Exporting a texture
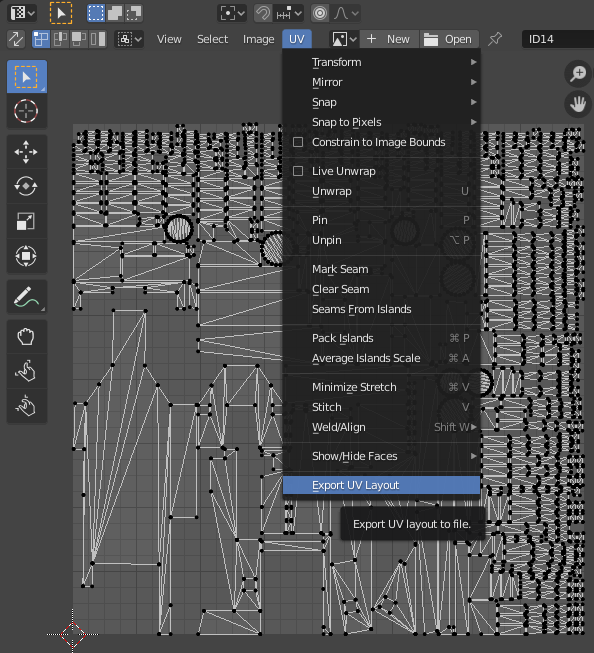
If you do not already have a texture for your model you can use Blender to generate a texture. You should do this before you remove extra materials from the model. Start by selecting the mesh and all of its vertices:

When all vertices are selected you unwrap the mesh to get the UV layout:

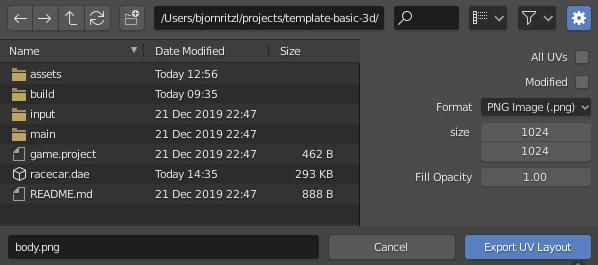
You can then proceed to export the UV layout to an image that can be used as a texture:
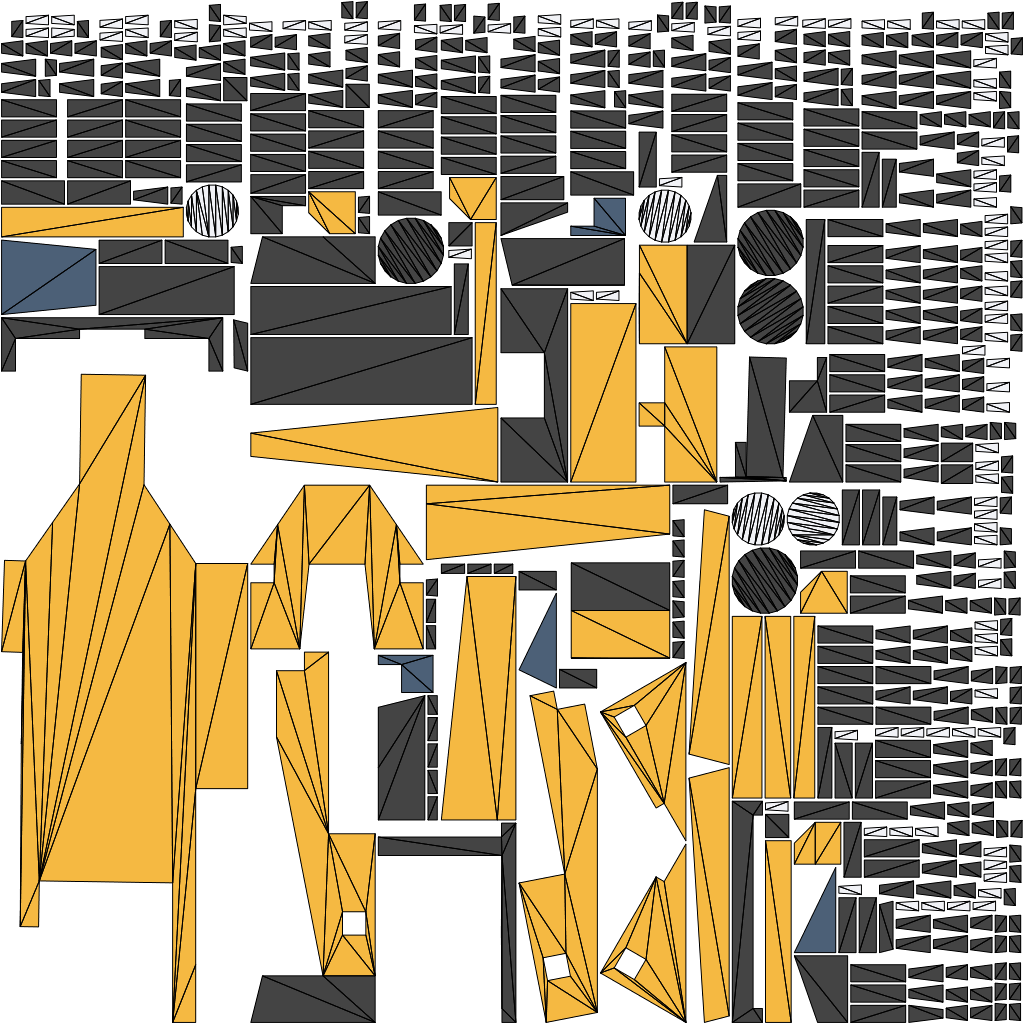
Exporting using Blender
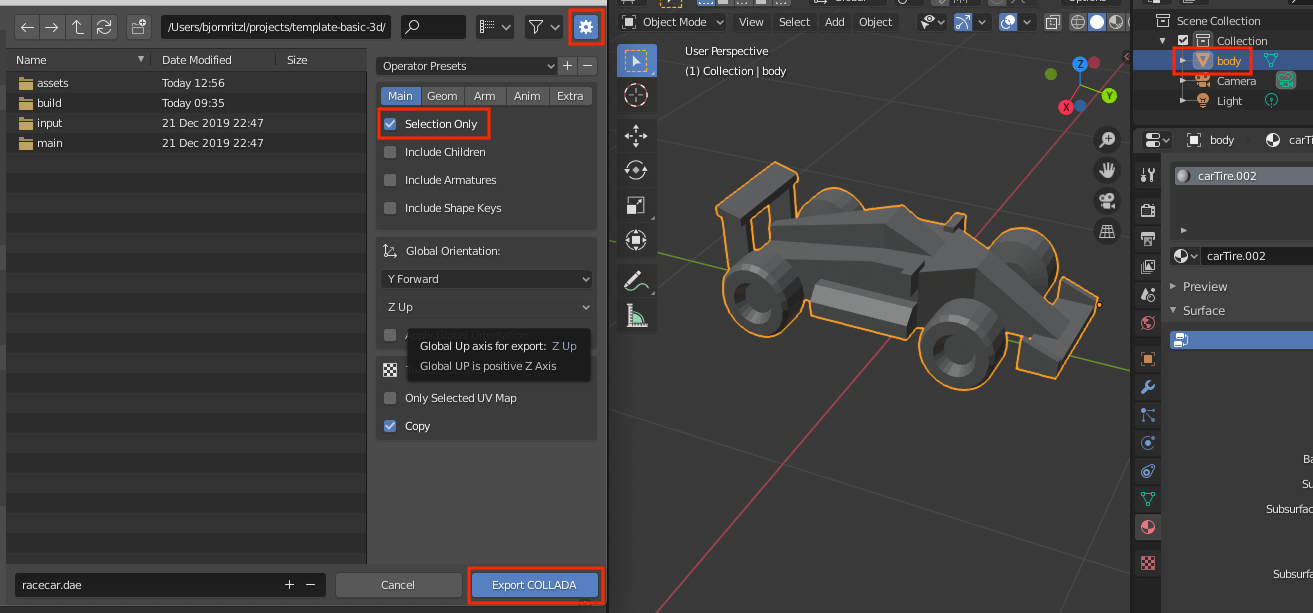
You export your model using the Export menu option. Select the model before you select the Export menu option and check “Selection Only” to only export the model.
- English
- 中文 (Chinese)
- Español (Spanish)
- Français (French)
- Νεοελληνική γλώσσα (Greek)
- Italiano (Italian)
- Język polski (Polish)
- Português (Portuguese)
- Русский (Russian)
- Українська (Ukranian)
Did you spot an error or do you have a suggestion? Please let us know on GitHub!
GITHUB