

Materials
Materials are used to express how a graphical component (a sprite, tilemap, font, GUI node, model etc) should be rendered.
A material holds tags, information that is used in the rendering pipeline to select objects to be rendered. It also holds references to shader programs that are compiled through the available graphics driver and uploaded to the graphics hardware and run when the component is rendered each frame.
- For more information on the render pipeline, see the Render documentation.
- For an in depth explanation of shader programs, see the Shader documentation.
Creating a material
To create a material, right click a target folder in the Assets browser and select New... ▸ Material. (You can also select File ▸ New... from the menu, and then select Material). Name the new material file and press Ok.
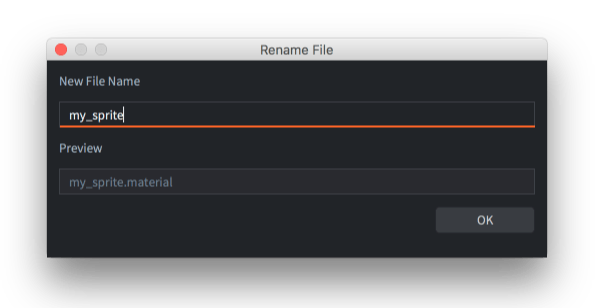
The new material will open in the Material Editor.
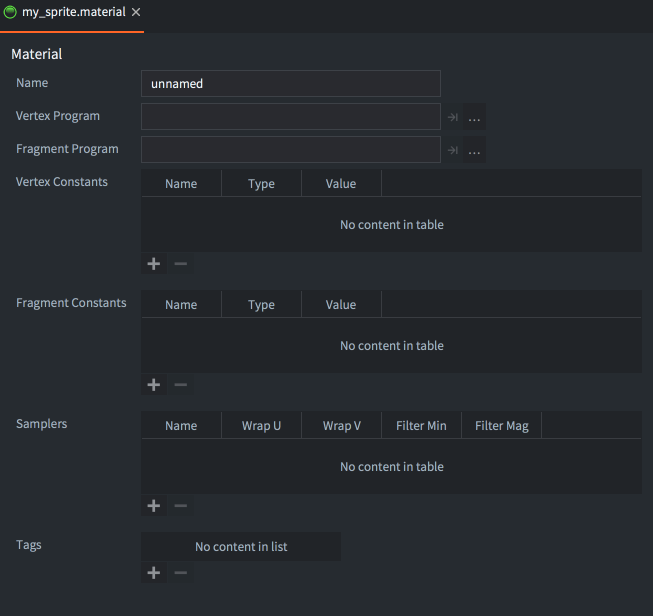
The material file contains the following information:
- Name
- The identity of the material. This name is used to list the material in the Render resource to include it in the build. The name is also used in the render API function
render.enable_material(). The name should be unique. - Vertex Program
- The vertex shader program file (
.vp) to use when rendering with the material. The vertex shader program is run on the GPU for each of a component’s primitive vertices. It computes the screen position of each vertex and also optionally output “varying” variables that are interpolated and input to the fragment program. - Fragment Program
- The fragment shader program file (
.fp) to use when rendering with the material. The program runs on the GPU for each of a primitive’s fragments (pixels) and its purpose is to decide the color of each fragment. This is usually done by texture lookups and calculations based on input variables (varying variables or constants). - Vertex Constants
- Uniforms that will be passed to the vertex shader program. See below for a list of available constants.
- Fragment Constants
- Uniforms that will be passed to the fragment shader program. See below for a list of available constants.
- Samplers
- You can optionally configure specific samplers in the materials file. Add a sampler, name it according to the name used in the shader program and set the wrap and filter settings to your liking.
- Tags
- The tags associated with the material. Tags are represented in the engine as a bitmask that is used by
render.predicate()to collect components that should be drawn together. See the Render documentation on how to do that. The maximum number of tags you can use in a project is 32.
Attributes
Shader attributes (also referred to as vertex streams, or vertex attributes), is a mechanism for how the GPU retrieves vertices from memory in order to render geometry. The vertex shader specifies a set of streams by using the attribute keyword and in most cases Defold produces and binds the data automatically under the hood based on the names of the streams. However, in some cases you might want to forward more data per vertex to achieve a specific effect that the engine does not produce. A vertex attribute can be configured with the following fields:
- Name
- The attribute name. Similar to shader constants, the attribute configuration will only be used if it matches an attribute specified in the vertex program.
- Semantic type
- A semantic type indicates the semantic meaning of what the attribute is and/or how it should be shown in the editor. For example, specifying an attribute with a
SEMANTIC_TYPE_COLORwill show a color picker in the editor, while the data will still be passed in as-is from the engine to the shader.SEMANTIC_TYPE_NONEThe default semantic type. Does not have any other effect on the attribute other than passing the material data for the attribute directly to the vertex buffer (default)SEMANTIC_TYPE_POSITIONProduces per-vertex position data for the attribute. Can be used together with coordinate space to tell the engine how the positions will be calculatedSEMANTIC_TYPE_TEXCOORDProduces per-vertex texture coordinates for the attributeSEMANTIC_TYPE_PAGE_INDEXProduces per-vertex page indices for the attributeSEMANTIC_TYPE_COLORAffects how the editor interprets the attribute. If an attribute is configured with a color semantic, a color picked widget will be shown in the inspectorSEMANTIC_TYPE_NORMALProduces per-vertex normal data for the attributeSEMANTIC_TYPE_TANGENTProduces per-vertex tangent data for the attributeSEMANTIC_TYPE_WORLD_MATRIXProduces per-vertex world matrix data for the attributeSEMANTIC_TYPE_NORMAL_MATRIXProduces per-vertex normal matrix data for the attributeSEMANTIC_TYPE_TEXTURE_TRANSFORM_2DProduces a per-vertex 3x3 texture transform matrix for the attribute. For particle components, the engine provides a matrix that transforms coordinates into atlas space for the image property on the component. For sprite components, the engine provides a matrix for each image the component is using (when using multi-texturing). For model components, an identity matrix is provided.
- Data type
- The data type of the backing data for the attribute.
TYPE_BYTESigned 8-bit byte valuesTYPE_UNSIGNED_BYTEUnsigned 8-bit byte valuesTYPE_SHORTSigned 16-bit short valuesTYPE_UNSIGNED_SHORTUnsigned 16-bit short valuesTYPE_INTSigned integer valuesTYPE_UNSIGNED_INTUnsigned integer valuesTYPE_FLOATFloating point values (default)
- Normalize
- If true, the attribute values will be normalized by the GPU driver. This can be useful when you don’t need full precision, but want to calculate something without knowing the specific limits. E.g a color vector typically only need byte values of 0..255 while still being treated as a 0..1 value in the shader.
- Coordinate space
- Some semantic types support supplying data in different coordinate spaces. To implement a billboarding effect with sprites, you typically want a position attribute in local space as well as a fully transformed position in world space for most effective batching.
- Vector type
- The vector type of the attribute.
VECTOR_TYPE_SCALARSingle scalar valueVECTOR_TYPE_VEC22D vectorVECTOR_TYPE_VEC33D vectorVECTOR_TYPE_VEC44D vector (default)VECTOR_TYPE_MAT22D matrixVECTOR_TYPE_MAT33D matrixVECTOR_TYPE_MAT44D matrix
- Step function
- Specifies how the attribute data should be presented to the vertex function. This is only relevant for instancing.
VertexOnce per vertex, e.g a position attribute will typically be given to the vertex function per vertex in the mesh (default)InstanceOnce per instance, e.g a world matrix attribute will typically be given to the vertex function once per instance
- Value
- The value of the attribute. Attribute values can be overridden on a per-component basis, but otherwise this will act as the default value of the vertex attribute. Note: for default attributes (position, texture coordinates and page indices) the value will be ignored.
Custom attributes can also be used to trim memory footprint on both CPU and GPU by reconfiguring the streams to use a smaller data type, or a different element count.
Default attribute semantics
The material system will assign a default semantic type automatically based on the name of the attribute in run-time for a specific set of names:
position- semantic type:SEMANTIC_TYPE_POSITIONtexcoord0- semantic type:SEMANTIC_TYPE_TEXCOORDtexcoord1- semantic type:SEMANTIC_TYPE_TEXCOORDpage_index- semantic type:SEMANTIC_TYPE_PAGE_INDEXcolor- semantic type:SEMANTIC_TYPE_COLORnormal- semantic type:SEMANTIC_TYPE_NORMALtangent- semantic type:SEMANTIC_TYPE_TANGENTmtx_world- semantic type:SEMANTIC_TYPE_WORLD_MATRIXmtx_normal- semantic type:SEMANTIC_TYPE_NORMAL_MATRIXmtx_texture_transform_2d- semantic type:SEMANTIC_TYPE_TEXTURE_TRANSFORM_2D
If you have entries for these attributes in the material, the default semantic type will be overridden with whatever you have configured in the material editor.
Setting custom vertex attribute data
Similar to user defined shader constants, you can also update vertex attributes in runtime by calling go.get, go.set and go.animate:
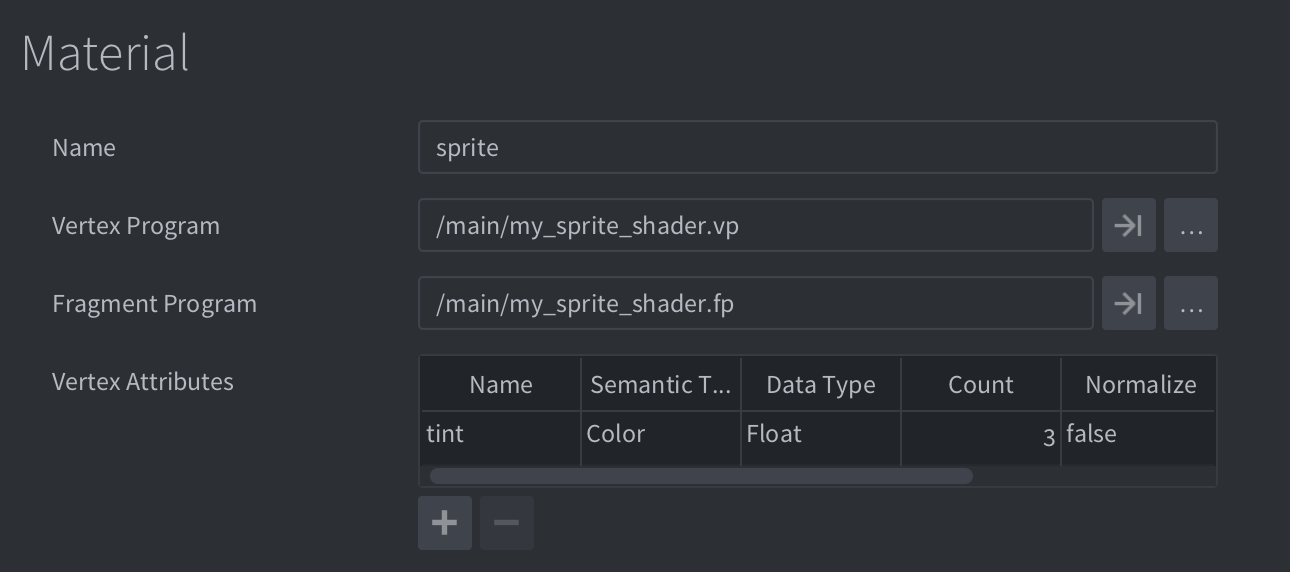
go.set("#sprite", "tint", vmath.vector4(1,0,0,1))

go.animate("#sprite", "tint", go.PLAYBACK_LOOP_PINGPONG, vmath.vector4(1,0,0,1), go.EASING_LINEAR, 2)
There are some caveats to updating the vertex attributes however, whether or not a component can use the value depends on the semantic type of the attribute. For example, a sprite component supports the SEMANTIC_TYPE_POSITION so if you update an attribute that has this semantic type, the component will ignore the overridden value since the semantic type dictates that the data should always be produced by the sprites position.
Model components also expose custom material attributes through go.get(), go.set() and go.animate(). For example, after defining an attribute named my_attribute in the model material:
go.set("#model", "my_attribute", vmath.vector4(1, 0, 0, 1))
go.animate("#model", "my_attribute", go.PLAYBACK_LOOP_PINGPONG,
    vmath.vector4(0, 1, 0, 1), go.EASING_LINEAR, 2)
Only the first mesh in a model with multiple meshes can currently be addressed this way. Updating a non-instanced per-vertex attribute may also rebuild and upload vertex data proportional to the mesh size, so frequent updates can be expensive for large meshes.
In cases where that a vertex attribute is either a scalar or a vector type other than a Vec4 you can still set the data using go.set:
-- The last two components in the vec4 will not be used!
go.set("#sprite", "sprite_position_2d", vmath.vector4(my_x,my_y,0,0))
go.animate("#sprite", "sprite_position_2d", go.PLAYBACK_LOOP_PINGPONG, vmath.vector4(1,2,0,0), go.EASING_LINEAR, 2)
Since Defold 1.14.0, Mat2, Mat3 and Mat4 attributes all use vmath.matrix4 values with go.set() and go.get(). Setting a Mat2 or Mat3 attribute takes the upper-left 2×2 or 3×3 part of the matrix. Reading it returns a vmath.matrix4 with the unused rows and columns filled from an identity matrix.
For example, with a Mat2 attribute named custom_mat2 and semantic type None in a model’s material:
local value = vmath.matrix4()
value.m00 = 2
value.m11 = 3
go.set("#model", "custom_mat2", value)

local result = go.get("#model", "custom_mat2")
print(result.m00, result.m11) -- 2, 3
print(result.m22, result.m33) -- 1, 1 (identity padding)
Always assign the complete matrix. Flattened values such as vmath.vector4 and assignments to individual attribute sub-properties are rejected for matrix attributes. To change an element, modify the matrix in Lua and pass it back with go.set().
Examples of using custom vertex attributes
Using a texture transform attribute to convert UV coordinates to atlas space:
#version 140

in vec3 position;
in vec4 texcoord0;
in mat3 texture_transform_2d;

out vec2 var_texcoord0;

void main()
{
  // Extract position from the transform
  vec2 atlas_pos = texture_transform_2d[2].xy;
  // Extract the scale from the transform
  vec2 atlas_size = vec2(
      length(texture_transform_2d[0].xy),
      length(texture_transform_2d[1].xy)
  );
  // convert to local UV (0..1)
  vec2 localUV = (texcoord0 - atlas_pos) / atlas_size;

  // Alternatively, if the UV coordinates already are in the 0..1 range,
  // you can transform into atlas space directly by multiplying the transform:
  vec2 transformedUv = texture_transform_2d * texcoord0;

  // Pass the value into the fragment shader
  var_texcoord0 = localUV;

  // ... rest of vertex shader
}
Instancing
Instancing is a technique used to efficiently draw multiple copies of the same object in a scene. Instead of creating a separate copy of the object each time it’s used, instancing allows the graphics engine to create a single object and then reuse it multiple times. For example, in a game with a large forest, instead of creating a separate tree model for each tree, instancing allows you to create one tree model and then place it hundreds or thousands of times with different positions and scales. The forest can now be rendered with a single draw call instead of individual draw calls for each tree.
Instancing is currently only available for Model components.
Instancing is enabled automatically when possible. Defold heavily relies on batching the draw state as much as possible - for instancing to work some requirements must be met:
- The same material must be used for all instances. Instancing will still work if a custom material has been set by
render.enable_material) - The material must be configured to use the ‘local’ vertex space
- The material must have at least one vertex attribute that is repeated per instance
- Constant values must be the same for all instances. Constant values can be put into custom vertex attributes or some other backing method instead (e.g a texture)
- Shader resources, such as textures or storage buffers, must be the same for all instances
Configuring a vertex attribute to be repeated per instance requires that the Step function is set to Instance. This is done automatically for certain semantic types based on name (see the Default attribute semantics table above), but it can also be set manually in the material editor by setting the Step function to Instance.
As a simple example, the following scene has four game objects with a model component each:
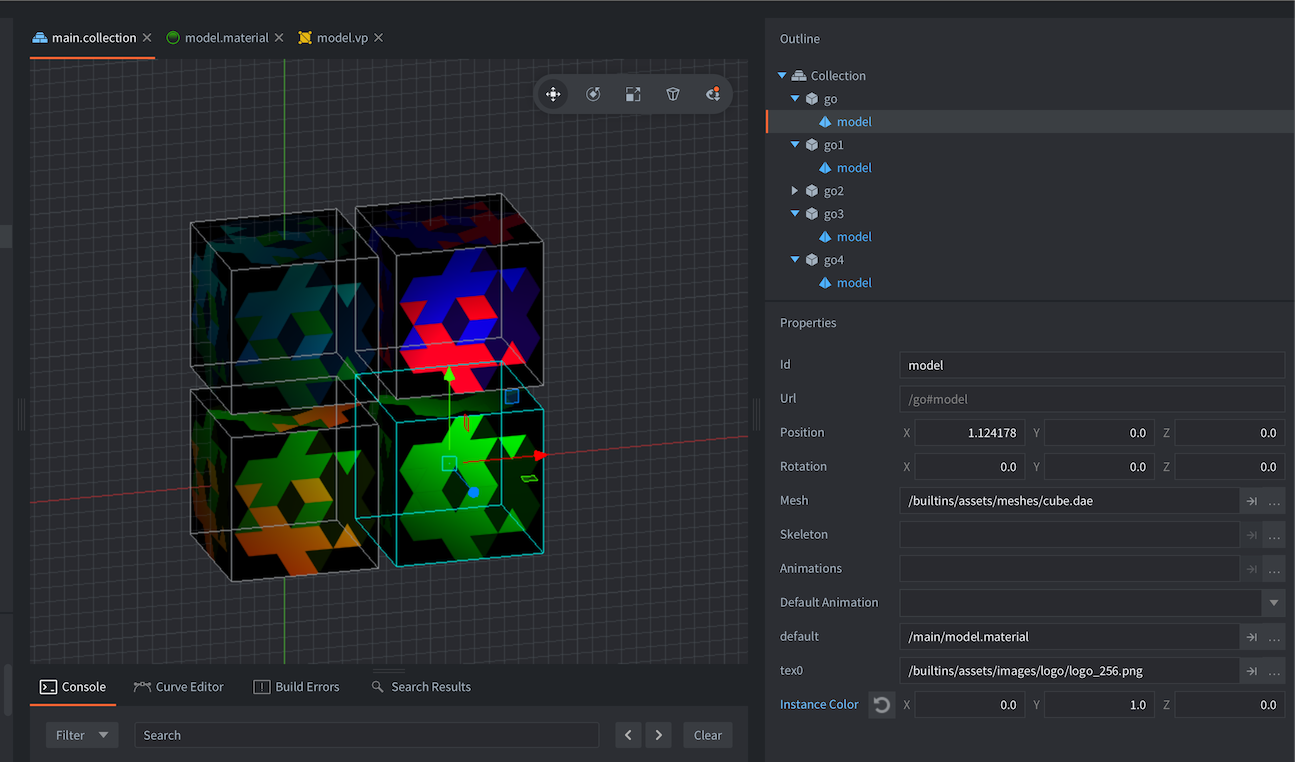
The material is configured as such, with a single custom vertex attribute that is repeated per instance:

The vertex shader has multiple per-instance attributes specified:
// Per vertex attributes
attribute highp vec4 position;
attribute mediump vec2 texcoord0;
attribute mediump vec3 normal;

// Per instance attributes
attribute mediump mat4 mtx_world;
attribute mediump mat4 mtx_normal;
attribute mediump vec4 instance_color;
Note that the mtx_world and mtx_normal will be configured to use the step function Instance by default. This can be changed in the material editor by adding an entry for them and setting the Step function to Vertex, which will make the attribute be repeated per vertex instead of per instance.
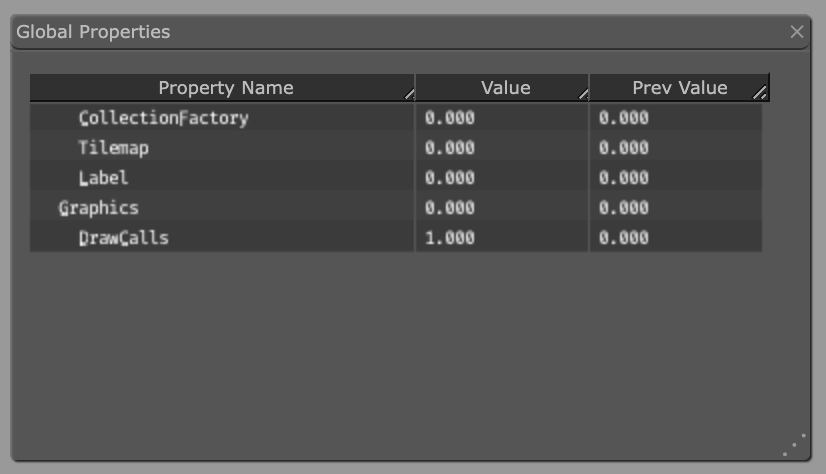
To verify that the instancing works in this case, you can look at the web profiler. In this case, since the only thing that changes between the instances of the box is the per-instance attributes, it can be rendered with a single draw call:
Backwards compatibility
OpenGL 3.1 on desktop and OpenGL ES 3.0 on mobile provide instancing as a core feature. Older OpenGL ES and WebGL contexts may still support it through an extension such as ANGLE_instanced_arrays; other older adapters do not. When instancing is unavailable, rendering still works by default, but may be less performant.
Use graphics.get_adapter_info() to detect support and select a cheaper material or omit instance-heavy content when necessary. The features field is an array of the supported feature constants, not a table keyed by those constants:
local function has_context_feature(feature)
    local adapter_info = graphics.get_adapter_info()
    for _, supported_feature in ipairs(adapter_info.features) do
        if supported_feature == feature then
            return true
        end
    end
    return false
end

local instancing_supported = has_context_feature(
    graphics.CONTEXT_FEATURE_INSTANCING
)
Vertex and fragment constants
Shader constants, or “uniforms” are values that are passed from the engine to vertex and fragment shader programs. To use a constant you define it in the material file as either a Vertex Constant property or a Fragment Constant property. Corresponding uniform variables need to be defined in the shader program. The following constants can be set in a material:
CONSTANT_TYPE_WORLD- The world matrix. Use to transform vertices into world space. For some component types, the vertices are already in world space when they arrive to the vertex program (due to batching). In those cases multiplying with the world matrix in the shader will yield the wrong results.
CONSTANT_TYPE_VIEW- The view matrix. Use to transform vertices to view (camera) space.
CONSTANT_TYPE_PROJECTION- The projection matrix. Use to transform vertices to screen space.
CONSTANT_TYPE_VIEWPROJ- A matrix with the view and projection matrices already multiplied.
CONSTANT_TYPE_WORLDVIEW- A matrix with the world and view matrices already multiplied.
CONSTANT_TYPE_WORLDVIEWPROJ- A matrix with the world, view and projection matrices already multiplied.
CONSTANT_TYPE_WORLD_INVERSE- The inverse of the world matrix. Use to transform from world space back into the object’s local space.
CONSTANT_TYPE_VIEW_INVERSE- The inverse of the view matrix. Use to transform from camera space back into world space.
CONSTANT_TYPE_PROJECTION_INVERSE- The inverse of the projection matrix. Use to transform from clip space back into camera space.
CONSTANT_TYPE_VIEWPROJ_INVERSE- The inverse of the combined view and projection matrices. Use to transform from clip space back into world space.
CONSTANT_TYPE_WORLDVIEW_INVERSE- The inverse of the combined world and view matrices. Use to transform from camera space back into object-local space.
CONSTANT_TYPE_WORLDVIEWPROJ_INVERSE- The inverse of the combined world, view and projection matrices. Use to transform from clip space back into object-local space. These inverse constants avoid calculating a matrix inverse in the shader.
CONSTANT_TYPE_NORMAL- A matrix to compute normal orientation. The world transform might include non-uniform scaling, which breaks the orthogonality of the combined world-view transform. The normal matrix is used to avoid issues with the direction when transforming normals. (The normal matrix is the transpose inverse of the world-view matrix).
CONSTANT_TYPE_TIME- An engine-provided
vector4where.xis elapsed time since engine start,.yis the delta time from the previous frame, and.zand.ware currently zero. The engine updates this value automatically; it does not need to be updated withgo.set(). See the Shadertoy tutorial for an example.Declare a Time constant named
timein a modern GLSL uniform block:uniform fragment_inputs { vec4 time; }; CONSTANT_TYPE_USER- A vector4 constant that you can use for any custom data you want to pass into your shader programs. You can set the initial value of the constant in the constant definition, but it is mutable through the functions go.set() / go.animate(). You can also retrieve the value with go.get(). Changing a material constant of a single component instance breaks render batching and will result in additional draw calls.
Example:
go.set("#sprite", "tint", vmath.vector4(1,0,0,1))

go.animate("#sprite", "tint", go.PLAYBACK_LOOP_PINGPONG, vmath.vector4(1,0,0,1), go.EASING_LINEAR, 2)
CONSTANT_TYPE_USER_MATRIX4- A matrix4 constant that you can use for any custom data you want to pass into your shader programs. You can set the initial value of the constant in the constant definition, but it is mutable through the functions go.set() / go.animate(). You can also retrieve the value with go.get(). Changing a material constant of a single component instance breaks render batching and will result in additional draw calls.
Example:
go.set("#sprite", "m", vmath.matrix4())
GUI node material constants
Inside a GUI script, read and write a node’s material constants with gui.get() and gui.set() rather than the go functions. Vector components, matrix constants, and constant arrays are supported. Array indices in the options table are 1-based:
local node = gui.get_node("button")

local tint = gui.get(node, "tint")
gui.set(node, "tint.x", 0.5)
gui.set(node, "light_matrix", vmath.matrix4())
gui.set(node, "tint_array", vmath.vector4(1, 0, 0, 1), { index = 1 })
In order for a material constant of type CONSTANT_TYPE_USER or CONSTANT_TYPE_USER_MATRIX4 to be available using go.get() and go.set(), or gui.get() and gui.set(), it has to be used in the shader program. If the constant is defined in the material but not used in the program it will be removed from the material and it will not be available at run-time.
Samplers
Samplers are used to sample the color information from a texture (a tile source or atlas). The color information can then be used for calculations in the shader program.
Sprite, tilemap, GUI and particle effect components automatically bind their image texture to the first declared sampler2D. Sprite components also support multiple textures: every sampler declared in the material becomes a named image slot in the Sprite component. The first texture supplies the sprite’s animation data and drives the frame sequence. For each frame, its image id is used to find the corresponding image in every additional texture, which supplies its own UVs. The assigned atlases or tile sources should therefore contain matching frame ids and similarly shaped images; differing polygon-packed shapes can cause texture bleeding. See Multi textured sprites for details.
For a component or render workflow that does not expose an additional texture slot, use render.enable_texture() to bind extra texture samplers from the render script.
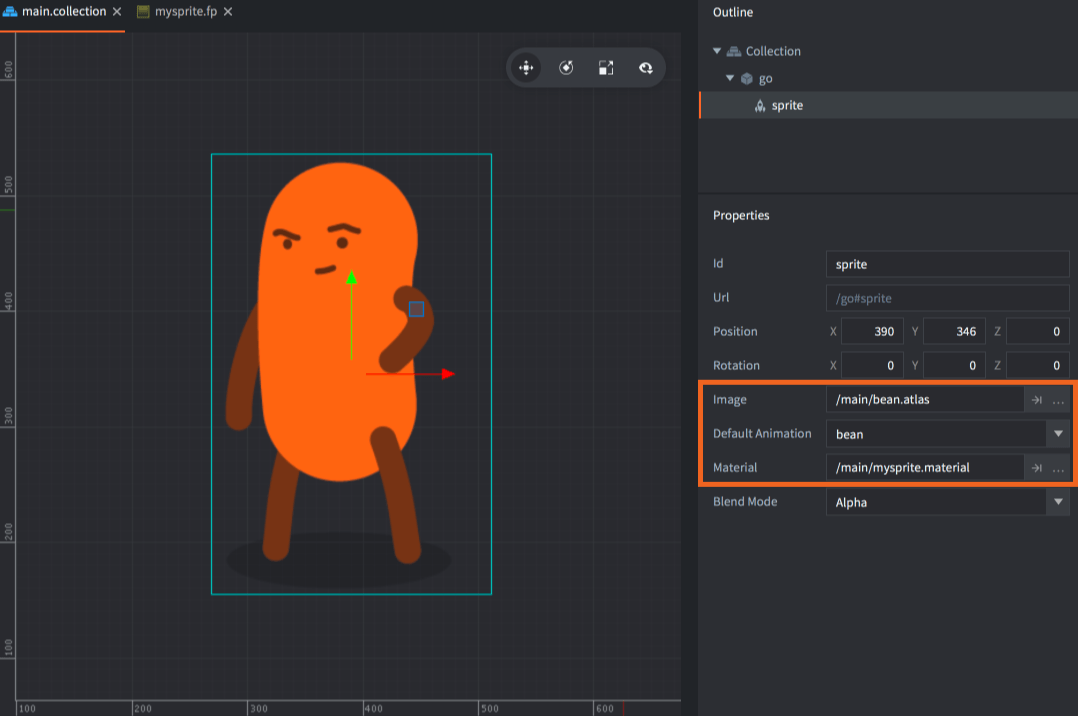
-- mysprite.fp
varying mediump vec2 var_texcoord0;
uniform lowp sampler2D MY_SAMPLER;
void main()
{
    gl_FragColor = texture2D(MY_SAMPLER, var_texcoord0.xy);
}
You can specify a component’s sampler settings by adding the sampler by name in the materials file. If you don’t set up your sampler in the materials file, the global graphics project settings are used.

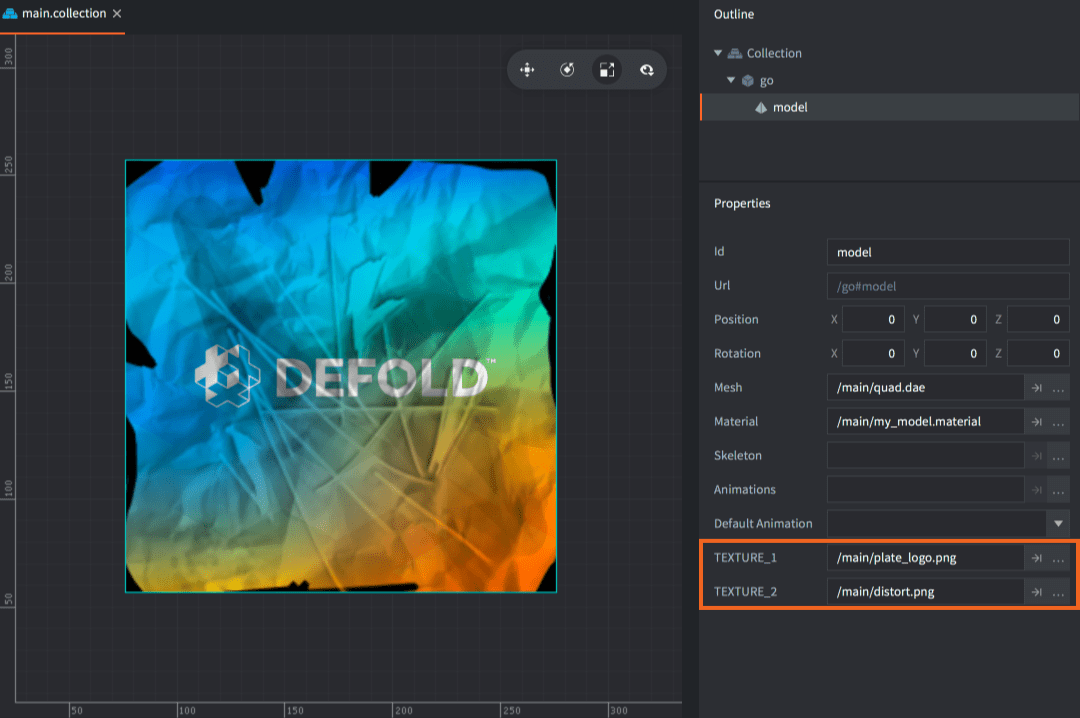
For model components, you need to specify your samplers in the material file with the settings you want. The editor will then allow you to set textures for any model component that use the material:

-- mymodel.fp
varying mediump vec2 var_texcoord0;
uniform lowp sampler2D TEXTURE_1;
uniform lowp sampler2D TEXTURE_2;
void main()
{
    lowp vec4 color1 = texture2D(TEXTURE_1, var_texcoord0.xy);
    lowp vec4 color2 = texture2D(TEXTURE_2, var_texcoord0.xy);
    gl_FragColor = color1 * color2;
}
Sampler settings
- Name
- The name of the sampler. This name should match the
sampler2Ddeclared in the fragment shader. - Wrap U/W
- The wrap mode for the U and V axes:
WRAP_MODE_REPEATwill repeat texture data outside the range [0,1].WRAP_MODE_MIRRORED_REPEATwill repeat texture data outside the range [0,1] but every second repetition is mirrored.WRAP_MODE_CLAMP_TO_EDGEwill set texture data for values greater than 1.0 to 1.0, and any values less than 0.0 is set to 0.0—i.e. the edge pixels will be repeated to the edge.
- Filter Min/Mag
- The filtering for magnification and minification. Nearest filtering requires less computation than linear interpolation, but can result in aliasing artifacts. Linear interpolation often provides smoother results:
Defaultuses the default filter option specified in thegame.projectfile underGraphicsasDefault Texture Min FilterandDefault Texture Mag Filter.FILTER_MODE_NEARESTuses the texel with coordinates nearest the center of the pixel.FILTER_MODE_LINEARsets a weighted linear average of the 2x2 array of texels that lie nearest to the center of the pixel.FILTER_MODE_NEAREST_MIPMAP_NEARESTchooses the nearest texel value within an individual mipmap.FILTER_MODE_NEAREST_MIPMAP_LINEARselects the nearest texel in the two nearest best choices of mipmaps and then interpolates linearly between these two values.FILTER_MODE_LINEAR_MIPMAP_NEARESTinterpolates linearly within an individual mipmap.FILTER_MODE_LINEAR_MIPMAP_LINEARuses linear interpolation to compute the value in each of two maps and then interpolates linearly between these two values.
- Max Anisotropy
- Anisotropic filtering is an advanced filtering technique that takes multiple samples, blending the results together. This setting controls the level of anisotropy for the texture samplers. If anisotropic filtering is not supported by the GPU the parameter will not do anything, and it will be set to 1 as default.
Constants buffers
When the rendering pipeline draws, it pulls constant values from a default system constants buffer. You can create a custom constants buffer to override the default constants and instead set shader program uniforms programmatically in the render script:
self.constants = render.constant_buffer() -- <1>
self.constants.tint = vmath.vector4(1, 0, 0, 1) -- <2>
...
render.draw(self.my_pred, {constants = self.constants}) -- <3>
- Create a new constants buffer
- Set the
tintconstant to bright red - Draw the predicate using our custom constants
Note that the buffer’s constant elements are referenced like an ordinary Lua table, but you can’t iterate over the buffer with pairs() or ipairs().