Slice-9
Description
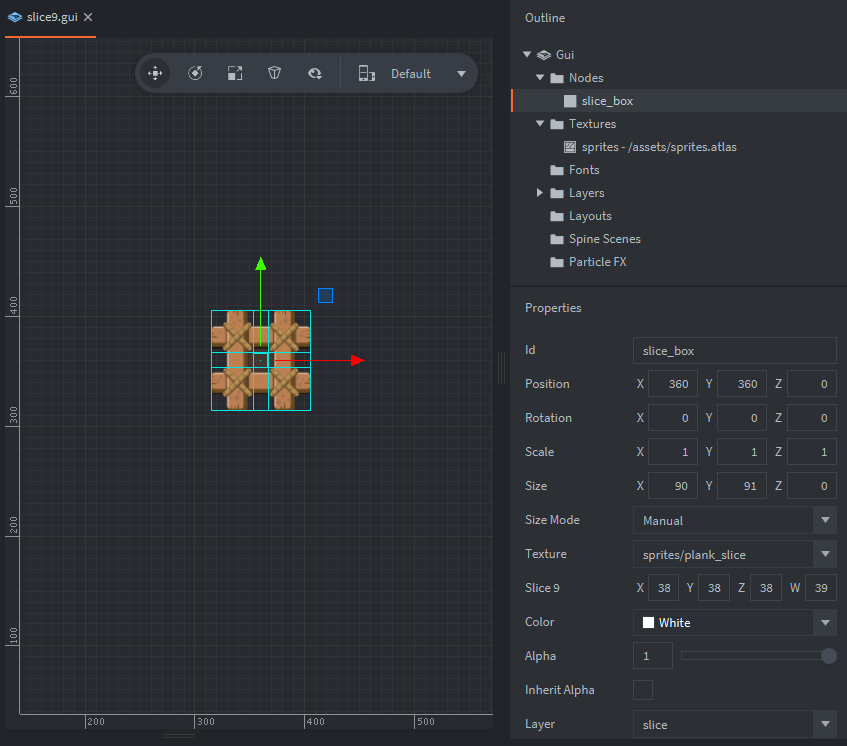
Overview : Using a small stylized image (90x91 pixels) we apply it to a gui node and set the slice-9 properties, we can then adjust the size and retain the styling without streching and distortion. :More on Slice-9 with Defold:
The setup consists of a gui collection, gui script, a box node and a texture atlas
- Box Node
- contains:
- A texture set to stylized wood plank image.
- Size Mode set to Manual
- Slice 9 adjusted settings
- Gui script
- Use:
- For animating the node to different sizes, showing slice-9 at its potential.
Scripts
slice9.gui_script
local shape1 = vmath.vector3(660,576,0)  --  < 1 >
local shape2 = vmath.vector3(150,500,0)
local shape3 = vmath.vector3(350,250,0)

local function getshape(self)  --  < 2 >
    local node = gui.get_node("slice_box")
    local function animate_size(node, shape)  --  < 3 >
        gui.animate(node, "size", shape, gui.EASING_INOUTCUBIC, 1.75, 2.5, getshape, gui.PLAYBACK_ONCE_FORWARD)
    end
    if self.shape_number == 1 then
        animate_size(node, shape1)
        self.shape_number = 2
    elseif self.shape_number == 2 then
        animate_size(node, shape2)
        self.shape_number = 3
    else
        animate_size(node, shape3)
        self.shape_number = 1
    end
end

function init(self)  --  < 4 >
    self.shape_number = 1
    getshape(self)
end

--[[

1.-Here we create 3 local vector3's representing 3 different sizes for use when animating
    the gui node size property.

2.-getshape() function gets our slice-9 gui node then an if statement is used to check
    the shape_number variable and animate_size is set accordingly and shape_number is
    changed for the next shape.

3.-The function animate_size() takes in the node and shape vector3 and uses them
    with gui.animate. Here we animate the "size" of the node and after the animation is
    complete getshape function is called again and a different shape "size" will be animated
    once again.

4.-In the initialize function we set self.shape_number to 1 and call getshape function to
    start the looping chained animation.

--]]